manuals.online logo
Brands
  1. Home
  2. •
  3. Brands
  4. •
  5. Monoprice
  6. •
  7. TV Mount
  8. •
  9. Monoprice 10906 User manual

Monoprice 10906 User manual

Other Monoprice TV Mount manuals

Monoprice 39488 User manual

Monoprice

Monoprice 39488 User manual

Monoprice 34196 User manual

Monoprice

Monoprice 34196 User manual

Monoprice MLB-13 User manual

Monoprice

Monoprice MLB-13 User manual

Monoprice MUA-46 User manual

Monoprice

Monoprice MUA-46 User manual

Monoprice 34195 User manual

Monoprice

Monoprice 34195 User manual

Monoprice LPA37-696 User manual

Monoprice

Monoprice LPA37-696 User manual

Monoprice SB-41 User manual

Monoprice

Monoprice SB-41 User manual

Monoprice 34195 User manual

Monoprice

Monoprice 34195 User manual

Monoprice 39306 User manual

Monoprice

Monoprice 39306 User manual

Monoprice 39490 User manual

Monoprice

Monoprice 39490 User manual

Monoprice MP-DLB401 User manual

Monoprice

Monoprice MP-DLB401 User manual

Monoprice MHP-40 User manual

Monoprice

Monoprice MHP-40 User manual

Popular TV Mount manuals by other brands

Krüger & Matz KM1300 owner's manual

Krüger & Matz

Krüger & Matz KM1300 owner's manual

Barkan E220 manual

Barkan

Barkan E220 manual

Bauhn ACTVB-1120 installation guide

Bauhn

Bauhn ACTVB-1120 installation guide

Vantage Point Products CB01 instructions

Vantage Point Products

Vantage Point Products CB01 instructions

Ergotron Neo Flex Cantilever UHD user guide

Ergotron

Ergotron Neo Flex Cantilever UHD user guide

ECG LD 174203 instruction manual

ECG

ECG LD 174203 instruction manual

StarTech.com FPCEILBTB user manual

StarTech.com

StarTech.com FPCEILBTB user manual

VonHaus 05/038 instruction manual

VonHaus

VonHaus 05/038 instruction manual

Techlink ECHO TV manual

Techlink

Techlink ECHO TV manual

Sandstrom SSTVMC12X instruction manual

Sandstrom

Sandstrom SSTVMC12X instruction manual

Kanto RCAD590 user manual

Kanto

Kanto RCAD590 user manual

Forging Mount HY9440 instruction manual

Forging Mount

Forging Mount HY9440 instruction manual

ICW SCACC18 installation instructions

ICW

ICW SCACC18 installation instructions

LG WM-L640V owner's manual

LG

LG WM-L640V owner's manual

Gembird WM-65ST-01 user manual

Gembird

Gembird WM-65ST-01 user manual

ERARD FiTUP XXL 035320 quick start guide

ERARD

ERARD FiTUP XXL 035320 quick start guide

PEERLESS PLCK-1 Installation and assembly

PEERLESS

PEERLESS PLCK-1 Installation and assembly

GEM GEM GP001 instructions

GEM

GEM GEM GP001 instructions

manuals.online logo
manuals.online logoBrands
  • About & Mission
  • Contact us
  • Privacy Policy
  • Terms and Conditions

Copyright 2025 Manuals.Online. All Rights Reserved.


VESA Range = 30 ~ 625
PID
10906
NET WEIGHT GROSS WEIGHT PRODUCT SIZE L x W x H
VESA Range = 75 ~ 400
HighQualityTVStandw/Mount
forFlatPanelTVsupto55-Inches
UserʼsManual
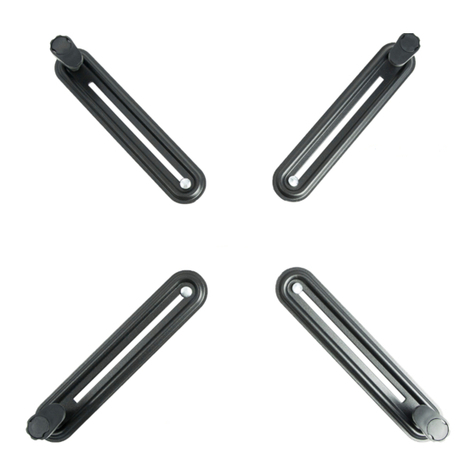
For TVs with a flat back design.
Place your TV face down on a soft blanket or towel and attach the two
TV Suspension Brackets (B) to the back of the TV, as shown below.
Loosen the Safety Bolts on the two TV Suspension Brackets. With the help of an assistant, lift the TV and hook the top of the Suspension
Brackets to the top of the TV Suspension Plate. Ensure the securely hangs in place. Tighten the Safety Bolts to secure the TV in place.
Using the included Allen wrench (A6) loosen the bolt holding the
TV Mounting Plate to the TV Riser (C) and adjust the plate so that
the face is parallel to the front and back of the shelves. Tighten
the bolt, but do not overtighten.
Using the hardware shown above, attach the Suspension Plate (A) to
the TV Mount Plate. The screws (A2) are inserted from the front.
Follow the order shown above: Screw (A2), Silver Washer (A5),
Black Washer (A4), Suspension Plate (A), TV Mount Bracket on TV
Riser (C), Silver Washer (A5), and Nut (A3). Use a Phillips or slotted
screwdriver and a wrench to tighten the assembly together.
Slide the other Lower Shelf (B) over the two Threaded Rods (I) and
the exposed Double Threaded Stud (A), as shown above. Make sure
that the dull side is up, so that the finished side is on top when the
final assembly is inverted for use.
Screw the two Feet (H) onto the outer Threaded Rods (I). Screw
the Foot (F) onto exposed Double Threaded Stud (A). Twist to
tighten, but do not overtighten.
With the help of an assistant, lift the assembled TV Stand off the
floor, invert it, and set it back down on its feet.
Screw the remaining Double Threaded Stud (A) into the top of
Spacer (D) as shown above. Next, screw the TV Riser (C) onto the
exposed Double Threaded Stud (A) Hold Spacer (E) and twist TV
Riser (C) to tighten. Do no overtighten.
Slide a Lower Shelf (K) over the two Threaded Rods (I) and over the
exposed Double Threaded Stud (A), as shown above. Make sure that
the dull side is up, so that the finished side is on top when the final
assembly is inverted for use.
Slide the two Spacers (G) over the two Threaded Rods (I). Screw the
Spacer (E) onto the exposed Double Threaded Stud (A). You will
need to hold Spacer (D) while twisting Spacer (E) to tighten the two
together. Screw another Double Threaded Stud (A) into Spacer (E).
Place the Top Shelf (J) upside down on top of a soft blanket or towel.
Screw the two Threaded Rods (I) into the sockets on the bottom of the
top shelf, as shown above. Twist to tighten, but do not overtighten.
Slide the two Spacers (G) over the two Threaded Rods (I). Set the
Spacer (D) over the hole in the center-rear of the shelf. Screw one of
the Double Threaded Studs (A) into the Spacer (D), as shown above.
Thank you for purchasing the Monoprice 10906 TV Stand! Please take an inventory of the package contents to ensure you have all the items
listed below. If anything is missing or damaged, please contact Monoprice Customer Service for a replacement.
For best results, assemble the TV stand on a soft blanket or towel to protect the finish while it is being assembled.
Check your TV’s owner’s manual to determine the correct size screws used
to attach to the VESA mounting holes. If you cannot find the information in
the manual, try the included screws to find the ones that fit best.