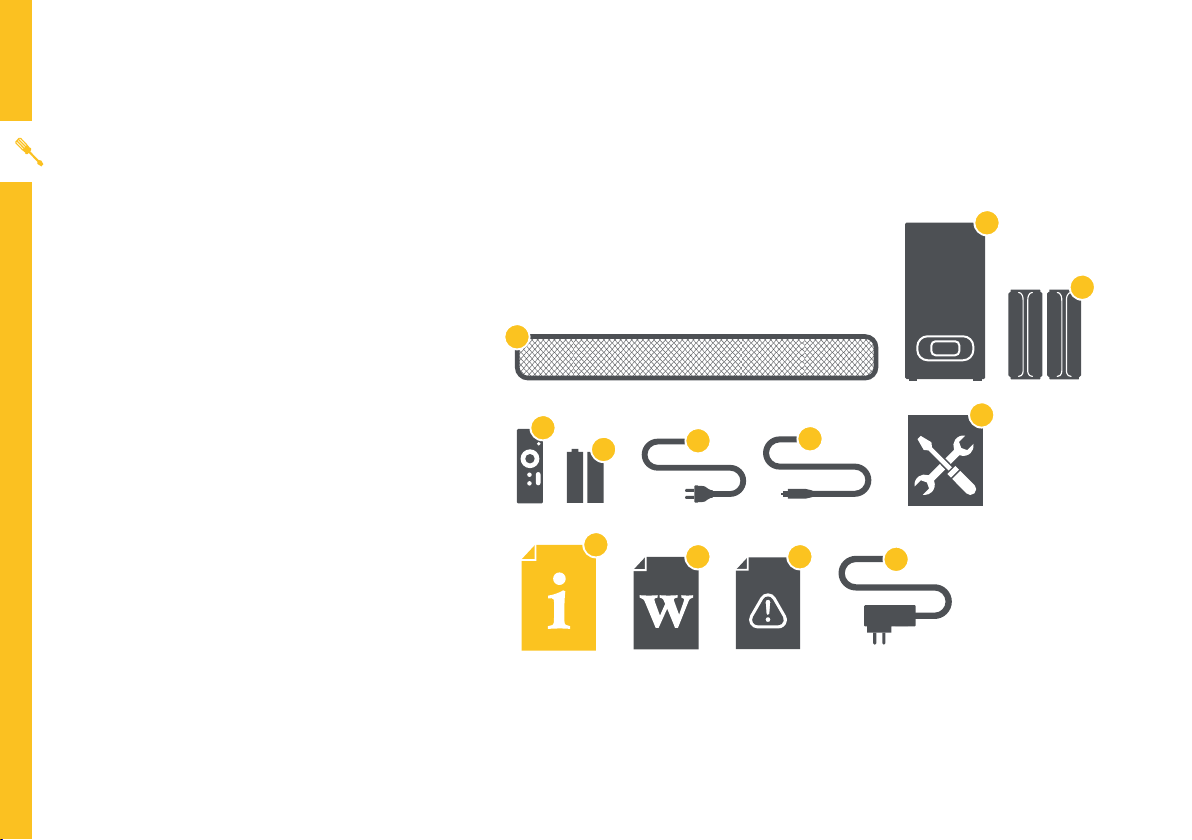
10 | PRODUCT OVERVIEW
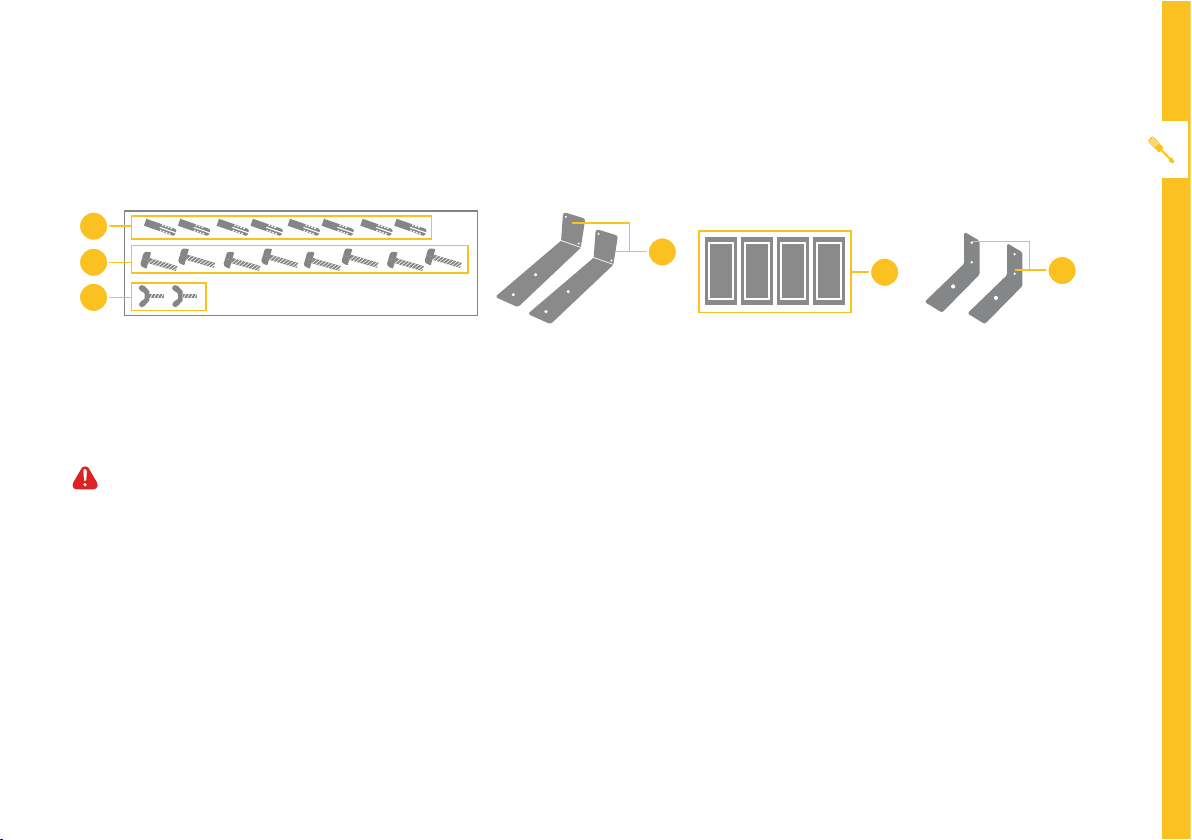
Wall Mounting Instructions (Surround Speakers)
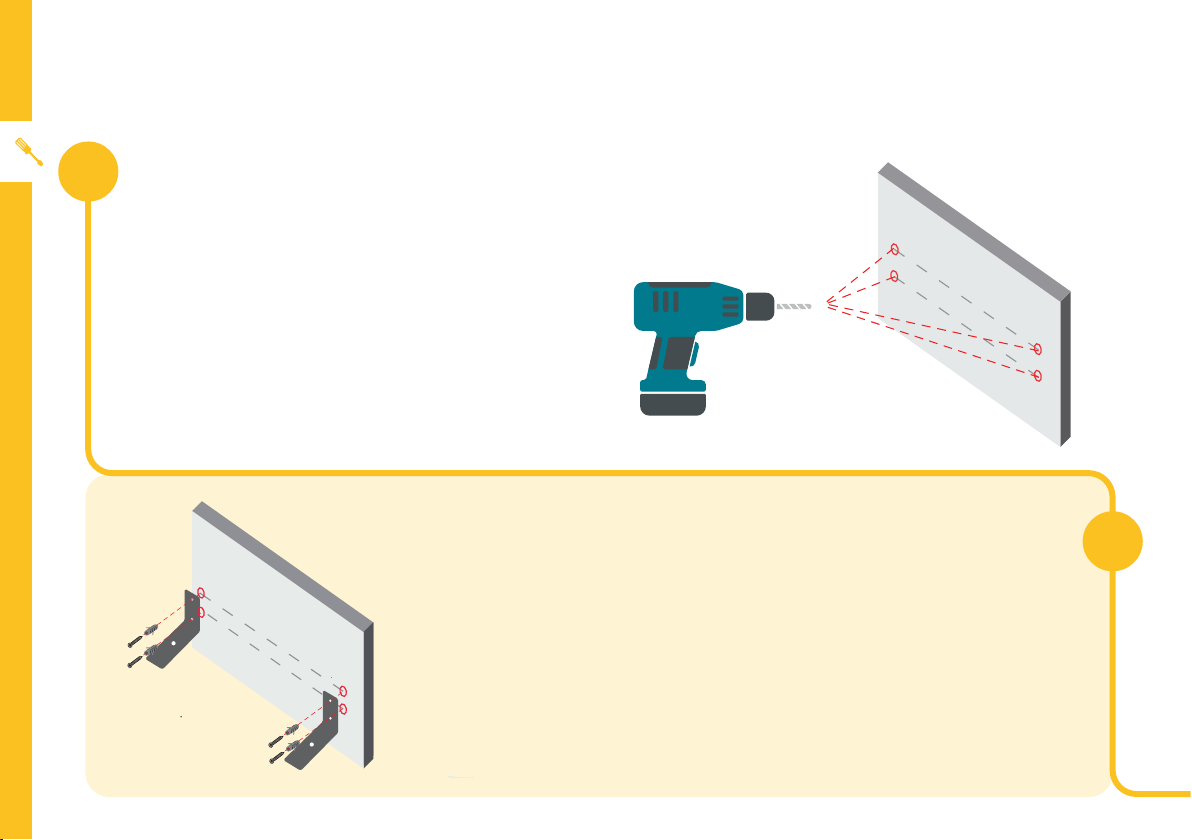
Use a pencil to make drill hole marks on the wall
for the plastic anchors at the desired mounting
location. Make sure the marks are level before
drilling. Use a 6mm bit and power drill (not
supplied) to drill holes on the marks.
Note: For a wood stud wall, use an electronic
stud detector to locate the centre of the framing
studs before marking and drilling the holes.
For a concrete or brick wall:
Align the holes on the mounting bracket to the drilled holes on the
wall. Insert the supplied plastic anchors through the mounting bracket
and into the holes and push in until they are flush with the wall. Drive
the supplied long screws into the plastic anchors and tighten until the
screw head is approximately 3mm from the wall.
For a wood stud wall:
Drive the screws into the wall and tighten until the screw head is
approximately 3mm from the wall.
1
2