14 15
OPERATING INSTRUCTIONOPERATING INSTRUCTION
11. During operation, the appliance will prompt you to add fruit or nut ingredients into the
bread pan by a series of beeps (except the programs of Dough, am and Bake).
12. Once the process has been completed, 10 beeps will be heard. Press START/STOP
button for several seconds to stop the process and remove the bread. Use oven mitts
to open the lid, hold and lift up the bread pan, and remove the bread from the bread
maker.
CAUTIO : The bread pan and bread is extremely hot! Always handle with care.
13. Allow the bread pan to cool down before removing the bread. Then use non-stick
spatula to gently loosen the sides of the bread from the pan.
14. Turn the bread pan upside down onto a wire cooling rack or clean cooking surface
and gently shake until bread is dislodged from the bread maker.
15. Allow the bread cool for about 20 minutes before slicing. It is recommended to slice
bread with an electric cutter or dentate cutter rather than fruit or kitchen knives;
otherwise the bread may be deformed.
16. If START/STOP button is not pressed at the end of the baking process, the bread will
be kept warm automatically for 1 hour (if applicable),
17. When keep warm is finished, a series of beeps will sound. Unplug the power cord
from the power supply and allow bread maker to completely cool before cleaning and
storing.
18. CAUTION: Before slicing the loaf, use the hook to remove the kneading blade
embedded in the loaf at the bottom of the baking pan. As the loaf is hot, never use
your hand to remove the kneading blade.
OTE: If bread is not consumed, it is advisable to store any remaining bread in a
sealed plastic bag or container. Bread can be stored for about three days in room
temperature, or more inside the refrigerator. Storage time is at most ten days. As
homemade bread does not contain any preservatives, storage time is not as long
compared to those available in the supermarkets.
WARNING DISPLAY
1. If the display shows “HHH” after you have pressed START/STOP button, 5 beeps will
sound, indicating that the temperature inside the bread maker is still too high. Open
the lid and let the machine cool down for 10 to 20 minutes before resuming.
2. If the display shows “LLL” after you have pressed START/STOP button, 5 beeps will
sound, indicating that the temperature inside of bread pan is too low. Place the bread
maker into a higher temperature environment and resume operation. (Except for the
bake program)
3. If the display shows “EE0” after you have pressed START/STOP button, beeps will
sound, indicating that the temperature sensor has cut a circuit, press START/STOP
button to stop the beeps from sounding. If the “EE0” warning in the LCD continues to
flash, have the circuit sensor checked by an Authorized expert. If the display shows
“EE1”, it means the temperature sensor has experience a short circuit.
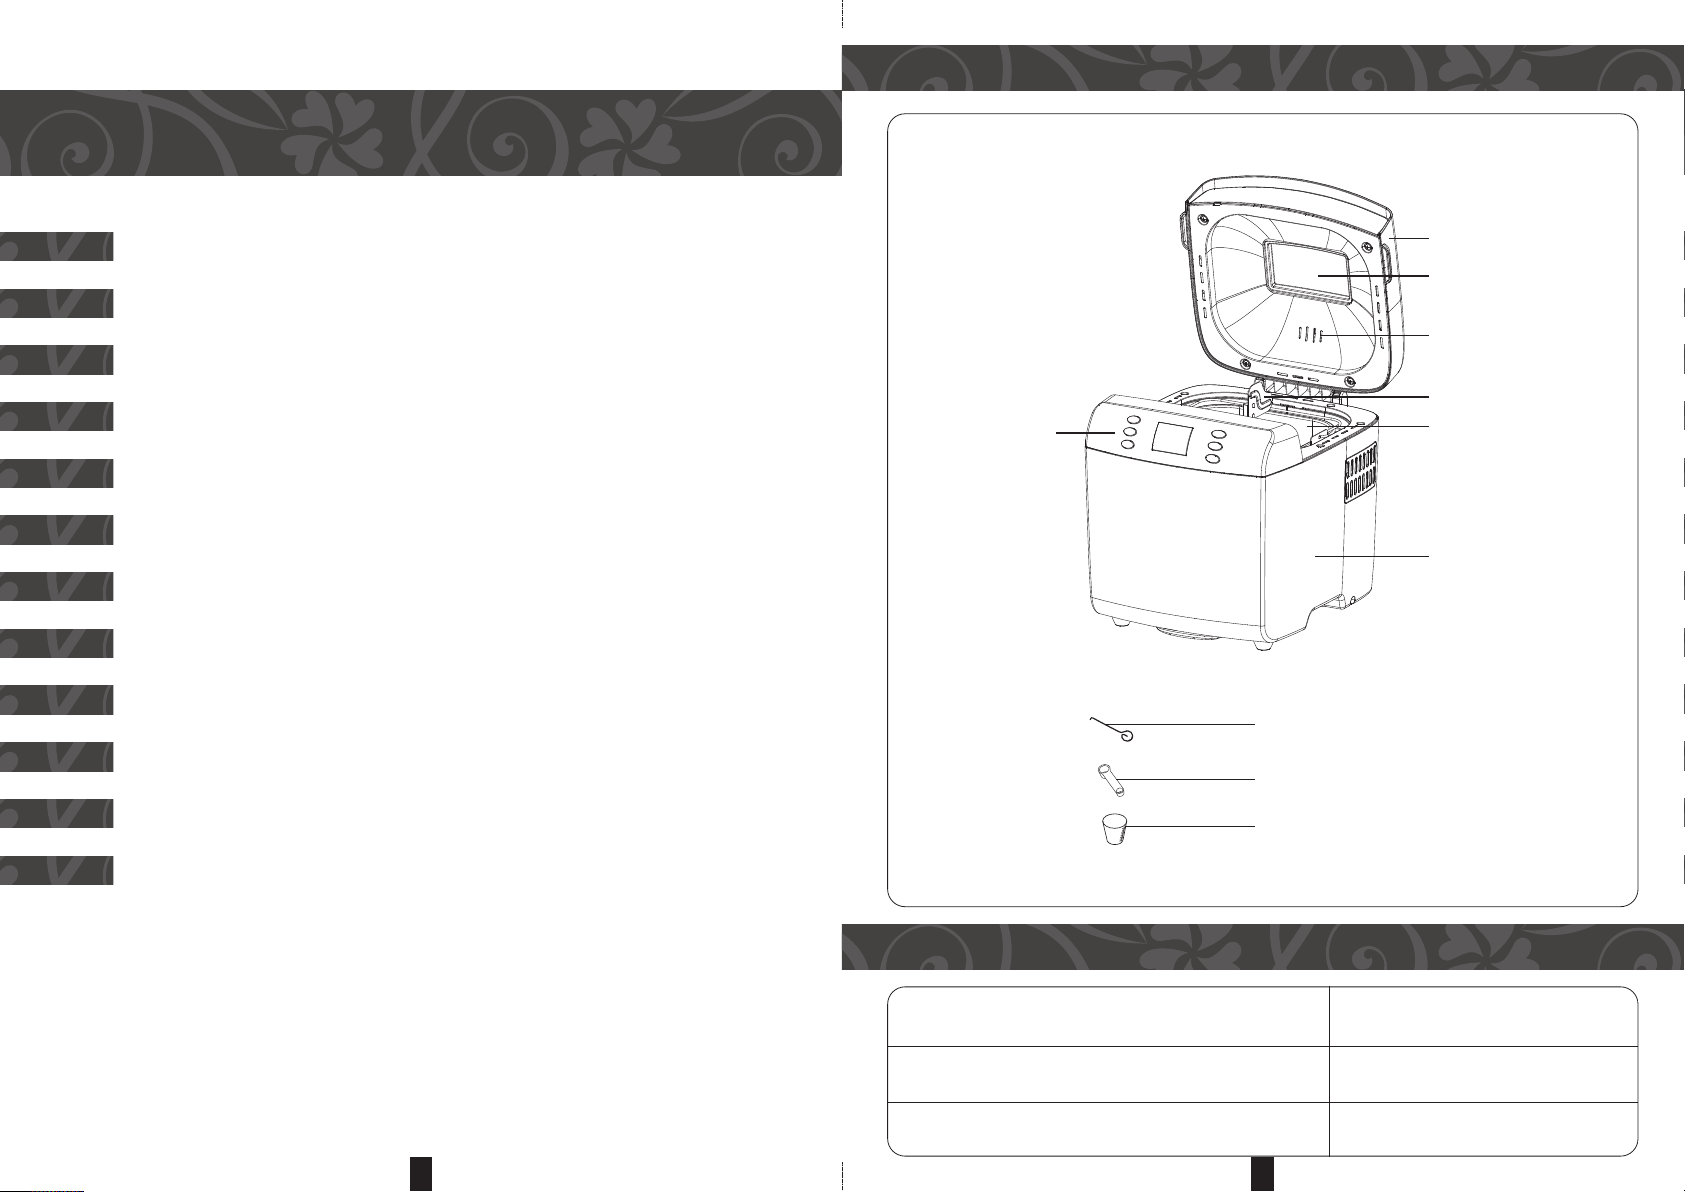
USING YOUR BREAD MAKER
1. Place the bread maker on a firm and flat surface.
2. Open the lid and set the pan in position by turning it in clockwise until it clicks in the
correct position.
3. Insert the kneading blade onto the drive axle. It is recommended to fill the crevice with
heat-resisting margarine prior to placing the kneading blade to avoid dough from
sticking to the kneading blade, and also to ensure the kneading blade can be removed
easily from the bread.
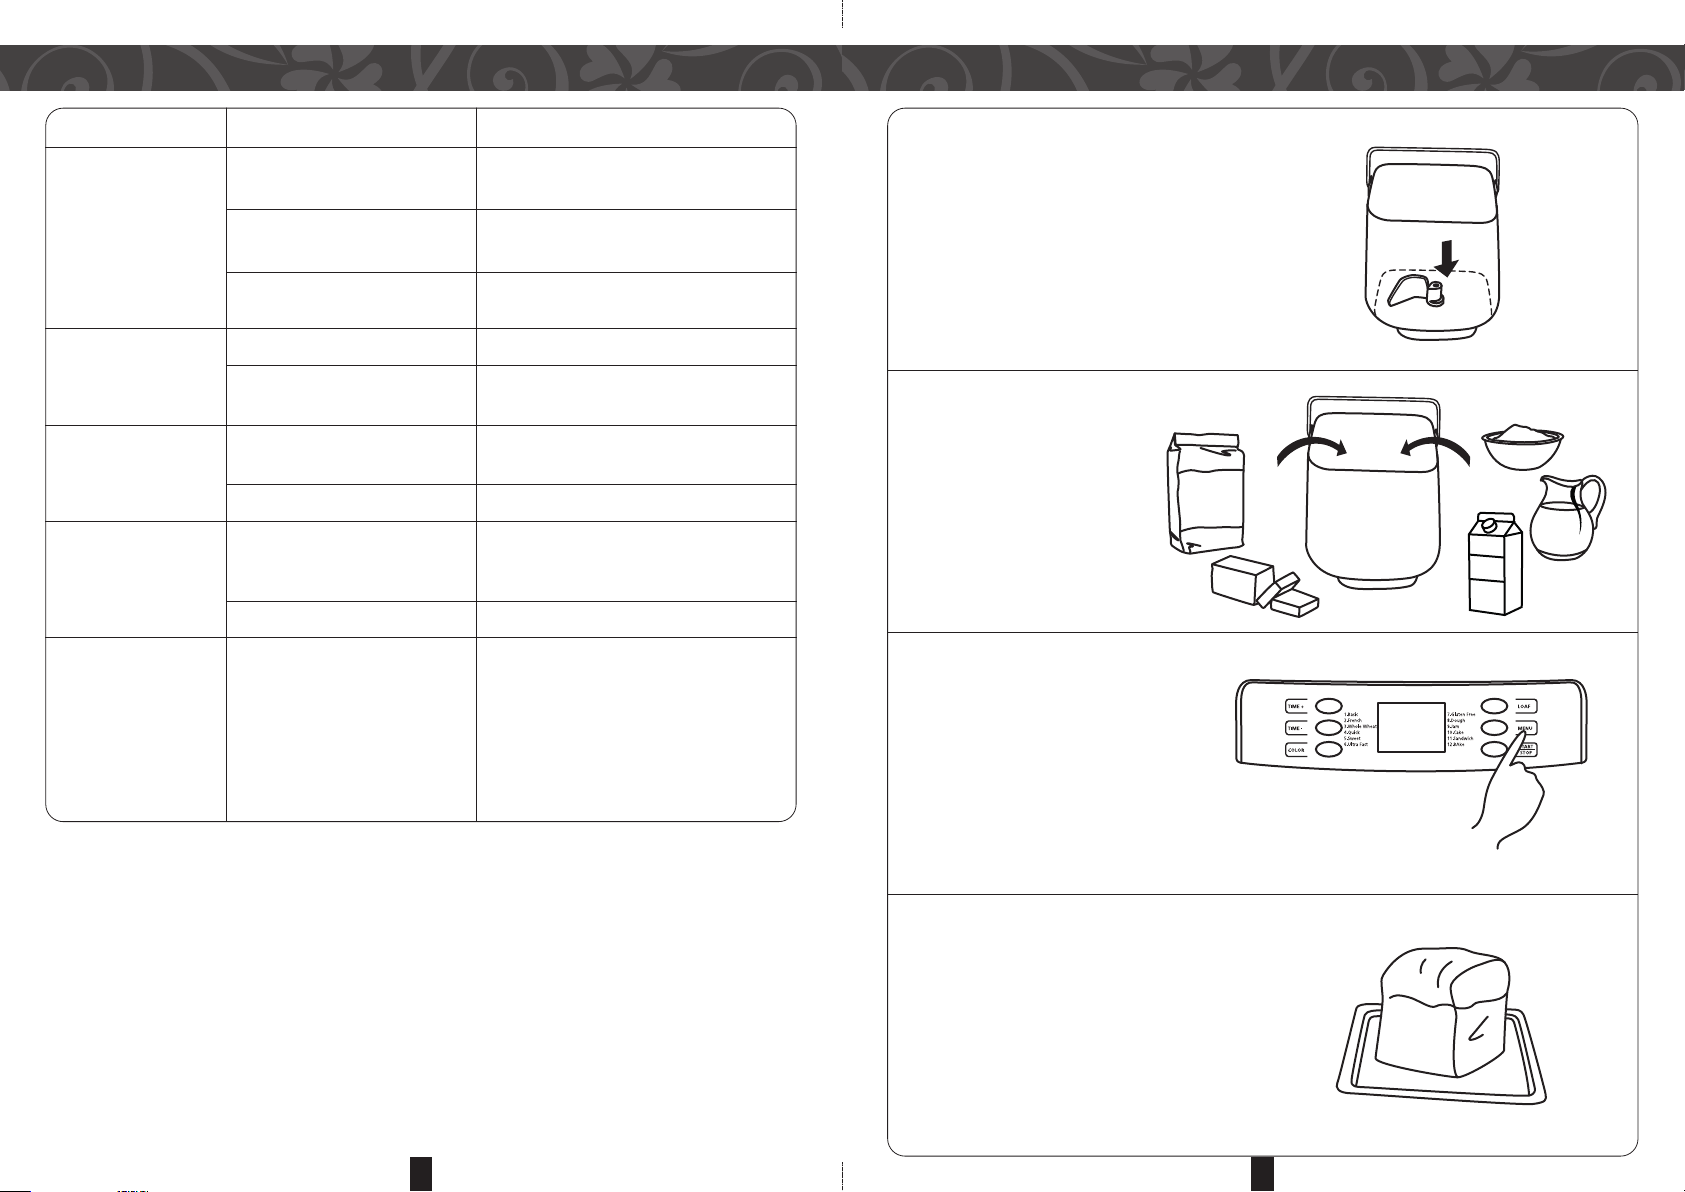
4. Place ingredients into the bread pan. Add water or liquid substance first, then add
sugar, salt and flour, always add yeast or baking powder as the final ingredient.
5. Make a small indentation on top of the flour with your finger, add yeast into the
indentation, ensuring it does not come into contact with liquid or salt.
( OTE: The maximum quantity of flour and yeast is 550g or 2.5 spoons)
6. Close the lid gently and plug the power cord into the power supply.
7. Press the MENU button until your desired program is selected. Press the COLOR
button to select the desired crust color (if applicable).
8. Press the LOAF/SIZE button to select the desired size (if applicable).
9. Set the delay time by pressing “TIME+” or “TIME-” button. Skip this step if you want
the bread maker to start working immediately.
10. Press the START/STOP button to begin operation.