manuals.online logo
Brands
  1. Home
  2. •
  3. Brands
  4. •
  5. Morphy Richards
  6. •
  7. Toaster
  8. •
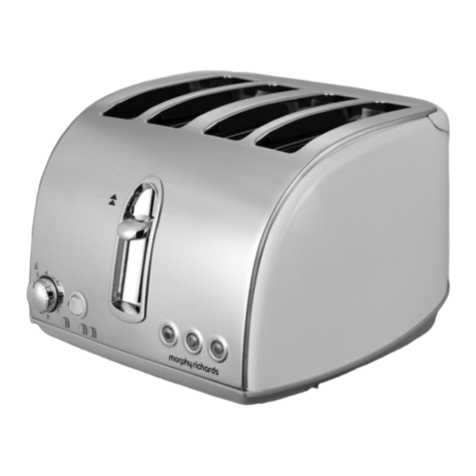
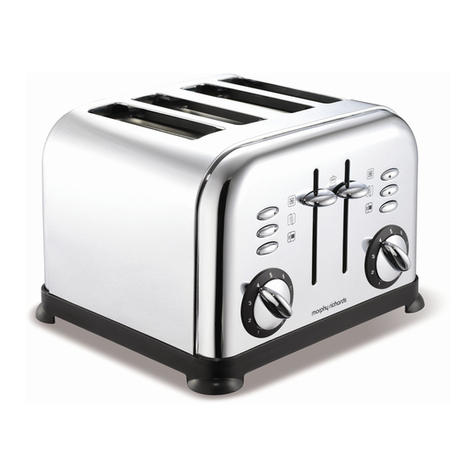
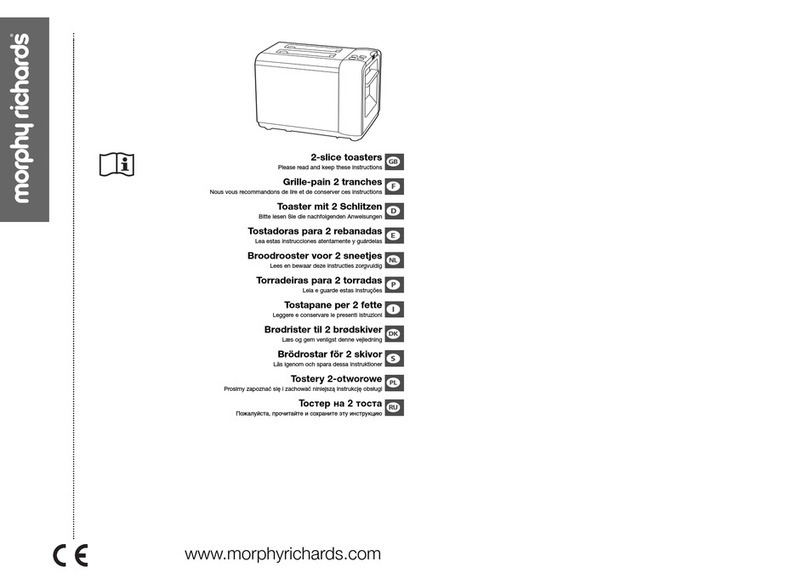
  9. Morphy Richards 4 slice polished chrome toaster User manual

Morphy Richards 4 slice polished chrome toaster User manual

This manual suits for next models

1

Other Morphy Richards Toaster manuals

Morphy Richards LATITUDE FOOD FUSION ASPECTS TOASTERS User manual

Morphy Richards

Morphy Richards LATITUDE FOOD FUSION ASPECTS TOASTERS User manual

Morphy Richards Chroma 2 User manual

Morphy Richards

Morphy Richards Chroma 2 User manual

Morphy Richards AT-204 User manual

Morphy Richards

Morphy Richards AT-204 User manual

Morphy Richards ELIPTA User manual

Morphy Richards

Morphy Richards ELIPTA User manual

Morphy Richards Evoke User manual

Morphy Richards

Morphy Richards Evoke User manual

Morphy Richards VERVE User manual

Morphy Richards

Morphy Richards VERVE User manual

Morphy Richards Meno 44341 User manual

Morphy Richards

Morphy Richards Meno 44341 User manual

Morphy Richards PRISM User manual

Morphy Richards

Morphy Richards PRISM User manual

Morphy Richards 44333 User manual

Morphy Richards

Morphy Richards 44333 User manual

Morphy Richards Evoke User manual

Morphy Richards

Morphy Richards Evoke User manual

Morphy Richards 3 slice Trio toaster User manual

Morphy Richards

Morphy Richards 3 slice Trio toaster User manual

Morphy Richards IBESSENTIALT User manual

Morphy Richards

Morphy Richards IBESSENTIALT User manual

Morphy Richards 2 SLICE ACCENTS TOASTERS WITH PAUSE AND... User manual

Morphy Richards

Morphy Richards 2 SLICE ACCENTS TOASTERS WITH PAUSE AND... User manual

Morphy Richards 2 & 4 slice essentials toaster User manual

Morphy Richards

Morphy Richards 2 & 4 slice essentials toaster User manual

Morphy Richards 44340 MENO LIDDED TOASTER User manual

Morphy Richards

Morphy Richards 44340 MENO LIDDED TOASTER User manual

Morphy Richards Deluxe User manual

Morphy Richards

Morphy Richards Deluxe User manual

Morphy Richards Toaster User manual

Morphy Richards

Morphy Richards Toaster User manual

Morphy Richards 2 SLICE ACCENTS TOASTERS WITH PAUSE AND... User manual

Morphy Richards

Morphy Richards 2 SLICE ACCENTS TOASTERS WITH PAUSE AND... User manual

Morphy Richards Accents 44038 User manual

Morphy Richards

Morphy Richards Accents 44038 User manual

Morphy Richards 4 SLICE ACCENT TOASTER User manual

Morphy Richards

Morphy Richards 4 SLICE ACCENT TOASTER User manual

Morphy Richards IB44066 User manual

Morphy Richards

Morphy Richards IB44066 User manual

Morphy Richards IB44700 User manual

Morphy Richards

Morphy Richards IB44700 User manual

Morphy Richards 2 SLICE ACCENTS TOASTERS WITH PAUSE AND... User manual

Morphy Richards

Morphy Richards 2 SLICE ACCENTS TOASTERS WITH PAUSE AND... User manual

Morphy Richards ELIPTA User manual

Morphy Richards

Morphy Richards ELIPTA User manual

Popular Toaster manuals by other brands

West Bend SOHO Toaster instruction manual

West Bend

West Bend SOHO Toaster instruction manual

Philips HD2615/80 user manual

Philips

Philips HD2615/80 user manual

Taurus ARCTIC 960648 quick start guide

Taurus

Taurus ARCTIC 960648 quick start guide

KitchenAid KTT570 instructions

KitchenAid

KitchenAid KTT570 instructions

Redfox TO 920 G Instructions for installation and use

Redfox

Redfox TO 920 G Instructions for installation and use

Electrolux EAT978 Instruction book

Electrolux

Electrolux EAT978 Instruction book

SEVERIN SA 9275 manual

SEVERIN

SEVERIN SA 9275 manual

Breville the Big One BTS100 Instruction booklet

Breville

Breville the Big One BTS100 Instruction booklet

Sunbeam TA2540 user guide

Sunbeam

Sunbeam TA2540 user guide

ARENDO 305716 user manual

ARENDO

ARENDO 305716 user manual

Life Crispy AT-001 user manual

Life

Life Crispy AT-001 user manual

Beko TAM 6201 I user manual

Beko

Beko TAM 6201 I user manual

Zephir ZHC485 instruction manual

Zephir

Zephir ZHC485 instruction manual

H.Koenig TOS9 instruction manual

H.Koenig

H.Koenig TOS9 instruction manual

ZIEGELMULLER Ritter ET 10 Operating and assembly instructions

ZIEGELMULLER

ZIEGELMULLER Ritter ET 10 Operating and assembly instructions

HURAKAN HKN-TOP3 manual

HURAKAN

HURAKAN HKN-TOP3 manual

Magio MG-275 instruction manual

Magio

Magio MG-275 instruction manual

Philips HD2565 manual

Philips

Philips HD2565 manual

manuals.online logo
manuals.online logoBrands
  • About & Mission
  • Contact us
  • Privacy Policy
  • Terms and Conditions

Copyright 2025 Manuals.Online. All Rights Reserved.

Two year guarantee
This guarantee is valid in the UK and Ireland
only. It is in your interest to retain the retailers receipt
as proof of purchase. Please quote the following
information if the product develops a fault. These
numbers can be found on the base of the product.
Model No. Serial No.
All Morphy Richards products are individually tested
before leaving the factory. In the unlikely event of any
appliance proving to be faulty within 28 days of
purchase it should be returned to the place of purchase
for it to be replaced.
If the fault develops after 28 days and within 24
months of original purchase, you should contact the
Helpline number quoting Model number and Serial
number on the product, or write to the address below.
You will be asked to return the product (in secure,
adequate packaging) to the address below along
with a copy of proof of purchase. Subject to the
exclusions set out below (see ‘Exclusions’) the faulty
appliance will then be repaired or replaced and
dispatched usually within 7 working days of receipt.
If for any reason this item is replaced during the 2
year guarantee period, the guarantee on the new
item will be calculated from original purchase date.
Therefore it is vital to retain your original till receipt or
invoice to indicate the date of initial purchase.
To qualify for the 2 year guarantee the appliance
must have been used according to the
manufacturers instructions. For example kettles
should have been regularly descaled or an iron cord
should have been stored as recommended by the
instructions.
EXCLUSIONS
Morphy Richards shall not be liable to replace
or repair the goods under the terms of the
Guarantee where:
1 The fault has been caused or is attributable to
accidental use, misuse, negligent use or used
contrary to the manufacturers recommendations
or where the fault has been caused by power
surges or damage caused in transit.
2 The appliance has been used on a voltage
supply other than that stamped on the
products.
3 Repairs have been attempted by persons other
than our service staff (or authorised dealer).
4 Where the appliance has been used for hire
purposes or non-domestic use.
5 Morphy Richards are not liable to carry out any
type of servicing work, under the guarantee.
6 Plastic filters for all Morphy Richards kettles
and coffee makers are not covered by the
guarantee.
This guarantee does not confer any rights other
than those expressly set out above and does not
cover any claims for consequential loss or damage.
This guarantee is offered as an additional benefit
and does not affect your statutory rights as a
consumer.
The After Sales Division, Morphy Richards Ltd, Mexborough, South Yorkshire, England, S64 8AJ
Helpline (office hours ): UK (local rate) 08450 777700, Republic of Ireland 1800 409119
4 slice polished chrome toaster
2
Important SafeguardsImportant Safeguards
Important Safeguards
When using electrical appliances, basic
safety precautions should always be
followed, including the following:
1Read all the instructions.
2Do not touch hot surfaces. Use handles or
knobs.
3To protect against fire and risk of electrical
shock do not immerse cord, plug or toaster
itself in water or other liquid.
4Ensure that this appliance is situated out of
reach of children. NEVER allow a child to
use this product.
5Unplug from the socket when not in use
and before cleaning. Allow to cool before
putting on or taking off parts.
6Do not operate any appliance with a
damaged plug, or after an appliancehas
malfunctioned, or has been dropped or
damaged in any way. Contact Morphy
Richards for advice on examination, repair
or electrical or mechanical adjustment.
This appliance contains no user
serviceable parts.
7The use of attachments or tools not
recommended or sold by Morphy Richards
may cause fire, electric shock or injury.
8Do not use outdoors.
9 Do not let the mains lead overhang the
edge of the table or work-top, or touch
hot surfaces.
10 DONOTPLACETHEAPPLIANCE ONOR
NEARAHOTGAS ORELECTRICHOB,OR
INAHEATED OVEN.
11 Do not attempt to move the appliance whilst
hot.
12 When unplugging turn any control to off,
then remove plug from wall socket.
13 Do not use appliance for other than
intended use.
14 Preheating of this appliance is not required.
15 DONOTTOUCHTHEMETALTOPORSIDES
OFTHETOASTERDURINGORAFTERUSE
ASTHEY GET VERYHOT.
16 ENSURETHATSUFFICIENTSPACEISLEFT
ABOVE AND AROUND ALL SIDESOF
YOURTOASTERTO ALLOW AIR TO
CIRCULATE.PLACE THETOASTER ONA
HEATRESISTANTSURFACE.DOWATCH
YOURTOASTERDURINGUSE.AFIRE MAY
OCCURIFTOASTERSARECOVEREDOR
TOUCHINGFLAMMABLEMATERIAL,
INCLUDINGCURTAINS,DRAPERIES,WALLS
ETC,WHENINOPERATION.
17 Do not use underneath cupboards.
18 Oversize foods, metal foil packages, or
utensils must not be inserted into a toaster,
as they may involve a risk of fire or electric
shock.
19 Do not attempt to dislodge food when
toaster is plugged in and never introduce
cooking utensils into the slots.
20 Do not place bread or other items on
top of the bread slots as this will
damage your toaster and creates a
fire hazard.
If your toaster does not work, check the
following points:
21 Has the toaster been set correctly - is the
plug in its socket and the switch in the ‘on’
position?
22 Is the plug itself or the socket faulty - check
this by plugging in another appliance.
23 Does the fuse need replacing - if you have
fitted your own plug, are the internal plug
connections secure and correctly made?
24 Do not lift or move the toaster by inserting
fingers in bread slots.
SAVE THESESAVE THESE
SAVE THESE
INSTRU TIONSINSTRU TIONS
INSTRU TIONS
Electrical RequirementsElectrical Requirements
Electrical Requirements
Check that the voltage on the rating plate of
your appliance corresponds with your house
electricity supply which must be A.C.
(Alternating Current).
If the socket outlets in your home are not
suitable for the plug supplied with this appli-
ance the plug should be removed and the
appropriate one fitted.
IMPORTANT:THEPLUGREMOVED
FROMTHEMAINSLEAD,IFSEVERED,MUSTBE
DESTROYEDASAPLUGWITH BARED
FLEXIBLECORDISHAZARDOUSIFENGAGED
INTOALIVESOCKETOUTLET.
If you use a 13 amp BS1363 plug, a 13 amp
BS1362 fuse must be fitted.
WARNING : THIS APPLIANCE MUST BE
EARTHED.
3
Features of your toasterFeatures of your toaster
Features of your toaster
Crumb Tray
Set slice control switch
Cord storage
Electronic variable browning control
Cool touch handle
Cancel button with neon
Frozen bread button with neon
Re-heat button with neon
Bread carriage lever/high lift feature
Bread slots
Before first useBefore first use
Before first use
•Before using the toaster for the first time
operate the toaster without bread with the
slice control switch set to and the
browning control set to 8. Note: the bread
carriage lever will not stay down
unless the toaster is plugged in and
the wall switch is on. Ventilate the
room during this period.
•As with all new electric heating elements,
your toaster emits a ‘new’ smell when it is
first switched on. This is quite normal and
not a cause for concern.
Instructions for useInstructions for use
Instructions for use
1Set the slice control switch according to
the number of slices to be toasted,
for 1 or 2 slices for 3 or 4 slices.
If both sides of one or two slices are
required to be toasted then the bread must
be placed in the bread slot as indicated
on top of the toaster. If you require the
bagels, buns or bread to be toasted on one
side only set the switch to the and place
Using the cancel setting
When the bread carriage lever is
depressed, the cancel button will illuminate.
If you wish to interrupt the toasting process,
press the cancel button.
Using the frozen bread button
To toast frozen bread, do not adjust the
browning control, place the bread normally in
the bread slots, depress the bread carriage
lever and press the frozen bread button .
The button will illuminate and the toaster will
automatically toast for an extended period.
the bread in the bread slot. Only the
side of the bread facing the right hand
bread slot will be toasted. Note that only
two slices of one-sided toast can be made
at a time.
2Select the desired level of browning on the
browning control marked 1 to 8. The
setting required will vary according
to the moisture content and
thickness of bread. For best
results ensure that the bread
slices are of even thickness,
freshness and size.
Remember that stale bread toasts more
rapidly than fresh and thin bread toasts
quicker than thick. See additional points for
more information.
3After selecting the desired level, place
your bread in the slots and depress the
bread carriage lever downwards until it
locks.
4After the set degree of browness
has been reached the bread will pop-up
automatically ready for removal from the
slots.The bread carriage lever will have
returned to its upper position and the
heating element will have switched off,
ready for the next toasting.
•Note : that the toast can be made slightly
darker by using the re-heat function.
•If the bread in your toaster becomes
jammed disconnect your toaster at
the socket, allow it to cool, then
remove the bread.
•When not in use, switch your toaster off at
the mains and remove the plug from the
socket.DO NOTWRAP THECABLE
AROUNDTHEMAINBODYOFTHE
APPLIANCE DURINGORAFTERUSE.
MorphyRichards productsare intended forhousehold useonly.
MorphyRichards has apolicy of continuous improvementin product qualityand design.
The Company, therefore, reserves the right to change the specification of its models at any time.
Morphy Richards Limited, Mexborough,
South Yorkshire, England, S64 8AJ 444/8502/15 Rev 1
Using your re-heat button
If you toast has popped up and gone cold,
the toaster offers a re-heat facility. To use,
depress the bread carriage lever and press
the re-heat button immediately . The
button will illuminate and the toaster will
operate for a short period re-heating the
bread.
Using the high lift release
If small bread is toasted, this may be
removed more easily by lifting the bread
carriage lever.
leaning and Maintenanceleaning and Maintenance
leaning and Maintenance
1After use and before cleaning, switch off
at the mains, remove the plug from the wall
socket and wait for the toaster to cool.
2Wipe the outside of the toaster with a damp
cloth only and dry with another cloth or
tissue.
•NEVER use metal polish or coarse scouring
agents and never immerse your toaster in
any sort of liquid.
•NEVER use any pointed or sharp articles
for cleaning the inside, otherwise the
heating element will be damaged.
•NEVER use a brush or push your fingers or
metal objects down the slots.
rumb trayrumb tray
rumb trayrumb tray
rumb tray
Crumbs will accumulate in the crumb tray
and could catch fire if not emptied periodically.
When the toaster has cooled down completely,
tap the sides of the case lightly to dislodge any
crumbs lodged in the toasting chamber and pull
out the crumb tray . Empty the tray and
replace it.
Never operate the
toaster without
the crumb tray
fitted.
Additional pointsAdditional points
Additional points
•In order to achieve uniform browning, we
recommend you wait a minimum of 30
seconds between each toasting, so that the
control can automatically be reset.
•If toasting one slice only, you may need to
adjust the browning control to a slightly
lower setting.
•Note you will also notice a slight
variation in toast colour on one side of a
single slice.
•Stale bread toasts more rapidly than fresh
bread. Therefore, the browning control
should be set at a lower setting than usual.
•All sorts of bread can be used as well as
teacakes, small rolls etc. Slices should not
however be so thick as to cause burning or
jamming within the bread slots.
•When toasting 2 slices it is recommended
they are of equal size and freshness.
Allow the toaster to cool fully before putting
away.