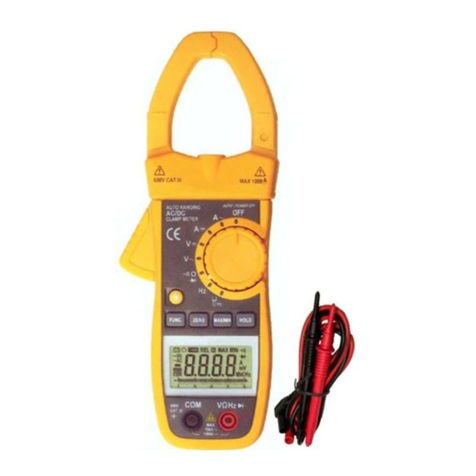
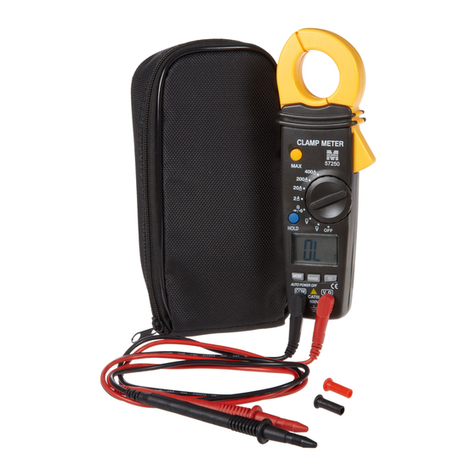
Morris Products 57276 User manual

Model 57276
A
:0.01 1200 CAT II
MEM
AL:1 100
~
~
1 99
:
~
A
~
:600V
A
M
P
C
L
EARTH RESISTANCE
EARTH RESISTANCE
CLAMP
USERS MANUAL
1mA 20A

CONTENTS
WARNING - - - - - - - - - - - - - - - - - - - - - - - - - - - - - - - - - - - - - - - - - - - - - - 1
MAINTENANCE - - - - - - - - - - - - - - - - - - - - - - - - - - - - - - - - - - - - - - - - - 1
INTRODUCTION - - - - - - - - - - - - - - - - - - - - - - - - - - - - - - - - - - - - - - - - - 2
FRATURES - - - - - - - - - - - - - - - - - - - - - - - - - - - - - - - - - - - - - - - - - - - - 2
SUMMARY OF FUNCTION - - - - - - - - - - - - - - - - - - - - - - - - - - - - - - - - 3
LAYOUT - - - - - - - - - - - - - - - - - - - - - - - - - - - - - - - - - - - - - - - - - - - - - - 3
LCD DISPLAY - - - - - - - - - - - - - - - - - - - - - - - - - - - - - - - - - - - - - - - - - - 4
OPERATION
ON/OFF OPERATION - - - - - - - - - - - - - - - - - - - - - - - - - - - - - - - - - - 6
EARTH RESISTANCE MEASUREMENT - - - - - - - - - - - - - - - - - - - - 7
CURRENT MEASUREMENT - - - - - - - - - - - - - - - - - - - - - - - - - - - - - 10
HOLD BUTTON - - - - - - - - - - - - - - - - - - - - - - - - - - - - - - - - - - - - - - 11
ALARM OPERATION - - - - - - - - - - - - - - - - - - - - - - - - - - - - - - - - - 11
MEMORY FUNCTION - - - - - - - - - - - - - - - - - - - - - - - - - - - - - - - - - 12
SPECIAL FUNCTION - - - - - - - - - - - - - - - - - - - - - - - - - - - - - - - - - - 13
SPECIFICATION - - - - - - - - - - - - - - - - - - - - - - - - - - - - - - - - - - - - - - - - 15
FEATURES - - - - - - - - - - - - - - - - - - - - - - - - - - - - - - - - - - - - - - - - - - - 15
ACCESSORY - - - - - - - - - - - - - - - - - - - - - - - - - - - - - - - - - - - - - - - - - - 16
CHANGING THE BATTERIES - - - - - - - - - - - - - - - - - - - - - - - - - - - - - - - 16
CHARGE THE BATTERIES - - - - - - - - - - - - - - - - - - - - - - - - - - - - - - - - 17
APPLICATION FIELD - - - - - - - - - - - - - - - - - - - - - - - - - - - - - - - - - - - - 18

WARNING
* Before measuring, note that the metal objects or the conductors that connect with
the electric equipment are dangerous, as well as the earth system. So when you
test the electric equipment, you must especially pay attention to safety.
* The warning letter that is in the back of your instrument reminds you of the values
that must not be exceeded, the measurement ranges, and briefly, the operation
of the clamp.
* Do not exceed the permissible overloads of loop current.
* Before switching the instrument on, you must press the trigger several times to
ensure the clamp is closing correctly.
* When switching on and the clamp it is auto-calibrating, do not open the clamp or
hook the clamp jaw around any conductor.
R
RE
EA
AD
D
T
TH
HE
E
I
IN
NS
ST
TR
RU
UC
CT
TI
IO
ON
NS
S
B
BE
EF
FO
OR
RE
E
U
US
SI
IN
NG
G
T
TH
HE
E
I
IN
NS
ST
TR
RU
UM
ME
EN
NT
T
MAINTENANCE
* Keep the surfaces of the clamp jaw clean, any dirt may cause malfunction of the
clamp.
* Use the soft damp cloth to clean the clamp jaw faces, do not use abrasives,
solvents, or alcohol.
* Avoid any shock, especially the clamp jaw faces.
* Avoid the immediate proximity of metallic masses.
* After each measurement, press the HOLD button to reduce consumption of the
batteries.
* Remove the batteries from the instrument in case of prolonged non-use.
―1 ―

INTRODUCTION
Modern industrial electronic equipment is in quick development. A good
Earth ground is becoming an efficient system to prevent from interference and
thunderbolt. A safe and quick earth tester is most needed.
The Earth resistance clamp is a breakthrough from traditional testers. Neither
the supplementary earth leads nor the break earth equipment is necessary.
Ground resistance results can be safely and quickly obtained only by clamping
the ground line.
Current testing is also provided. This high sensitivity clamp meter
can measure the leakage current to 1mA, neutral current to 20ARMS. It is
especially important for testing ground circuit with strong interference and ripple
that will influence the electrical quality.
In addition to industrial electronic equipment, it is also widely used in the field
of electric power distribution, telecommunication and architectural ground.
FEATURES
☼0.01Ωhigh accuracy for low resistance measurement
☼0.001Ωhigh resolution
☼Record 99 resistance measurement values
☼With alarm function of resistance limit, set alarm threshold in 1Ωto 100Ω
☼Measure leakage current and neutral current 1mA~20A
☼45mm×32mm large jaws of exactitude measurement probe
☼Digital measurement, autorange ,easy operation
☼Double insulation, strengthen the interference resistance
☼Untouched measurement ,ensure the safety
☼Time per measurement : 1 second
☼Current overload display : >20A RMS, display “OL”
―2 ―

SUMMARY OF FUNCTION
FUNCTION BUTTON
ON/OFF/EXIT SET MODE
A MEASUREMENT/ ALARM VALUE INCREASE/
RECORD NUMBER SELECT
▲A
ΩMEASUREMENT/ ALARM VALUE MINISH /
RECORD NUMBER SELECT
▼Ω
HOLD DISPLAY HOLD
SELECT ALARM MODE AL
SELECT /SET MEMORY MODE MEM
SWITCH BUZZER ON/OFF +Ω
SET ALARM VALUE +AL
AUTO POWER OFF FUNCTION SET +HOLD
READ SAVED MEASUREMENT VALUE +MEM
RESET MEMORY TO ZERO HOLD+MEM
LAYOUT
1.Clamp jaw
2.Trigger
3.MEM Button
4.Button(ON/OFF BUTTON )
5.LCD Display
6.AL Button
7.▼Ω Button
8.▲A Button
9.HOLD Button
―3 ―

LCD DISPLAY
(Note: when switch is on, the clamp performs a rapid auto-test of the whole
display. All the symbols on the LCD are displayed for this short time.)
―4 ―
A
:0.01 1200 CAT II
MEMAL:1 100
~
~
1 99
:
~
A
~
:600V
9
8
7
6
2
3
4
5
1
A
M
P
C
L
EARTH RESISTANCE
1mA 20A

1.Buzzer ON symbol
2.HOLD symbol : holds the last measurement
3.Interference Symbol: shows that the current in the loop is disturbed such that
the resistance measurement value is not guaranteed.
4.Clamp symbol: shows that the clamp is closed incorrectly, cannot measure.
5.Wait symbol: shows that the instrument is auto-calibrating
6.Current measurement unit
7.Resistance measurement unit
8.Decimal points
9.Percent sign of the batteries actual service life
10. Alarm threshold value of resistance unit
11. Digital display of the battery actual service life orAlarm threshold value
―5 ―
10
11
12
13
141516
17
6
7
8
9
18
19
20
2 3 4 5
1

12. High Alarm symbol
13. LowAlarm symbol
14. Alarm mode symbol
15. Low voltage indication symbol
16. Auto Power Off symbol
17. Record number symbol
18. Read memory mode symbol
19. save in memory mode symbol
20. 4 digit LCD digital display
OPERATION
一、ON/OFF OPERATION
button switches ON/OFF. Press button so the clamp switch is on,
Press the button for 2 seconds, the instrument switches off.
As soon as it switches on, the earth resistance clamp begins to
auto-calibrate to obtain better resolution. When it is calibrating, the instrument
will count from CAL 9 to CAL 0. The user must wait for the clamp to complete
calibration. Do not open the clamp or hook the clamp jaw around the
conductor or the object to be measured during the calibration. After the
calibration is completed, the instrument returns to the measurement mode
when last switch off. If the instrument is in resistance measurement mode
when switch off, the LCD will display the primary resistance measured value.
―6 ―

二、EARTH RESISTANCE MEASUREMENT
1.After switching on, the instrument is automatically in measurement current
mode, you can press the ▼Ω button to configure for resistance
measurement mode.
2.Hook the clamp jaw around earth leads or electrode to be tested.
3.If symbol “ - - - ” and symbol are shown on the display, it indicates
that the clamp is closed incompletely. You must press the trigger of the
instrument several times to close the clamp jaw correctly. After the
symbol disappears from the display, meter is in the normal measurement
mode.
4.Read the measurement value on the display.
5.When the display shows the “NOISE” symbol, it indicates that there is an
interference current in the loop, the resistance measurement may be
innaccurate.
6.Schematic of measurement
·Buzzer ON
·A loop earth resistance of 36.2Ω
·The batteries service life is 87%
―7 ―

·Buzzer ON
·A loop earth resistance of 68.7Ω
·The earth resistance value is above the high alarm
threshold 50Ω, a beep is emitted
·Buzzer ON
·A loop earth resistance of 0.5Ω
·The earth resistance value is less than the low alarm
threshold value 8Ω, a beep is emitted
―8 ―

·Buzzer ON
·A loop earth resistance of 19.6Ω
·The earth resistance value is less than the high alarm
threshold value 30Ω, no beep is emitted
·6 recorded values in the memory
·Buzzer ON
·Read the 22nd recorded measurement, the loop earth
resistance of 176.4Ω
·The low alarm threshold of earth resistance set at 15Ω
·Buzzer ON
·A interfered current is in the loop resistance, the current
measured resistance is 55.2Ω, the value is not guaranteed
·The batteries service life is 86%
―9 ―

·Buzzer ON
·A loop earth resistance of 93.7Ω
·The batteries service life is 18% and less than 20%.The
display shows the low voltage indication
·Auto Power Off function is valid
·55 recorded values in the memory
·The clamp jaw is closed incorrectly, ”---” is displayed
·The batteries service life is 90%
三、CURRENT MEASUREMENT
1. Press the A button on the instrument.
2. The display shows the current unit “A” or “mA”, the instrument is in
―10 ―

current measurement mode. You can measure current of the conductor.
3. Read the measurement value on the display.
4. If the display shows symbol “OL”, it indicates the measured value exceeds
the measurement range.
四、HOLD BUTTON
Press the HOLD button to lock display of the current measured value and the
last measurement on measurement mode.
五、ALARM OPERATION
1. On resistance measurement, press the AL button, “AL” symbol and the value
of the alarm threshold is displayed.
2. According to the measurement demand, you can press the “AL” button time
after time to select one of three alarm modes:
---- LOW ALARM MODE: this signals measurement below the alarm
threshold, a continuous beep at low frequency. The symbol is
displayed.
---- HIGH ALARM MODE: this signals measurement above the alarm
―11 ―

threshold, a continuous beep at high frequency. The symbol
is displayed.
---- NO ALARM MODE: signals measurement is not confined in alarm
threshold.
3. Set the alarm threshold
The earth resistance clamps initial Alarm threshold value is high alarm
threshold of 20Ω. In resistance measurement mode, press the +Al to set
in Alarm threshold value setting mode, then “AL” symbol and the Alarm
threshold value are displayed; press ▲A or ▼Ω button, you can increase or
decrease the Alarm threshold value, the Alarm threshold is from 1 to 100Ω
inclusive. After switching off the threshold value is not changed. Setting
Alarm threshold value completed, you can press AL button to select one of
the three Alarm modes: HIGHT ALARM MODE, LOW ALARM MODE, NO
ALARM MODE. When the selection is completed, you can press the
button to exit Alarm threshold value setting mode.
六、MEMORY FUNCTION
1. Clear memory
Press the HOLD+MEM for 3 seconds, then the “CLR” symbol is shown on
the display. At a beep, the memory is cleared. The instrument returns to
measurement mode automatically.
2. Save measured value
When pressing the MEM button,the ”MEM” symbol is displayed; press this
button for 2 seconds to save the current measured value in memory.
―12 ―

The number of record goes up by 1 automatically and is shown on the
display, when the number of the record is 99, if MEM button is pressed
again at this time, a beep is emitted and the instrument prohibits saving the
measurement value. When the batteries service life is less than 20%, a
beep warns that the saving measured value is prohibited.
3. Read the saving measurements
Press the +MEM for 1 second, then the instrument is in the read
memory mode, the “MR” and “HOLD” symbol are displayed, the number of
the record and the measured value are shown at one time. To display
previous record or subsequent record in the memory press ▲A button or ▼
Ωbutton. You can press the button to exit read the record mode to
return resistance measurement mode.
七、SPECIAL FUNCTION
1.Press +Ωbutton, & the buzzer symbol disappears from the display,
the buzzer & beep function is switched off by pressing button and Alarm
function is invalid; press the +Ωto switch to turn on the buzzer again.
2.ON/OFF Auto Power Off function
Press +HOLD button, the LCD displays “P” symbol, the Auto Power Off
function switch is on. After no operation for 5 minutes, the instrument
switches off automatically. Press +HOLD again, then the “P” symbol
disappears from the display, the Auto Power Off function switch is off. To
switch off the instrument press the button for 2 seconds.
―13 ―

3.Symbol
When the battery service life is less than 20%,the symbol is continually
displayed, the clamp cannot save the measured value in memory in this
case. When the batteries service life is less than 15%, prompt beeps is
continually emitted. After 10 beeps is emitted, the instrument switch turns off
automatically.
4.NOISE Symbol
“NOISE” appears on the display indicates that an interference current of
testing earth resistance is too high, the resistance measurement is not
accurate.
5.Symbol
This symbol indicates that the clamp is closed incorrectly and cannot make a
measurement.
6.WAIT Symbol
This symbol is shown on the display when the instrument switch is on and
begins to auto-calibrate, it is from CAL 9 to CAL 1 to calibration count.
7.OL Symbol
Measured resistance value exceeds 1200Ωor measured current value
exceeds 20A, this symbol is shown on the display.
―14 ―

SPECIFICATION
RANGE ACCURACY RESOLUTION
0.01Ω~0.999Ω±(1.5%+0.01Ω) 0.001Ω
1Ω~9.99Ω±(1.5%+0.1Ω) 0.01Ω
RESISTANCE 10Ω~99.9Ω±(2.0%+0.3Ω) 0.1Ω
100Ω~199.9Ω±(3.0%+1Ω) 1Ω
200Ω~400Ω±(6.0%+5Ω) 5Ω
400Ω~500Ω±(10%+10Ω) 10Ω
500Ω~1200Ωapprox. 20% 20Ω
100mA ±(2.5%+1mA) 0.1mA
300mA ±(2.5%+2mA) 0.3mA
CURRENT 1A ±(2.5%+0.003A) 0.001A
3A ±(2.5%+0.01A) 0.003A
10A ±(2.5%+0.03A) 0.01A
20A ±(2.5%+0.05A) 0.03A
※TESTING CONDITIONS: Temperature 23℃±3℃
Humidity 50%RH±10%
Battery Voltage >7V

External magnetic field <40A/m
External electric field <1 V/m
Testing frequency of current 45Hz~65Hz
FEATURES
·Test voltage : 3700V
· Electric clearance : 6.5mm ( IEC1010 double insulation CATⅡ600V )
· Electric shock : IEC1010-1
· Limiting overload : 20A RMS current
· Average consumption : approx. 50mA
· Range : autorange
· Display : LCD 4 digits, 9999
·Low voltage indication : display symbol
· Power supply : Ni-MH 600mAh 1.2V×6 AAA
· Average service life: recharge 500 times, per time approx. 10~12 hours for
continued use
· Time per measurement : 1 SECOND
· Operating temperature : -10℃~50℃(14℉to 122℉)
· Storage temperature : -20℃~60℃(-4℉to 140℉)
· Conductor size : ф32mm OR 45mm×32mm
· Dimensions : 54mm×104mm×276mm
· Weight : approximate 1050g (including batteries)

ACCESSORIES
Calibration loop of resistance (0.01Ω) 1 piece
Calibration loop of resistance (1Ω) 1 piece
Calibration loop of resistance (10Ω) 1 piece
1.2V Batteries ( Ni-MH ) 6 pcs
Users manual 1 piece
Battery charger 1 pcs
Carry case 1 piece
CHANGING THE BATTERIES
When the display appears the symbol, the batteries are weak, they
must be changed. Please follow these steps:
―16 ―

1.Switch off the meter
2.Unscrew the screw on the battery cover
3.Remove the cover
4.Take the battery box out of the instrument
5.Replace with new batteries of the same type
7.Reinstall the battery box
8.Replace the battery cover
9.Reinstall the screw
CHARGE THE BATTERIES
Refer to the operation manual on the battery charger.
―17 ―
battery cover
battery box
batteries
Table of contents
Other Morris Products Measuring Instrument manuals
Popular Measuring Instrument manuals by other brands

Eaton
Eaton Power Xpert Meter 2000 quick start guide

Hanna Instruments
Hanna Instruments pH 21 instruction manual

Apacer Technology
Apacer Technology AL100 user manual

Amprobe
Amprobe UAT-600 Series quick start guide

Hanna Instruments
Hanna Instruments HI96718C instruction manual

Steiner
Steiner M830r LRF instruction manual

Nidec-Shimpo
Nidec-Shimpo FG-7000T Operation manual

Fathom
Fathom QiQuac M5 operating manual

Keysight Technologies
Keysight Technologies N9020A Installation note

tams elektronik
tams elektronik GBM-1 manual

National Instruments
National Instruments 9775 Getting started guide

Kometec
Kometec Air Co2ntrol 5000 Operating instruction