Mothers choice serenity 017340 User manual

motherschoice.com.au
follow us on
the only choice
instruction
manual
Illustrations and designs may vary.
IMPORTANT: KEEP THIS BOOKLET IN THE
PLACE PROVIDED ON THE CHILD RESTRAINT.
convertible
car seat
suitable from newborn to 4 years
motherschoice.com.au
follow us on
the only choice
instruction
manual
Illustrations and designs may vary.
IMPORTANT: KEEP THIS BOOKLET IN THE
PLACE PROVIDED ON THE CHILD RESTRAINT.
convertible
car seat
suitable from newborn to 4 years
motherschoice.com.au
follow us on
the only choice
instruction
manual
Illustrations and designs may vary.
IMPORTANT: KEEP THIS BOOKLET IN THE
PLACE PROVIDED ON THE CHILD RESTRAINT.
convertible
car seat
suitable from newborn to 4 years
motherschoice.com.au
follow us on
the only choice
instruction
manual
Illustrations and designs may vary.
IMPORTANT: KEEP THIS BOOKLET IN THE
PLACE PROVIDED ON THE CHILD RESTRAINT.
convertible
car seat
suitable from newborn to 4 years
motherschoice.com.au
follow us on
the only choice
instruction
manual
Illustrations and designs may vary.
IMPORTANT: KEEP THIS BOOKLET IN THE
PLACE PROVIDED ON THE CHILD RESTRAINT.
convertible
car seat
suitable from newborn to 4 years
motherschoice.com.au
follow us on
the only choice
instruction
manual
Illustrations and designs may vary.
IMPORTANT: KEEP THIS BOOKLET IN THE
PLACE PROVIDED ON THE CHILD RESTRAINT.
convertible
car seat
suitable from newborn to 4 years
motherschoice.com.au
follow us on
the only choice
instruction
manual
Illustrations and designs may vary.
IMPORTANT: KEEP THIS BOOKLET IN THE
PLACE PROVIDED ON THE CHILD RESTRAINT.
convertible
car seat
suitable from newborn to 4 years

•vvv
2
PUSH
DOWN
PULL
OUT
SLACK
CLICK
quick start guide Rearward-facing installation:
newborn up to 12 approximately
POSITION 4
•vvv
2
PUSH
DOWN
PULL
OUT
SLACK
CLICK
quick start guide Rearward-facing installation:
newborn up to 12 approximately
POSITION 4
•vvv
3
PUSH
DOWN
SASH
LAP
PULL
OUT
SLACK
CLICK
SELECT
RECLINE
1, 2, 3
quick start guide Forward-facing installation:
12 months up to 4 years (approximately)
•vvv
2
PUSH
DOWN
PULL
OUT
SLACK
CLICK
quick start guide Rearward-facing installation:
newborn up to 12 approximately
POSITION 4
•vvv
2
PUSH
DOWN
PULL
OUT
SLACK
CLICK
quick start guide Rearward-facing installation:
newborn up to 12 approximately
POSITION 4
•vvv
3
PUSH
DOWN
SASH
LAP
PULL
OUT
SLACK
CLICK
SELECT
RECLINE
1, 2, 3
quick start guide Forward-facing installation:
12 months up to 4 years (approximately)
POSITION 4 Front of vehicle
PUSH
DOWN
PULL
OUT
SLACK
•vvv
2
PUSH
DOWN
PULL
OUT
SLACK
CLICK
quick start guide Rearward-facing installation:
newborn up to 12 approximately
POSITION 4
•vvv
3
PUSH
DOWN
SASH
LAP
PULL
OUT
SLACK
CLICK
SELECT
RECLINE
1, 2, 3
quick start guide Forward-facing installation:
12 months up to 4 years (approximately)

•vvv
3
PUSH
DOWN
SASH
LAP
PULL
OUT
SLACK
CLICK
SELECT
RECLINE
1, 2, 3
quick start guide Forward-facing installation:
12 months up to 4 years (approximately)
•vvv
2
PUSH
DOWN
PULL
OUT
SLACK
CLICK
quick start guide Rearward-facing installation:
newborn up to 12 approximately
POSITION 4
•vvv
3
PUSH
DOWN
SASH
LAP
PULL
OUT
SLACK
CLICK
SELECT
RECLINE
1, 2, 3
quick start guide Forward-facing installation:
12 months up to 4 years (approximately)
•vvv
3
PUSH
DOWN
SASH
LAP
PULL
OUT
SLACK
CLICK
SELECT
RECLINE
1, 2, 3
quick start guide Forward-facing installation:
12 months up to 4 years (approximately)
•vvv
2
PUSH
DOWN
PULL
OUT
SLACK
CLICK
quick start guide Rearward-facing installation:
newborn up to 12 approximately
POSITION 4
•vvv
3
PUSH
DOWN
SASH
LAP
PULL
OUT
SLACK
CLICK
SELECT
RECLINE
1, 2, 3
quick start guide Forward-facing installation:
12 months up to 4 years (approximately)
•vvv
2
PUSH
DOWN
PULL
OUT
SLACK
CLICK
quick start guide Rearward-facing installation:
newborn up to 12 approximately
POSITION 4
•vvv
3
PUSH
DOWN
SASH
LAP
PULL
OUT
SLACK
CLICK
SELECT
RECLINE
1, 2, 3
quick start guide Forward-facing installation:
12 months up to 4 years (approximately)
SELECT
SELECT
RECLINE
RECLINE
1, 2, 3
1, 2, 3
Front of vehicle
PUSH
DOWN
PULL
OUT
SLACK
LAP
SASH
ATTATCH TOP TETHER
CLICK
CLICK

•vvv
2
PUSH
DOWN
PULL
OUT
SLACK
CLICK
quick start guide Rearward-facing installation:
newborn up to 12 approximately
POSITION 4
•vvv
2
PUSH
DOWN
PULL
OUT
SLACK
CLICK
quick start guide Rearward-facing installation:
newborn up to 12 approximately
POSITION 4
•vvv
3
PUSH
DOWN
SASH
LAP
PULL
OUT
SLACK
CLICK
SELECT
RECLINE
1, 2, 3
quick start guide Forward-facing installation:
12 months up to 4 years (approximately)
•vvv
2
PUSH
DOWN
PULL
OUT
SLACK
CLICK
quick start guide Rearward-facing installation:
newborn up to 12 approximately
POSITION 4
•vvv
4
contents
Quick start guide .................... 2 - 3
Introduction ................................. 5
Warnings ............................... 6 - 8
preparing seat and vehicle
Rearward-facing vehicle position .. 9
Forward-facing vehicle position ... 10
Anchorttinglocation....................11
Anchorttinginstallation.......12-14
Angle adjustment .......................... 15
Components list ........................ 16 - 17
Shoulder heights ....................... 18 - 19
installation
Conguringharnessstraps...........20
Adjusting harness height ............. 21
To fasten buckle assembly ........... 22
Adjusting top tether strap ........... 23
Rearward-facinginstallation........24
Forward-facing installation ........... 25
Next seat for your child .................. 26
care and maintenance
Removing buckle .................... 27 - 28
Care instructions ............................ 29
Removing trim ............................... 29
Removing accessories ......... 30 - 31
contacts
Notes...................................32-34
Warranty .................................... 35
Customer service ..................... 36
•vvv
5
Thank you for purchasing this child seat. This product is
suitable for newborns to children approximately 4 years
old. We welcome you as a valued customer, and trust
that your child will enjoy many years of comfort and
safety.
No child restraint can guarantee absolute protection
from a crash. However proper use of this restraint may
reduce the risk of injury or death!
before you start:
motherschoice.com.au
follow us on
Call our Customer Service Team: 1300 809 526
Monday to Friday (8:30am - 5:00pm AEST)
www.motherschoice.com.au mother’s choice
need assistance?

•vvv
3
PUSH
DOWN
SASH
LAP
PULL
OUT
SLACK
CLICK
SELECT
RECLINE
1, 2, 3
quick start guide Forward-facing installation:
12 months up to 4 years (approximately)
•vvv
2
PUSH
DOWN
PULL
OUT
SLACK
CLICK
quick start guide Rearward-facing installation:
newborn up to 12 approximately
POSITION 4
•vvv
3
PUSH
DOWN
SASH
LAP
PULL
OUT
SLACK
CLICK
SELECT
RECLINE
1, 2, 3
quick start guide Forward-facing installation:
12 months up to 4 years (approximately)
•vvv
3
PUSH
DOWN
SASH
LAP
PULL
OUT
SLACK
CLICK
SELECT
RECLINE
1, 2, 3
quick start guide Forward-facing installation:
12 months up to 4 years (approximately)
•vvv
4
contents
Quick start guide .................... 2 - 3
Introduction ................................. 5
Warnings ............................... 6 - 8
preparing seat and vehicle
Rearward-facing vehicle position .. 9
Forward-facing vehicle position ... 10
Anchorttinglocation....................11
Anchorttinginstallation.......12-14
Angle adjustment .......................... 15
Components list ........................ 16 - 17
Shoulder heights ....................... 18 - 19
installation
Conguringharnessstraps...........20
Adjusting harness height ............. 21
To fasten buckle assembly ........... 22
Adjusting top tether strap ........... 23
Rearward-facinginstallation........24
Forward-facing installation ........... 25
Next seat for your child .................. 26
care and maintenance
Removing buckle .................... 27 - 28
Care instructions ............................ 29
Removing trim ............................... 29
Removing accessories ......... 30 - 31
contacts
Notes...................................32-34
Warranty .................................... 35
Customer service ..................... 36
•vvv
5
Thank you for purchasing this child seat. This product is
suitable for newborns to children approximately 4 years
old. We welcome you as a valued customer, and trust
that your child will enjoy many years of comfort and
safety.
No child restraint can guarantee absolute protection
from a crash. However proper use of this restraint may
reduce the risk of injury or death!
before you start:
motherschoice.com.au
follow us on
Call our Customer Service Team: 1300 809 526
Monday to Friday (8:30am - 5:00pm AEST)
www.motherschoice.com.au mother’s choice
need assistance?

•vvv
2
PUSH
DOWN
PULL
OUT
SLACK
CLICK
quick start guide Rearward-facing installation:
newborn up to 12 approximately
POSITION 4
•vvv
2
PUSH
DOWN
PULL
OUT
SLACK
CLICK
quick start guide Rearward-facing installation:
newborn up to 12 approximately
POSITION 4
•vvv
3
PUSH
DOWN
SASH
LAP
PULL
OUT
SLACK
CLICK
SELECT
RECLINE
1, 2, 3
quick start guide Forward-facing installation:
12 months up to 4 years (approximately)
•vvv
2
PUSH
DOWN
PULL
OUT
SLACK
CLICK
quick start guide Rearward-facing installation:
newborn up to 12 approximately
POSITION 4
•vvv
6
•Tobeusedonlyinarearward-facingpositionuntiltheinfant’sshoulders
reachthelowershoulderheightmarker(approximately12monthsofage).
Thentobeusedinaforward-facingpositionuntilthechild’sshoulders
reachtheuppershoulderheightmarker(approximately4yearsofage).
•Continuetousethischildrestraintuntilthechildreachesthislimit.
•Donotuseforwardfacinguntilchild’sshouldersareabovethelower
shoulderheightmarker.
•Infantsareatriskofseriousinjuryiftheyfaceforwardtooearly.
•Childrenareatriskofseriousinjuryiftheymovetoboosterseatstooearly.
•Childrenwhohaveoutgrownthisrestraintaresafestinalargerchild
restraintwithanin-builtharnessoraboosterseatuntiltheirshoulders
reachtheuppershoulderheightmarkeroftherestraint.
GENERAL
•Usetherestraintexactlyasshownintheinstructions.
•Supervisionofchildrenisneededbecausetheymaybeabletoundothe
buckles.
•DO NOT LEAVE CHILDREN UNATTENDED IN THE CAR.
•Donotalterormodifythisrestraint.
•Repairsmustonlybedonebythemanufacturersoragent.
•Donotallowtherestrainttocomeintocontactwithpolishes,oils,bleach
andotherchemicals.
•Destroytherestraintifithasbeeninaseverecrash,evenifnodamageis
visible
WARNINGS
Pleasereadandfollowalloftheinstructionsoutlinedinthismanualformaximum
protection.
Ifyouhaveanyquestionsregardingtheinstallationoruseofthischildrestraintin
AustraliaorNewZealand,pleasecontactourcustomerservicenumbersprovided.
Analternativeoptionistoalsocontactanyregisteredchildttingstationauthorised
byyourlocaltransportauthority.
Nochildrestraintcanguaranteeabsoluteprotectionfromacrash.Howeverproper
useofthisrestraintmayreducetheriskofinjuryordeath.
before you start...
•vvv
7
WARNINGS
•DO NOT USE THIS RESTRAINT WITHOUT THE COVER.
•Toensureinfant’sbackisevenlysupported,donotputmorethanone
nappyonthebabyandmakesurethenappyisnotthicklyfoldedatthe
back.
•DO NOT USE A REAR- FACING CHILD RESTRAINT WHERE AN
AIRBAG IS FITTED IN FRONT OF THE SEATING POSITION.
•Fittherestraintrmlytothecarseat.
•Fittheharnessrmlytothechild.
•Alooserestraintorharnessisdangerous.
•Donotharnessaninfantwrappedinablanketorswaddled.Anyblanketor
wrapmustonlybeplacedovertheharnessandinfant.
•Seatbeltextendersarenotrecommendedtobeusediftheseatbeltis
notlongenoughtosecurethechildrestraint.Ifseatbeltsaretooshort
thenadviceshouldbesoughtfromachildrestrainttterandtheir
recommendationbeconsideredbeforeusingaseatbeltextender.
•Alwayssecurethelooseendofthetoptetherstrap.Donotusethechild
restraintwherethisstrapmayfallintoasplitintheseatbackorofftheside
oftheseat.
•Alwayssecurethelooseendofthetoptetherstraptopreventithanging
outofthecarorbeingaccessiblebythechild.
•ALWAYS ATTACH HOOK AND REMOVE SLACK.
•THIS RESTRAINT IS NOT SUITABLE FOR USE WHERE THE TOP
TETHER STRAP MAY FALL INTO A SPLIT IN THE SEAT BACK OR
OFF THE SIDE OF THE SEAT.
•THIS RESTRAINT MUST BE ATTACHED TO A CHILD RESTRAINT
UPPER ANCHORAGE POINT IN THE CAR. REFER TO CAR OWNER’S
HANDBOOK FOR LOCATION OF UPPER ANCHORAGE POINTS.
REFER TO A CHILD RESTRAINT FITTING STATION IF NO UPPER
ANCHORAGE POINTS ARE IN THE MOTOR CAR.
•Alwayscheckthemeasurementsbetweenthefrontoftheseatbackof
therearseatandallfrontseatsinthecarinwhichthechildrestraintis
intendedtobeused,toensurethatthespaceissufcient.
•Careandattentionbegiventoventilationandshadingoftheoccupant.
•TO BE USED WITH A LAP-SASH/LAP-ONLY SEATBELT IN THE FRONT
/ BACK OF MOST CARS WITH FORWARD FACING SEATS.
•vvv
3
PUSH
DOWN
SASH
LAP
PULL
OUT
SLACK
CLICK
SELECT
RECLINE
1, 2, 3
quick start guide Forward-facing installation:
12 months up to 4 years (approximately)
•vvv
2
PUSH
DOWN
PULL
OUT
SLACK
CLICK
quick start guide Rearward-facing installation:
newborn up to 12 approximately
POSITION 4
•vvv
3
PUSH
DOWN
SASH
LAP
PULL
OUT
SLACK
CLICK
SELECT
RECLINE
1, 2, 3
quick start guide Forward-facing installation:
12 months up to 4 years (approximately)
•vvv
3
PUSH
DOWN
SASH
LAP
PULL
OUT
SLACK
CLICK
SELECT
RECLINE
1, 2, 3
quick start guide Forward-facing installation:
12 months up to 4 years (approximately)
•vvv
6
•Tobeusedonlyinarearward-facingpositionuntiltheinfant’sshoulders
reachthelowershoulderheightmarker(approximately12monthsofage).
Thentobeusedinaforward-facingpositionuntilthechild’sshoulders
reachtheuppershoulderheightmarker(approximately4yearsofage).
•Continuetousethischildrestraintuntilthechildreachesthislimit.
•Donotuseforwardfacinguntilchild’sshouldersareabovethelower
shoulderheightmarker.
•Infantsareatriskofseriousinjuryiftheyfaceforwardtooearly.
•Childrenareatriskofseriousinjuryiftheymovetoboosterseatstooearly.
•Childrenwhohaveoutgrownthisrestraintaresafestinalargerchild
restraintwithanin-builtharnessoraboosterseatuntiltheirshoulders
reachtheuppershoulderheightmarkeroftherestraint.
GENERAL
•Usetherestraintexactlyasshownintheinstructions.
•Supervisionofchildrenisneededbecausetheymaybeabletoundothe
buckles.
•DO NOT LEAVE CHILDREN UNATTENDED IN THE CAR.
•Donotalterormodifythisrestraint.
•Repairsmustonlybedonebythemanufacturersoragent.
•Donotallowtherestrainttocomeintocontactwithpolishes,oils,bleach
andotherchemicals.
•Destroytherestraintifithasbeeninaseverecrash,evenifnodamageis
visible
WARNINGS
Pleasereadandfollowalloftheinstructionsoutlinedinthismanualformaximum
protection.
Ifyouhaveanyquestionsregardingtheinstallationoruseofthischildrestraintin
AustraliaorNewZealand,pleasecontactourcustomerservicenumbersprovided.
Analternativeoptionistoalsocontactanyregisteredchildttingstationauthorised
byyourlocaltransportauthority.
Nochildrestraintcanguaranteeabsoluteprotectionfromacrash.Howeverproper
useofthisrestraintmayreducetheriskofinjuryordeath.
before you start...
•vvv
7
WARNINGS
•DO NOT USE THIS RESTRAINT WITHOUT THE COVER.
•Toensureinfant’sbackisevenlysupported,donotputmorethanone
nappyonthebabyandmakesurethenappyisnotthicklyfoldedatthe
back.
•DO NOT USE A REAR- FACING CHILD RESTRAINT WHERE AN
AIRBAG IS FITTED IN FRONT OF THE SEATING POSITION.
•Fittherestraintrmlytothecarseat.
•Fittheharnessrmlytothechild.
•Alooserestraintorharnessisdangerous.
•Donotharnessaninfantwrappedinablanketorswaddled.Anyblanketor
wrapmustonlybeplacedovertheharnessandinfant.
•Seatbeltextendersarenotrecommendedtobeusediftheseatbeltis
notlongenoughtosecurethechildrestraint.Ifseatbeltsaretooshort
thenadviceshouldbesoughtfromachildrestrainttterandtheir
recommendationbeconsideredbeforeusingaseatbeltextender.
•Alwayssecurethelooseendofthetoptetherstrap.Donotusethechild
restraintwherethisstrapmayfallintoasplitintheseatbackorofftheside
oftheseat.
•Alwayssecurethelooseendofthetoptetherstraptopreventithanging
outofthecarorbeingaccessiblebythechild.
•ALWAYS ATTACH HOOK AND REMOVE SLACK.
•THIS RESTRAINT IS NOT SUITABLE FOR USE WHERE THE TOP
TETHER STRAP MAY FALL INTO A SPLIT IN THE SEAT BACK OR
OFF THE SIDE OF THE SEAT.
•THIS RESTRAINT MUST BE ATTACHED TO A CHILD RESTRAINT
UPPER ANCHORAGE POINT IN THE CAR. REFER TO CAR OWNER’S
HANDBOOK FOR LOCATION OF UPPER ANCHORAGE POINTS.
REFER TO A CHILD RESTRAINT FITTING STATION IF NO UPPER
ANCHORAGE POINTS ARE IN THE MOTOR CAR.
•Alwayscheckthemeasurementsbetweenthefrontoftheseatbackof
therearseatandallfrontseatsinthecarinwhichthechildrestraintis
intendedtobeused,toensurethatthespaceissufcient.
•Careandattentionbegiventoventilationandshadingoftheoccupant.
•TO BE USED WITH A LAP-SASH/LAP-ONLY SEATBELT IN THE FRONT
/ BACK OF MOST CARS WITH FORWARD FACING SEATS.

•vvv
2
PUSH
DOWN
PULL
OUT
SLACK
CLICK
quick start guide Rearward-facing installation:
newborn up to 12 approximately
POSITION 4
•vvv
2
PUSH
DOWN
PULL
OUT
SLACK
CLICK
quick start guide Rearward-facing installation:
newborn up to 12 approximately
POSITION 4
•vvv
3
PUSH
DOWN
SASH
LAP
PULL
OUT
SLACK
CLICK
SELECT
RECLINE
1, 2, 3
quick start guide Forward-facing installation:
12 months up to 4 years (approximately)
•vvv
2
PUSH
DOWN
PULL
OUT
SLACK
CLICK
quick start guide Rearward-facing installation:
newborn up to 12 approximately
POSITION 4
•vvv
8
WARNINGS
•Theuseofchildrestraintsinthefrontseatmayberestrictedforchildren
ofspecicagesbylocallegislation.Pleasecheckwithyourlocal
legislationregardinganyrestrictionforchildrestraint.Ifacarhastwoor
morerowsofseats,childrenunderfourmustnottravelinthefrontseat.
Ifallseats,otherthanthefrontseats,arebeingusedbychildrenunder
sevenyears,childrenagedbetweenfourandsixyears(inclusive)may
travelinthefrontseat,providedtheyuseanapprovedchildrestraintor
boosterseat.
•Thischildrestraintisnotapprovedforusewithanyconnectorsthat
connecttothecar’sISOFIXlowanchorages.
•Useofaftermarketaccessories(i.e.itemsnotprovidedintheboxwiththe
childrestraint),canreducethesafetyprovidedbychildrestraintandmay
causeinjuryordeath.Forapprovedaftermarketaccessoriespleaserefer
topage 11.
•PleasecontactDorelAustraliaCustomerServicewithanyquestionsor
concerns.
•vvv
9
CORRECT REARWARD-FACING VEHICLE POSITION
SomeseatingpositionsinyourvehiclemayNOT besafeforthissafetyseat.
Somevehiclesdonothaveanyseatingpositionsthatcanbeusedsafely
withtheseat.Ifyouarenotsurewheretoplacetheinfantseatinyour
vehicle,consultyourvehicle’sowner’shandbook.
Vehicle Seat Location Requirements
Childrenaresaferwhenproperlyrestrainedinrearvehicleseatingpositions.
Wheneverpossible,securetheinfantseatinthecentrepositionoftheseat
directlybehindthefrontseats.
convertible car seat
preparing vehicle for your seat
560mm
560mm
CORRECT USE
CORRECT USE

•vvv
3
PUSH
DOWN
SASH
LAP
PULL
OUT
SLACK
CLICK
SELECT
RECLINE
1, 2, 3
quick start guide Forward-facing installation:
12 months up to 4 years (approximately)
•vvv
2
PUSH
DOWN
PULL
OUT
SLACK
CLICK
quick start guide Rearward-facing installation:
newborn up to 12 approximately
POSITION 4
•vvv
3
PUSH
DOWN
SASH
LAP
PULL
OUT
SLACK
CLICK
SELECT
RECLINE
1, 2, 3
quick start guide Forward-facing installation:
12 months up to 4 years (approximately)
•vvv
3
PUSH
DOWN
SASH
LAP
PULL
OUT
SLACK
CLICK
SELECT
RECLINE
1, 2, 3
quick start guide Forward-facing installation:
12 months up to 4 years (approximately)
•vvv
8
WARNINGS
•Theuseofchildrestraintsinthefrontseatmayberestrictedforchildren
ofspecicagesbylocallegislation.Pleasecheckwithyourlocal
legislationregardinganyrestrictionforchildrestraint.Ifacarhastwoor
morerowsofseats,childrenunderfourmustnottravelinthefrontseat.
Ifallseats,otherthanthefrontseats,arebeingusedbychildrenunder
sevenyears,childrenagedbetweenfourandsixyears(inclusive)may
travelinthefrontseat,providedtheyuseanapprovedchildrestraintor
boosterseat.
•Thischildrestraintisnotapprovedforusewithanyconnectorsthat
connecttothecar’sISOFIXlowanchorages.
•Useofaftermarketaccessories(i.e.itemsnotprovidedintheboxwiththe
childrestraint),canreducethesafetyprovidedbychildrestraintandmay
causeinjuryordeath.Forapprovedaftermarketaccessoriespleaserefer
topage 11.
•PleasecontactDorelAustraliaCustomerServicewithanyquestionsor
concerns.
•vvv
9
CORRECT REARWARD-FACING VEHICLE POSITION
SomeseatingpositionsinyourvehiclemayNOT besafeforthissafetyseat.
Somevehiclesdonothaveanyseatingpositionsthatcanbeusedsafely
withtheseat.Ifyouarenotsurewheretoplacetheinfantseatinyour
vehicle,consultyourvehicle’sowner’shandbook.
Vehicle Seat Location Requirements
Childrenaresaferwhenproperlyrestrainedinrearvehicleseatingpositions.
Wheneverpossible,securetheinfantseatinthecentrepositionoftheseat
directlybehindthefrontseats.
convertible car seat
preparing vehicle for your seat
560mm
560mm
CORRECT USE
CORRECT USE

•vvv
2
PUSH
DOWN
PULL
OUT
SLACK
CLICK
quick start guide Rearward-facing installation:
newborn up to 12 approximately
POSITION 4
•vvv
2
PUSH
DOWN
PULL
OUT
SLACK
CLICK
quick start guide Rearward-facing installation:
newborn up to 12 approximately
POSITION 4
•vvv
3
PUSH
DOWN
SASH
LAP
PULL
OUT
SLACK
CLICK
SELECT
RECLINE
1, 2, 3
quick start guide Forward-facing installation:
12 months up to 4 years (approximately)
•vvv
2
PUSH
DOWN
PULL
OUT
SLACK
CLICK
quick start guide Rearward-facing installation:
newborn up to 12 approximately
POSITION 4

•vvv
3
PUSH
DOWN
SASH
LAP
PULL
OUT
SLACK
CLICK
SELECT
RECLINE
1, 2, 3
quick start guide Forward-facing installation:
12 months up to 4 years (approximately)
•vvv
2
PUSH
DOWN
PULL
OUT
SLACK
CLICK
quick start guide Rearward-facing installation:
newborn up to 12 approximately
POSITION 4
•vvv
3
PUSH
DOWN
SASH
LAP
PULL
OUT
SLACK
CLICK
SELECT
RECLINE
1, 2, 3
quick start guide Forward-facing installation:
12 months up to 4 years (approximately)
•vvv
3
PUSH
DOWN
SASH
LAP
PULL
OUT
SLACK
CLICK
SELECT
RECLINE
1, 2, 3
quick start guide Forward-facing installation:
12 months up to 4 years (approximately)

•vvv
2
PUSH
DOWN
PULL
OUT
SLACK
CLICK
quick start guide Rearward-facing installation:
newborn up to 12 approximately
POSITION 4
•vvv
2
PUSH
DOWN
PULL
OUT
SLACK
CLICK
quick start guide Rearward-facing installation:
newborn up to 12 approximately
POSITION 4
•vvv
3
PUSH
DOWN
SASH
LAP
PULL
OUT
SLACK
CLICK
SELECT
RECLINE
1, 2, 3
quick start guide Forward-facing installation:
12 months up to 4 years (approximately)
•vvv
2
PUSH
DOWN
PULL
OUT
SLACK
CLICK
quick start guide Rearward-facing installation:
newborn up to 12 approximately
POSITION 4
•vvv
12
Childrestraintsmustbeusedcorrectlytoprovideproperprotectionforyour
child.Theanchoragesystemonchildrestraintmustbeusedinthecorrect
way.
CORRECT
Makesurethereisnoslackinthetopstrapandtheattachmentclipisupright
intheanchoragetting.
INCORRECT
Theclipmustnotlieatontheanchoragetting.
INSTALLATION CORRECT
Make sure there is no
slack in the top strap
and the attachment
clip is upright in the
anchoragetting.
The clip must not
lieatonthe
anchoragetting.
Anchorages in
vertical panel at
rear of vehicle
Floor mounted
anchorages
INCORRECT
FIGURE 1
FIGURE 2
x
x
convertible car seat
preparing vehicle for your seat
•vvv
13
convertible car seat
preparing vehicle for your seat
Vehicle metal
structure
Spacer(s)
(ifrequired)
Attachment bolt
Anchor fitting
Vehicle trim
1
Centre line of
seating position
200mm
min.
FOR SEDANS ONLY:
2
Vehicle metal
structure
Spacer(s)
(ifrequired)
Attachment bolt
Anchor fitting
Vehicle trim
Lock washer
Nut
Reinforcing
washer
3
FOR CARS FITTED WITH A CHILD
RESTRAINT UPPER ANCHORAGE POINT
Locatetheupperanchoragepointbehind
therearseatingposition(consultthecar
owner’shandbookforthelocationoftheupper
anchoragepoint).
Removethethreadplugfromtheparcelshelf/
oor/roofandinstalltheattachmentboltas
shownin Figure 1.
CAUTION:DONOTOVERTIGHTENTHE
ATTACHMENTBOLT.OVERTIGHTENINGMAY
FRACTUREORBREAKBOLT.MAXIMUM
TORQUEIS20Nm.
FOR CARS NOT FITTED WITH A CHILD
RESTRAINT UPPER ANCHORAGE POINT
For sedans only
Drilla9mmdiameterholeintheparcelshelf
onthecentre-lineoftheseatingpositionas
shownin Figure 2.Installtheanchorboltas
showninFigure 3. Itisrecommendedthatthis
installationbecarriedoutbyachildrestraint
ttingstationorlicencedmotormechanic.
For vehicles other than sedans
InAustralia,consultyournearestchildrestraint
ttingstationortrafcauthorityforvehicle
inspectiontondthebest,correctpositionfor
theplacementoftheupperanchoragepoint,
andforthecorrectattachmentboltlengthand
useofspacers.InNewZealand,consultthe
agentforthevehicle.

•vvv
3
PUSH
DOWN
SASH
LAP
PULL
OUT
SLACK
CLICK
SELECT
RECLINE
1, 2, 3
quick start guide Forward-facing installation:
12 months up to 4 years (approximately)
•vvv
2
PUSH
DOWN
PULL
OUT
SLACK
CLICK
quick start guide Rearward-facing installation:
newborn up to 12 approximately
POSITION 4
•vvv
3
PUSH
DOWN
SASH
LAP
PULL
OUT
SLACK
CLICK
SELECT
RECLINE
1, 2, 3
quick start guide Forward-facing installation:
12 months up to 4 years (approximately)
•vvv
3
PUSH
DOWN
SASH
LAP
PULL
OUT
SLACK
CLICK
SELECT
RECLINE
1, 2, 3
quick start guide Forward-facing installation:
12 months up to 4 years (approximately)
•vvv
12
Childrestraintsmustbeusedcorrectlytoprovideproperprotectionforyour
child.Theanchoragesystemonchildrestraintmustbeusedinthecorrect
way.
CORRECT
Makesurethereisnoslackinthetopstrapandtheattachmentclipisupright
intheanchoragetting.
INCORRECT
Theclipmustnotlieatontheanchoragetting.
INSTALLATION CORRECT
Make sure there is no
slack in the top strap
and the attachment
clip is upright in the
anchoragetting.
The clip must not
lieatonthe
anchoragetting.
Anchorages in
vertical panel at
rear of vehicle
Floor mounted
anchorages
INCORRECT
FIGURE 1
FIGURE 2
x
x
convertible car seat
preparing vehicle for your seat
•vvv
13
convertible car seat
preparing vehicle for your seat
Vehicle metal
structure
Spacer(s)
(ifrequired)
Attachment bolt
Anchor fitting
Vehicle trim
1
Centre line of
seating position
200mm
min.
FOR SEDANS ONLY:
2
Vehicle metal
structure
Spacer(s)
(ifrequired)
Attachment bolt
Anchor fitting
Vehicle trim
Lock washer
Nut
Reinforcing
washer
3
FOR CARS FITTED WITH A CHILD
RESTRAINT UPPER ANCHORAGE POINT
Locatetheupperanchoragepointbehind
therearseatingposition(consultthecar
owner’shandbookforthelocationoftheupper
anchoragepoint).
Removethethreadplugfromtheparcelshelf/
oor/roofandinstalltheattachmentboltas
shownin Figure 1.
CAUTION:DONOTOVERTIGHTENTHE
ATTACHMENTBOLT.OVERTIGHTENINGMAY
FRACTUREORBREAKBOLT.MAXIMUM
TORQUEIS20Nm.
FOR CARS NOT FITTED WITH A CHILD
RESTRAINT UPPER ANCHORAGE POINT
For sedans only
Drilla9mmdiameterholeintheparcelshelf
onthecentre-lineoftheseatingpositionas
shownin Figure 2.Installtheanchorboltas
showninFigure 3. Itisrecommendedthatthis
installationbecarriedoutbyachildrestraint
ttingstationorlicencedmotormechanic.
For vehicles other than sedans
InAustralia,consultyournearestchildrestraint
ttingstationortrafcauthorityforvehicle
inspectiontondthebest,correctpositionfor
theplacementoftheupperanchoragepoint,
andforthecorrectattachmentboltlengthand
useofspacers.InNewZealand,consultthe
agentforthevehicle.

•vvv
2
PUSH
DOWN
PULL
OUT
SLACK
CLICK
quick start guide Rearward-facing installation:
newborn up to 12 approximately
POSITION 4
•vvv
2
PUSH
DOWN
PULL
OUT
SLACK
CLICK
quick start guide Rearward-facing installation:
newborn up to 12 approximately
POSITION 4
•vvv
3
PUSH
DOWN
SASH
LAP
PULL
OUT
SLACK
CLICK
SELECT
RECLINE
1, 2, 3
quick start guide Forward-facing installation:
12 months up to 4 years (approximately)
•vvv
2
PUSH
DOWN
PULL
OUT
SLACK
CLICK
quick start guide Rearward-facing installation:
newborn up to 12 approximately
POSITION 4
•vvv
14
CHILD RESTRAINTS MUST NOT BE ATTACHED TO UNSOUND METAL
OR TO WOOD OR SYNTHETIC STRUCTURES. WHEN DRILLING THE
9mm HOLE DO NOT DRILL THROUGH FUEL LINES, FUEL TANKS,
ELECTRICAL WIRING, OR RADIO SPEAKERS. WEBBING STRAPS
MUST BE PROTECTED FROM SHARP CORNERS AND EDGES.
THE ANCHOR FITTING MUST BE USED ONLY AS DESCRIBED ABOVE.
IT MUST NOT BE HOOKED ONTO ANY OTHER OBJECT.
WARNINGS
convertible car seat
preparing vehicle for your seat
•vvv
15
•DO NOT install convertible child restraints excessively reclined, ensure
the angle is no greater than 53°.
•DO NOT adjust harness or tether strap hardware such that it sits
too close to the occupant.
•Ensure that correct seatbelt path is used and that the restraint is
installed in the correct direction for rearward facing application
(Refer to page 24).
•DO NOT wrap baby in a blanket or swaddled as infant can be ejected
and killed inanaccident.
•Ensure the harness fits the baby firmly.
•Ensure that any blanket or other covering may only be placed over the
harness after the harness is adjusted firmly.
•The infant’s legs and arms are not to be bounded or wrapped together.
Positionseatensuringthattheangleis
nogreaterthan53˚fromhorizontalplane.
WARNINGS
53˚
convertible car seat
preparing vehicle for your seat

•vvv
3
PUSH
DOWN
SASH
LAP
PULL
OUT
SLACK
CLICK
SELECT
RECLINE
1, 2, 3
quick start guide Forward-facing installation:
12 months up to 4 years (approximately)
•vvv
2
PUSH
DOWN
PULL
OUT
SLACK
CLICK
quick start guide Rearward-facing installation:
newborn up to 12 approximately
POSITION 4
•vvv
3
PUSH
DOWN
SASH
LAP
PULL
OUT
SLACK
CLICK
SELECT
RECLINE
1, 2, 3
quick start guide Forward-facing installation:
12 months up to 4 years (approximately)
•vvv
3
PUSH
DOWN
SASH
LAP
PULL
OUT
SLACK
CLICK
SELECT
RECLINE
1, 2, 3
quick start guide Forward-facing installation:
12 months up to 4 years (approximately)
•vvv
14
CHILD RESTRAINTS MUST NOT BE ATTACHED TO UNSOUND METAL
OR TO WOOD OR SYNTHETIC STRUCTURES. WHEN DRILLING THE
9mm HOLE DO NOT DRILL THROUGH FUEL LINES, FUEL TANKS,
ELECTRICAL WIRING, OR RADIO SPEAKERS. WEBBING STRAPS
MUST BE PROTECTED FROM SHARP CORNERS AND EDGES.
THE ANCHOR FITTING MUST BE USED ONLY AS DESCRIBED ABOVE.
IT MUST NOT BE HOOKED ONTO ANY OTHER OBJECT.
WARNINGS
convertible car seat
preparing vehicle for your seat
•vvv
15
•DO NOT install convertible child restraints excessively reclined, ensure
the angle is no greater than 53°.
•DO NOT adjust harness or tether strap hardware such that it sits
too close to the occupant.
•Ensure that correct seatbelt path is used and that the restraint is
installed in the correct direction for rearward facing application
(Refer to page 24).
•DO NOT wrap baby in a blanket or swaddled as infant can be ejected
and killed inanaccident.
•Ensure the harness fits the baby firmly.
•Ensure that any blanket or other covering may only be placed over the
harness after the harness is adjusted firmly.
•The infant’s legs and arms are not to be bounded or wrapped together.
Positionseatensuringthattheangleis
nogreaterthan53˚fromhorizontalplane.
WARNINGS
53˚
convertible car seat
preparing vehicle for your seat
40˚
40˚
Front of vehicle
53˚
53˚
•
If in rare instances you are unable to meet the installation
recommendations as described above, please consult with a professional
Child Restraint Installation Specialist.

•vvv
2
PUSH
DOWN
PULL
OUT
SLACK
CLICK
quick start guide Rearward-facing installation:
newborn up to 12 approximately
POSITION 4
•vvv
2
PUSH
DOWN
PULL
OUT
SLACK
CLICK
quick start guide Rearward-facing installation:
newborn up to 12 approximately
POSITION 4
•vvv
3
PUSH
DOWN
SASH
LAP
PULL
OUT
SLACK
CLICK
SELECT
RECLINE
1, 2, 3
quick start guide Forward-facing installation:
12 months up to 4 years (approximately)
•vvv
2
PUSH
DOWN
PULL
OUT
SLACK
CLICK
quick start guide Rearward-facing installation:
newborn up to 12 approximately
POSITION 4
•vvv
16
1. Headrest Insert (iftted)
2. Seat Insert
3. Belt Mates (x2)
4. Harness
5. Buckle
6. Centre Front Adjuster
(undercover)
7. Belt Path Opening
(bothsides)
8. Adjuster Strap
9. Seat Base
10. Base Recline Adjuster
7
9
6
2
8
1
4
3
5
10
convertible car seat
components list
•vvv
17
14
15
16
17
12
18
11. Top Tether Strap Adjuster
12. Top Tether Strap
13. Anchor Kit
14. Top Tether / Instruction
Manual storage pocket
15. Harness Slots
16. Harness Straps
17. Seat Trim Elastic Strap
18. Splitter Plate
19. Rearward-Facing Belt Path
20. Recline Indicator
21. Forward-Facing Belt Path
21. FORWARD-FACING
BELT PATH
19. REARWARD-FACING
BELT PATH
FORWARD-FACING
BELT PATH
convertible car seat
components list
19 20 21
11
13
SQUEEZE LEVER
•vvv
16
1. Headrest Insert (iftted)
2. Seat Insert
3. Belt Mates (x2)
4. Harness
5. Buckle
6. Centre Front Adjuster
(undercover)
7. Belt Path Opening
(bothsides)
8. Adjuster Strap
9. Seat Base
10. Base Recline Adjuster
7
9
6
2
8
1
4
3
5
10
convertible car seat
components list
•vvv
17
14
15
16
17
12
18
11. Top Tether Strap Adjuster
12. Top Tether Strap
13. Anchor Kit
14. Top Tether / Instruction
Manual storage pocket
15. Harness Slots
16. Harness Straps
17. Seat Trim Elastic Strap
18. Splitter Plate
19. Rearward-Facing Belt Path
20. Recline Indicator
21. Forward-Facing Belt Path
21. FORWARD-FACING
BELT PATH
19. REARWARD-FACING
BELT PATH
FORWARD-FACING
BELT PATH
convertible car seat
components list
19 20 21
11
13

•vvv
3
PUSH
DOWN
SASH
LAP
PULL
OUT
SLACK
CLICK
SELECT
RECLINE
1, 2, 3
quick start guide Forward-facing installation:
12 months up to 4 years (approximately)
•vvv
2
PUSH
DOWN
PULL
OUT
SLACK
CLICK
quick start guide Rearward-facing installation:
newborn up to 12 approximately
POSITION 4
•vvv
3
PUSH
DOWN
SASH
LAP
PULL
OUT
SLACK
CLICK
SELECT
RECLINE
1, 2, 3
quick start guide Forward-facing installation:
12 months up to 4 years (approximately)
•vvv
3
PUSH
DOWN
SASH
LAP
PULL
OUT
SLACK
CLICK
SELECT
RECLINE
1, 2, 3
quick start guide Forward-facing installation:
12 months up to 4 years (approximately)
•vvv
16
1. Headrest Insert (iftted)
2. Seat Insert
3. Belt Mates (x2)
4. Harness
5. Buckle
6. Centre Front Adjuster
(undercover)
7. Belt Path Opening
(bothsides)
8. Adjuster Strap
9. Seat Base
10. Base Recline Adjuster
7
9
6
2
8
1
4
3
5
10
convertible car seat
components list
•vvv
17
14
15
16
17
12
18
11. Top Tether Strap Adjuster
12. Top Tether Strap
13. Anchor Kit
14. Top Tether / Instruction
Manual storage pocket
15. Harness Slots
16. Harness Straps
17. Seat Trim Elastic Strap
18. Splitter Plate
19. Rearward-Facing Belt Path
20. Recline Indicator
21. Forward-Facing Belt Path
21. FORWARD-FACING
BELT PATH
19. REARWARD-FACING
BELT PATH
FORWARD-FACING
BELT PATH
convertible car seat
components list
19 20 21
11
13
•vvv
16
1. Headrest Insert (iftted)
2. Seat Insert
3. Belt Mates (x2)
4. Harness
5. Buckle
6. Centre Front Adjuster
(undercover)
7. Belt Path Opening
(bothsides)
8. Adjuster Strap
9. Seat Base
10. Base Recline Adjuster
7
9
6
2
8
1
4
3
5
10
convertible car seat
components list
FORWARD-FACING
BELT PATH
REARWARD-FACING
BELT PATH
18 20
19
21
19
21
•vvv
17
14
15
16
17
12
18
11. Top Tether Strap Adjuster
12. Top Tether Strap
13. Anchor Kit
14. Top Tether / Instruction
Manual storage pocket
15. Harness Slots
16. Harness Straps
17. Seat Trim Elastic Strap
18. Splitter Plate
19. Rearward-Facing Belt Path
20. Recline Indicator
21. Forward-Facing Belt Path
21. FORWARD-FACING
BELT PATH
19. REARWARD-FACING
BELT PATH
FORWARD-FACING
BELT PATH
convertible car seat
components list
19 20 21
11
13
•vvv
17
14
15
16
17
12
18
11. Top Tether Strap Adjuster
12. Top Tether Strap
13. Anchor Kit
14. Top Tether / Instruction
Manual storage pocket
15. Harness Slots
16. Harness Straps
17. Seat Trim Elastic Strap
18. Splitter Plate
19. Rearward-Facing Belt Path
20. Recline Indicator
21. Forward-Facing Belt Path
21. FORWARD-FACING
BELT PATH
19. REARWARD-FACING
BELT PATH
FORWARD-FACING
BELT PATH
convertible car seat
components list
19 20 21
11
13

•vvv
2
PUSH
DOWN
PULL
OUT
SLACK
CLICK
quick start guide Rearward-facing installation:
newborn up to 12 approximately
POSITION 4
•vvv
2
PUSH
DOWN
PULL
OUT
SLACK
CLICK
quick start guide Rearward-facing installation:
newborn up to 12 approximately
POSITION 4
•vvv
3
PUSH
DOWN
SASH
LAP
PULL
OUT
SLACK
CLICK
SELECT
RECLINE
1, 2, 3
quick start guide Forward-facing installation:
12 months up to 4 years (approximately)
•vvv
2
PUSH
DOWN
PULL
OUT
SLACK
CLICK
quick start guide Rearward-facing installation:
newborn up to 12 approximately
POSITION 4
•vvv
18
MARKER B: YOUNG TODDLER
MARKER A: OLDER CHILD
Fortoddleruseuptoapprox4years
oldorwhenthechild’sshoulders
reachtheshoulderheightmarkerat
whichpointyoumustmovetothe
nextcarseat.
Fornewbornuseuptoapprox12
monthsoldorwhenthechild’s
shouldersreachtheshoulderheight
markeratwhichpointyoumustturn
theseatforward-facing.
Lower Shoulder Height Marker
Upper Shoulder Height Marker
Marker A
Marker B
convertible car seat
preparing vehicle for your seat
•vvv
19
•Continuetousethischildrestraintuntilthechildreachesthislimit.
•Donotuseforwardfacinguntilchild’sshouldersareabovethelower
shoulderheightmarker.
•Infantsareatriskofseriousinjuryiftheyfaceforwardtooearly.
•Childrenareatriskofseriousinjuryiftheymovetoboosterseatstooearly.
•Childrenwhohaveoutgrownthisrestraintaresafestinalargerchild
restraintwithanin-builtharnessoraboosterseatuntiltheirshoulders
reachtheuppershoulderheightmarkeroftherestraint.
•Thechildrestraintisunsuitablefortheoccupantwhentheshouldersare
belowthelowermarkerorabovetheuppermarker.Thechildneedstobe
movedintothenextformofchildrestraint(boosterseat)whentheyreach
thetopshoulderheightmarker.
NOTE :
• If the baby’s neck muscles are unable to support their head, then
the child should remain rear facing.
WARNINGS
convertible car seat
preparing vehicle for your seat

•vvv
3
PUSH
DOWN
SASH
LAP
PULL
OUT
SLACK
CLICK
SELECT
RECLINE
1, 2, 3
quick start guide Forward-facing installation:
12 months up to 4 years (approximately)
•vvv
2
PUSH
DOWN
PULL
OUT
SLACK
CLICK
quick start guide Rearward-facing installation:
newborn up to 12 approximately
POSITION 4
•vvv
3
PUSH
DOWN
SASH
LAP
PULL
OUT
SLACK
CLICK
SELECT
RECLINE
1, 2, 3
quick start guide Forward-facing installation:
12 months up to 4 years (approximately)
•vvv
3
PUSH
DOWN
SASH
LAP
PULL
OUT
SLACK
CLICK
SELECT
RECLINE
1, 2, 3
quick start guide Forward-facing installation:
12 months up to 4 years (approximately)
•vvv
18
MARKER B: YOUNG TODDLER
MARKER A: OLDER CHILD
Fortoddleruseuptoapprox4years
oldorwhenthechild’sshoulders
reachtheshoulderheightmarkerat
whichpointyoumustmovetothe
nextcarseat.
Fornewbornuseuptoapprox12
monthsoldorwhenthechild’s
shouldersreachtheshoulderheight
markeratwhichpointyoumustturn
theseatforward-facing.
Lower Shoulder Height Marker
Upper Shoulder Height Marker
Marker A
Marker B
convertible car seat
preparing vehicle for your seat
•vvv
19
•Continuetousethischildrestraintuntilthechildreachesthislimit.
•Donotuseforwardfacinguntilchild’sshouldersareabovethelower
shoulderheightmarker.
•Infantsareatriskofseriousinjuryiftheyfaceforwardtooearly.
•Childrenareatriskofseriousinjuryiftheymovetoboosterseatstooearly.
•Childrenwhohaveoutgrownthisrestraintaresafestinalargerchild
restraintwithanin-builtharnessoraboosterseatuntiltheirshoulders
reachtheuppershoulderheightmarkeroftherestraint.
•Thechildrestraintisunsuitablefortheoccupantwhentheshouldersare
belowthelowermarkerorabovetheuppermarker.Thechildneedstobe
movedintothenextformofchildrestraint(boosterseat)whentheyreach
thetopshoulderheightmarker.
NOTE :
• If the baby’s neck muscles are unable to support their head, then
the child should remain rear facing.
WARNINGS
convertible car seat
preparing vehicle for your seat

•vvv
2
PUSH
DOWN
PULL
OUT
SLACK
CLICK
quick start guide Rearward-facing installation:
newborn up to 12 approximately
POSITION 4
•vvv
2
PUSH
DOWN
PULL
OUT
SLACK
CLICK
quick start guide Rearward-facing installation:
newborn up to 12 approximately
POSITION 4
•vvv
3
PUSH
DOWN
SASH
LAP
PULL
OUT
SLACK
CLICK
SELECT
RECLINE
1, 2, 3
quick start guide Forward-facing installation:
12 months up to 4 years (approximately)
•vvv
2
PUSH
DOWN
PULL
OUT
SLACK
CLICK
quick start guide Rearward-facing installation:
newborn up to 12 approximately
POSITION 4
•vvv
21
PUSH
PULL
TO ADJUST SHOULDER STRAP HEIGHT:
1. Placethumborngerthroughcoveropening
andpresstheharnessreleaseleveratthefront
ofseat.
2. Pullbothshoulderstrapssimultaneously
toloosen.
NOTE: Ensuretheharness
heightsareofequallength.
CORRECT INCORRECT
3. Undothestrapsfromthe
splitterplatelocatedonthe
backofthechildrestraint.
4. Re-threadtheshoulderstraps
throughthedesiredslots.
Reconnectthestrapstothe
splitterplate.
SQUEEZE LEVER
• Alwaysadjusttheheightoftheshoulderstrapsasthechildgrows.
• Failuretofastenandtightentheharnesssystem
correctlycanresultinseriousinjuryordeath.
WARNINGS
Theseatisttedwith3forward-facingrecline
positions.The4thandmostreclinedposition
isforrearward-facinguseONLY.
Toadjust,placehandunderseatandsqueeze
theREDlevertoselectthedesiredposition.
ADJUSTING SEAT RECLINE
NOTE:NeverusePosition4
forforward-facing.
convertible car seat
preparing infant seat to fit your child
Table of contents
Other Mothers choice Car Seat manuals

Mothers choice
Mothers choice journey User manual

Mothers choice
Mothers choice kin AP User manual

Mothers choice
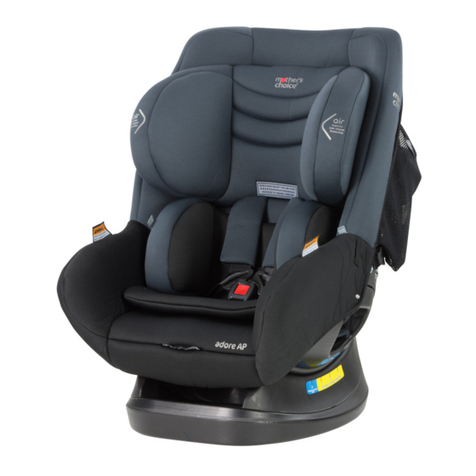
Mothers choice adore AP User manual

Mothers choice
Mothers choice nest II User manual

Mothers choice
Mothers choice glide User manual

Mothers choice
Mothers choice Infinity User manual

Mothers choice
Mothers choice Star-Gold User manual