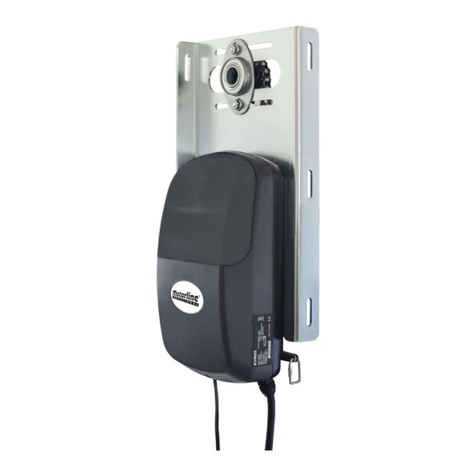
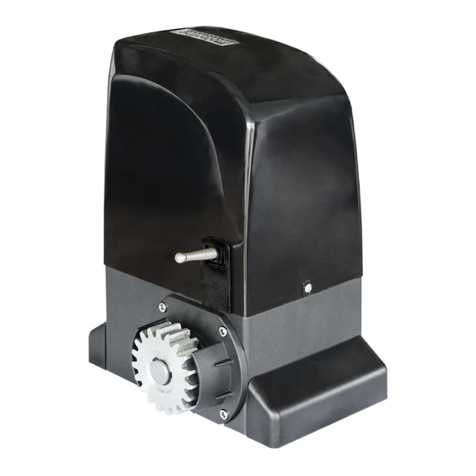
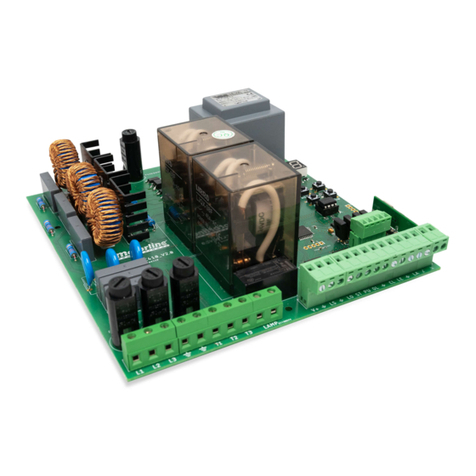
Motorline JAG400 Use and care manual

V6.2
REV. 05/2022
JAG
EN
USER’S AND INSTALLER’S MANUAL

A B
B
A
B
B
A
A
B
A
A
A
ENEN
00. CONTENT 01. SAFETY INSTRUCTIONS
INDEX STANDARDS TO FOLLOW
STANDARDS TO FOLLOW
INSIDE PACKAGE
TECHNICAL SPECIFICATIONS
UNLOCK MOTOR
. SAFETY INSTRUCTIONS
. PACKAGE
. MOTOR
HEIGHT OF THE SUPPORTS
INTERIOR OPENING INSTALLATION QUOTAS
INSTALLATION STEPS
MICROS ADJUSTMENT
INSTALLATION MAP
. INSTALLATION
EXTERNAL OPENING INSTALLATION QUOTAS
V/V MOTOR
V MOTOR
. CONNECTION SCHEME
. MAINTENANCE
V MOTOR
FINAL CONSUMERS INSTRUCTIONS
V/V MOTOR
INSTRUCTIONS FOR SPECIALIZED INSTALLERS
MAINTENANCE
. COMPONENTS TEST
. TROUBLESHOOTING
This product is certified in accordance with European
Community (EC) safety standards.
This product complies with Directive 2011/65/EU of the
European Parliament and of the Council, of 8 June 2011, on
the restriction of the use of certain hazardous substances
in electrical and electronic equipment and with Delegated
Directive (EU) 2015/863 from Commission.
(Applicable in countries with recycling systems).
This marking on the product or literature indicates that the
product and electronic accessories (eg. Charger, USB cable,
electronic material, controls, etc.) should not be disposed
of as other household waste at the end of its useful life. To
avoid possible harm to the environment or human health
resulting from the uncontrolled disposal of waste, separate
these items from other types of waste and recycle them
responsibly to promote the sustainable reuse of material
resources. Home users should contact the dealer where
they purchased this product or the National Environment
Agency for details on where and how they can take these
items for environmentally safe recycling. Business users
should contact their vendor and check the terms and
conditions of the purchase agreement. This product and
its electronic accessories should not be mixed with other
commercial waste.
This marking indicates that the product and electronic
accessories (eg. charger, USB cable, electronic material,
controls, etc.) are susceptible to electric shock by direct or
indirect contact with electricity. Be cautious when handling
theproductandobserveallsafetyproceduresinthismanual.

A EN
01. SAFETY INSTRUCTIONS 01. SAFETY INSTRUCTIONS
GENERAL WARNINGS
•This manual contains very important safety and usage information.
very important. Read all instructions carefully before beginning the
installation/usage procedures and keep this manual in a safe place
that it can be consulted whenever necessary.
•This product is intended for use only as described in this manual. Any
other enforcement or operation that is not mentioned is expressly
prohibited, as it may damage the product and put people at risk
causing serious injuries.
•Thismanualisintended firstly forspecializedtechnicians, and doesnot
invalidate the user’s responsibility to read the “User Norms” section in
order to ensure the correct functioning of the product.
•The installation and repair of this product may be done by qualified
and specialized technicians, to assure every procedure are carried
out in accordance with applicable rules and norms. Nonprofessional
and inexperienced users are expressly prohibited of taking any action,
unless explicitly requested by specialized technicians to do so.
•Installations must be frequently inspected for unbalance and the
wear signals of the cables, springs, hinges, wheels, supports and other
mechanical assembly parts.
•Do not use the product if it is necessary repair or adjustment is
required.
•When performing maintenance, cleaning and replacement of parts,
the product must be disconnected from power supply. Also including
any operation that requires opening the product cover.
•The use, cleaning and maintenance of this product may be carried
out by any persons aged eight years old and over and persons whose
physical,sensorialormentalcapacitiesarelower,orbypersonswithout
any knowledge of the product, provided that these are supervision
and instructions given by persons with experienced in terms of usage
of the product in a safe manner and who understands the risks and
dangers involved.
•Children shouldn’t play with the product or opening devices to avoid
the motorized door or gate from being triggered involuntarily.
WARNINGS FOR TECHNICIANS
•Before beginning the installation procedures, make sure that you have
all the devices and materials necessary to complete the installation
of the product.
•You should note your Protection Index (IP) and operating temperature
to ensure that is suitable for the installation site.
•Provide the manual of the product to the user and let them know how
to handle it in an emergency.
•If the automatism is installed on a gate with a pedestrian door, a door
locking mechanism must be installed while the gate is in motion.
•Do not install the product “upside down” or supported by elements do
not support its weight. If necessary, add brackets at strategic points
to ensure the safety of the automatism.
•Do not install the product in explosive site.
•Safety devices must protect the possible crushing, cutting, transport
and danger areas of the motorized door or gate.
•Verify that the elements to be automated (gates, door, windows,
blinds, etc.) are in perfect function, aligned and level. Also verify if the
necessary mechanical stops are in the appropriate places.
•The centralmust be installed on asafeplace of any fluid (rain, moisture,
etc.), dust and pests.
•You must route the various electrical cables through protective tubes,
to protect them against mechanical exertions, essentially on the
power supply cable. Please note that all the cables must enter the
central from the bottom.
•If the automatism is to be installed at a height of more than 2,5m from
the ground or other level of access, the minimum safety and health
requirements for the use of work equipment workers at the work of
Directive 2009/104/CE of European Parliament and of the Council of 16
September 2009.
•Attach the permanent label for the manual release as close as possible

A EN
01. SAFETY INSTRUCTIONS
to the release mechanism.
•Disconnect means, such as a switch or circuit breaker on the electrical
panel, must be provided on the product’s fixed power supply leads in
accordance with the installation rules.
•If the product to be installed requires power supply of 230Vac or
110Vac, ensure that connection is to an electrical panel with ground
connection.
•The product is only powered by low voltage satefy with central (only
at 24V motors)
WARNINGS FOR USERS
•Keep this manual in a safe place to be consulted whenever necessary.
•If the product has contact with fluids without being prepared, it must
immediately disconnect from the power supply to avoid short circuits,
and consult a specialized technician.
•Ensure that technician has provided you the product manual and
informed you how to handle the product in an emergency.
•Ifthesystemrequiresanyrepairormodification,unlocktheautomatism,
turn off the power and do not use it until all safety conditions have
been met.
•In the event of tripping of circuits breakers of fuse failure, locate
the malfunction and solve it before resetting the circuit breaker or
replacing the fuse. If the malfunction is not repairable by consult this
manual, contact a technician.
•Keep the operation area of the motorized gate free while the gate in in
motion, and do not create strength to the gate movement.
•Do not perform any operation on mechanical elements or hinges if the
product is in motion.
RESPONSABILITY
•Supplier disclaims any liability if:
•Product failure or deformation result from improper installation
use or maintenance!
•Safety norms are not followed in the installation, use and
maintenance of the product.
•Instructions in this manual are not followed.
•Damaged is caused by unauthorized modifications
•In these cases, the warranty is voided.
MOTORLINE ELECTROCELOS SA.
Travessa do Sobreiro, nº29
4755-474 Rio Côvo (Santa Eugénia)
Barcelos, Portugal
SYMBOLS LEGEND:
• Important safety
notices
• Useful information
• Programming
information
• Potentiometer
information
• Connectors
information
• Buttons
information

A B
01
02
03
mm
JAG JAG mm
mm
mm
mm
mm
ENEN
02. PACKAGE 03. MOTOR
INSIDE PACKAGE TECHNICAL SPECIFICATIONS
07•
03•
09•
04•
06•01•
02•
08•
05•
In the package you will find the following components:
01 • swing motors
02 • Control Board
03 • remote controls ( channels)
04 • Front supports
05 • Rear supports
06 • Capacitors [,F (V) or F (V)]
07 • Photocells
08 • User’s manual
09 • Release keys
Electronic components in the kit:
Kit Package:
JAG specifications are as follow:
01
02
03
JAG JAG
• Power Supply
V Vac /Hz Vac /Hz
V Vac /Hz Vac /Hz
V Vdc Vdc
• Power /V W W
V W W
• Current
V ,A ,A
V ,A ,A
V A A
• RPM /V RPM RPM
V RPM RPM
• Noise level LpA dB (A) LpA dB (A)
• Force N N
• Operating temperatures -C to C -C to C
• Thermal protection C C
• Protection class IP IP
• Working frequency /V
V Intensive Intensive
• Course mm mm
• Max leaf length mm mm
• Capacitor V ,F ,F
V F F
• Opening speed V mm/s mm/s
V ,mm/s ,mm/s

A B
06
A
A
B
B
05
07
08
04
ENEN
A?? mm
BA - 20mm
Motor must be installed with a small inclination , to prevent water infiltration through the
extension arm.
For this, the front support must be fixed to the gate with a height lower than the height of the
rear support. See example below:
Example:
• If the height of the rear bracket (dimension A)is set at mm, then the height of the front
bracket (dimension B) will be mm (mm-mm).
Dimension A • Vertical distance from the floor to the top of the rear support.
Dimension B • Vertical distance from the floor to the top of the front support.
• Set dimension A (this can be any size of your choice).
• After you set dimension A, subtract 20mm to find dimension B.
It is very important that these dimensions are respected! Only this way can be assured the
correct functioning and durability of the motors!
It is also very important to have a levelled ground/terrain!
HEIGHT OF THE SUPPORTS
03. MOTOR
TECHNICAL SPECIFICATIONS
LOCK/UNLOCK MOTOR
04. INSTALLATION
Place the unlocking key in the slot signed on
image 05 (motor installed on the left) or 06
(motor installed on the right).
Turn the key to lock or unlock the motor (07).
08
JAG || dimensions are the following:
04
mm || mm
mm || mm
mm

A
09
X
W
Y
EN
On the Illustrated diagrams below and on the next page, are the dimensions for the installation of the automated system.
INTERIOR OPENING INSTALLATION QUOTAS
04. INSTALLATION
* The installation of opening stopper is not mandatory.
Legend:
Dimension X - Horizontal distance between hinge axis of the door and the axis axle of the motor.
Dimension Y - Vertical distance between hinge axis of the door and the axis axle of the motor.
Dimension W - Distance between axis of the motor brackets.
When installing the automation, it is mandatory to respect the dimensions x and
y, indicated in the tables. Within this area, it is possible to identify the maximum
opening angle that the gate reaches in these dimensions.
X, Yand Wshown in (mm)
It is very important that these dimensions are respected! Only this way can be assured
the correct functioning and durability of the motors!
JAG
Dimension
Y
Dimension X
100º 96º 94º 91º
96º 93º 91º -
93º 90º - -
90º ---
W1295 to 1300
JAG
Dimension
Y
Dimension X
98º 100º 103º 105º 107º 109º 109º 106º 104º 101º 98º 95º 93º 91º
98º 100º 102º 104º 107º 108º 106º 104º 101º 99º 96º 93º 91º -
98º 100º 102º 104º 106º 107º 104º 101º 99º 97º 94º 92º - -
98º 100º 102º 104º 106º 104º 101º 99º 97º 95º 92º ---
98º 100º 102º 104º 104º 101º 98º 96º 95º 93º 91º ---
98º 100º 102º 103º 101º 98º 96º 94º 93º 91º ----
97º 99º 100º 98º 95º 93º 92º 90º ------
97º 97º 94º 92º 91º ---------
93º 91º ------------
W1695 to 1700
(EXTERIOR)
(INTERIOR)
Axis of rotation of the
motor, on the rear support
Opening
direction
Axis of rotation of the gate
(center of the door hinge)
Axis of rotation of the
motor, on the front bracket
Closing mechanical
stopper
*Opening mechanical stopper

A
X
Y
W
EN
EXTERNAL OPENING INSTALLATION QUOTAS
04. INSTALLATION
JAG
Dimension
Y
Dimension X
96º 98º 100º 101º 103º 105º 101º 96º 91º
96º 97º 99º 101º 102º 104º 99º 94º -
95º 97º 99º 100º 102º 103º 97º 92º -
95º 97º 98º 100º 101º 102º 95º 91º -
95º 96º 98º 99º 101º 99º 94º - -
94º 96º 97º 99º 101º 97º 92º - -
94º 96º 97º 99º 99º 95º 90º - -
94º 95º 97º 98º 96º 93º ---
93º 95º 96º 98º 94º 92º ---
93º 94º 96º 93º 91º ----
93º 94º 93º ------
92º 92º -------
91º --------
W895 to 900
On the Illustrated diagrams below and on the next page, are the dimensions for the installation of the automated system.
JAG
Dimension
Y
Dimension X
91º 93º 90º
90º 90º -
90º - -
W895 to 900
10
(EXTERIOR)
(INTERIOR) Distance between the centers of the
holes on the supports from motor
Axis of rotation of the gate
(center of the door hinge)
Axis of rotation of the motor,
on the front support
Closing mechanical
stopper
Axis of rotation of the
motor, on the rear support
Opening
direction
*Opening
mechanical stopper
* The installation of opening stopper is not mandatory.
Legend:
Dimension X - Horizontal distance between hinge axis of the door and the rear axis of the motor.
Dimension Y - Vertical distance between hinge axis of the door and the rear axis of the motor.
Dimension W - Distance between axis of the motor brackets.
When installing the automation, it is mandatory to respect the dimensions x and
y, indicated in the tables. Within this area, it is possible to identify the maximum
opening angle that the gate reaches in these dimensions.
X, Yand Wshown in (mm)
It is very important that these dimensions are respected! Only this way can be assured
the correct functioning and durability of the motors!

A B
13
12
15
14 11
14
16
15
12 13
ENEN
Pay attention to the installation dimensions mentioned on pages B, and !
• Fix the supports.
• The rear support must be fixed on the pillar
or wall.
• The front support must be fixed on the gate.
Respect the height and distance measures
between the front and rear supports.
It can be fixed by using screws with
mechanical bushing or chemical welding
process,becauseboth provideanappropriate
support.
04. INSTALLATION
INSTALLATION STEPS INSTALLATION STEPS
• Test the movement.
• Install the motor on the supports
• The motor must be placed on both supports
the same time to avoid leaving the motor sus-
pended by only one of the supports.
To make the task easier, you should unlock the
motor in order to be able to stretch/retract
arm easily (see page A),to get the correct po-
sition for supports.
• Install the pins removed earlier on each side with a small amount of lubricant for less
friction.
• Unlock the motor and move the door manually to see if the door opens and closes uniformly
and correctly, without any irregular friction during its entire movement.
This will ensure that the motor is not subjected to problems during operation.
04. INSTALLATION
• Connecting the motor to control board and con-
figuring control devices.
• With the motor installed, connect it to control board
for system configuration (see control board user
manual).
It is important to configure the desired control
devices (remote controls, wall switch, etc.) and other
additional components such as antenna, flashing light,
key selector, among others.
It is important to respect this installation order!
Otherwise, it is not possible to ensure correct installation and the motors may not work
properly!

A B
B
A
B
A
17 18
19
20
21
22
23
24
25
26
ENEN
01 • Unlock the motor (see page 4A).
02 • Loosen the front screws, remove the cover and the profile cover.
03 • Take the gate to the closed position.
04 • Loosen the screw shown in the image (), so that it is possible to move the micro-switch in
the profile.
05 • Adjust the closure micro-switch (A) until it makes “click” on the pressure piece. Tighten the
screw to secure the micro in that position.
06 • Take the gate to the open position.
07 • Loosen the screw shown in the image (), so that it is possible to move the micro-switch
in the profile.
08 • Adjust the closure micro-switch (B) until it makes *click* on the pressure piece. Tighten the
screw to secure the micro in that position.
A • The Closing Micro-Switch.
B • The Opening Micro-Switch.
09 • Test the door manually and
if necessary readjust the micros,
as indicated in the previous
paragraphs.
10 • When finished, place the
profile cover and the plastic
cover.
11 • Repeat the whole process
for the other motor.
04. INSTALLATION
MICROS ADJUSTMENT
04. INSTALLATION
MICROS ADJUSTMENT
Example of the gate with inside opening

A
27
EN
04. INSTALLATION
INSTALLATION MAP
INTERIOR
PHOTOCELLS
EXTERIOR
PHOTOCELLS
EXTERIOR
PHOTOCELLS
KEY
SELECTOR
MOTOR WARNING
LAMP
ANTENNA
CONTROL
BOARD
JUNCTION BOX
LEGEND: Connection cables
It is important to use mechanical stoppers in the opening and closing position of the gate.
If not respected, components of the automation may suffer efforts for which they were not
prepared, and as a result will be damaged.
It is important to use junction boxes for connections between motors, components and
control board. All cables must enter and exit on the bottom of the junction and control
board box.
27
GATE STOPPER

A B
V
PU
SERR.
L N
LAMP
230V
MOTORE 1
AP COM CH
MOTORE 2
AP COM CH
1 1 12 2 23 3 34 45
5
6 7 8 9 10
1 2
1 12 23 4 5 6 7 8 9 10 11
MOT.2 SERR.
+ -
+ V
CN1 CN2
MOT.1
LAMP
+ -
BAT
+12V-
12/20V S.P.
+
ENEN
06. COMPONENTS TEST
24V MOTOR110V/230V MOTOR
05. CONNECTION SCHEME
MOTOR WIRES |CONNECTIONS
Connectionsshouldbemadeasshownabove,connectingthemotorwirestotheappropriate
inputs of the central and capacitor.
NOTE: The white motor wires are connected directly to the capacitor wires!
24V MOTOR
Test A • Make the connections as indicated in the image.
If the motor works, the problem is in the control board. If it does not operate, do the test B.
Test B • Loosen the 4 screws to remove the cover and access the internal connections.
Make the connections as indicated in the image.
If the motor works, the problem is on the diode(s) or on the micro(s). If it does not operate,
replace with a new 24V motor and re-test to ensure that all is ok.
To detect which are the components with problems in a V JAG automatism installation, it is
necessary to conduct tests with a direct connection to a external power supply (battery V).
In the scheme below is shown how it should be done this link.
NOTES:
• Once you connect the wires to a V battery, the motor must work for one direction. To test
the reverse movement, change the position of the wires connected to the battery.
S A
S B
Yellow/Green
Brown
Gray
Black
White
White
Wires color Motor wires Motor wires
Ground Wire
MOTOR-AP
MOTOR-COM
MOTOR-CH
Capacitor
Capacitor
Ground Wire
MOTOR-CH
MOTOR-COM
MOTOR-AP
Capacitor
Capacitor
• These connections correspond to an installation with an opening to the interior. If the au-
tomation is installed with an opening towards the outside of the gate, you must swap the AP
wire with the CH wire on the motor 1 and 2.
• If the motors work towards the opposite direction, swap AP with CH.

A EN
06. COMPONENTS TEST
230V/110V MOTOR
01 • Replace the brown and black wires by white wires and connect in the terminal.
02 • Connect the capacitor in the terminal, in the same white wires inputs.
03 • Connect the power supply wires in the opening the motor will rotate one way and
during the closing, the motor will rotate the opposite way.
04 • Finally, connect it to a 230V or 110V plug, depending on the motor/control board in test.
If the motor works, the problem is in the microswitches.
If the motor does not work, normally the problem is on the motor. Replace it with a new
one and test again.
01 • Connect the 3 automation wires in the terminal.
02 • Connect the two automation white wires with the capacitator wires.
03 • Connect the power supply wires in the opening the motor will rotate one way and
during the closing, the motor will rotate the opposite way.
04 • Finally, connect it to a 230V or 110V plug, depending on the motor/control board in test.
If the motor works, the problem is in the control board.
If the motor does not, make the TEST 2.
TEST 1 - Control board Functioning TEST 2 - Micros functioning
Motor Motor Motor Motor
Black Black
Gray Gray
Brown Brown
COM COM
Power
Supply
Power
Supply
Power
Supply
Power
Supply
Power
Supply Power
Supply
AUTOMATION AUTOMATION
Ground Wire Ground Wire
Black Black
Brown Brown
Phase
Phase
Gray Gray
COM COM
Phase
Phase
Capacitor
,F (V)
/F (V)
Capacitor
,F (V)
/F (V)
Capacitor
,F (V)
/F (V)
OPEN CLOSE OPEN CLOSE
Capacitor
,F (V)
/F (V)
All tests must be performed by qualified per-
sonnel due to serious danger associated with
the misuse of electrical systems!!
To detect if the malfunction is on the control board or on the motor
is, sometimes, necessary to perform tests with connection directly
to a V/V power supply.
For this, it is necessary to interpose a capacitor on the connection
in order to the automatism to work (check the type of capacitor to
be used in the product manual).
The diagram below, shows how to make that connection and how to
merge the different components wires.
NOTES:
• To perform the tests, there is no need to remove the automatism from
the place it is installed, because in this way, it is possible to understand if
the automatism can function properly connected directly to the current.
• You should use a new capacitor during this test to ensure that the pro-
blem does not lie on it.

A EN
• Clean stainless steel arm
• Lubricate pins
• With a cloth soaked in lubricant spray, wipe
any residue that accumulates on the motors
stainless steel arm.
• Apply a small amount of spray lubricant on
the arm and using a dry cloth remove the ex-
cess, leaving a homogeneous layer of lubri-
cant over the arm.
• Place a small amount of lubricant on the holes that contains support pins.
• Check motor supports
• Make sure that supports remain well fixed on the pillars and gate to ensure proper functioning of
the equipment.
These maintenance measures must be applied every year in order to insure proper
functioning of the automated system.
07. MAINTENANCE
MAINTENANCE

A EN
Anomaly Procedure Behavior Procedure II Discovering the origin of the problem
• Motor
doesn't
work at all.
• Make sure you
have power in the
automation control
board and if it is
working properly.
• Still not working. • Consult a qualified MOTORLINE
technician.
• Motor
doesn’t
move
but makes
noise.
• Unlock motor and
move gate by hand
to
check for
mechanical
problems on the
gate.
• Is the gate
closed? • Consult an experienced
gate expert. • Check all motion axis and associated motion systems related with gate and motors (pins, hinges, etc.) to find out what is the problem.
• Gate moves
easily? • Consult a qualified
MOTORLINE technician.
• Motor
opens
but doesn’t
close.
• Unlock motor and
move gate by hand
to
closed position.
Lock motor(s) again
and turn off power
supply for
seconds.
Reconnect it and
send order to open
gate using remote
control.
• Gate opened but
didn’t close again.
• Check if there is any
obstacle in front of the
photocells;
• Check if any of the control
devices (key selector, push
button, video intercom, etc.)
of the gate are jammed and
sending permanent signal to
control board;
• Consult a qualified
MOTORLINE technician.
• Motor
doesn’t
make
complete
route.
• Unlock motor and
move gate by hand
to
check for
mechanical
problems on the
gate.
• Encountered
problems? • Consult an experienced
gate expert. • Check all motion axis and associated motion systems related with gate and motors (pins, hinges, etc.) to find out what is the problem.
• Gate moves
easily? • Consult a qualified
MOTORLINE technician.
• Open control box and check
if it has V/V/V power
supply;
• Check input fuses;
• Disconnect motors from
control board and test them by
connecting directly to power
supply in order to find out if they
have problems (see page B/).
• If the motors work, the
problem is on the control board.
Pull it out and send it to our
MOTORLINE technical services for
diagnosis;
• If the motors doesn’t work,
remove them from installation
site and send to our MOTORLINE
technical services for diagnosis.
• Check capacitors, testing
motor with new capacitors;
• If capacitors are not the
problem, disconnect motors
from control board and test them
by connecting directly to power
supply in order to find out if they
have problems (see page B
and ).
• If the motors work, the
problem is from control board.
Pull it out and send it to our
MOTORLINE technical services for
diagnosis;
• If the motors doesn’t work,
remove them from installation
site and send to our MOTORLINE
technical services for diagnosis.
• Check capacitors, testing with
new capacitors;
• If capacitors are not the
problem, disconnect motors from
control board and test them by
connecting directly to power
supply in order to find out if they
are faulty;
• If the motors doesn’t work,
remove them from installation
site and send to our MOTORLINE
technical services for diagnosis.
• If motors work well and move
gate at full force during the
entire course, the problem is with
control board. Set force using
trimmer on the board. Make a
new working time programming ,
giving sufficient time for opening
and closing with appropriate
force (see manual of the control
board in question).
• If this doesn’t work, remove
control board and send it to
MOTORLINE technical services. NOTE: Setting force of the
controller should be sufficient
to make the gate open and close
without stopping, but should stop
with a little effort from a person.
In case of safety systems failure,
the gate shall never cause
physical damaged to obstacles
(vehicles, people, etc.).
All MOTORLINE control boards have LEDs that
easily allow to conclude which devices are
with anomalies.
All safety devices LEDs (DS) in normal
situations remain On.
All "START" circuits LEDs in normal situations
remain Off.
If LEDs devices are not all On, there is some
security systems malfunction (photocells,
safety edges), etc.
If "START" circuits LEDs are turn On, there is a
control device sending permanent signal.
A) SECURITY SYSTEMS:
• Close with a shunt all safety systems
on the control board (check manual of the
control board in question).
If the automated system starts working
normally check for the problematic device.
• Remove one shunt at a time until you find
the malfunction device .
• Replace it for a functional device and
check if the motor works correctly with
all the other devices. If you find another one
defective, follow the same steps until you find
all the problems.
B) START SYSTEMS:
• Disconnect all wires from START terminal
input.
• If the LED turned Off, try reconnecting one
device at a time until you find the defective
device.
NOTE:
In case procedures described in sections A)
and B) don’t result, remove control board and
send to our technical services for diagnosis.
08. TROUBLESHOOTING
FINAL CONSUMERS INSTRUCTIONS INSTRUCTIONS FOR SPECIALIZED INSTALLERS
This manual suits for next models
1
Table of contents
Other Motorline Gate Opener manuals
Popular Gate Opener manuals by other brands

Eagle
Eagle Eagle-E7 instruction manual

Comunello Automation
Comunello Automation ABACUS 220 Installation and user manual

Mighty Mule
Mighty Mule 200 E-Z GATE OPENER UL325 SERIES installation manual

CAME
CAME FROG installation manual

Chamberlain
Chamberlain Swing GATE Installation and operation instructions

Erreka
Erreka MAGIC Installer manual