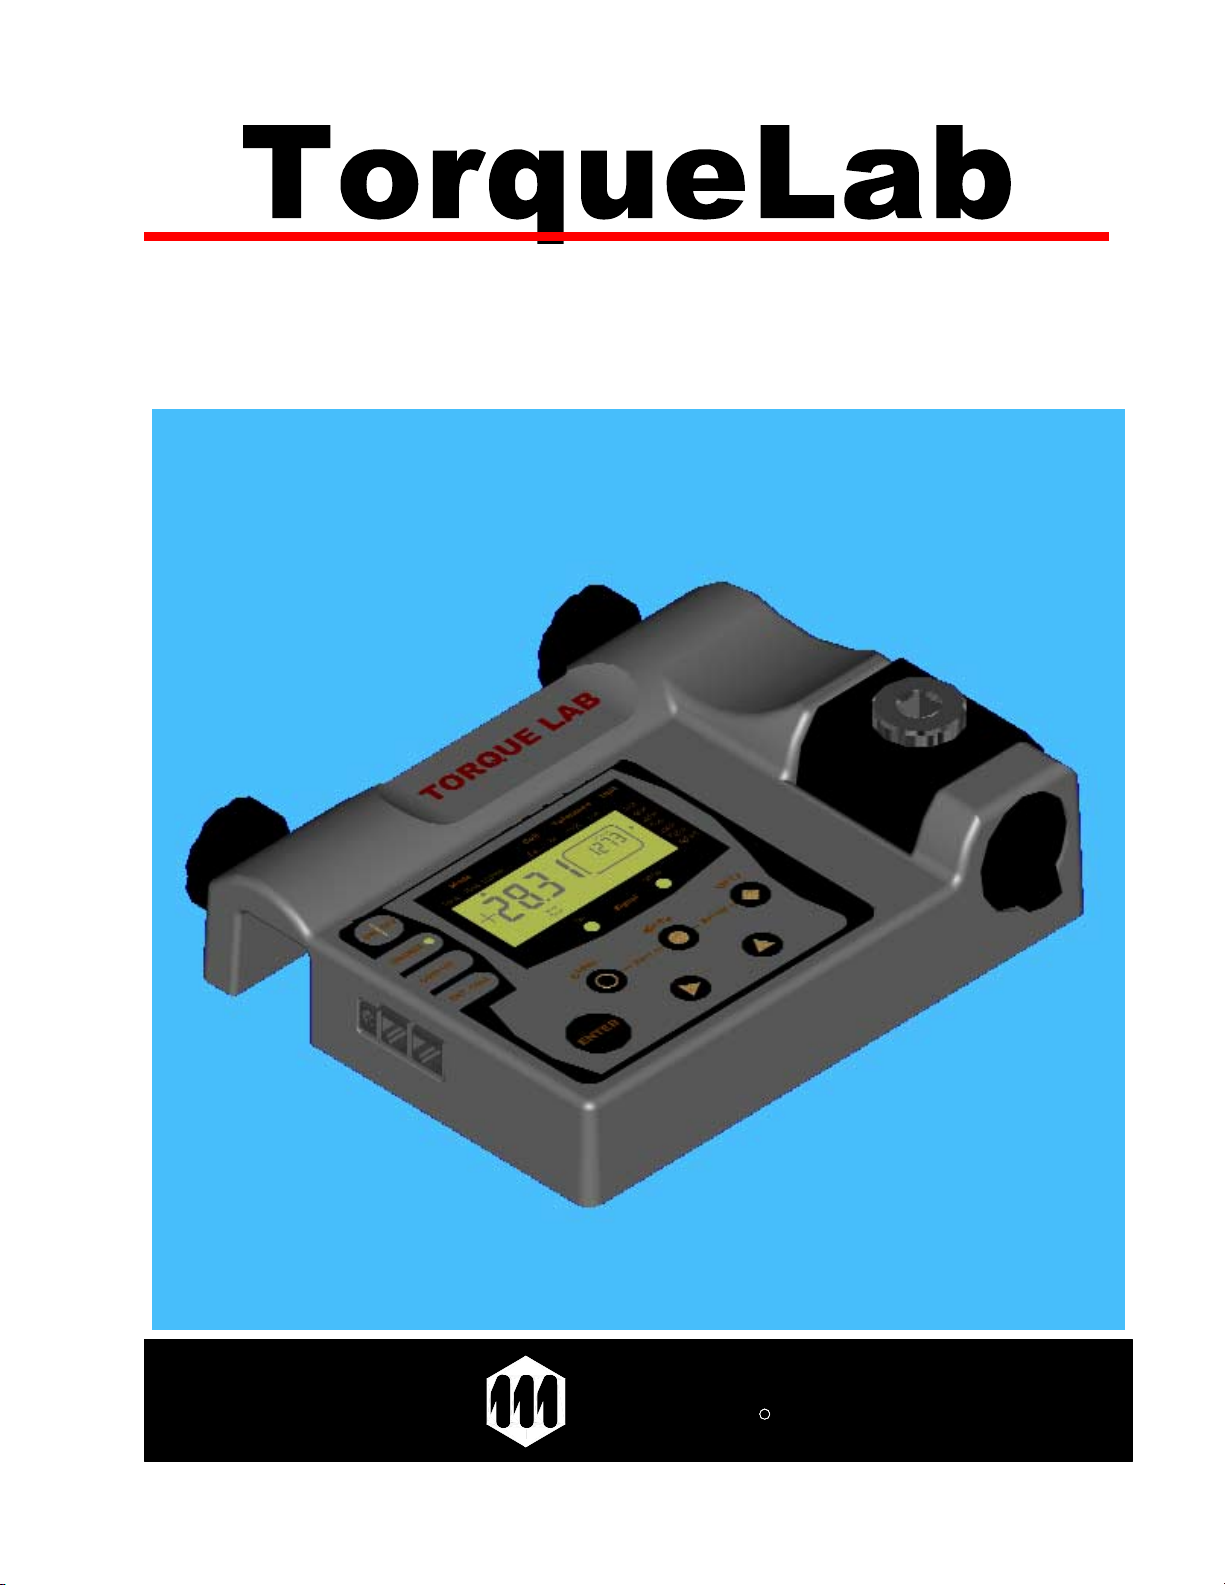
Mountz TorqueLab User manual

1
â
ââ
â
Analyzer
mountzR
the torque tool specialists

2
TABLE OF CONTENT
IMPORTANT PRECAUTIONS ………………………………………………………………...……… 3
WARRANTY ………………………………………………………………...………………..… 3
FEATURES OVERVIEW ……………………………………………………………………...……….. 4
MOUNTING ………………………………………………………………..……………………….…… 5
EXTERNAL CONNECTIONS …………………………………………………………...…..………… 6
USER INTERFACE ………………………………………………………………...……………...…… 7
DISPLAY ……………………………………………………………….…………….…...…… 7
KEYPAD ……………………………………………………………………….……….……… 7
CLEARING THE DISPLAY ………………………………………………………………………….… 8
CLEAR KEY ………………………………………………………………...……………..…… 8
ENTER KEY ………………………………………………………………...………………..… 8
SLEEP MODE ……………………………………………………………..…………………....……… 8
GO / NO GO SIGNAL ……………………………………………………..…………………....………9
PRINTING / DOWNLOADING DATA ………………………………………..……………………... 10
MODE SELECTION ………………………………………………………………….…….……….… 11
TRACK …………………………………………………………………….……….……..…… 11
PEAK …………………………………………………………………….………………..…… 11
1ST PEAK ………………………………………………………………….…………….…… 11
UNIT SELECTION …………………………………………………………………..…………...…… 12
SET-UP MENU ……..………………………………………………………………..…………...…… 13
TOLERANCE SET-UP …………………………………………………...…………………..….…… 14
CLEAR SET-UP ……………………………………………………….…….………………..….…… 14
FILTER SET-UP ……………………………………………………………….…………...…….…… 15
CELL SET-UP ………………………………………………………….……………………………… 15
CALIBRATION SET-UP …………………………………………………...……….………...….…… 16
ACCESS CODE ………………………………………………………………...………….… 16
CAPACITY UNIT ………………………………………………………………...…………… 16
HIGH CAPACITY ………………………………………………………………...………...… 16
LOW CAPACITY ………………………………………………………………...…………… 17
RATED OUTPUT ………………………………………………………………...……...…… 17
FAST CALIBRATION ………………………………………………………………...……… 17
TRUE CALIBRATION ………………………………………………………………...……… 18

3
IMPORTANT PRECAUTIONS
The TorqueLabâis solely designed for measuring and testing of torque controlled equipment
such as wrenches, power tools or hand- screwdrivers. Mountz, Inc. strongly recommends that
this analyzer not to be modified and/or used for any application other than for which it was
designed. If the analyzer is not used as described in this manual, the safety features of the unit
might be impaired.
Although the unit is safe during normal operation, remember to use common sense and
exercise caution when using other equipment such as power tools, calibration equipment and
custom accessories.
If you have questions relative to a particular application, contact Mountz, Inc. to determine if it
can or should be performed on the product.
Mountz, Inc.
1080 N. 11th St.
San Jose, CA 95112
800-456-1828
www.etorque.com
• Do not use the analyzer if the housing or transducer look damaged, or if you
suspect that the unit is not operating properly.
• Make sure to select the appropriate transformer when using external power
supply.
• Secure the analyzer using the integrated clamping channel or using the
threaded holes provided in the back of the unit by bolting it onto the work
area.
• When using a power tool or an accessory item always follow safety
precautions recommended by the manufacturer.
WARRANTY
Every Mountz tool is thoroughly checked and tested before shipment. Should defects due to faulty
materials and/or workmanship develop within (1) year from the date of sale, the tool will be repaired
free of charge if returned to Mountz, Inc. This warranty is not valid if the tool has been misused,
tampered with or abuse. Any questions pertaining to Warranty Repair or Returns should be directed
to Mountz Customer Service department.
All incoming freight charges are the responsibility of the customer. If the customer requests second
day or overnight return, the customer will be responsible for the difference between ground and air
shipment returns. Tools that are returned and found to require repair for any reason other than faulty
material(s) and/or workmanship, including, but not limited to: normal or excessive wear, misuse,
abuse, tampering, attempts to repair or repair work performed by individuals other than Mountz
personnel, could be void of any and all warranty. In such cases, Mountz will estimate the cost of the
repair and will proceed with the repairs when the authorization for such repairs is received.
Tools estimated for repair and/or calibration are subject to a minimum service charge of $25.00 if
repair and/or recalibration are not authorized.

4
FEATURES OVERVIEW
Controlling torque is quintessential for companies to ensure their product' s quality,
safety and reliability isn't compromised. Insufficiently torqued fasteners can vibrate loose
overtime and when excessively torqued the threaded fasteners can strip. Using a quality torque
analyzer has become increasingly important for many companies to secure that proper torque is
being applied.
The Torque Lab analyzer is built for accuracy and reliability. This analyzer accurately
measures torque for most tools, meeting the demands to test multiple torque ranges for various
tools used in production. The analyzer features a built-in transducer and supports most external
size transducers. Utilizing a high-performance circuitry system, the analyzer can download
torque readings to a computer at high speeds. This allows a powerful collection of analytical
data to be stored for future reference and statistical analysis of tools. Offering three modes of
operation (Track, Peak, and 1st Peak) this versatile analyzer provides the operator a variety of
ways to smoothly verify torque applied with a selection of seven measuring units. Models
ranging in torque up to 250 lbf.ft.
• Recommended for all hand screwdrivers, wrenches, or power tools.
• Accuracy +/- 1% of reading from 10% to 20%, +/- 0.5% of reading from 20% to 100%
of full scale.
• Selection of three operation modes: (Track, Peak, 1st Peak).
• Seven units of torque measurements available: (lbf.ft, lbf.in, ozf.in, N.m, cN.m,
Kgf.m, kgf.cm).
• Can accept up to 9 external transducers.
• Go / No Go signals (green / red LEDS) to indicate validity of torque readings.
• Buzzer for audible user feedback.
• RS-232 interface to download readings in "real time."
• Manual and auto reset functions to clear displayed values.
• Software selectable filters to eliminate unwanted "noise": (500Hz, 1000Hz, 1500Hz,
3000Hz).
• Calibration will allow for both a fast calibration (using mV/V transducers rated output)
and a true (dead weight) calibration.
• Battery powered or AC adapter cord included. NiMh batteries provide 10 hours of
operation per charge and a low battery indication turns on when battery is low.
Automatic shut down occurs when battery becomes critically low.

5
MOUNTING
It is strongly recommend securing the analyzer to a workbench before operating. Immobilizing
the analyzer is critical for the safety the operator as well as for the accuracy of torque
measurements during operation.
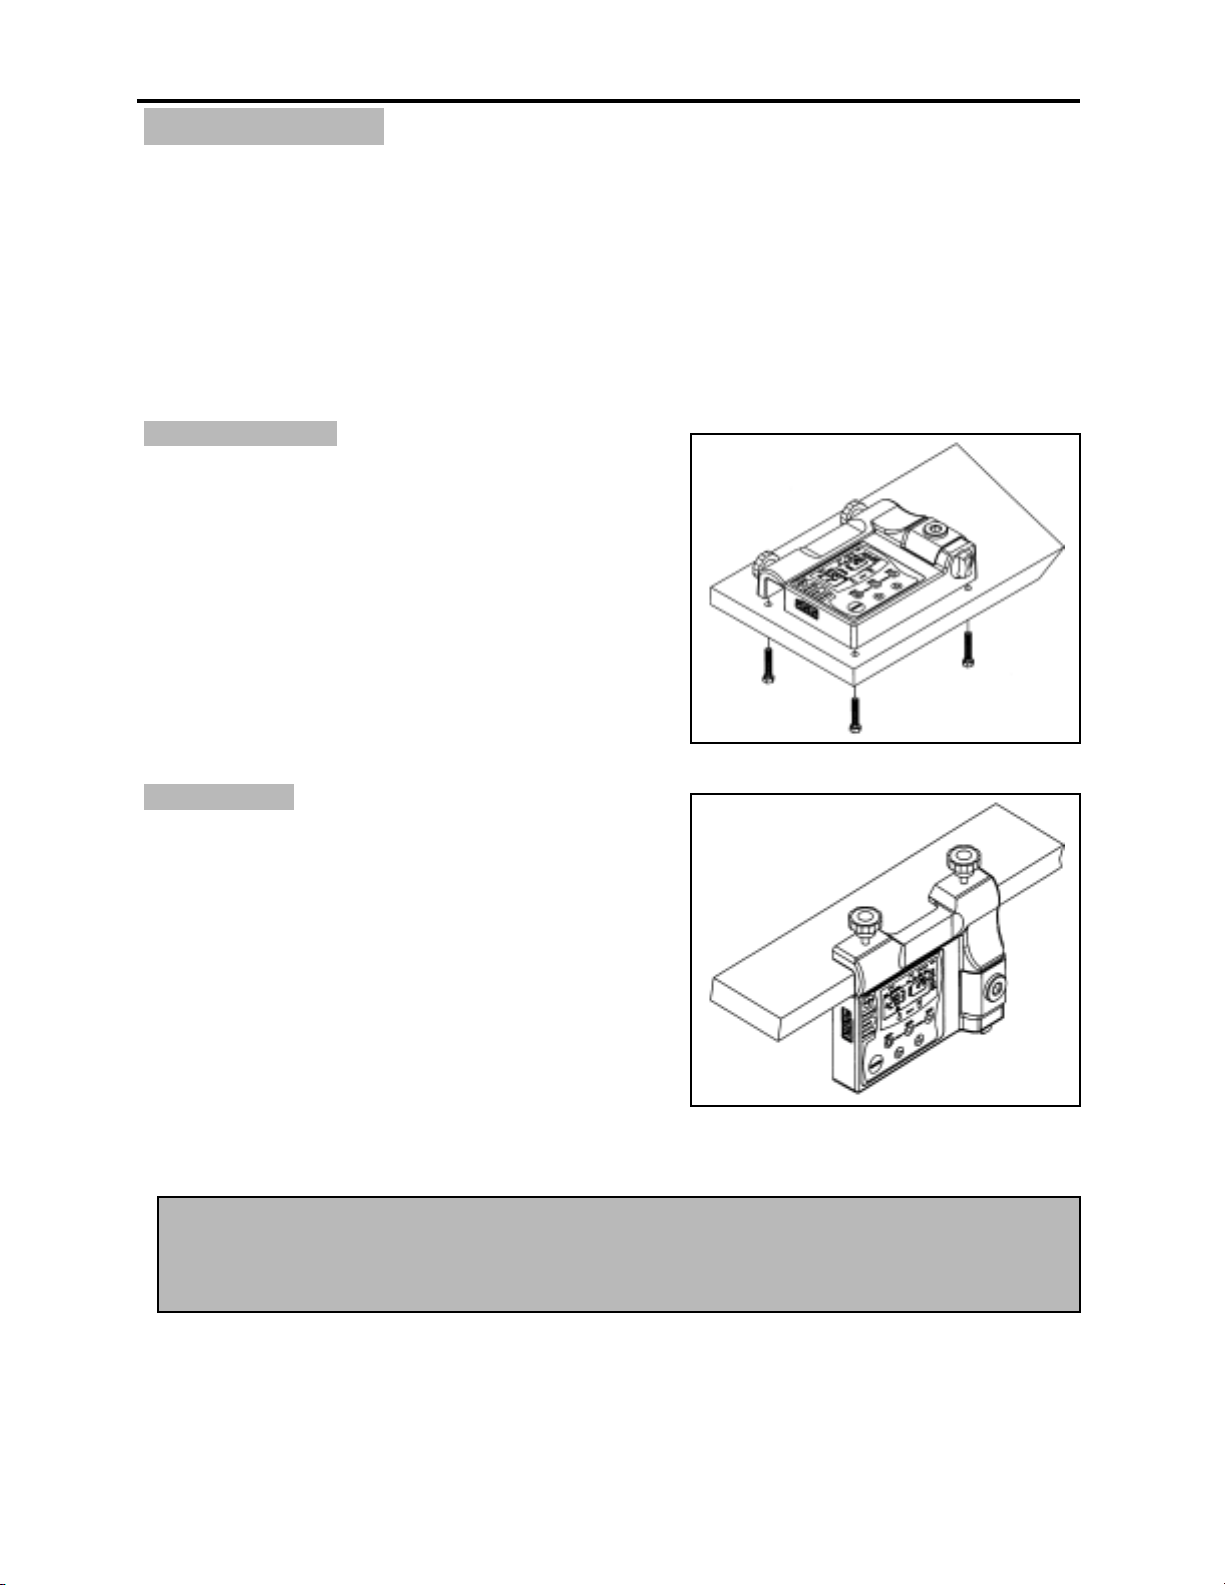
The TorqueLabâfeatures two mounting options.
SURFACE MOUNT
This mounting option offers the most secure way to
immobilize the analyzer, and is recommended
when used at a permanent location.
In the back of the unit, you will find 4 threaded
holes 3/8-16, spaced at 9.75 by 7.25 inches.
RACK MOUNT
When the analyzer is used at various locations, this
fast mounting option offers more flexibility.
The mounting channel width is 1.5 inch wide.
Always hand tighten the knobs, when clamping.
Note: Remember that a loose Analyzer during utilization can impact the validity of torque
readings. Always make sure the unit is secure before operating, repeated usage may
loosen the screws or knobs.

6
EXTERNAL CONNECTIONS
EXTERNAL POWER SUPPLY
Plug the provided transformer to recharge
the internal battery supply when low.
Note: The TorqueLabâcan be used while
being charged.
RS 232 OUTPUT
The RS 232 can be used for printing or
downloading torque values into a computer.
Rate: 9600 BPS
Format: 8 bits fixed, 1 stop bit, no parity.
EXTERNAL TRANSDUCER INPUT
The TorqueLabâcan be used with external
transducers up to 9 Cells (Cell 01 –09).
The TorqueLabâis compatible with
transducers with Rated Output between 1.7
to 2.3 mV/V and 5 V. See “CELL SET-UP”.
TRANSDUCER and RS 232 CONNECTION PIN-OUT
The following diagram and Table define the pins of the I/O connectors for the TorqueLabâ.
RS-232 Connector Transducer Connector
Pin Signal Pin Signal
1 Not Used 1 + Signal
2 Reserved 2 - Signal
3 TXD 3 Excitation -
4 Not Used 4 Excitation +
5 Ground 5 Reserved
6 Not Used 6 Signal from Brush-Less
7 Reserved
8 Reserved
9 Analog Ground
10 + V for Brush-Less
Transducer
6….….1
Pin Numbers
RS-232 Transducer
10..……...1

7
USER INTERFACE
DISPLAY
KEYPAD
Select among
seven measuring
units.
Small window:
2nd peak torque
reading or data
p
ulses depending
upon mode.
"Go and "No Go" LEDs used to monitor
lower and upper torque limit and receive a
visual and audible warning
Large window
displays torque
reading
Select between "Auto Clear" and "Manual
Clear" for how torque values will be cleared
from the window
Three modes of
operation for
measuring torque
Displays which
transducer in use When tolerance parameters are
set, "High" or "Low" will flash if
torque is outside the parameters
Use "Scroll Right" key to change modes and
active digits when setting numbers.Use "Scroll Up" key change units or to move
through the menus or increase value when
setti
ng numbers.
"Unit" change key
For "Set-Up" press
"Unit" and "Mode"
keys
"Mode" change key.
"Clear" key to
clear readings
without RS 232
"Enter" Key to
clear readings and
send to RS232
p
ort.

8
CLEARING THE DISPLAY
Hysteresis
All transducers can experience some drift in the “zero” or “zero offset” point when shifting torque
from clockwise to counter clockwise or vice versa. This is a normal characteristic of transducers
due to a hysteresis or lack of “retrace.” As a result, for the most accurate readings, you should
preload the transducer in the direction of measurement. Proceed as follows:
• Apply torque to the transducer in the direction of usage, clockwise or counter clockwise.
• Unload the transducer and wait for 30 seconds.
• Proceed to taking torque measurements.
CLEAR KEY
The CLEAR key function is to “Clear” readings from the display and reset all values to zero.
Clearing the display should always be performed before taking new readings.
ENTER KEY
The ENTER key function is used for the validation of user selection during set-ups.
The other function is to send data to the RS 232 port for printing or downloading displayed
readings. After sending the data, the readings will automatically be cleared from the display thus
the ENTER key can also be used to clear the display (see Printing / Downloading Data section).
SLEEP MODE
The TorqueLabâfeatures a built-in sleep mode function to save power when not in use. If there
is no activity for 5 minutes, such as key press or no torque input, the analyzer will display SLP.
Any key press will restore the analyzer to operational mode and restore power to any
components that were shut down.
Note: If the CLEAR key does not clear the display to zero, it may be an indication of
damaged or overtorqued transducer. In this case you should contact the manufacturer.
Notes: When in AUTO CLEAR mode this process occurs automatically.
The CLEAR function will also prevent data from being printed or downloaded (see
Printing / Downloading Data section).

9
GO / NO GO SIGNAL
The TorqueLabâis equipped with visual (green and red LED) and audible (buzzer) signals to
provide the user instant torque status during operation. These signals operate in conjunction
with the transducer’s capacity and tolerance settings.
Torque Range Signal Status
____________________________________________________________________________
Buzzer Long Beep
NoGo On
Go Off
HighTol.Icon On
High Capacity Low Tol. Icon Off
Buzzer Short Beep
No Go Flashing
Go Off
High Tol. Icon Flashing
High Tolerance Low Tol. Icon Off
Buzzer Short Beep
No Go Off
Go On
HighTol.Icon Off
Low Tolerance Low Tol. Icon Off
Buzzer Off
NoGo Flashing
Go Off
HighTol.Icon Off
Low Capacity Low Tol. Icon Flashing
Buzzer Off
No Go On
Go Off
HighTol.Icon Off
LowTol.Icon On
Zero N/A N/A

10
PRINTING / DOWNLOADING DATA
Data output is available, from the TorqueLabâ, via the RS232 port. The analyzer only outputs
displayed torque values. These values can be directly printed by any serial printer or
downloaded into a computer.
The data format is 9600 BPS, 8 data bits, No Parity, 1 Stop Bit and no flow control.
How to send torque values to the RS 232
• When in Track mode, the analyzer will automatically and continuously output the values
through its serial port. This provides a “real time” torque output desired for some
applications, but remember that in track mode will output torque values every 128 msec.
• When in Peak or 1st Peak mode and Auto Clear is set, the analyzer will automatically
output the values through its serial port before the display is cleared. Only the captured
torque value can be printed or downloaded.
• When in Peak or 1st Peak mode and Manual Clear is set, the user needs to press the
Enter key to send the data through the serial port. If you do not want to send a specific
value, use the Clear key to prevent downloading or printing of that value.
If you desire to download and display data on a computer, you can do so by using any serial
communications software. One such program is Hyperterminal accessory, standard to Windows
95, NT or Windows 98. A description of operation with Windows 95, NT, or Windows 98 is given
below. This procedure may vary slightly depending on the Windows software version being
used. This is just an example, if you have problems consult Windows Help files.
• Select “Start”, “Programs”, “Accessories”, and then “Hyperterminal”. Then select
HyperTerminal.exe.
• When the program starts you will be asked to choose an icon and assign a name.
Choose any icon you prefer and choose a name such as “Data_Aq”, for example. Click
OK.
• The “Connect To” screen will appear. Just click OK, or if you want to change the
COM port, select the appropriate COM port and click OK.
• The “COM2 Properties” screen will appear. Choose 9600 Bits per second. Leave
the default values for character format (8 Data Bits, Parity – None, and Stop Bits 1).
Change the Flow Control to “None”. Click OK.
• Click “File” on the Menu Bar and select “Properties”. When the “Data_Aq Properties”
screen appears choose the “Settings” tab and then choose “ASCII setup”. In “ASCII
receiving” check the box “Append line feeds to incoming line ends”. Click OK then OK
again.
11
Hyperterminal is now configured to allow torque values to be displayed on your computer
screen. If you want to capture data to a file as it is downloaded, you must enable the file
capture option. To capture to a file, select “Transfer” from the Menu Bar and select “Capture
Text”. Then select the folder and file you wish to save it as.
MODE SELECTION
The TorqueLabâAnalyzer offers three different modes for displaying torque information during
operation. The user will determine which mode is best suited for the application.
Key sequence to change mode:
• Mode
• Scroll Right
• Enter
TRACK
This mode constantly tracks increasing or decreasing
torque variations. The small window displays the same
torque values as the large characters, but at a slower
rate to better assimilate these variations.
Use this mode to monitor varying torque on motors and
machinery. Also for calibrating and testing Dial type
wrenches on a loading bench.
PEAK
The display retains the highest torque applied. The
small window displays the number of pulses (peaks)
generated during operation.
Use this mode during calibration or testing of any hand
type torque wrench (dial, beam, and screwdriver), as
well as power tools.
1ST PEAK
The display holds the first detected torque peak
applied. The small window displays further increasing
torque inputs.
+
+
Track
Tor
q
ue
Notes: The Auto/Manual Clear function will be
disabled during this mode.
Peak
A
uto
Clear
+
Pulses
Set
-
up
B
A
uto
Clear
Tor
q
ue
1s
t
Peak
+
+

12
This function is primarily used for testing and
calibrating click type mechanical torque wrenches. The
TorqueLabâcaptures the point where the wrench
clicks. This peak may be used for operator training on
correct use of the wrench. Always apply torque
smoothly to avoid false first peak readings.
UNIT SELECTION
The TorqueLabâanalyzer supports seven units of torque measurement, lbf.ft, lbf.in, ozf.in, N.m,
cN.m, Kgf.m, and kgf.cm. However certain torque values cannot be converted into other units
due to display resolution, in these cases the TorqueLabâwill warn you by displaying “Err”.
Key sequence to change units:
• Units
• Scroll Up
• Enter
Torque Conversion Chart
Units to
Convert ozf.in lbf.in lbf.ft mN.m cN.m N.m gf.cm kgf.cm kgf.m
mN.m 0.142 0.009 0.0007 1 0.1 0.001 10.2 0.01 0.0001
cN.m 1.416 0.088 0.007 10 1 0.01 102 0.102 0.001
N.m 141.6 8.851 0.738 1000 100 1 10,197 10.2 0.102
ozf.in 1 0.0625 0.005 7.062 0.706 0.007 72 0.072 0.0007
lbf.in 16 1 0.083 113 11.3 0.113 1152.1 1.152 0.0115
lbf.ft 192 12 1 1356 135.6 1.356 13,826 13.83 0.138
gf.cm 0.014 0.0009 0.00007 0.098 0.01 0.0001 1 0.001 0.00001
kgf.cm 13.89 0.868 0.072 98.07 9.807 0.098 1000 1 0.01
kgf.m 1389 86.8 7.233 9807 980.7 9.807 100,000 100 1
Lbf.in
Downlo
+
B
A
uto
Clear
Pulses
American S.I. Metric

13
SET-UP MENU
The following is a quick reference for the Set-Up menu structure. If lost within the menu, you
can turn the analyzer OFF and ON at any time.
Key Function:
Set-Up (Mode + Unit) to access the menu
Scroll Up to navigate through the menu options or to select values
Scroll Right to locate values
Enter to validate selections
____________________________________________________________________________
Tolerance toL (Low Torque Threshold)
(High Torque Threshold)
____________________________________________________________________________
Clear CLr
Manual Clear
Auto Clear (Time Threshold)
____________________________________________________________________________
Filter FIL.1 ( 500 Hz)
FIL.2 (1000 Hz)
FIL.3 (1500 Hz)
FIL.4 (3000 Hz)
____________________________________________________________________________
Cell C.00 (Internal)
C.01 (External)
Through
C.09 (External)
____________________________________________________________________________
Calibration CAL
Access Code Code (2003)
Capacity unit CAP (Unit)
High Capacity H.CAP (Maximum torque)
Low Capacity L.CAP (Minimum torque)
Rated Output r.o. (mV.V)
Calibration Method ACCU (Fast)
(True)
True Calibration Points - - - - (–P0)
- - - - (–P1)
- - - - (–P2)
- - - - (–P3)
- - - - (+P0)
- - - - (+P1)
- - - - (+P2)
- - - - (+P3)
Exit Calibration Menu - - - - (Out)
____________________________________________________________________________
Software Revision SOFt (r #)
____________________________________________________________________________
Exit Set-Up Menu Out
____________________________________________________________________________

14
TOLERANCE SET-UP
The Tolerance parameters control the Go and No-Go signal response (see Go / No Go Signal
section). The user sets a lower and upper torque thresholds to get a visual and audible warning
signals when these limits are reached or breached during operation. This function is primarily
used for safety and quality control.
Low Tolerance
The display will prompt to the low tolerance setting.
Use the Scroll Up and Scroll Right keys to select a
torque value, then press Enter to validate the
selection.
High Tolerance
The user is then prompted to enter the upper
tolerance. Use the same key process as described
above.
CLEAR SET-UP
This function controls the method of clearing the display of torque readings.
Auto Clear
When Auto Clear is selected, the torque values,
during operation, will automatically be cleared from
the display.
The user can set the time threshold to control how
long the values should be displayed before
clearing.
Manual Clear
When Manual Clear is selected, the torque values
during operation will indefinitely be display until the
user presses the Clear key.
+
B
A
uto
Clear Set-up
Torque
+
B
A
uto
Clea
r
Set-up
Torque
B
Downlo
+
B
Tor
q
u
A
uto
Clea
r
Threshold
Set-up
B
Manual
Clear
Set-up
Note: The Tolerance values decimal point will be at a fixed position. The decimal location is
predetermined by the transducer’s capacity during the calibration process.
If the Go / No Go Signals are unwanted, the user can disable the function by setting
the Tolerance values to zero.
Note: The Tolerance values must be set using the calibrated set of units. If you wish to use
another set of units, use the conversion chart on page 12 to covert torque values.

15
FILTER SET-UP
The TorqueLabâoffers a selection of four different Low Pass Filters. These filters are used to
eliminate unwanted noise, most often occurring during operation of power tools.
The process of converting dynamic torque into an electronic signal using a transducer may
result in a distorted torque value due to undesirable frequencies. Different tools or applications
will generate different unwanted signals, for that reason no single filter can be specified. Our
experience has shown that a 1500 Hz filter should work with most applications, however we
recommend you, testing with different filters before validating torque values.
The filter selection is accessed through the Set-Up menu.
FIL 1 = 500 Hz
FIL 2 = 1000 Hz
FIL 3 = 1500 Hz
FIL 4 = 3000 Hz
CELL SET-UP
This option allows the user to select the cell (transducer) to be used during operation.
Although the TorqueLabâfeatures one internal cell, this analyzer can memorize and recall up to
9 external cells. The internal cell is always labeled C.00. Calibration data are saved under the
corresponding Cell #.
The Cell selection is accessed through the Set-Up menu.
You can also access this option to review current
settings for individual cells. The low capacity, high
capacity, mV/V and calibration method will be
displayed alternately in the small window.
B
Downlo
Tor
q
ue
Manual
Clear
Set-u
p
Hz
Auto
Clea
Downlo
+
B
Data
+
Manual
Clear
Torque
Threshold
Set-u
p
Note: When in Auto Clear is selected, the analyzer will automatically send the torque value
to the RS 232 port before clearing (see Printing / Downloading Data section).
Note: A value of "3333" in the small window, indicates that the cell has never been
programmed and can be available for calibration.

16
CALIBRATION SET-UP
Equipment and methods used during the calibration process of any transducers or analyzers
are critical and can dramatically affect the quality, accuracy and performance of your analyzer.
Maintain all your calibration equipment in top condition, and always perform the calibration
process in a controlled environment.
Key sequence to access the Calibration Set-Up:
Set-Up (Mode + Unit)
Scroll Up until you display CAL
Enter to access the program
ACCESS CODE
The Access Code is “2003”, this can not be
changed. In order to prevent tempering or deletion
of calibration data, we recommend releasing the
code number to limited personnel.
Scroll Up to change the number
Enter to validate
CAPACITY UNIT
This unit of measurement corresponds to the
transducer to be calibrated.
Scroll Up to change units
Enter to validate
HIGH CAPACITY
This value is the transducer’s maximum capacity
provided by the manufacturer. Always start with
the left most digit.
Scroll Up to update digit value
Scroll Right to select digit to be updated
Enter to validate
B
+
B
Tor
q
ue
Manual
Clear
Set-u
p
B
Auto
Clea
Downlo
+
B
Tor
q
ue
Manual
Clear
Set-u
p
B
B
Auto
Clea
Downlo
+
B
Manual
Clear
Set-u
p
Tor
q
ue
B
Aut
o
Manual
Clear
Downl
Set-up
+
B
Torque
Threshold
Note: Make sure the Cell number corresponds
to the transducer you are intending to
calibrate. See Cell Set-Up section if you
need to chan
g
e number.

17
CALIBRATION SET-UP Continues…
DECIMAL POINT
Prompts to decimal point selection
Scroll Right to change decimal point location
Enter to validate
LOW CAPACITY
This value is the transducer’s minimum capacity
provided by the manufacturer.
Scroll Up to change the number
Scroll Right to change digit
Enter to validate
RATED OUTPUT
The TorqueLabâcan accept a rated output ranging
from 1.700 to 2.300 mV/V and 5 V (Brushless
transducers). This value is provided by the
manufacturer and needs to be known if performing
a Fast Calibration. If you intend to do a True
Calibration you can enter 2.000 mV/V
Scroll Up to change the number
Scroll Right to change digit
Enter to validate
FAST CALIBRATION
This method of calibration is based on a two-point
(zero and full scale) calibration system, which
doesn’t compensate for transducers nonlinearly.
It’s a lesser accurate method than the True calibration.
Scroll Up to change the method
Enter to validate
Manual
Clear
+
B
Data
Tor
q
ue
mV.
V
+
B
Auto
Clear
Manual
Clear
Downloa
Set-up
+
B
Data
Tor
q
ue
Threshold
+
Torque
Threshold
B
B
Auto
Clear
Downloa
+
B
Data
+
Manual
Clear
Set-u
p
Note: The decimal point is now at a fixed
location, previously determined during
the HIGH CAPACITY set-u
p
.
Note: When choosing this method, the
calibration program will be completed and
the display will return to the operating
mode.
B
Aut
o
Manual
Clear
Downl
Set-up
+
B
Torque
Threshold

18
CALIBRATION SET-UP Continues…
TRUE CALIBRATION
This method is based on an eight-point
calibration system to compensate for a
transducers nonlinearly.
Scroll Up to change the method
Enter to validate
Prompts to the dead weight calibration program
-P0 Counter Clockwise offset point.
1. Load the transducer to maximum capacity.
2. Unload the transducer and wait for 30 sec.
3. Repeat steps 1 and 2 three times to
exercise the transducer.
4. Press Enter to accept the offset, if any.
-P1 Counter Clockwise point (10% FS)
5. Load the transducer to 10 % of maximum
capacity.
6. Use the Scroll Up and Scroll Right keys to
adjust the displayed value to match the
actual torque applied.
7. Press Enter to accept –P1.
-P2 Counter Clockwise point (50% FS)
8. Load the transducer to 50 % of maximum
capacity.
9. Use the Scroll Up and Scroll Right keys to
adjust the displayed value to match the
actual torque applied.
10. Press Enter to accept –P2.
-P3 Counter Clockwise point (100% FS)
11. Load the transducer to maximum capacity.
12. Use the Scroll Up and Scroll Right keys to
adjust the displayed value to match the
actual torque applied.
13. Press Enter to accept –P3.
The program will then prompt for the Clockwise Calibration Points, this will require the same
process as described above.
Once the process is completed, exit the Calibration Set-Up by pressing Enter when Out is
displayed inside the large window.
B
Auto
Clea
Manual
Clear
Downlo
Set-up
-
B
Data
Tor
q
ue
Threshol
-
Auto
Clea
Manual
Clear
Downlo
Set-up
-
B
Torque
-
Auto
Clea
Manual
Clear
Downlo
Set-up
-
B
Data
Torque
Threshol
-
Auto
Clea
Manual
Clear
Downlo
Set-up
+
B
Tor
q
u
Note: Do not zero the display if a value is
present. The analyzer needs this offset, if
an
y
, for
p
ro
g
rammin
g
p
ur
p
ose.

19
APPLICATIONS
Impulse and Power Tool Testing
Impulse tools have become prevalent throughout the industry. The advantages of ergonomics
and functionality of impulse tools are well known. It is also well known that, due to the lack of
standards in the industry, all impulse tools are not created equal.
The frequency at which a pulse tool pulses has not been standardized. Some are fast and some
are relatively slow. Some tools create sharp torque vs. time peaks and some create flat peaks.
In addition to this, the characteristics of the joint (soft, medium or hard) changes the output of
the tool, so a tool that pulses one way on one type of joint may pulse differently on the next. To
further complicate things, each brand of tool will act different given the same joint
characteristics. And to make things worse, variations in air pressure to the tool will also make
the tool behave differently. The good news is that individual impulse tools repeat under the
same conditions (within reasonable limits). So creating the same conditions as the application
under test is important.
Due to these non-tester related variations, it is difficult, if not impossible, to create a torque
tester that will be out-of-the-box accurate for all impulse tools and all joint conditions. This is not
to say that the tester is not accurate, only that the conditions during test may not simulate the
conditions during the application, and due to the variance in pulse tools, the tester may show a
different torque value than what is actually happening at the application.
In order to minimize the effects of these variances, the application must be analyzed so it can
be simulated properly on the torque tester with a joint simulator.
The TorqueLabâ
ââ
â, and the Mountz family of transducers have been designed to minimize
these variations and are well suited for both the analysis of the application joint and the
testing of the impulse tool.
You can test pulse and power tools in different ways:
1. Preferred Method (and quickest): Use the TorqueLabâin Peak Mode with a rotary transducer
between the pulse tool and the actual application. This is a widely accepted way to test since
you are using the actual joint as the test station. What the TorqueLabâreads is what the
fastener “sees”. Caution: Variances in tool performance may occur do to the addition of the
rotary transducer.
2. Simulated Method: Always use a quality joint rate simulator (run down adapter) when testing
power tools in a simulated application. Use Joint rate and Breakaway methods to obtain most
accurate torque readings in a simulated rundown.
A
lways use a quality joint rate simulator (run down adapter) when testing power tools in a
simulated application. Use the peak mode. The Peak mode is designed to meet the demanding
frequency requirements for testing dynamic torque applications.

20
APPLICATIONS
Calibrating Torque Wrenches & Hand Screwdrivers
To calibrate torque wrenches that are outside the range of the TorqueLabâ, use a bench-
mounted transducer (BMX) or mount a TWX or SMX transducer in a fixture. Mount the
transducer directly to a bench and apply the torque directly to the wrench by hand, or attach the
transducer to a Mountz mechanical loader and isolate the wrench from the operator, reducing
the possibility of operator errors (highly recommended).
For manual calibration of click type wrenches use the First Peak mode on the TorqueLabâso
the tester will display the point at which the wrench “clicked” (First Peak) and the point when the
operator stopped pulling (Second Peak shown in the torque window). In First Peak Mode the
Torque Labâwill disregard any further input once the wrench has clicked. Make sure you apply
the torque slowly and smoothly (try not to shake or you may induce a false first peak). To avoid
this problem, calibrate click wrenches in Peak mode on a mechanical loader.
For dial type, screwdrivers and cam- over torque wrenches put the Torque Labâin Peak mode.
You can also enter the wrench accuracy tolerance in the Torque Labâ's Tolerance settings
making it easier to determine a Go or No/Go condition.
Table of contents
Other Mountz Measuring Instrument manuals