Polymotion Chat Studio 3.1.0 Quick Start Guide
iiiContents
Chapter 1 Polymotion Chat Studio 3.1.0 ....................................... 1
Overview of Polymotion Chat Tracking System................1
Setting up Polymotion Chat Studio.....................................1
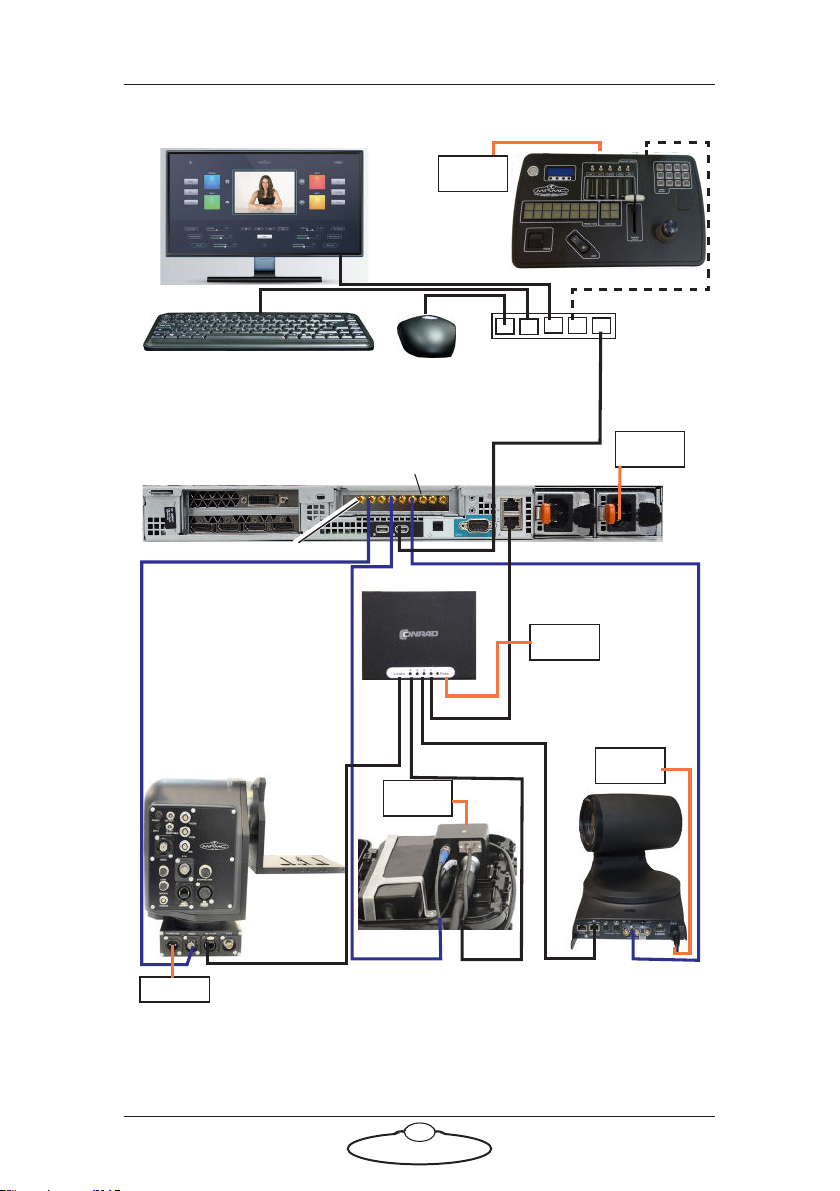
Connecting Cables (Dell 1U Server)..........................2
Connecting Cables (Dell 2U Server)..........................3
Launching Polymotion Chat .......................................4
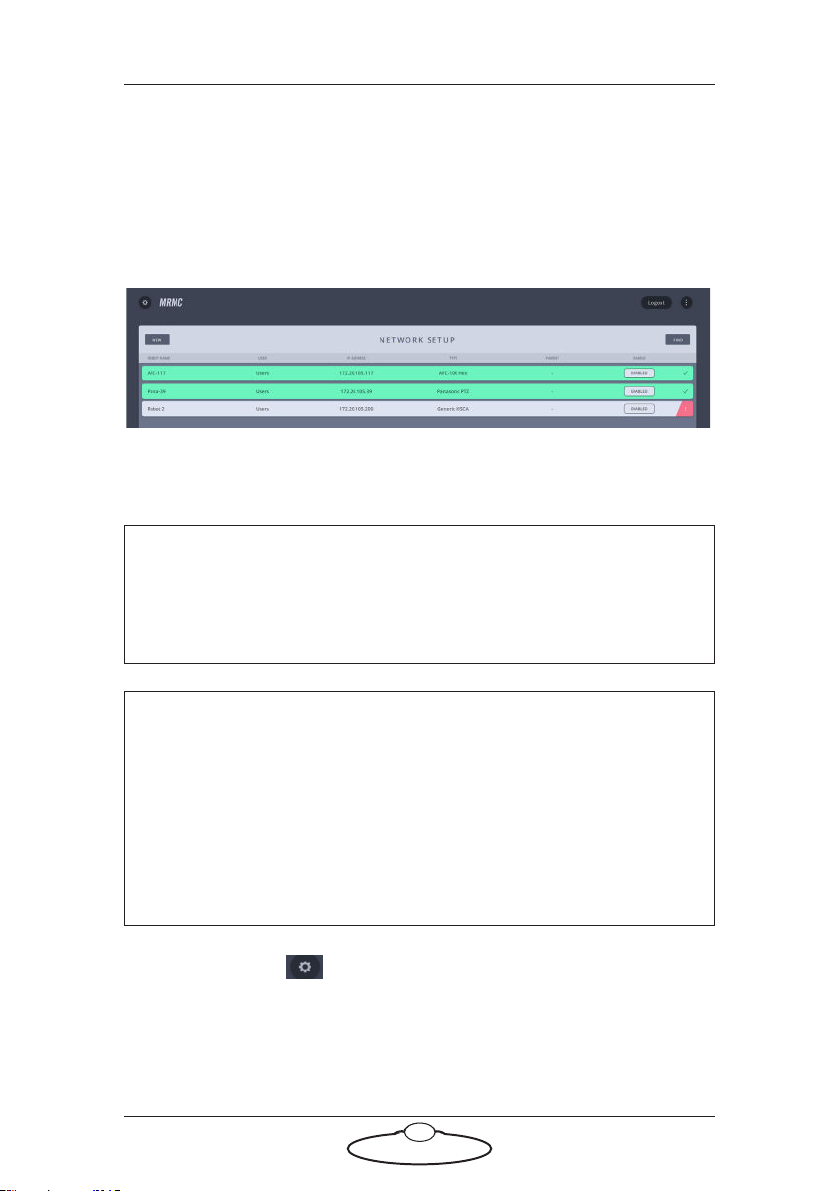
Setting up Polymotion Chat using Network
Setup and Chat wizard .................................................4
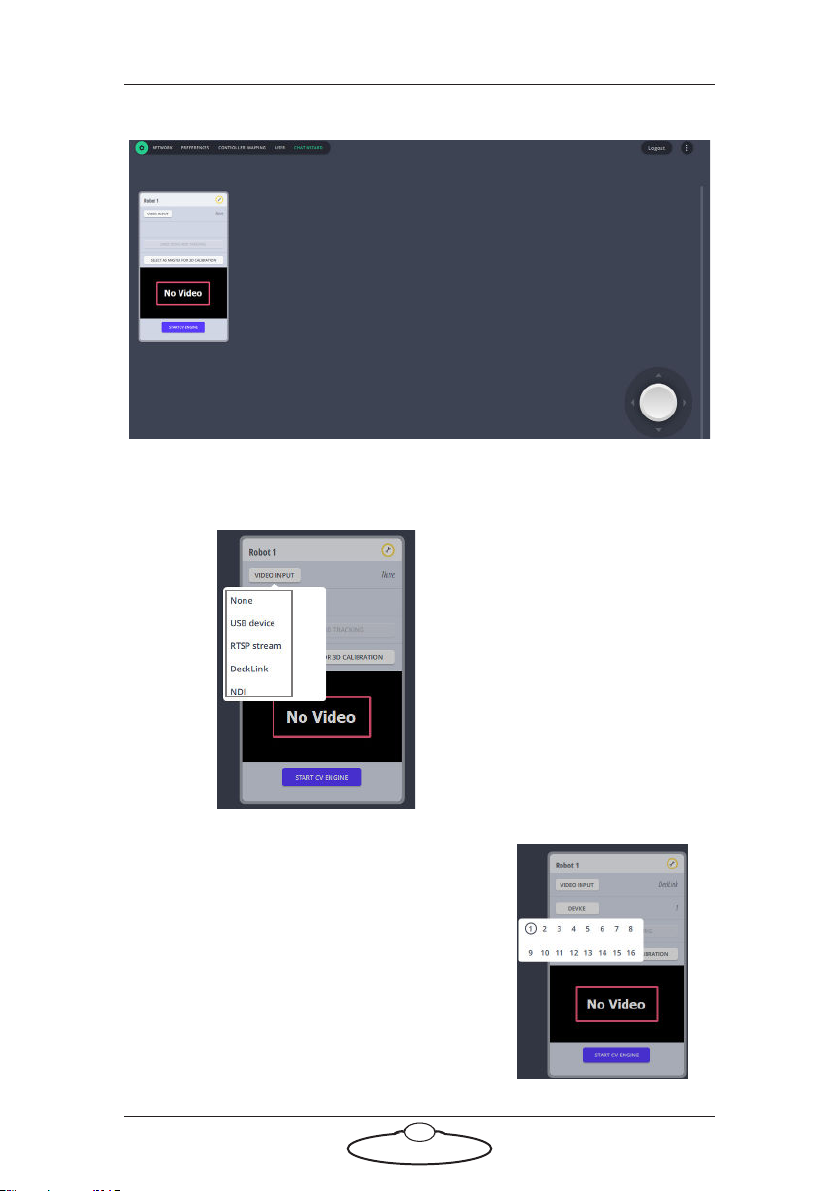
Setting up the robotic heads for Polymotion Chat ..........14
Polymotion Chat Main page...............................................15
Axes sliders and joystick controls.............................16
Tracking Sensitivity ....................................................17
Setting pan and tilt soft limits...................................18
Presets....................................................................................19
Preset Banks ................................................................19
Storing a non-tracking preset....................................20
Storing/editing a tracking preset ..............................20
Configuring a Preset...................................................22
Autoframing.......................................................23
Person to look for (Face Recognition)............25
Liveview graphics settings................................26
Starting Tracking ........................................................27
Altering Static Zones.........................................30
LiveView Controls ......................................................30
Deselect Person..................................................30
Edit Static Zone .................................................31
Follow Face.........................................................31
Live Capture .......................................................32
Synchronised Robots..................................................32
Fine adjustment of autoframing zoom position .....33
Motion Prediction ......................................................33
Stopping Tracking.......................................................34
Face Capture Page................................................................35
Multi-screen View................................................................39
Moves Page............................................................................40
Selecting a head...........................................................40
Presets...........................................................................41
Storing a position as a preset ...........................41
Activating a preset.............................................42