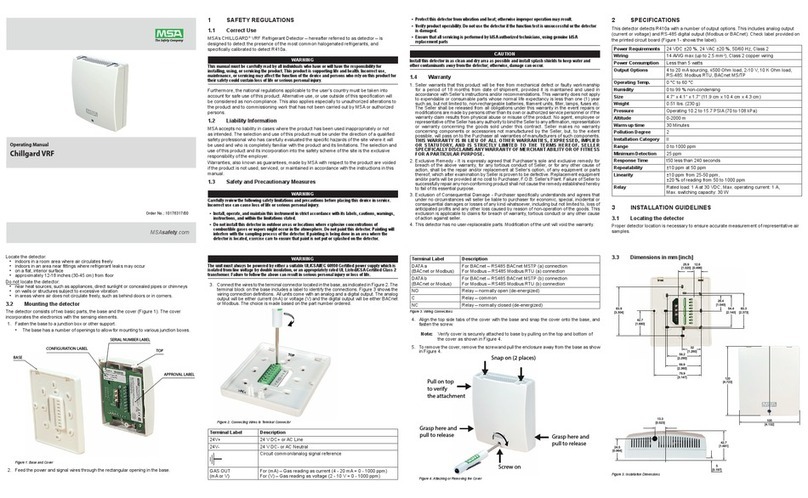
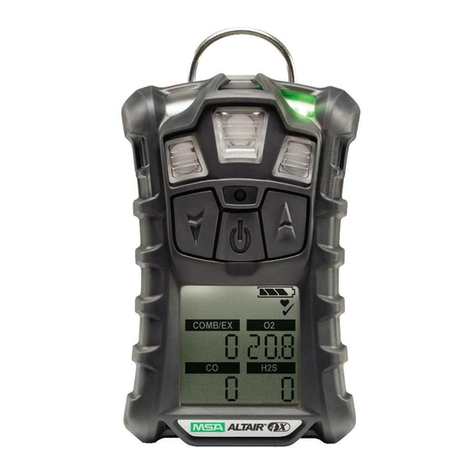
MSA Orion G User manual

Orion®G Multigas
and Leak Detector
Operating Manual
Detector de múltiples gases y
de fugas Orion®G
Manual de operaciones
Détecteur de
gaz et de fuites
Orion®G
Mode d’emploi
In North America, to contact your nearest stocking location, dial toll-free 1-800-MSA-2222. To contact
MSA International, dial 1-412-967-3354 or 1-800-MSA-7777.
© MINE SAFETY APPLIANCES COMPANY 2005 – All Rights Reserved
This manual is available on the internet at www.msanet.com
En América del Norte para comunicarse con el lugar de abastecimiento más cercano llame sin costo
alguno al 1-800-MSA-2222. Para comunicarse con MSA International, llame al 1-412-967-3354 ó al
1-800-MSA-7777.
© MINE SAFETY APPLIANCES COMPANY 2005 – Se reservan todos los derechos.
Este manual puede obtenerse en la internet en el sitio: www.msanet.com
Pour contacter le distributeur le plus proche en Amérique du Nord, appeler le numéro gratuit 1-800-
MSA-2222. Pour joindre MSA International, composer le 1-412-967-3354 ou le 1-800-MSA-7777.
© MINE SAFETY APPLIANCES COMPANY 2005 – Tous droits réservés.
Ce manuel est disponible sur l’internet à www.msanet.com
Manufactured by
Fabricado por
Fabriqué par
MSA INSTRUMENT DIVISION
P.O. Box 427, Pittsburgh, Pennsylvania 15230
USA, EE.UU., Etats-Unis
(L) Rev 210040520

Orion®G
Multigas and
Leak Detector
Operating Manual
In North America, to contact your nearest stocking location, dial toll-free 1-800-MSA-2222. To contact
MSA International, dial 1-412-967-3354 or 1-800-MSA-7777.
© MINE SAFETY APPLIANCES COMPANY 2005 - All Rights Reserved
This manual is available on the internet at www.msanet.com
Manufactured by
MSA INSTRUMENT DIVISION
P.O. Box 427, Pittsburgh, Pennsylvania 15230
(L) Rev 1 10040520

º
WARNING
THIS MANUAL MUST BE CAREFULLY READ BY ALL INDIVIDUALS WHO HAVE
OR WILL HAVE THE RESPONSIBILITY FOR USING OR SERVICING THE
PRODUCT. Like any piece of complex equipment, this instrument will perform as
designed only if it is used and serviced in accordance with the manufacturer’s
instructions. OTHERWISE IT COULD FAIL TO PERFORM AS DESIGNED AND
PERSONS WHO RELY ON THIS PRODUCT FOR THEIR SAFETY COULD
SUSTAIN SEVERE PERSONAL INJURY OR DEATH.
The warranties made by Mine Safety Appliances Company with respect to the product are voided if
the product is not used and serviced in accordance with the instructions in this manual. Please
protect yourself and others by following them. We encourage our customers to write or call
regarding this equipment prior to use or for any additional information relative to use or repairs.
º
CAUTION
For safety reasons, thisequipment must be operated by qualified personnel only. Read and
understand the instruction manual completely before operating.

Table of Contents
Chapter 1
Instrument Safety and Certifications . . . . . . . . . . 1-1
Safety Limitations and Precautions . . . . . . . . . . . . . . . . . . . . . 1-2
Date of Instrument Manufacture. . . . . . . . . . . . . . . . . . . . . . . . 1-4
Certifications. . . . . . . . . . . . . . . . . . . . . . . . . . . . . . . . . . . . . . . . 1-4
Chapter 2
Quick Start . . . . . . . . . . . . . . . . . . . . . . . . . . . . . . . . 2-1
Figure 2-1. Understanding the Display . . . . . . . . . . . . . 2-1
Turning ON the Orion G Multigas and Leak Detector . . . . . . 2-2
Figure 2-2. Flow Diagram . . . . . . . . . . . . . . . . . . . . . . . 2-2
Moving Through the Orion G Multigas and Leak Detector
Pages . . . . . . . . . . . . . . . . . . . . . . . . . . . . . . . . . . . . . . . . . . . . 2-3
Figure 2-3. Orion G Buttons . . . . . . . . . . . . . . . . . . . . . 2-3
Turning OFF the Orion G Multigas and Leak Detector. . . . . . 2-4
Chapter 3
Using the Orion G Multigas and Leak Detector . 3-1
Turning ON the Orion G Multigas and Leak Detector . . . . . . 3-1
Figure 3-1. Battery Pack Installation . . . . . . . . . . . . . . . 3-1
Figure 3-2. Battery and Heartbeat Indicators . . . . . . . . 3-3
Verifying Pump Operation. . . . . . . . . . . . . . . . . . . . . . . . . . . . . 3-5
Figure 3-3. Pump Alarm on the Display . . . . . . . . . . . . 3-6
Calibration Check (FIGURE 3-4) . . . . . . . . . . . . . . . . . . . . . . . 3-7
Figure 3-4. Orion G Detector with Calibration Tubing . 3-7
Measuring Gas Concentrations. . . . . . . . . . . . . . . . . . . . . . . . . 3-8
Figure 3-5. Instrument in LEL Alarm . . . . . . . . . . . . . . . 3-8
Figure 3-6. Instrument in Oxygen Alarm . . . . . . . . . . . . 3-9
Leak Detection Page (FIGURE 3-8). . . . . . . . . . . . . . . . . . . . 3-10
Figure 3-7. Instrument in Toxic Gas Alarm . . . . . . . . . 3-10
Figure 3-8. Flow Diagram . . . . . . . . . . . . . . . . . . . . . . 3-11
Operating Manual Table of Contents
TOC-1

Viewing Optional Displays (see FIGURE 3-8) . . . . . . . . . . . . 3-12
Figure 3-9. Instrument on Leak Page . . . . . . . . . . . . . 3-12
Figure 3-10. PEAK Readings on the Display . . . . . . . 3-13
Figure 3-11. MIN Reading on Display . . . . . . . . . . . . . 3-14
Figure 3-12. Exposure Page with STEL Alarm . . . . . . 3-14
Figure 3-13. Exposure Page with TWA Alarm . . . . . . 3-16
Figure 3-14. Time Display . . . . . . . . . . . . . . . . . . . . . . 3-17
Turning OFF the Orion G Multigas and Leak Detector. . . . . 3-18
Figure 3-15. Date Display . . . . . . . . . . . . . . . . . . . . . . . 3-18
Chapter 4
Setting up the Gas Utility Instrument . . . . . . . . . . 4-1
Power Systems . . . . . . . . . . . . . . . . . . . . . . . . . . . . . . . . . . . . . 4-1
Table 4-1. Approximate Battery Run Times (20oC) . . 4-1
Table 4-2. Capacity Reductions Expected for
Batteries at Colder Temperatures . . . . . . . . 4-1
To Charge the Battery Pack (A.C. Charger 10020551). . . . 4-2
Figure 4-1. Removing the Battery . . . . . . . . . . . . . . . . . 4-2
To Charge the Battery Pack (Vehicle Charger
10026502) . . . . . . . . . . . . . . . . . . . . . . . . . . . . . . . . . . . . . . 4-3
Table 4-3. Batteries Approved for use in the Orion
G Alkaline Battery Pack . . . . . . . . . . . . . . . . 4-4
To Replace the Batteries . . . . . . . . . . . . . . . . . . . . . . . . . . 4-4
Changing Instrument Settings . . . . . . . . . . . . . . . . . . . . . . . . . . 4-4
Table 4-4. Available Instrument Selections and
Methods for Changing Selections . . . . . . . . 4-5
To Change the Time of Day:. . . . . . . . . . . . . . . . . . . . . . . 4-5
To Change the Date: . . . . . . . . . . . . . . . . . . . . . . . . . . . . . 4-5
To Access the Instrument Set-up Mode:. . . . . . . . . . . . . . 4-6
Figure 4-2. Instrument Setup Mode . . . . . . . . . . . . . . . . 4-7
Figure 4-3. Instrument Setup Mode . . . . . . . . . . . . . . . . 4-8
In the Set-up Mode, the Following Options Appear: . . . . 4-9
Table of Contents Operating Manual
TOC-2

Chapter 5
Calibration. . . . . . . . . . . . . . . . . . . . . . . . . . . . . . . . . 5-1
Calibrating the Orion G Multigas and Leak Detector . . . . . . . 5-1
Table 5-1. Autocalibration and Required Calibration
Cylinders . . . . . . . . . . . . . . . . . . . . . . . . . . . . 5-1
Figure 5-1. Calibration Flow Chart . . . . . . . . . . . . . . . . 5-2
Figure 5-2. Zero Flag . . . . . . . . . . . . . . . . . . . . . . . . . . . 5-3
Figure 5-3. CAL Flag . . . . . . . . . . . . . . . . . . . . . . . . . . . 5-3
Autocalibration Failure . . . . . . . . . . . . . . . . . . . . . . . . . . . . 5-5
Accessing the Expanded Tolerance Calibration . . . . . . . 5-5
Figure 5-4. Typical Calibration Setup - . . . . . . . . . . . . . 5-5
Chapter 6
Warranty, Maintenance and Troubleshooting . . . 6-1
MSA Portable Instrument Warranty . . . . . . . . . . . . . . . . . . . . . 6-1
Cleaning and Periodic Checks . . . . . . . . . . . . . . . . . . . . . . . . . 6-2
Cleaning and Routine Care . . . . . . . . . . . . . . . . . . . . . . . . . . . 6-3
Checking The Probe Inlet Filter . . . . . . . . . . . . . . . . . . . . . . . . 6-3
Probe Dust Filters (see FIGURE 8-2 and TABLE 8-3) . . 6-3
Internal "Firewall" Filter (see FIGURES 8-1 and 8-2
and TABLE 8-2) . . . . . . . . . . . . . . . . . . . . . . . . . . . . . . . . . 6-3
Storage. . . . . . . . . . . . . . . . . . . . . . . . . . . . . . . . . . . . . . . . . . . . 6-4
Shipment . . . . . . . . . . . . . . . . . . . . . . . . . . . . . . . . . . . . . . . . . . 6-5
Troubleshooting . . . . . . . . . . . . . . . . . . . . . . . . . . . . . . . . . . . . . 6-5
Table 6-1. Troubleshooting Guidelines . . . . . . . . . . . . 6-6
Table 6-2. Error Codes . . . . . . . . . . . . . . . . . . . . . . . . 6-7
Repair Procedures. . . . . . . . . . . . . . . . . . . . . . . . . . . . . . . . . . . 6-7
Remove the Battery Pack . . . . . . . . . . . . . . . . . . . . . . . . . 6-7
Replace the Battery Pack . . . . . . . . . . . . . . . . . . . . . . . . . 6-8
Figure 6-1. Leak Sensor Replacement . . . . . . . . . . . . . 6-9
Operating Manual Table of Contents
TOC-3

Chapter 7
Performance Specifications . . . . . . . . . . . . . . . . . . . 7-1
Table 7-1. Certifications . . . . . . . . . . . . . . . . . . . . . . . . 7-1
Table 7-2. Instrument Specifications . . . . . . . . . . . . . . 7-2
Environment and Oxygen Sensor Readings . . . . . . . . . . 7-3
Table 7-3. COMBUSTIBLE GAS - Typical
Performance Specifications. . . . . . . . . . . . . . 7-3
Table 7-4. OXYGEN - Typical Performance
Specifications. . . . . . . . . . . . . . . . . . . . . . . . . 7-3
Pressure Changes . . . . . . . . . . . . . . . . . . . . . . . . . . . . . . . 7-4
Humidity Changes. . . . . . . . . . . . . . . . . . . . . . . . . . . . . . . . 7-4
Temperature Changes . . . . . . . . . . . . . . . . . . . . . . . . . . . . 7-4
Table 7-5. CARBON MONOXIDE (appropriate
models only) - Typical Performance
Specifications. . . . . . . . . . . . . . . . . . . . . . . . . 7-5
Table 7-6. CARBON MONOXIDE - Cross
Reference Factors for Orion G Calibration
Using Calibration Cylinder (P/N 813720)
or (P/N 10040791) . . . . . . . . . . . . . . . . . . . . 7-5
Table 7-7. HYDROGEN SULFIDE (appropriate
models only) - Typical Performance
Specifications. . . . . . . . . . . . . . . . . . . . . . . . . 7-6
Table 7-8. HYDROGEN SULFIDE - Cross
Reference Factors for Orion G Calibration
Using Calibration Cylinder (P/N 813720)
or (P/N 10040791) Set to 10 ppm H2S. . . . 7-6
Chapter 8
Replacement and Accessory Parts. . . . . . . . . . . . . 8-1
Table 8-1. Accessory Parts List. . . . . . . . . . . . . . . . . . 8-1
Table 8-2. Replacement Parts List . . . . . . . . . . . . . . . 8-2
Figure 8-1. Replacement Parts (see Table 8-2) . . . . . . 8-3
Figure 8-2. Replacement Parts (see Table 8-2) . . . . . . 8-4
Table 8-3. Leak Sensor Replacement Parts List . . . . 8-5
Figure 8-3. Leak Sensor Replacement Parts . . . . . . . . 8-5
Table of Contents Operating Manual
TOC-4

Chapter 1
Instrument Safety and
Certifications
The Orion®G Multigas and Leak Detector is for use by trained
and qualified personnel. It is designed to be used when
performing a hazard assessment to:
•Assess potential worker exposure to combustible and toxic
gases and vapors
•Determine the appropriate gas and vapor monitoring needed for
a workplace
•Determine the source of a gas leak.
The Orion G Multigas and Leak Detector can be equipped to
detect:
•Combustible gases and certain combustible vapors
•Oxygen-deficient or oxygen-rich atmospheres
•Specific toxic gases for which a sensor is installed.
º
WARNING
•Read and follow all instructions carefully.
•Check calibration before each day’s use and adjust if
necessary.
•Check calibration more frequently if exposed to silicone,
silicates, lead-containing compounds, hydrogen sulfide, or
high contaminant levels.
•Recheck calibration if unit is subjected to physical shock.
•Check pump for proper operation before each days use.
•Use only to detect gases/vapors for which a sensor is
installed.
•Do not use to detect combustible dusts or mists.
•Make sure adequate oxygen is present.
•Do not block sensors.
Operating Manual Chapter 1, Safety Limitations and Certifications
1-1

•Do not place end of sampling probe in liquids.
•Wait for accurate reading; response times vary, based on
gas/vapor and length of sampling line.
•Have a trained and qualified person interpret
instrument readings.
•Do not replace alkaline cells in a combustible atmosphere.
•Do not recharge NiMH battery packs in a combustible
atmosphere.
•Do not alter or modify instrument.
INCORRECT USE CAN CAUSE SERIOUS PERSONAL INJURY
OR DEATH.
Safety Limitations and Precautions
Carefully review the following safety limitations and precautions
before placing this instrument in service:
•The Orion G Multigas and Leak Detector is designed to:
•Detect gases and vapors in air only
•Detect only specified toxic gases for which a sensor
is installed.
•Perform the following checks before each day’s use to verify
proper instrument operation:
•Calibration check (see Calibration Check section). Adjust
calibration if the readings are not within the specified limits.
•Check pump for proper operation
(see "Verifying Pump Operation" section). Have pump
serviced if necessary.
•Check calibration more frequently if the unit is subjected to
physical shock or high levels of contaminants. Also, check
calibration more frequently if the tested atmosphere contains
the following materials, which may desensitize the combustible
gas sensor and reduce its readings:
•Organic silicones
•Silicates
•Lead-containing compounds
•Hydrogen sulfide exposures over 200 ppm or exposures
over 50 ppm for one minute.
Chapter 1, Safety Limitations and Certifications Operating Manual
1-2

•The minimum concentration of a combustible gas in air that can
ignite is defined as the Lower Explosive Limit (LEL). A
combustible gas reading of "100", or a %CH4reading within the
range of approximately 5% to 10% indicates that an explosion
hazard exists. Extreme caution must be exercised in this
situation.
•Do not use the Orion G Multigas and Leak Detector to test for
combustible or toxic gases in the following atmospheres as this
may result in erroneous readings:
•Oxygen-deficient or oxygen-rich atmospheres
•Reducing atmospheres
•Furnace stacks
•Inert environments
•Atmospheres containing combustible airborne mists
or dusts.
•Do not use the Orion G Multigas and Leak Detector to test for
combustible gases in atmospheres containing vapors from
liquids with a high flash point (above 100oF) as this may result
in erroneously low readings.
•Allow sufficient time for unit to display accurate reading.
Response times vary based on the type of sensor being utilized
(see "Performance Specifications" section of manual).
Additionally, allow a minimum of 0.7 seconds per foot of sample
line to allow the sample to be drawn through to the sensors.
•Keep the probe tip above liquid surfaces; otherwise, liquid may
enter the system and block the sample flow, causing inaccurate
readings and/or internal damage.
•All instrument readings and information must be interpreted by
someone trained and qualified in interpreting instrument
readings in relation to the specific environment, industrial
practice and exposure limitations.
•Replace alkaline cells or recharge NiMH battery-pack in
non-hazardous area only. Use only battery chargers listed in
this manual; other chargers may damage the battery pack and
the unit. Dispose of batteries in accordance with local health
and safety regulations.
•Do not alter this instrument or make any repairs beyond those
specified in this manual. Only MSA-authorized personnel may
repair this unit; otherwise, damage may result.
Operating Manual Chapter 1, Safety Limitations and Certifications
1-3


Date of Instrument Manufacture
The date of manufacture of your Orion G Multigas and Leak
Detector is coded into the instrument serial number.
•The last three digits represent the month (the letter)
and the year (the two-digit number).
•The letter corresponds to the month starting with
A for January, B for February, etc.
Certifications
Tests completed by MSA verify that the Orion G Multigas and
Leak Detector meets applicable industry and government
standards as of the date of manufacture.
Chapter 1, Safety Limitations and Certifications Operating Manual
1-4

Chapter 2
Quick Start
It is your responsibility to know how to use the Orion G Multigas
and Leak Detector. When used properly, the Orion G Detector
will alert you to the presence of combustible gases and vapors
and to atmospheres that are rich or deficient in oxygen. It will
also alert you to the presence of carbon monoxide and hydrogen
sulfide, if it is equipped with sensors for those gases. These
conditions are displayed clearly and simultaneously on the face of
the instrument. See FIGURE 2-1 for an explanation of the flags,
numbers and button operation of the Orion G Multigas and Leak
Detector.
Figure 2-1. Understanding the Display
Operating Manual Chapter 2, Quick Start
2-1

Turning ON the Orion G Multigas and
Leak Detector
To turn ON the Orion G Multigas and Leak Detector:
•Install the battery pack or
•If the battery pack is already installed, push the
ON-OFF/PAGE button.
Figure 2-2. Flow Diagram
Chapter 2, Quick Start Operating Manual
2-2

The instrument then performs a Self-test where the:
•display check occurs
(every segment on the display momentarily illuminates)
•audible alarm sounds
•alarm lights illuminate
•display backlight illuminates.
Once the Self-test is complete, the instrument enters the Measure
mode and is ready for use.
Moving Through the Orion G Multigas
and Leak Detector Pages
FIGURE 2-2 is a flow diagram showing the operation of the
instrument. Note that the STEL, TWA, TIME and DATE pages
will appear only if the Orion G Multigas and Leak Detector is
equipped with the optional datalogging package. To access
instrument features and informational pages:
•Push the ON-OFF/PAGE button (FIGURE 2-3).
The Pages appear in the following order:
•Leak Detector
Places the instrument in the Leak Detection mode
•Bar-hole Page
For timed sampling of bar-holes
•Peak
Shows peak value recorded since last instrument turn-ON
•Min
Shows minimum value recorded since last instrument turn-ON
for the oxygen sensor only
•STEL (Datalogging instrument only)
Shows Short Term Exposure Limit for installed toxic gas sensors
Figure 2-3. Orion G Buttons
Operating Manual Chapter 2, Quick Start
2-3

•TWA (Datalogging instrument only)
Shows Time Weighted Average for installed toxic gas sensors
•Time (Datalogging instrument only)
Shows time of day in a 24-hour format
•Date (Datalogging instrument only)
Shows current date in a Month/Day/Year format.
To return instrument to the Measure page:
•Push the ON-OFF/PAGE button again
•The instrument will automatically return to the Measure page
after a delay of 30 seconds on any page (except the Leak
Detection page and the Bar-hole page).
Turning OFF the Orion G Multigas and
Leak Detector
To turn OFF the Orion G Multigas and Leak Detector:
•Push and hold the ON-OFF/PAGE button for five seconds.
•Hourglass displays to indicate instrument turn-OFF
•The instrument returns to the Measure page.
Chapter 2, Quick Start Operating Manual
2-4

When Self-test ends:
•Instrument enters the Measure mode
•Gas concentrations appear on the display (unless the
instrument is set up to come ON in "ticker mode").
"WARNING
Acalibrationcheckmustbeperformedafterswitchingbattery
packs to assure accuracy of readings. Failure to perform
a calibration can result in serious personal injury or death.
Fresh Air Set Up Option
(for automatic zero adjustment of the Orion G Multigas and Leak
Detector sensors)
NOTE: The Fresh Air Setup (FAS) has limits. If a hazardous
level of gas is present, the Orion G Multigas and
Leak Detector ignores the FAS command and goes
into alarm.
"WARNING
Do not activate the Fresh Air Setup unless you are certain
you are in fresh, uncontaminated air; otherwise, inaccurate
readings can occur which can falsely indicate that a
hazardous atmosphere is safe. If you have any doubts as
to the quality of the surrounding air, do not use the Fresh
Air Setup feature. Do not use the Fresh Air Setup as a
substitute for daily calibration checks. The calibration check
is required to verify span accuracy. Failure to follow this
warning can result in serious personal injury or death.
Persons responsible for the use of the Orion G Multigas and
Leak Detector must determine whether or not the Fresh Air Setup
option should be used. The user’s abilities, training and normal
work practices must be considered when making this decision.
1. Turn ON the Orion G Multigas and Leak Detector.
•Once the instrument self check is complete, the ZERO
flag flashes for 10 seconds.
2. To perform a Fresh Air Setup (FAS), push the ON/OFF-PAGE
button while the Zero flag is flashing.
Chapter 3, Using the Orion G Gas Utility Instrument Operating Manual
3-2

•FAS will not be available if the instrument is set up to
power ON with the LEAK sensor turned ON.
3. To immediately skip the FAS, push the CHANGE/
RESET button.
•If no buttons are
pushed, the FAS
automatically stops
flashing after the 10
seconds have expired.
Heartbeat Indicator
(see FIGURE 3-2)
•The Heartbeat Indicator
flashes once every 30
seconds to notify the user the
instrument is ON and
operating.
Battery Life Indicator
(see FIGURE 3-2)
•The battery condition icon
continuously displays in the upper portion of the screen,
regardless of the selected page.
•As the battery charge dissipates, segments of the battery icon
go blank until only the outline of the battery icon remains.
Battery Warning
•A Battery Warning indicates that a nominal 20 minutes of
operation remain before instrument batteries are
completely depleted.
NOTE: Duration of remaining instrument operation during
Battery Warning depends on:
•Ambient temperatures
(The battery warning is likely to be shorter in
colder temperatures, particularly with
alkaline batteries)
•Whether the battery warning is reset (it comes ON
again every five minutes).
Figure 3-2. Battery and Heartbeat
Indicators
Operating Manual Chapter 3, Using the Orion G Gas Utility Instrument
3-3

Chapter 3
Using the Orion G Multigas and
Leak Detector
Turning ON the Orion G Multigas and
Leak Detector
Installing the Battery Pack (FIGURE 3-1)
1. Slide battery pack toward the top of the instrument.
2. Swing battery pack up and into the body of the instrument.
3. Secure battery pack by installing the two screws in the bottom
two corners of the battery pack and instrument. The screws
must be snug to ensure that the battery pack properly seals
to the instrument. Do not over-tighten.
4. Once battery pack is installed, the Orion G Multigas and Leak
Detector will turn ON.
The instrument now performs the following Self-test where the:
•Display check occurs
(every segment on the display momentarily illuminates)
•Audible alarm sounds
•Alarm lights illuminate
•Display backlight illuminates
•Internal instrument diagnostic occurs
(any detected internal errors appear on the display).
Figure 3-1. Battery Pack Installation
Operating Manual Chapter 3, Using the Orion G Gas Utility Instrument
3-1

•When the Orion G Multigas and Leak Detector goes into Battery
Warning:
•Battery Life indicator flashes
•Alarm sounds
•Alarm lights flash.
•To silence the Battery Warning, push the CHANGE/RESET
button.
•Once the battery warning has been silenced, the alarm will
re-activate in approximately five minutes.
•The Orion G Multigas and Leak Detector continues to operate
until the instrument is turned OFF or battery shutdown occurs.
Battery Shutdown
When the batteries can no longer operate the instrument, the
instrument goes into Battery Shutdown mode:
•Battery Indicator remains ON
•Alarm sounds continuously
•Alarm lights flash
•No other pages can be viewed
•After approximately five minutes, the instrument automatically
turns OFF.
"WARNING
When Battery Shutdown condition sounds, stop using the
instrument; it can no longer alert you of potential hazards
since it does not have enough power to operate properly.
You must:
1. Leave the area immediately.
2. Turn OFF the instrument if it is ON.
3. Report to the person responsible for maintenance.
4. Replace or recharge the battery pack.
Failure to follow this procedure, could result in serious
personal injury or death.
For Alkaline Battery packs, replace batteries when the
"Battery Low" or "Battery Shutdown" alarms occur. When
replacing alkaline batteries, replace ALL batteries with fresh
Chapter 3, Using the Orion G Gas Utility Instrument Operating Manual
3-4

ones at the same time. Do not mix new and
partially-discharged batteries. If the batteries are improperly
replaced or improperly mixed, the "Battery Low" and "Battery
Shutdown" alarms may fail to function, which could result
in serious personal injury or death.
Do not use rechargeable batteries in Alkaline Battery Packs.
The Alkaline battery warning and alarm setpoints are not
optimized for rechargeable batteries. The low battery warning
and alarm could occur too quickly to be noticed. Using
rechargeable batteries in the Alkaline battery packcould result
in serious personal injury or death.
NOTE: The instrument recognizes the type of installed battery
pack (rechargeable NiMH or alkaline) and
automatically adjusts the low battery warning and
alarm setpoints.
"CAUTION
During "Battery Low" condition, prepare to exit the work area
since the instrument could go into "Battery Shutdown" at any
time, resulting in loss of sensor function. Depending on the
age of the batteries, ambient temperature and other conditions,
the instrument "Battery Low" and "Battery Shutdown" times
could be shorter than anticipated.
"WARNING
Recharge or replace the batteries when the "Battery Low" or
"Battery Shutdown" conditions occur.
Do not reuse a NiMH battery without recharging, even if
the battery regains some charge after a period of non-use.
Verifying Pump Operation
1. Turn ON the Orion G Multigas and Leak Detector.
•The pump motor starts fast and then slows down as the
instrument adjusts the power to run the pump.
•The pump indicator will flash until the proper flow rate
is obtained.
Operating Manual Chapter 3, Using the Orion G Gas Utility Instrument
3-5
Table of contents
Languages:
Other MSA Security Sensor manuals

MSA
MSA FlameGard 5 UV/IR Use and care manual

MSA
MSA ALTAIR 5X User manual

MSA
MSA OptiVizor User manual

MSA
MSA 10102693 Operation instructions

MSA
MSA 3S small User manual

MSA
MSA ALTAIR CO User manual

MSA
MSA Ultra Elite-PF User manual

MSA
MSA ALTAIR 4XR User manual

MSA
MSA FireHawk M7 User manual

MSA
MSA FL500 UV/IR User manual
Popular Security Sensor manuals by other brands

General Monitors
General Monitors IR5500 instruction manual

diagral
diagral DV260 manual

Aeotec
Aeotec ZWA039 quick start guide

OPTEX FA
OPTEX FA V Series instruction manual

United Technologies
United Technologies Edwards Signature SIGA-OSHD Installation sheet

PCB Piezotronics
PCB Piezotronics 117B221 Installation and operating manual