MSI PRO MP2412 User manual

PRO Series
LCD Monitor
PRO MP2412 (3BA9)
User Guide

2Contents
Contents
Getting Started.............................................................................................................. 3
Package Contents................................................................................................... 3
Installing the Monitor Stand................................................................................... 4
Adjusting the Monitor ............................................................................................. 5
Monitor Overview.................................................................................................... 6
Connecting the Monitor to PC ................................................................................ 8
OSD Setup ..................................................................................................................... 9
OSD Keys ................................................................................................................ 9
OSD Menus.................................................................................................................. 11
Professional.......................................................................................................... 11
Image .................................................................................................................... 13
Input Source ......................................................................................................... 14
Navi Key ................................................................................................................ 14
Setting................................................................................................................... 15
Specifications.............................................................................................................. 16
Preset Display Modes ................................................................................................ 18
Troubleshooting.......................................................................................................... 19
Safety Instructions...................................................................................................... 20
TÜV Rheinland Certification....................................................................................... 22
Regulatory Notices..................................................................................................... 23
Revision
V1.0, 2023/06

3
Getting Started
Getting Started
This chapter provides you with the information on hardware setup procedures. While
connecting devices, be careful in holding the devices and use a grounded wrist strap
to avoid static electricity.
Package Contents
Monitor PRO MP2412
Documentation Quick Start Guide
Accessories Stand
Stand Base
External Power Supply
Power Cord
Cables High Speed HDMI™ Cable (Optional)
⚠
Important
∙
Contact your place of purchase or local distributor if any of the items is damaged or
missing.
∙
Package contents may vary by country.
∙
The included power cord is exclusively for this monitor and should not be used with
other products.

4Getting Started
Installing the Monitor Stand
1. Leave the monitor in its protective foam packaging. Align and gently push the stand
bracket towards the monitor groove until it locks in place.
2. Align and gently push the cable organizer towards the stand until it locks in place.
3. Align and gently push the base towards the stand until it locks in place.
4. Make sure the stand assembly is properly installed before setting the monitor
upright.
1
2
3
⚠
Important
∙
Place the monitor on a soft, protected surface to avoid scratching the display panel.
∙
Do not use any sharp objects on the panel.
∙
This product comes with NO protective film to be removed by the user! Any
mechanical damages to the product including removal of the polarizing film may
affect the warranty!

5
Getting Started
Adjusting the Monitor
This monitor is designed to maximize your viewing comfort with its adjustment
capabilities.
⚠
Important
Avoid touching the display panel when adjusting the monitor.
-5°
20°

6Getting Started
Monitor Overview
5 6 7
1
23
4
1OSD Keys
2Power Button
3Cable Organizer
4Kensington Lock
5Power Jack

7
Getting Started
6DisplayPort
Supports 1920x1080@100Hz as specified in DisplayPort 1.2a.
7HDMI™ Connector
Supports 1920x1080@100Hz as specified in HDMI™ 1.4b.

8Getting Started
Connecting the Monitor to PC
1. Turn off your computer.
2. Connect the video cable from the monitor to your computer.
3. Assemble the external power supply & power cord. (Figure A)
4. Connect the external power supply to the monitor power jack. (Figure B)
5. Plug the power cord into the electrical outlet. (Figure C)
6. Turn on the monitor. (Figure D)
7. Power on the computer and the monitor will auto detect the signal source.
A
B
C
D
9
OSD Setup
OSD Setup
This chapter provides you with essential information on OSD Setup.
⚠
Important
All information is subject to change without prior notice.
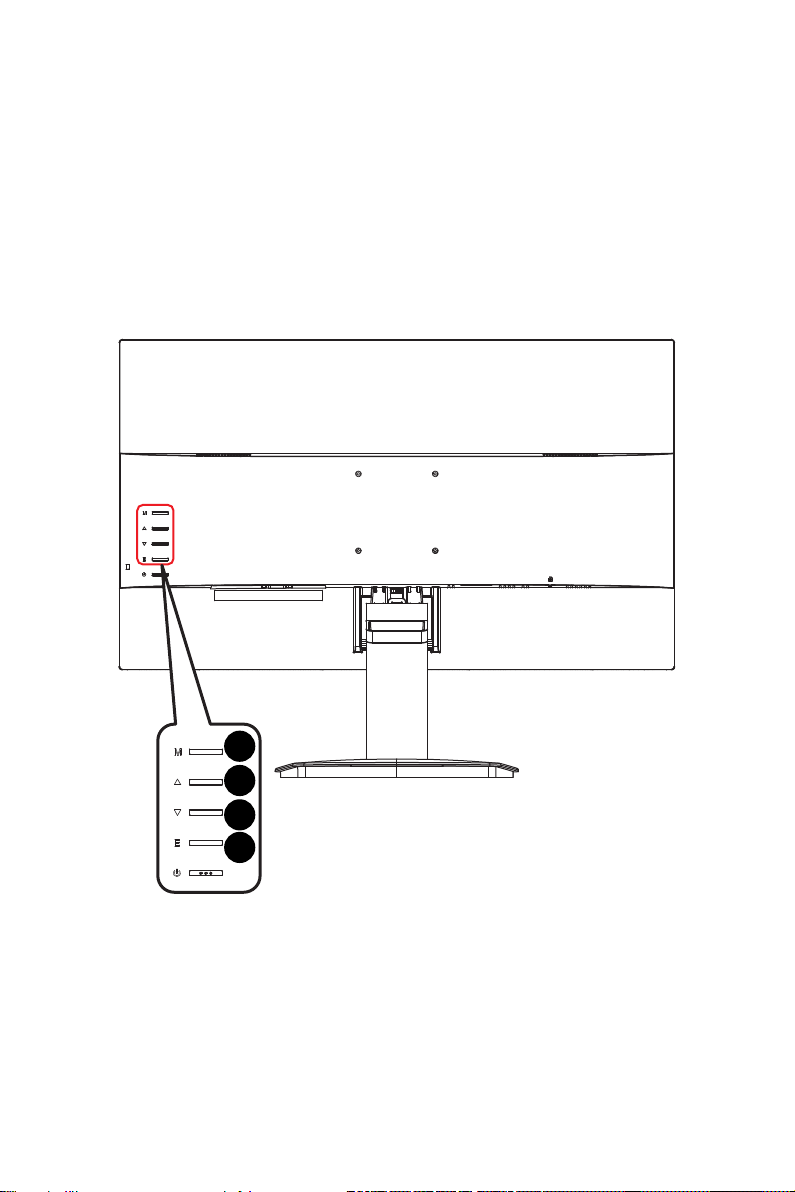
OSD Keys
The monitor comes with a set of OSD Keys that help to control the On-Screen Display
(OSD) menu.
1
2
3
4

10 OSD Setup
OSD Keys Hot Key (When OSD is OFF) OSD Setup (When OSD is ON)
1
M
∙Activating the OSD Main Menu ∙Returning to the previous
menu
∙Exiting from the OSD Main
Menu
2
∙Used as the designated
shortcut hotkey
∙Used as the Up/Right button
to select function menus and
items
∙Allowing upward adjustment in
function values
3∙Used as the Down/Left button
to select function menus and
items
∙Allowing downward
adjustment in function values
4
E
∙Activating the auto
adjustment function that
automatically sets the
horizontal/vertical position,
clock and focus
∙Used as the Enter button to
enter function items
∙Confirming the selection
This manual suits for next models
2
Table of contents
Other MSI Monitor manuals


MSI
MSI Optix Series User manual

MSI
MSI Optix MAG274R User manual

MSI
MSI Optix Series User manual

MSI
MSI PRO Series User manual

MSI
MSI Optix Series User manual

MSI
MSI Optix Series User manual

MSI
MSI Optix MAG321CQR User manual

MSI
MSI Optix Series User manual

MSI
MSI Modern Series User manual

MSI
MSI MD271CPWDE 3PA6 User manual


