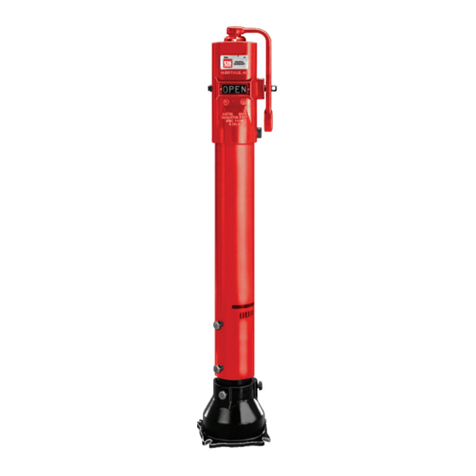
Mueller U-20808 Service manual

InstallatIon InstructIons manual
Customer Service Center
Decatur, Illinois
800.871.2194
www.uspvh.com
Reliable Connections
TM
U-20808
U-20809
Non-Adjustable
Vertical
Indicator
Posts
TABLE OF CONTENTS PAGE
General Information 2
Technical Data 3
Dimensions 4
Installation 5-6
Parts 7
Maintenance 8
WARNING:
1. Read and follow instructions carefully. Proper training and periodic
review regarding the use of this equipment is essential to prevent possible
serious injury and/or property damage. The instructions contained herein
were developed for using this equipment on ttings manufactured by
Mueller Co., LLC only, and may not be applicable for any other use.
2. DO NOT exceed the pressure ratings of any components or equipment.
Exceeding the rated pressure may result in serious injury and/or property
damage.
3. Safety goggles and other appropriate protective gear should be used.
Failure to do so could result in serious injury.
!

U-20808/U-20809 Non-Adjustable Vertical Indicator Posts
General Information
2 3
Approvals and Standards
Model U-20808/U-20809 Indicator
Posts are listed by Underwriters
Laboratories Inc. (UL). Model
U-20808 Indicator Posts are
approved by Factory Mutual
Research Corporation.
WARNING: The Model
U-20808/U-20809 Indicator Posts
described herein must be installed
and maintained in compliance
with this document, as well as
with the applicable standards
of the National Fire Protection
Association, in addition to the
standards of any other authorities
having jurisdiction. Failure to do
so may impair the integrity of
these devices.
The owner is responsible for
maintaining their re protection
system and devices in proper
operating condition. The installing
contractor or manufacturer should
be contacted relative to any
questions.
Removing or disabling the tamper
resistant feature of the special key
wrench screw (used to secure the
cover of the Supervisory Control
Valve Switch) will void its listings
and approval.
Vertical Indicator Posts are designed
to operate non-rising stem (inside
screw) gate valves, which are
used to control an underground
water supply to automatic sprinkler,
water spray deluge, foam-water
deluge, or standpipe re protection
systems. They permit operation of
underground valves while providing
an above ground visual indication
as to whether the valves are open
or shut, in addition to a means for
locking the valves in a particular
position. Indicator posts provide for
valve operation from outside of the
protected property and, therefore, the
opportunity for more prompt valve
operation in an emergency situation.
U-20808 Indicator Posts will
accommodate 4” – 14” post indicator
valves (PIV) requiring 14 to 43
turns to open and that are listed or
approved for re protection system
service. The U-20809 Indicator Post
will accommodate 16” – 24” post
indicator valves requiring 49 to 75
turns to open.
Indicator Posts are provided
“Standard Order” for use with left
hand opening valves; however,
they may be “Special Ordered” for
use with right hand opening valves
or converted in the eld for use
with a right hand opening valve by
changing the left hand opening Post
Head to a right hand opening Post
Head.
Indicator Posts accept direct
attachment of a 1/2” NPT mounting
electric supervisory switching device
which can be used by proprietary
and central stations to monitor the
open position of the Indicator Post.
Detailed information on attaching
a UL/FM approved Supervisory
Control Valve Switch (supplied by
customer) is given in the Technical
Data section.
overview
TYPICAL INSTALLATION OF:
U-20808: 4” - 14” Post Indicator Valves
U-20809: 16” - 24” Post Indicator Valves
Padlock
!
UL/FM
Approved
Supervisory
Control
Valve
Switch
(supplied by
customer)

2
U-20808/U-20809 Non-Adjustable Vertical Indicator Posts
Technical Data
3
The U-20808/U-20809 Indicator
Post bolts directly onto the stufng
box ange of 4” – 24” post indicator
valves (PIV) employing 2” operating
nuts. The Bell attaches to a PIV
mounting ange having four bolt
holes spaced at 90° on a 101/2”
diameter bolt circle. The Bell has 3/4”
clearance holes for the mounting
bolts.
The U-20808 Indicator Post has a
Threaded Sleeve which can readily
accommodate eld positioning of the
“OPEN” and “SHUT” Targets for 4” –
14” PIVs requiring 14 to 43 turns to
open. The U-20809 has a Threaded
Sleeve for 16” – 24” PIVs requiring
49 to 75 turns to open.
The U-20808/U-20809 Indicator Post
is available in three different “Order
Lengths.” Each “Order Length”
provides for adjustment of dimension
“D” (see tables on page 4). The
Stem requires no eld cutting within
the indicated adjustment range of
each “Order Length.”
indicator Posts
Nominal trench depths can be
accommodated by each “Order
Length,” for the 4” – 24” USPVH
Resilient Wedge PIVs based on the
typical diameter of underground
pipe. For PIVs with different ‘B’
dimensions, the minimum and
maximum trench depths which will
be accommodated by each “Order
Length” can also be calculated (see
tables on page 4).
“Standard Order” Posts are factory
set with the “OPEN” and “SHUT”
Targets positioned for use with left
hand (counter-clockwise) opening
valves. An arrow on the Post Head
indicates the left hand direction
of opening. The position of the
Targets may be reversed in the eld,
in order to accommodate a right
hand opening valve, provided that
the Post Head is changed to one
indicating right hand opening.
The Post Head is ASTM A126
Class B gray iron. The Cap is
polypropylene. The Bell, Operating
Nut, and U-20808 Operating Wrench
is ASTM A536 ductile iron. The
U-20809 Operating wrench is ASTM
A36 Hot Rolled Steel. The Windows
are made from polycarbonate. The
Barrel is schedule 40 steel pipe. The
Upper Stem, Lower Stem, Coupling,
and Coupling Insert are carbon
steel. The Targets and Sleeves are
Nylon. The Post Head, Upper Barrel,
and Wrench are painted red.

U-20808/U-20809 Non-Adjustable Vertical Indicator Posts
Dimensions and Trench Depths
4 5
VALVE TURNS
SIZE B C* TO OPEN
4” 10.95” 2.40” 14
6” 14.91” 3.45” 201/2
8” 18.02” 4.53” 261/2
10” 21.62” 5.55” 33
12” 24.52” 6.60” 381/2
14” 29.13” 7.65” 431/2
16” 32.35” 8.70” 49
18” 38.35” 9.75” 57
20” 41.48” 10.80” 63
24” 47.94” 12.90” 75
dimensions B & c
*C – 1/2 of Pipe Outside diameter (typical for
underground pipe)
SIZE No. D
0 2”
1 8”
2 14”
dimensions d
nominal trench dePths
For USPVH IBBM Double Disc and
Resilient Wedge Post Indicator
Valves
VALVE SIZE NUMBER
SIZE 0 1 2
4” 1’
-
3” 1’
-
9” 2’
-
3”
6” 1’
-
8” 2’
-
2” 2’
-
8”
8” 2’
-
1” 2’
-
7” 3’
-
1”
10” 2’
-
5” 3’
-
11” 4’
-
5”
12” 2’
-
9” 3’
-
3” 3’
-
9”
14” 3’
-
3” 3’
-
9” 4’
-
3”
16” 3’
-
7” 4’
-
1” 4’
-
7”
18” 4’
-
2” 4’
-
8” 5’
-
2”
20” 4’
-
6” 5’
-
0” 5’
-
6”
24” 5’
-
3” 5’
-
9” 6’
-
3”
TD
(Trench
Depth)
363/4”
(933.5mm)
30”
(762mm)
WINDOW CENTER LINE
D
C
(1/2Pipe
Outside
Diameter)
B
PIV
FINISHED
GRADE
POST HEAD
BARREL

U-20808/U-20809 Non-Adjustable Vertical Indicator Posts
Installation
5
installation instructions
Post Targets must be positioned for
use with the appropriate number
of turns to open the post indicator
valve. Improper positioning of the
Targets can result in an erroneous
indication of the open or shut
position of the valve. The U-20808
Indicator Post will accommodate
positioning of the Targets to operate
PIVs requiring 14 to 43 turns to
open; the U-20809 Indicator Post
will accommodate positioning the
Targets to operate PIVs requiring 49
to 75 turns to open.
NOTE: The Targets for the
U-20808 Indicator Post have
been factory set for use with a 6”
USPVH PIV and the Targets for the
U-20809 Indicator Post have been
factory set for a 24” USPVH PIV.
Consequently, Steps 6 –10 need
not be performed when installing
the U-20808 Post with a 6” USPVH
PIV (or with a PIV that requires
201/2turns to open) or the U-20809
Post with a 24” USPVH PIV (or
with a PIV that requires 75 turns
to open).
Installing the Post
1. Completely close the PIV.
2. Place approximately 5” high
blocks onto the stufng box ange of
the installed valve. Set the Indicator
Post onto the blocks and generally
centered over the PIV operating nut.
3. Slide out the Shipping Disk, and
allow the Coupling to drop down
over the PIV operating nut. Attach
the Coupling to the operating nut
with the Cotter Pin.
4. Remove the blocks and lower the
Indicator Post onto the PIV stufng
box ange. Bolt the Bell and stufng
box ange together using the four
Cap Screws and Nuts.
NOTE: If the pipe is sloped, it may
be necessary to shim some of the
Cap Screws with steel washers,
so that the Post will be plumb and
the Stem will run true with the
center of the Post Head. Coupling
clearances can accommodate a
maximum pipe slope of 5 degrees.
It is recommended that a spirit
level be used to set the vertical
alignment of the Indicator Post.
5. Loosen the Set Screw, and lift the
Post Head/Upper Stem Assembly
just high enough to insert a Phillips
head screwdriver through Hole “A”
in the Upper Stem. The Phillips head
screwdriver will temporarily hold the
Post Head above the upper Barrel.
6. Remove the Wrench, pry off the
Cap, remove the Retaining Ring,
and then lift the Post Head clear of
the Upper Stem Assembly.
7. Position the Targets (see below).
8. Replace the Post Head, Washer,
Retaining Ring, and Cap.
9. Remove the Phillips head
screwdriver, lower the Post Head,
and tighten the Set Screw.
OPEN TARGET:
Top surface of threaded
ange aligned with
USPVH Valve size mark
(10” Valve shown) OR
set to Dimension “X”
(see note 2).
SHUT TARGET:
Top surface of
threaded ange
aligned with
CT (center top)
mark OR bottom
surface aligned
with CB (center
bottom) mark
(see note 1).
X
OPEN TARGET:
Top surface of
threaded ange
aligned with USPVH
Valve size mark (10”
Valve shown) OR set
to Dimension “X”
(see note 2).
SHUT TARGET:
Top surface of
threaded ange
aligned with CT
(center top) mark
OR bottom surface
aligned with CB
(center bottom)
mark (see note 1).
X
FOR
LEFT
HAND
OPENING
VALVES
FOR
RIGHT
HAND
OPENING
VALVES
NOTES:
U-20808 INDICATOR POST
calculated as
follows: NO. OF TURNS TO OPEN VALVE
U-20809 INDICATOR POST
X
follows: NO. OF TURNS TO OPEN VALVE

U-20808/U-20809 Non-Adjustable Vertical Indicator Posts
Installation
6
10. Using the Wrench, open and
close the valve and check to see
that the “SHUT” and “OPEN” Targets
are clearly in view in the Windows,
at their respective positions, and
that there is no feeling of binding
of the Upper or Lower Stem
Assemblies. It is recommended
that the turns to open/close be
counted and compared to the valve
manufacturer’s specication, in order
to verify full valve opening.
NOTES: If there is any indication
of binding of the internal operating
parts, the vertical alignment of the
Indicator Post must be corrected.
If the Target Plates are not properly
in view, completely close the PIV
and then repeat Steps 5 – 10.
11. Back ll to nal grade and repeat
Step 11.
12. Tighten the switch mounting hole
plug if the Supervisory Control Valve
Switch is not to be immediately
attached.
13. Install the Supervisory Control
Valve Switch (supplied by customer)
a) Remove the Cover from the
assembly, and then loosen the
Trip Rod Locking Screw. Adjust
the position of the Trip Rod so
that it extends about 13/8” beyond
the Nipple, and then securely
tighten the Trip Rod Locking
Screw.
b) Rotate the Post Operating Nut
until the PIV is fully open. Note
the position of one of the “OPEN”
Targets in its Window.
c) Rotate the Operating Stem until
the “OPEN” Targets are out of the
Post Windows. Note the direction
in which the “OPEN” Target will
move when it is returned to the
Post Window.
d) Remove the Nipple from the
assembly, and then with the
Locknut screwed over the Nipple
threads, hand tighten the Nipple
into the 1/2” NPT hole provided in
the Post Head, and then tighten
the Locknut against the Post
Head to secure the Nipple rmly
in place.
e) Refer to “Attachment of
Supervisory Control Valve Switch”
(right) as appropriate, and note
the direction in which the Trip Rod
must move when the “OPEN”
Target is returned to the Post
Window.
Slide the Switch Assembly as far
as possible onto the Nipple while
maintaining proper orientation of
the assembly, and then tighten
the Set Screw that holds the
assembly onto the Nipple.
f) Attach leads from an electrical
continuity meter to the
appropriate terminals.
g) Return the valve to its fully open
position. Verify that the “OPEN”
Target returns to the position
noted in Step b. Also, verify that
the Switch contacts change
position within two turns of the
valve being fully open.
h) Begin to return the valve to its
closed position. Verify that the
Switch contacts change back to
their original position within two
turns from full open.
NOTE: If the Upper Stem
Assembly binds before the
“OPEN” Target reaches its
full open position, or the
switch contacts do not change
position as described in Steps
g and h, then the Targets must
be readjusted.
If the Targets require
readjustment, close the PIV,
remove the Switch assembly,
and repeat Steps 5 – 10;
however, when positioning the
Targets, rotate both Targets at
the same time as necessary so
that the “OPEN” target will trip
the Actuator Rod of the Switch.
Repositioning of the “OPEN”
and “SHUT” Targets relative
to each other should not be
necessary. Repeat Steps b – h.
Left-Hand Opening Valves
Left-Hand
Opening Valve is
Shut by Turning
Wrench to the
Right (Clockwise)
Right-Hand Opening Valves
Right-Hand
Opening Valve is
Shut by Turning
Wrench to the Left
(Counter-clockwise)
i) Remove the electrical continuity
test leads. The external eld
wiring connections can now be
made to the Switch.
NOTE: Use of a weathertight
conduit connector with a
gasket seal is recommended.

HOLE
“A”
USED TO
SECURE
COUPLING
TO PIV
OPERATING
NUT
7
U-20808/U-20809 Non-Adjustable Vertical Indicator Posts
Parts
1.
O.L. Post Head (U-20808).......
148692
O.R. Post Head (U-20808) ......
148649
O.L. Post Head (U-20809).......
241029
O.R. Post Head (U-20809) ......
241030
2. Barrel
“0” ..........................................241272
“1” ..........................................241273
“2” ..........................................241274
3. Bell ........................................290636
5. Lower Stem Assembly ..........287085
9. Hex Socket Set Screw,
3/4- 10 UNC x 1”....................198428
10. Pipe Plug 1/2” NPT...............198582
11. Window................................148790
12. Wrench
(U-20808)........... ............ 148690-1
(U-20809)........... ................241013
13. Upper Stem Assembly
“0” (U-20808)......................287080
“1” (U-20808)......................287081
“2” (U-20808)......................287082
“0” (U-20809)......................287646
“1” (U-20809)......................287647
“2” (U-20809)......................287648
18. Weather Cap.......................290143
19. Retaining Ring ....................290157
20. OPEN Target
(U-20808) ...........................290144
(U-20809) ...........................290552
21. SHUT Target
(U-20808) ...........................290145
(U-20809) ...........................290553
22. Hex Bolt
(U-20808) ...........................290191
(U-20809) ...........................290631
23. Hex Nut ...............................190939
rePlacement Parts
1 PostHead
2 Barrel
3 Bell
5 LowerStem
6 Coupling
7 Couplinginsert
8 CotterPin,1/4”x3”(2req’d)
9 HexSocketSetScrew,3/4-10UNCx1”
10 PipePlug,1/2”NPT
11 Window(2req’d)
12 Wrench
13 OperatingNut
14 SpringPin,1/8”x21/4”
15 CotterPin,1/8”x11/2”
16 ThreadedSleeve
17 UpperStem
18 WeatherCap
19 RetainingRing
20 “OPEN”Target
21 “SHUT”Target
22HexHeadCapScrew,5/8-11UNCx
2
1/4”(4req’d)
23 HexNut,5/8-11UNC(4req’d)
ID PART NAME
1
NOTE: When ordering specify Description & Part No.
For models with handwheels, contact customer service for replacement parts.
Parts list
23
7
5
6
8
15
8
22
17
12
19
18
11
13
14
9
16
20
21
10
3
2

U-20808/U-20809 Non-Adjustable Vertical Indicator Posts
Maintenance
care and maintenance
Model U-20808/U-20809 Indicator
Posts do not require any regular
schedule maintenance.
It is recommended that Indicator
Posts used to operate re protection
system water control valves be
locked in the fully-open position
using the Post Wrench. The locks
must be sturdy and resistant to
breakage except by heavy bolt
cutters.
It is also recommended that once a
month a visual inspection procedure
be followed, with the following items
checked:
1. The Post Head, Upper Barrel, and
Windows have not been damaged.
2. The Targets indicate that the valve
is open.
3. The Wrench is in place on the
Indicator Post, and it is properly
locked in the “OPEN” position.
In addition, on a quarterly basis, the
Indicator Post should be closed two
turns and then reopened tight to
verify that the PIV is in the full open
position and properly engages with
the Post and, that the Supervisory
Switch contacts (if applicable)
properly change position.
Any damaged parts must be
immediately replaced. The Indicator
Post should also be physically tried
to be sure that the valve is in the
fully-open position, if there are any
damaged parts, sign of tampering,
or the position of the valve is
questionable.
protection system main valve for
maintenance work on either the
systems which it controls,
permission to shut down the
the proper authorities and all
personnel who may be affected by
It is recommended that re
protection systems be inspected by
a qualied Inspection Service.
Water (U.S.)
1.800.871.2194
www.uspvh.com
Copyright © 2017 U.S. Pipe Valve & Hydrant, LLC. All Rights Reserved.
The trademarks, logos and service marks displayed in this document herein are the property of U.S. Pipe Valve & Hydrant, LLC, its afliates or other third parties.
Products marked with a section symbol ( § ) are subject to patents or patent applications. For details, visit www.mwppat.com. These products are intended for use in
potable water applications. Please contact your U.S. Pipe Valve & Hydrant Sales or Customer Service Representative concerning any other application(s).
Reliable Connections
TM
Form 13893 – Rev 09/17
This manual suits for next models
1
Table of contents
Other Mueller Control Unit manuals