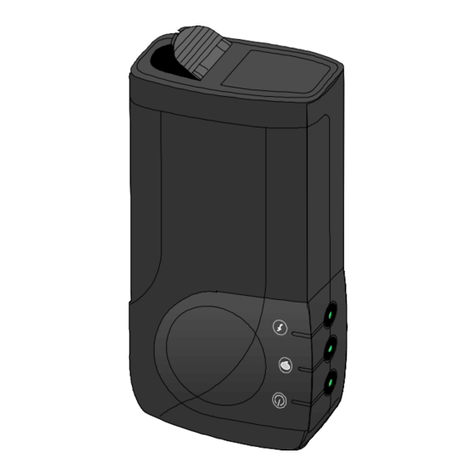
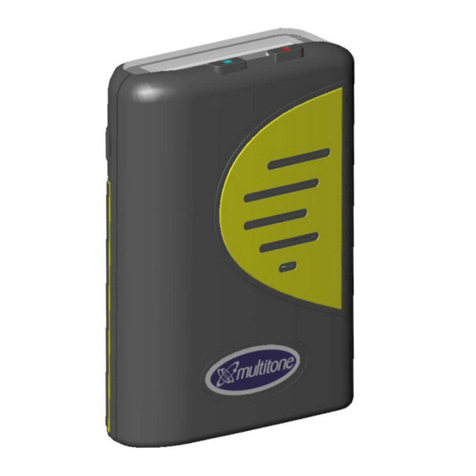
Multitone RPR 950 series User manual

USER GUIDE
For The
RPR 950 SERIES RADIO PAGER
Part No. 9261 - 9558 Issue 1

RPR 950 Series
9261 – 9558 Issue 1 2
EU Declaration of Conformity In Accordance With Article
6.3 of the EU Radio and Telecommunication Terminal
Equipment R & TTE Directive 99/5/EC
Low Voltage Directive 2006/95/EC;
RoHS Directive 2011/65/EU
(Decision 768/2008/EC Annex II, Module A)
As the manufacturer, we declare under our sole responsibility
that the equipment as specified below conforms to all the
applicable essential requirements of the EU Directives as
listed above.
Compliance is in accordance with the procedures of outlined
in the Annexes of the Directives and the technical standards
as listed below. The technical documentation required to
support this Declaration, is available for inspection by the
relevant enforcement authorities.
Products Covered By This Declaration:-
Type of Equipment: Radio Paging Receiver;
Brand Name: Multitone RPR950 Series;
Type Designation/Model:RPR951 (HF); RPR952 (VHF);
RPR953 (UHF)
This equipment is designated as a Class 1.7 (receive-only
radio) device under the terms of the Directive and TCAM
(Telecommunication Conformity Assessment and Market
Surveillance Committee) classification scheme. As such, it
may be freely distributed and operated within those territories
where the Directive 99/5/EC has been implemented.
Technical Basis of Conformity:-
The product(s) identified above, conform(s) to the technical
requirements of the Directive, by compliance with the following
technical standards:-

RPR 950 Series
9261 – 9558 Issue 1
3
Safety - EN 60950-1: 2006 + A2:2013
(Directive 1999/5/EC article 3.1{a});
Radio - ETSI EN 300 224-1 v1.3.1; ETSI 200 224-2 v1.1.1;
ETS EN 300 719-1 (Directive 1999/5/EC article 3.2);
EMC - ETSI EN 489-1 v1.9.2; EN 489-2 v1.3.1
(Directive 1999/5/EC article 3.1{b});
Attention!
The attention of the specifier, purchaser, installer or user,
is drawn to any special measures and limitations of use
which must be observed, in order to maintain compliance
with the above Directives and certification, when the
product is taken into service. Details of these measures
are contained in the associated product documentation,
or are available upon request from Multitone.
Signed:
B.R.Merchant,
PrincipalApprovals Engineer,
Multitone Electronics plc
Dated: 19th January 2015
FCC & Industry Canada Statement of Compliance
This device complies with Part 15 of the FCC Rules and
Industry Canada’s Licence-Exempt RSS’s.
Operation is subject to the following two conditions: (1) this
device may not cause harmful interference and (2) this device
must accept any interference that may cause undesired
operation.
Unauthorised modification to this equipment will void the
user's authority to continue to operate the device within the
scope of the Industry Canada and FCC Part 15 Rules.

RPR 950 Series
9261 – 9558 Issue 1 4
Cet appareil est conforme au(x) standard(s) RSS exempt(s)
de licence d’Industrie Canada. Son fonctionnement est sujet
aux deux conditions suivantes: (1) cet appareil ne doit pas
occasionner d’interférence et (2) cet appareil doit supporter
toutes les interférences, y compris celles qui pourraient
provoquer un mauvais fonctionnement de cet appareil.
A full technical specification for this product may be obtained
from your Multitone representative.
WEEE Directive & Product Disposal
At the end of its serviceable life, this
product should not be treated as
household or general waste. It should
be handed over to the applicable
collection point for the recycling of
electrical and electronic equipment, or
returned to Multitone or their agent, for
disposal.

RPR 950 Series
9261 – 9558 Issue 1
5
CONTENT Page No.
1. GENERAL USER INFORMATION
Radio Reception 6
Hazardous Areas 6
Pager Care 6
Service 6
Wearing Your Pager 6
2. CONTROLS AND DISPLAY 7
3. SWITCHING PAGER ON 7
4. SWITCHING PAGER OFF 8
5. DISPLAY OPTIONS 8
6. RECEIVING A CALL 8
7. RETRIEVING MESSAGES FROM THE MEMORY 11
8. RETRIEVING SPEECH CALLS 12
9. SPEECH VOLUME ADJUSTMENT 12
10. ALERT OPTIONS 12
11. PAGER STATUS 14
12. TIME OF DAY 15
13. OTHER OPTIONS 16
14. BATTERIES - CHANGING & CARE 17
15. CLIP REMOVAL & REPLACEMENT 19
16. ABSENCE & CHARGING 20

RPR 950 Series
9261 – 9558 Issue 1 6
1. GENERAL USER INFORMATION
Radio Reception
Your pager has been designed to give optimum performance
within the coverage area of the transmitting system. As with
any radio system, there may be areas of poor coverage where
signal reception may be sporadic, or non-existent. If
necessary, consult your system administrator in order to
familiarise yourself with these areas.
Hazardous Areas
Standard versions of this pager should not be taken into areas
where explosive gas, or dust products, may be present.
Intrinsically Safe versions are available for use in such
environments, details of which may be obtained from your
distributor, or direct from Multitone.
Pager Care
Protect your pager from liquids, extreme temperatures and
strong magnetic fields. Do not leave your pager exposed to
strong sunlight e.g. on a car dashboard, or a window sill.
Servicing
Should your pager need repair, return it to the designated
service agent, or Multitone Electronics. Do not attempt to open
or repair the product, as it contains delicate components and
requires specialised test equipment. Repairs should only be
performed by qualified personnel, in authorised workshops.
Wearing Your Pager
Your pager is supplied with a detachable clip, which is
specifically designed to enable a grip-fit when used for ‘in-
pocket’, or ‘belt’ applications. An elasticised detachable
Lanyard option with a metal retaining clip is also supplied.

RPR 950 Series
9261 – 9558 Issue 1
7
This may be used in conjunction with the clip, or as a separate
method of attachment.
2. CONTROLS AND DISPLAY
3. SWITCHING ON
To switch on your pager, press the ON/Cancel/Recall (OCR)
button once. The pager will emit a short beep and enter a self-
test routine, which will activate the LED, message display and
vibrate motor. The pager will then display its address and any
optional switch-on message that has been programmed. At
the end of this sequence, the display will blank and the pager
will enter its quiescent mode ready to receive calls, showing
either: -
no time, or time of day
If your pager is programmed with the Permanent ON option,
then the switch-on sequence will be automatically initiated
when a battery is fitted.
-- : -- 12:05
ON/CANCEL/RECALL
BUTTON (OCR)
ALPHA-NUMERIC MESSAGE DISPLAY
MUTE BUTTON

RPR 950 Series
9261 – 9558 Issue 1 8
4. SWITCHING OFF
To switch your pager OFF, first press and hold the MUTE
button and then press and hold the OCR button. The pager
will sequence to "OFF" and then switch itself off after
approximately 2 seconds. If either, or both, buttons are
released and repressed, the timeout sequence will continue.
If your pager is programmed with the Permanent ON option,
then it can only be switched off by removing the battery.
5. DISPLAY OPTIONS
The Liquid Crystal Display (LCD) is a 14 character full
alphanumeric device, which in the quiescent state is always
active and will show the highest priority status information
(without backlight). Where time is enabled as an option, this
will be displayed.
Display reversal: - The displayed text may be inverted, to suit
your method of wearing the pager. To enable this option from
the quiescent screen, press the OCR button to display the
status prompt and then press the MUTE button to reverse the
display. The new display direction will be held in the pager's
memory and retained, even when the equipment is switched
off, until you reset it.
6. RECEIVING A CALL
Your pager is capable of receiving tone, alphanumeric and
speech calls. When a call is received, firstly the red ‘alert’ LED
will flash and then an "alert tone" sound. Additionally if the
option is selected, the pager will also vibrate. This alert
sequence may be terminated at any time, by pressing the
CANCEL button.
A message will be displayed for all types of call, the end of
which will be denoted by the ** symbol. Initially any message
is displayed without a backlight, until any button is pressed.

RPR 950 Series
9261 – 9558 Issue 1
9
Any messages retrieved from the memory, will also be pre-
fixed by either a "time stamp", or a message number,
depending upon your system (see also Section 7).
Tone Only Calls
When used with Multitone MK6/7 code formats, your pager will
receive up to 8 different tone calls, each with a distinctive
beep alert pattern. For each call received, the pager will
display a tone call number for the duration of the alert. If the
alert is cancelled by pressing the OCR button, then the call
data will be displayed for a further 2.5 seconds.
Example of a tone call with a time stamp; on beep code 3,
received at 12.00 noon: -
+
Example of a tone call with an M (message) number: -
+
Alphanumeric Message Calls
Your pager may receive alphanumeric messages of up to 120
characters in length. When a call is received with an
alphanumeric message attachment, if the total length of the
message plus the stamp (time or message number) is less
than 14 characters, then the whole of the message will be
displayed for the length of the alert period, unless cancelled. If
the alert is cancelled, then the message will be displayed for a
further 2.5 seconds, with the backlight on.
Example of message less than 14 characters in length: -
If a received message is longer than 14 characters, then it is
broken into several segments of up to 14 characters in length.
These segments are then scrolled through automatically
12:00 tone call 3**
M1 tone call 3**
M2 ring 398**

RPR 950 Series
9261 – 9558 Issue 1 10
during the alert period, each being displayed for 1.25 seconds
except for the final screen, which is shown for 2.5 seconds.
This process is then repeated until the end of the alert period,
but if the call is cancelled before this time, the message will be
scrolled through again from the beginning and pause on the
final screen.
Example of a message larger than 14 characters: -
If a call is cancelled during the alert period, the MUTE button
may be used to review the message and to speed-up, or slow-
down, the viewing process. If MUTE is pressed and held, the
message is held at the current screen; releasing MUTE
causes the next screen to be displayed. If MUTE is pressed
and released during the final message screen, then the
display will revert to the first part of the message and the
whole message viewing process may be repeated.
Speech Calls
When receiving any call that has a speech message attached,
your pager will activate the alert sequence. This sequence will
include the flashing LED together with the alert tone at normal
volume, for a period of 4 seconds and additionally the display
of any alphanumeric message and/or call time/number data.
After 4 seconds, the speech channel will automatically open
and the spoken message will be heard.
The speech channel will close again automatically at the end
of a pre-determined time, or upon the receipt of a speech
termination signal, depending upon your system.
If during the 4 second alert period the OCR button is pressed,
it will terminate the call and a further press will terminate the
speech. If the OCR button is pressed again within the speech
time-out period, the speech channel will be re-opened.
13:27 Your visitor has
arrived in reception**
+
+
+
RPR 950 Series
9261 – 9558 Issue 1
11
All speech calls are automatically sent to the speech storage
memory for later retrieval (see section 8).
After the alert period, pressing the OCR button will also cancel
the call (remove it's new status), but a second press will re-
open the speech channel.
If calls remain un-cancelled, your pager will enter the
extended alert mode, if this option has been selected.
7. RETRIEVING MESSAGES FROM THE MEMORY
Unless cancelled, received calls are automatically entered into
your pager's memory. Up to 5 free-format messages of 120
characters in length and up to 4 pre-programmed messages of
14 characters in length, can be stored. When the memory is
full, each new message received will erase the oldest one.
Message retrieval is initiated from the quiescent state, by
twice pressing the OCR button. If the pager is in extended
alert mode, then pressing the OCR button once will enter the
memory replay mode. The pager will respond by displaying
the time stamp or message no. (header) of the first message.
If there are no messages, then the phrase no messages will
be displayed and the pager will return to the quiescent mode.
To find further messages, each further press of the OCR
button will cause the pager to scroll through the stored
message headers. The most recent message will be prefixed
by "M1", or the time at which it was received. If you wish to
view a message, stop pressing the OCR button and the
message will automatically scroll through the display.
The MUTE button may be used to stop a message sequence
to review the message and to speed-up, or slow-down, the
viewing process. If MUTE is pressed and held, the message is
held at the current screen; releasing MUTE causes the next
screen to be displayed.

RPR 950 Series
9261 – 9558 Issue 1 12
8. RETRIEVING SPEECH CALLS
Your pager will store up to 120 seconds of speech in 5 equal
memory segments, each of 24 seconds duration. It is not
possible to replay a speech message from the memory until
the original call has been completed, but it is possible to close
the speech channel during the original call. Where any speech
message exceeds 24 seconds, then the stored message will
be truncated. When the memory is full, any new message will
overwrite the oldest stored message.
The speech will automatically be replayed, when its
associated message is retrieved from the memory, as
described in Section 7. If the OCR button is pressed at any
time, the replay will be terminated and the next message will
be retrieved. If the MUTE button is pressed and released, then
the message will be re-started again from the beginning.
9. SPEECH (BEEP tone) VOLUME ADJUSTMENT
To adjust the volume of the speech messages and beep tone
where programmed as an option, the pager must be in the
quiescent state. First push the MUTE button, followed by the
OCR button. The display will show the current volume level
and this may then be adjusted by further pressing the OCR
button to increase the volume, or the MUTE button to
decrease. When the desired level is reached, release any
buttons and the pager will return to its quiescent state.
10. ALERT OPTIONS
Your pager has a number of options for alerting you to a call,
which may be selected according to the system requirements
and in some instances, individual needs.
Audible Alerts
Escalert - a programmable option, which allows the level
of the alert beep to increase on a gradual basis. The
sequence commences with the flashing LED alert only for 4

RPR 950 Series
9261 – 9558 Issue 1
13
seconds, followed by the LED + a low level alert tone for a
further 4 seconds and the sequence is completed by the final
selected alert duration (8, 16, 32 seconds, or continuous) of
LED + alert tone at full volume. The alert may be stopped at
any point in the sequence, by pressing the OCR button once.
Extended Alert - a programmable option, this mode acts
as a reminder if an original alert is not cancelled. The
sequence will start with the LED flashing every 2 seconds,
followed by two pip tones every 120 seconds thereafter, until
cancelled by pressing the OCR button. The most recently
received message will then be displayed.
Silent Alerts
Mute Mode - a programmable option, which will silence
the audible alerts and speech calls. Received calls will be
notified by the flashing LED and vibrate where selected.
Messages will be displayed and stored as normal, for later
recall.
Vibrate Option - a programmable option providing a
discreet alert, which may operate in conjunction with or
separate from, the audible alert options. Once programmed,
this option may be switched on or off by using the MUTE
button and stepping through the mute/vibrate option
sequence.
The Silent Alert configuration may be changed by pressing
and holding the MUTE button for approx. 1.5 seconds, whilst
the pager is in the quiescent state. Each further press/hold of
the MUTE button will cause the pager to cycle through each
option, until the desired mode is obtained. Each change is
acknowledged by an audible pip and where applicable, short
vibration. Pressing the OCR button in the quiescent state, will
allow you to check the selected option status.

RPR 950 Series
9261 – 9558 Issue 1 14
The available options are: -
On - normal audible alert, no vibrate;
On + vibrate - as for On, with vibrate enabled;
Mute + vibrate - alert tones and speech muted, with vibrate
enabled.
11. PAGER STATUS
Your pager is equipped to provide status information on-
demand. To activate this feature, whilst the pager is in
quiescent mode, press the OCR button once. This will cause
the message status > to be displayed, automatically followed
by each programmable status message, as follows: -
Status Message Condition
1 New message Message(s) with new status exist.
2 New messages
*Out-of-range Your pager has not received
a valid system signal for 3.5
minutes min.
*Low battery Battery voltage is low.
*Time of Day Dependent upon your pager
options, see Section 12.
*Mute Pager in Mute mode.
*Vibrate Vibrate option selected.
On No other messages to
display.
*Note: Your pager has to be programmed for this option, in
order to display this message.

RPR 950 Series
9261 – 9558 Issue 1
15
12. TIME OF DAY
Your pager may be programmed to show the time of day,
when in quiescent mode. The actual source of the time signal
may be from the pager's own internal clock, or an off-air signal
from your controlling system, where available. The time data is
used to ‘time-stamp’ incoming messages.
Off-air time signal - If this option has been selected, your
pager display will show the symbol --:-- in the quiescent state,
until the first valid time signal (transmitted every minute) has
been received from the system. If the pager should go out of
range of the system and no time signal is received for 2
minutes, then this symbol will also be displayed until a valid
signal is again received.
Internal Clock - where the off-air time signal option is not
enabled, it is possible to activate and set the pager's internal
clock. To set the time, press the OCR button during the
switch-on sequence and the time-of-day screen will initially
show the hours flashing.
To change the hours repeatedly press, or press and hold the
OCR button, until the desired hour is displayed. When this
point has been reached, press the MUTE button and the
minutes will start to flash. Press the OCR button until the
desired minutes are displayed. To complete the set-up, press
the MUTE button and the pager will continue the switch-on
sequence.
To reset the time on a pager which has already been
switched-on, or time incorrectly entered, simply turn the pager
off and on again and follow the set-up sequence.

RPR 950 Series
9261 – 9558 Issue 1 16
13. OTHER OPTIONS
Your pager is programmable to offer the following additional
options.
Group Alert - Your pager may be programmed to operate as
part of a ‘team’. Any group call to your team will activate your
audible alert sequence, even if your pager is in Mute mode.
Out of Range - This option will alert you, if you move outside
of the radio coverage area for your system. The alert is
activated if the pager has not received a valid signal for a pre-
set time, typically 3 minutes, 30 seconds.
Combinations of alert options are available, including visual
only, audible plus visual, or either option plus vibrate. The
audible/visual option enables an out of range warning on the
display for 4 seconds, accompanied by a 2 second buzz.
Pagers with the audible warning enabled, will also produce a
buzz when the OCR button is pressed whilst the receiver is
out of range (except in Mute mode). For the visual only alert,
just the message is displayed. In all cases when selected, the
vibrate option will cause several short pulses during the alert
period.
After the 4 second alert period, the pager will either continue
to display the Out Of Range message, or if a received
message is being stored, this will be notified until cleared.
Low Battery Warning - It is advised that this option is not
enabled for use with rechargeable cells.
The battery condition of your pager is continually
monitored and if a low battery voltage is sensed the pager
will continue to operate, but the battery must be changed
at the earliest opportunity (within 24 hours), or continued
operation and facilities cannot be guaranteed and some
features may be inhibited.

RPR 950 Series
9261 – 9558 Issue 1
17
When enabled, this option may be programmed for visual,
audible and vibrate alert options. A warning may be activated
under the following conditions: -
(i) at switch-on, the switch-on tone will be additionally
modulated by a buzz tone and the message low battery
displayed;
(ii) any alerts will be modulated with a buzz tone;
(iii) the battery condition may be checked at any time,
using the status interrogation mode as described in
Section 11. The low battery message will be displayed
and then the pager will return to its quiescent state, with
the message bat continuously showing at the edge of the
display.
Call Comparator - This option enables the pager to recognise
calls that are a repetition of a previous call, sent within a pre-
determined time after the original call. The pager will ignore
any repeated calls identified by the comparator. The time limit
can be programmed for periods of 30s, 120s and 300s after
the original call.
The exception to this will be for message calls, where the
original call has not been decoded with 100% confidence. In
this case the subsequent call will be accepted and will
overwrite the original message in the pager's memory. In both
cases however, a normal alert sequence will be generated.
14. BATTERIES - Changing the Battery & Battery Care
Your pager can be used with any 1.5 Volt nominal AA (LR6)
sized primary cell, or for re-chargeable applications, either
NiCd (where allowed) or NiMH secondary cells. It should be
noted that battery life expectancy may vary greatly with the
cell supplier and chemistry, especially with the re-chargeable
options.
In order to maximise battery life, cancel any alerts as soon as
possible and switch-off your pager when not in use. If your
pager is not to be used for a long period, it is recommended
that the battery be removed.

RPR 950 Series
9261 – 9558 Issue 1 18
NOTE: Any stored messages will be retained by the pager for
approximately 12 hours when the battery is removed, or the
pager is turned off.
To change the battery, ensure that the pager is switched off
and proceed as follows: -
Hold the pager in one hand, with the front facing downwards.
Using thumb or forefinger, gently slide the catch in the
direction of the arrow shown. Insert a thin blade (e.g. small
screwdriver) or finger nail into the recess on the side of the
door and gently lift enough to release it from its retaining slot.
Carefully lift and release the battery door away from the main
body in the direction shown, ensuring not to damage the
rubber seal around the edge of the battery compartment.
Blade recess

RPR 950 Series
9261 – 9558 Issue 1
19
Ensure correct location of
door before closing
Ensure that the battery door is lifted clear of the case and
remove the door. Remove the battery by placing your
forefinger onto the positive end-cap and lifting the battery
upwards, at the same time pushing slightly backwards against
the negative contact spring.
Battery replacement is the reverse sequence. Observing the
correct polarity, place the battery against the negative contact
spring and compress slightly, at the same time pushing the
battery into the compartment and engaging the positive end-
cap against the positive contact in the pager.
To replace the battery
door, firstly ensure
that the lip at bottom
of the door is located
correctly in the recess
at the bottom of the
battery compartment
and gently lower the
door into place,
ensuring not to
damage the rubber
seal. Once closed, compress the door at
the top end and slide the catch back into place.
15. CLIP REMOVAL & REPLACEMENT
Hold the pager in one hand and open the clip to reveal the
metal back-plate.

RPR 950 Series
9261 – 9558 Issue 1 20
Insert a thin blade or fingernail under the edge of the back-
plate as indicated by the arrow and lift away from the pager
body. Once the plate is clear, gently slide the clip towards the
bottom of the pager, until it comes away from the main body.
Before attempting clip replacement, ensure that the grip
adjustment slider is set to the top of the clip and that the metal
back-plate has been straightened. Re-insert the metal clip-
back into the guides on the case-back and slowly slide the clip
assembly into place, ensuring that the retaining lug re-locates
into the slot in the case-back.
16. ABSENCE & CHARGING
When your pager is inserted into an Absence Rack, it will
automatically be switched into the absence mode. A pager
that is already on will reset and a pager that is off will switch
on and enter the absence mode.
NB: No paging calls will be accepted whilst the pager is in
the rack and any stored messages will be erased.
When in a rack, your pager may display a programmable
message of up to 9 characters. Unless programmed
otherwise, the default message will be your pager's RIC
(receiver identity code) number. This message may be
programmed either prior to bringing the pager into service, or
new alphanumeric messages may be transmitted to it via the
absence rack data bus.
Other manuals for RPR 950 series
1
Table of contents
Other Multitone Pager manuals

Multitone
Multitone MIT870 SERIES User manual

Multitone
Multitone RPR 581 User manual

Multitone
Multitone FLA870 User manual

Multitone
Multitone EkoTek Pager Instruction manual

Multitone
Multitone RPR 530 SERIES User manual

Multitone
Multitone RPR 580 User manual

Multitone
Multitone RPR 750IS SERIES User manual

Multitone
Multitone EkoTek User manual

Multitone
Multitone TLA 850 User manual