Version 1.0.0 Laser Engraver User Manual - ILEM-GR-US Page 1 of 31
1.0 Security Disclaimer 1.0 Security Disclaimer1
……………………………………………………………………
29
……………………………………………………………………
31
……………………………………………………………………
3
…………………………………………………………………………………………………
4
…………………………………………………………………………………………………
5
…………………………………………………………………………………………………
14
…………………………………………………………………………………………………
17
…………………………………………………………………………………………………
19
…………………………………………………………………………………………………
22
…………………………………………………………………………………………………
29
…………………………………………………………………………………………………
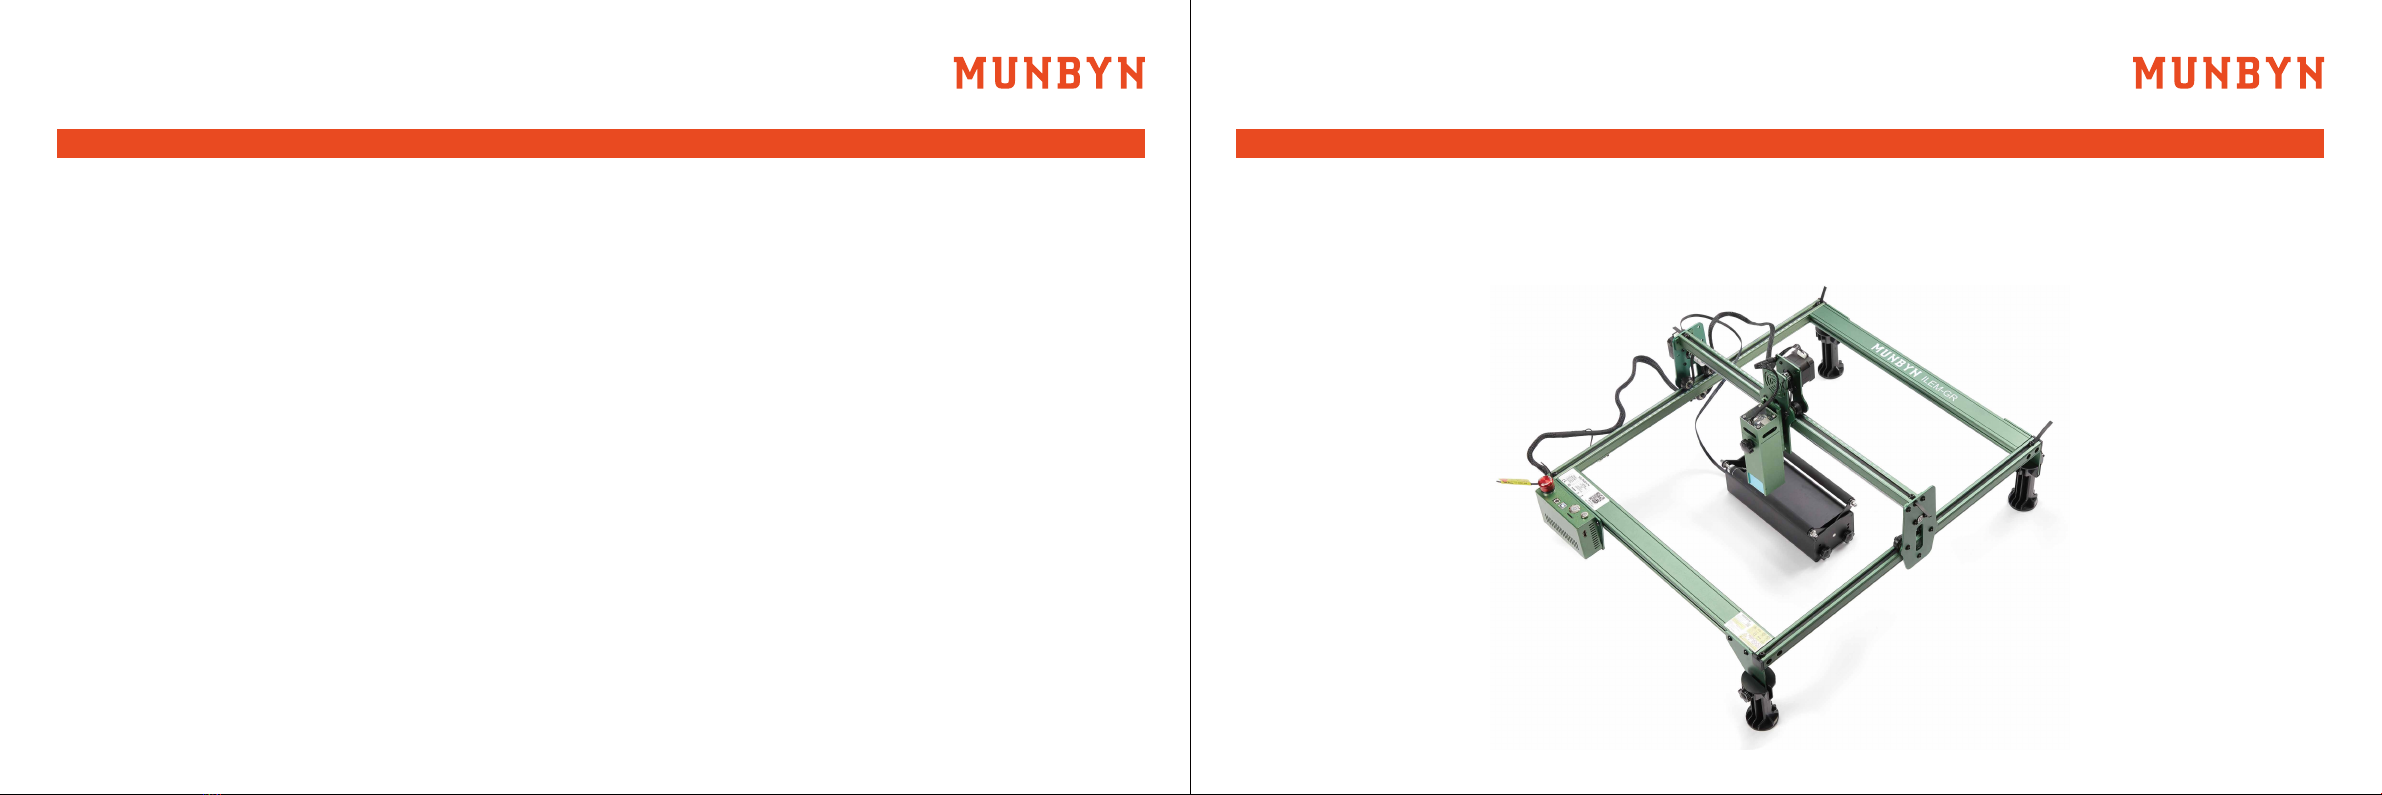
2.0 Product Introduction
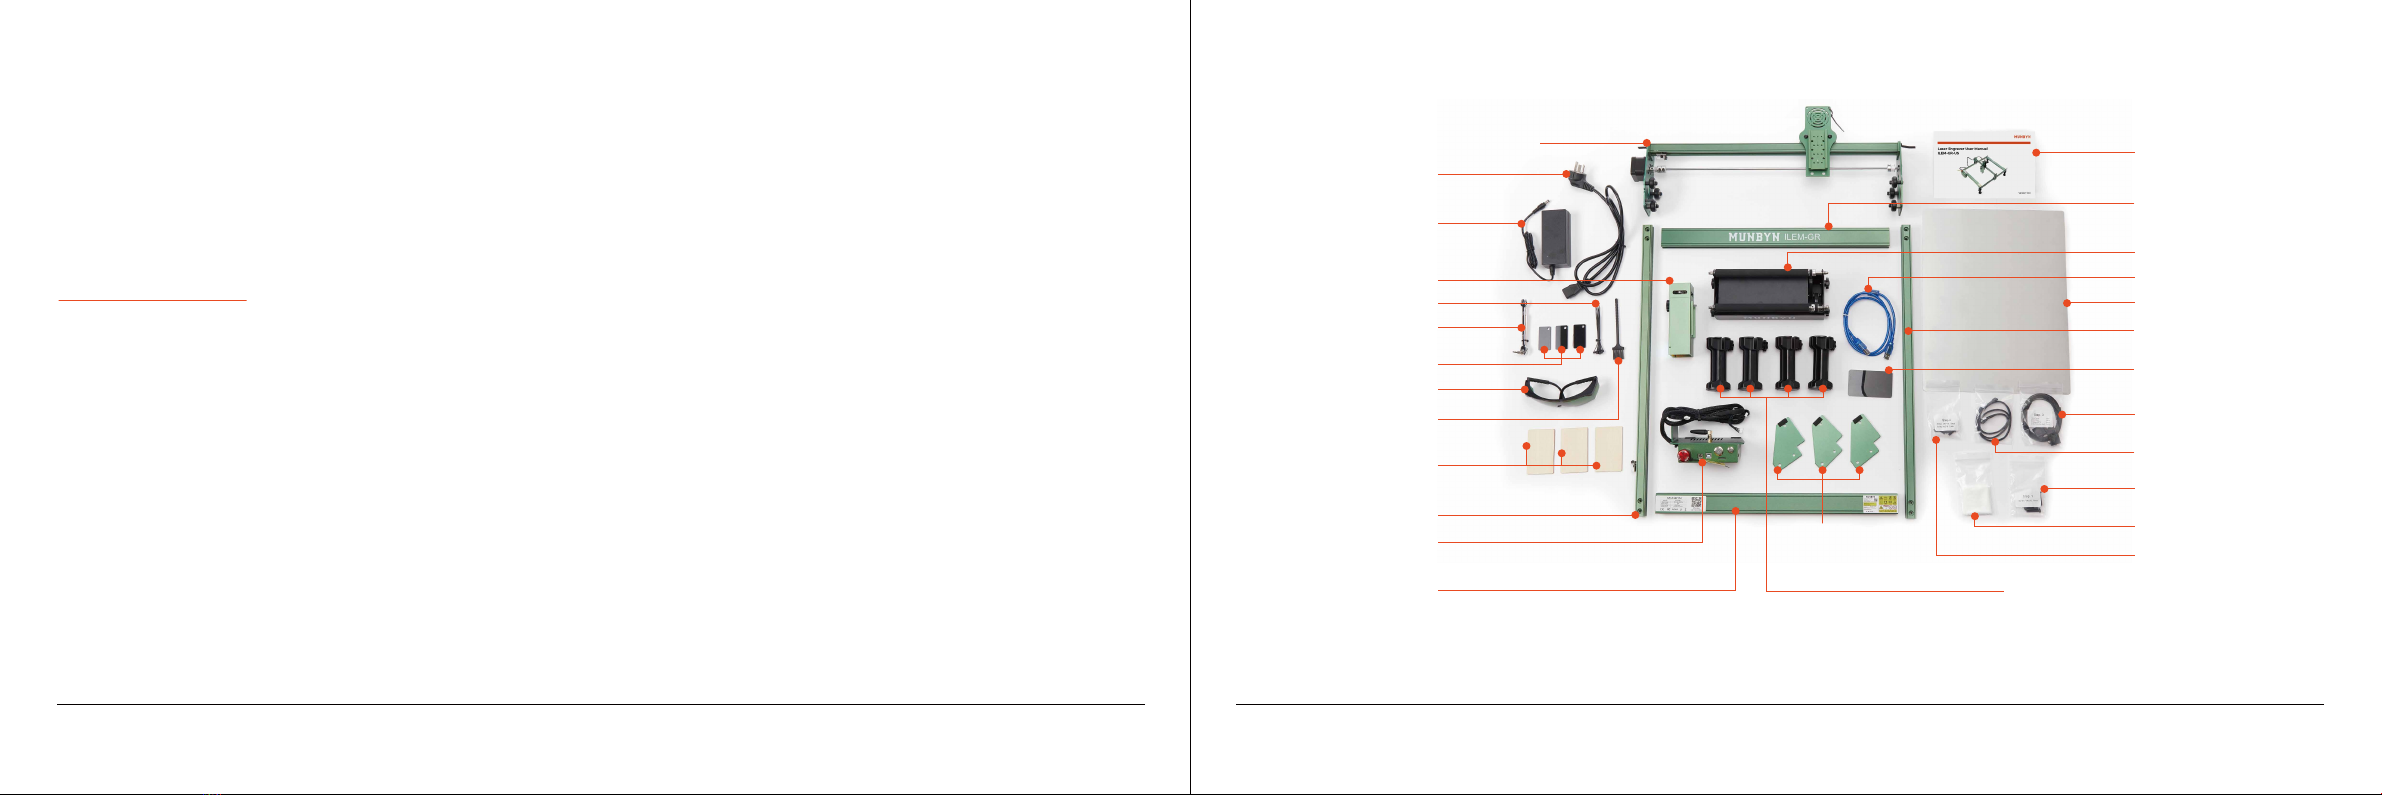
2.1 What’s in the Box?
Before using the laser engraver, please read this safety guide carefully, it mentions situations that
require special attention and includes warnings of unsafe practices that can cause damage to your
property or even endanger your safety.
This product is not a toy and is not suitable for people under 15. Do not allow children to touch the
laser module.
(1) Please be careful when operating in scenes with children. Please be sure to read this document
carefully before using the product to understand your legal rights, responsibilities, and safety
instructions; Otherwise, it may bring property loss, safety accidents, and hidden dangers to
personal safety. Once you use this product, you shall be deemed to have understood, and accepted
all terms and contents of this document. The user undertakes to be responsible for his or her
actions and all consequences arising therefrom. The user agrees to use the Product only for
legitimate purposes and agrees to the entire terms and contents of this document and any relevant
policies or guidelines that we may establish.
(2)You understand and agree that we may not be able to provide you with the cause of the damage
or accident and provide you with our after-sale service unless you provide the original engraving
or cutting files, engraving software configuration parameters used, operating system information,
video of the engraving or cutting process, and operational steps before the occurrence of a problem
or failure.
2.2 Control Box Description
3.0 Installation Steps
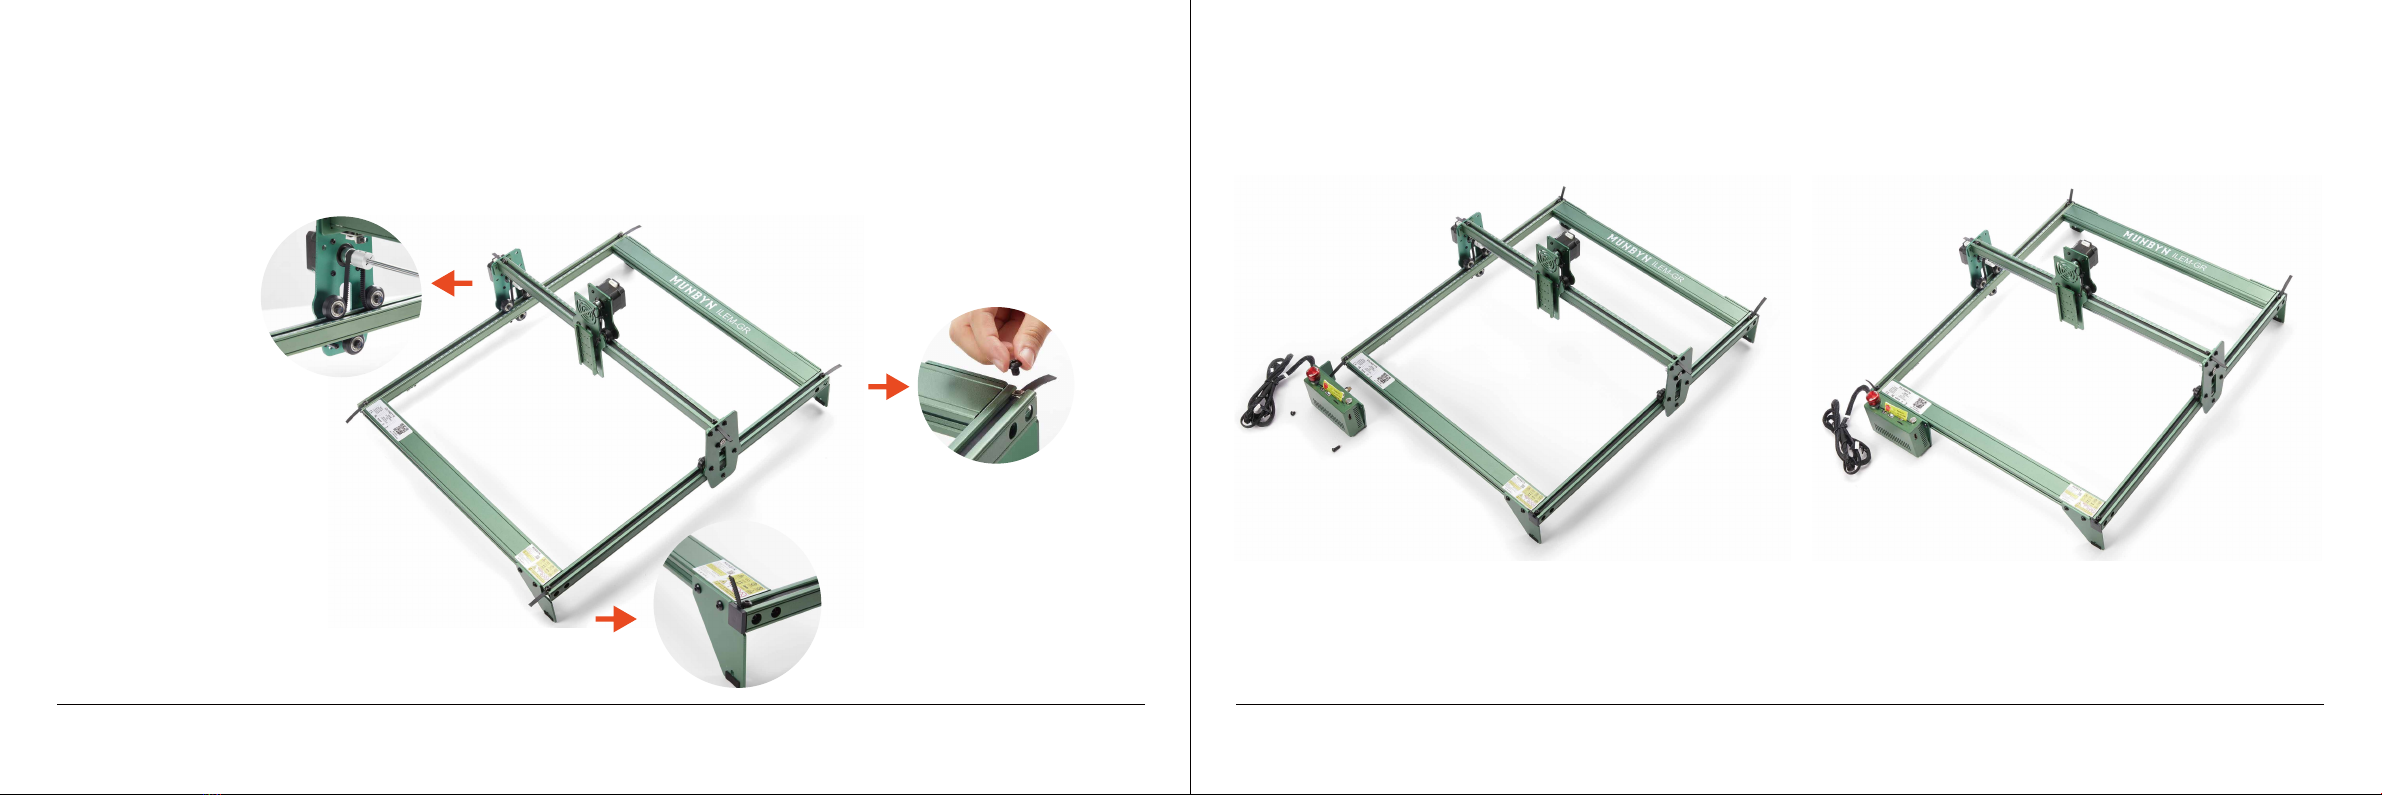
3.1 Equipment Installation Steps
3.2 Roller installation steps
3.3 Laser Focus Adjustment
4.0 Software Installation and Operation
5.0 FAQ
6.0 Support
4.1 LaserGRBL Engraving Software
4.2 LightBurn Engraving Software
4.3 Engraving Parameter Settings