MW POWER MW-SC4B User manual

BATTERY CHARGER
INSTRUCTION MANUAL
Model: MW-SC4B
Please save these instructions. These instructions contain important safety and operating
instructions. Read all instructions and follow them with each use of this product.
MW-SC4B-manual-EN-R1, 22.06.2020

1
Figure 1: Product overview
Figure 2: Product overview
Contents
2
Introduction
2
Intended use
2
Scope of delivery
2
List of parts
2
Technical data
2
Safety
2
Safety instructions
3
Product description
3
Operation
3
Before use
3
Connection
4
Disconnection
4
Mode selection
4
Mode 1 - 6V (7.2V/1A)
4
Mode 2 - 6V (7.4V/1A)
5
Mode 3 - 12V (14.4V/1A)
5
Mode 4 - 12V (14.7V/1A)
5
Mode 5 - 12V (14.4V/4A)
5
Mode 6 - 12V (14.7V/4A)
5
Mode memory function
5
10-stage automatic charge
6
Pulse charge
6
Regeneration mode
6
Protection function
7
Overheat protection
7
Maintenance and care
7
Disposal

2
Introduction
The instructions contain important information
concerning safety, use and disposal. Before using
the product, please carefully study with all of the
safety information and the operating instructions.
The instructions should be kept in a safe place
and submitted together with the product in the
event of passing the product on to anyone else
Intended use
The product is a 10-stage car battery charger that
is suitable for charging and trickle charging up of
6V or 12V lead-acid battery (batteries) with liquid
electrolyte(WET), Maintenance-free lead-acid
batteries(MF), gel electrolyte(GEL) or electrolyte
absorbent mats(AGM).
The product is not intended for commercial use
and is for indoor use only.
The manufacturer cannot accept any liability for
damage arising from improper use.
Scope of delivery
1
Car battery charger
1
Operating instructions
List of parts
1
Charger
2
Power cord with mains connector
3
Charging cable with red & black clamps
4
Mounting holes
5
LCD display
6
Defective battery error symbol
7
Clamp-related error symbol
8
Special error symbol
9
Standby symbol
10+11
6V charging mode in cold state, also for
many 6V AGM battery
11
6V charging mode
12
1A charging mode
13
4A charging mode
14
12V charging mode
14+15
12V charging mode in cold state, also
for many 12V AGM battery
16
Battery charge status display
17
Battery voltage display
18
Mode selection button
Technical data
Primary
Rated Input Voltage
220 - 240VAC, 50Hz
Input Power
70W MAX
Secondary
Rated Output Voltage
6VDC
12VDC
Charging Voltage
7.2/7.4VDC ±0.25VDC
14.4/14.7VDC ±0.25VDC
Rated Output Current
6V: 1 A ±10%
12V: 1A / 4A ±10%
Charger Type
10-Stage, Fully Automatic
Battery Type
6V & 12V Lead-Acid
(Wet, MF, GEL, AGM)
Battery Capacity
6V: 1.2 - 14Ah
12V: 1.2 - 120Ah
Ambient Temperature
-10 to +40°C
Housing Protection
IP65
Protection class
Class II
Safety
Safety instructions
For indoor use only.
Do not recharge the non-rechargeable
batteries.
Please check prior use if output voltage
and current of the battery charger is
suitable for the charging battery.

3
Do not use the battery charger in the
circumstances that the output polarity does
not match the load polarity.
If the supply cord is damaged, it must be
replaced by the manufacturer or its service
agent or a similar qualified person in order
to avoid a hazard.
The cover may under no circumstances be
opened. If the cover is damaged, then
battery charger may no longer be used.
Disconnect supply mains before
connecting or disconnecting the battery.
This product can be used by children aged
from 8 years and above and persons with
reduced physical, sensory or mental
capabilities or lack of experience and
knowledge if they have been given
supervision or instruction concerning use of
the product in a safe way and understand
the hazards involved.
Children shall not play with the product.
Cleaning and user maintenance shall not
be made by children without supervision.
Do not use the battery charger as jump
start.
Warning: Explosive gases. Prevent flames
and sparks. Provide adequate ventilation
during charging.
Provide adequate ventilation during
charging.
The battery terminal not connected to the
chassis has to be connected first. The
other connection is to be made to the
chassis, remote from the battery and fuel
line. The battery charger is then to be
connected to supply mains.
After using, disconnect the battery charger
from supply mains. Then remove the
chassis connection and the battery
connection in this order.
Product description
This product is designed for charging open as
well as a wide range of closed lead acid batteries
used for passenger cars, motorcycles and certain
other vehicles, e. g. WET batteries (with liquid
electrolyte), GEL batteries (with electrolyte in gel
form) or AGM (absorbent glass mat) batteries.
The battery capacity ranges from 6V/1.2Ah to
6V/14Ah or from 12V/1.2Ah to 12V/140Ah.
The special design permits re-charging up to
virtually 100% of the battery capacity.
Furthermore, a long-term connection of the
battery to the charging station can take place to
keep the battery in optimal condition when not in
use, without it being damaged in the process.
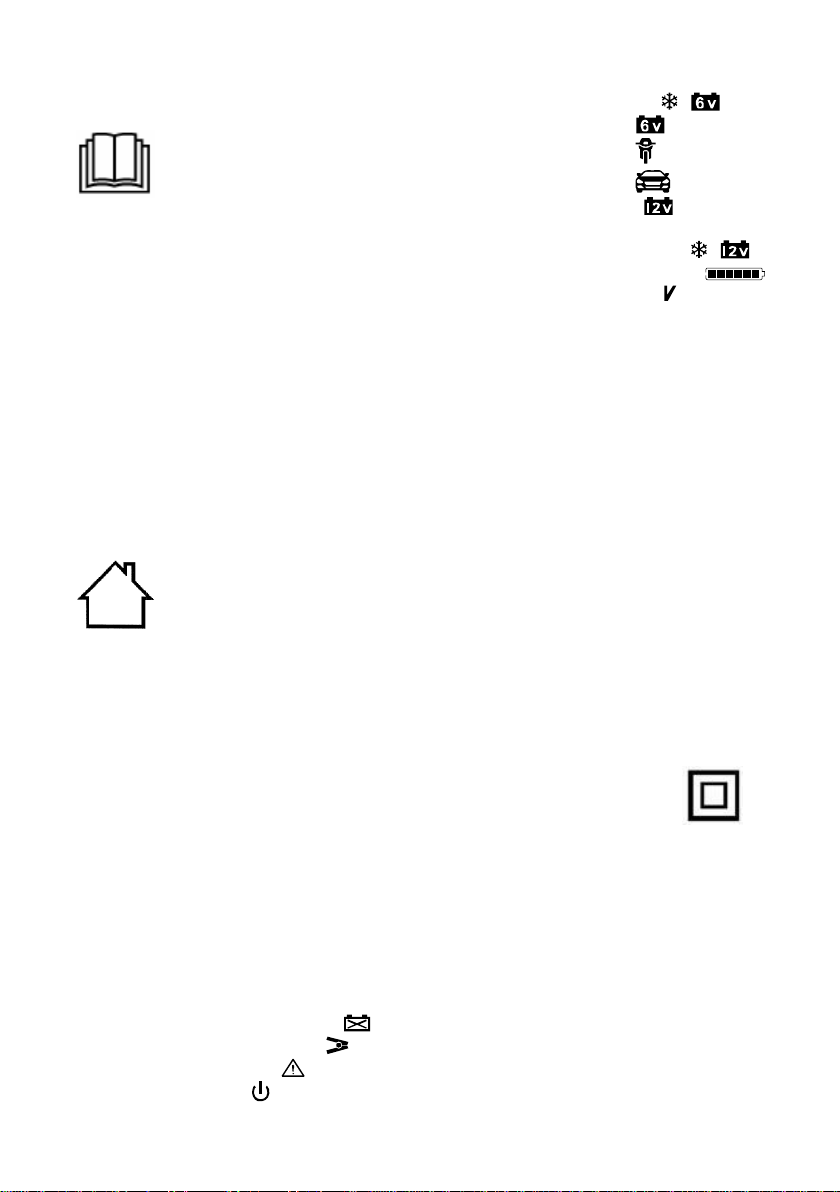
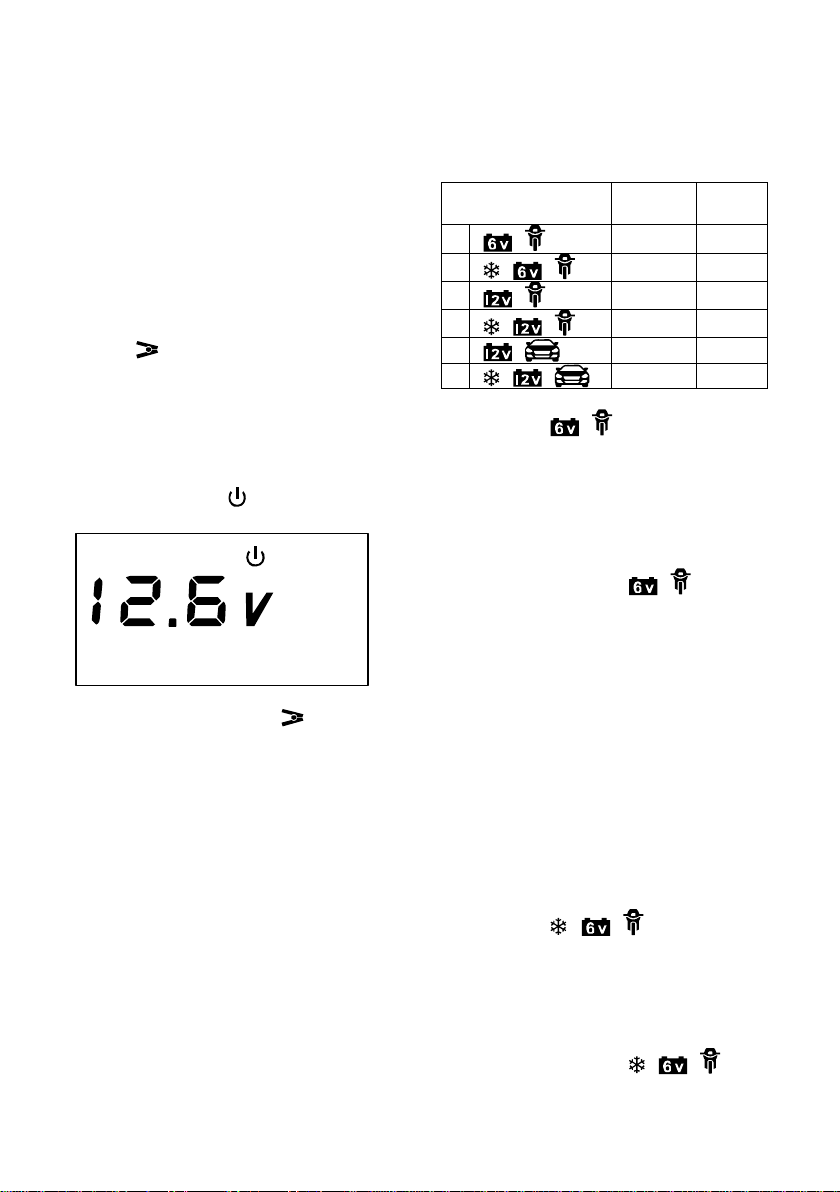
The charger features a total of 6 charging modes
for different batteries in various states. This
makes charging more efficient and reliable.
In addition, the battery charger is controlled by an
internal MCU (micro-computer unit). After
selecting the desired charging mode the charger
will recognize the battery connected (voltage,
condition) and compute the necessary charging
parameters (charging voltage, charging current).
This allows for efficient and safe charge. When
selecting a charging mode not suitable for the
battery or if the battery is defective, the charging
will not start. The charger switches to error
indicator.
Operation
Before use
Read the battery operating instructions
before connecting up the charger.
Observe the vehicle manufacturer's
recommendation if the battery is still
connected to the vehicle.
Clean the battery poles. Take care that
while doing so, your eyes do not come into
contact with the dirt.
Ensure sufficient ventilation. Hydrogen gas
(electrolytic gas) may escape from the
battery during charging and trickle
charging.
Connection
Connect the positive pole clamp (red) of
the charger to the positive pole of the
battery.
Connect the negative pole clamp (black) to

4
the negative pole of the battery or to the
car body. However well away from fuel
pipes.
If connection is right and the battery is 8V
above, battery voltage is correctly shown
on the LCD. LCD display’s back light is on
as well.
NOTE: If the battery voltage is 8V below, the
voltage on the LCD is NOT correct or nothing
on the LCD.
NOTE: If the battery is 16V above, the error
symbol is shown on the LCD and LCD
display’s back light flashes, which means the
charger is NOT suitable for the battery.
Connect the mains cable of the charger to
the mains socket.
If connection is right, battery voltage and
standby symbol is shown on the LCD.
Make sure error symbol are not
shown on the LCD. If shown, check the
connection of the battery.
NOTE: During normal operation, the display’s
back light will turn off for saving energy after
no action for 1 minute. To turn on the back
light, press the mode selection button ONLY
ONCE.
Disconnection
Always disconnect the charger from the
supply mains.
Remove the negative pole clamp (black)
from the negative pole of the battery or
from the bodywork.
Remove the positive pole clamp (red) from
the positive pole of the battery.
Mode Selection
Select the required mode by pressing the
mode selection button.
The following 6 modes are available.
Mode
Max
Voltage
Max
Current
1
7.2V
1A
2
7.4V
1A
3
14.4V
1A
4
14.7V
1A
5
14.4V
4A
6
14.7V
4A
Mode 1 - 6V (7.2V/1A)
Suitable for 6V batteries with a capacity between
1.2Ah and 14Ah in normal state. Charging mode
for WET, MF batteries and most GEL batteries.
Press the mode selection button to select
mode 1. The symbol is shown
on the LCD. If no further action is taken,
charging will automatically start after 3
seconds. During charging, the charge
status display shows the progress of the
charge procedure (1 - 6 bars). When the
battery is fully charged, the charge status
display shows 6 bars.
NOTE: When the charging starts, the standby
symbol will not be shown on the LCD.
NOTE: During charging, press the mode
selection button to stop the charge and
re-select the mode.
Mode 2 - 6V (7.4V/1A)
Suitable for 6V batteries with a capacity between
1.2Ah and 14Ah in cold conditions. This charging
mode is also designed for many AGM batteries.
Press the mode selection button to select
mode 2. The symbol is
shown on the LCD. If no further action is

5
taken, charging will automatically start after
3 seconds. During charging, the charge
status display shows the progress of the
charge procedure (1 - 6 bars). When the
battery is fully charged, the charge status
display shows 6 bars.
Mode 3 - 12V (14.4V/1A)
Suitable for 12V batteries with a capacity
between 1.2Ah and 14Ah in normal state.
Charging mode for WET, MF batteries and most
GEL batteries.
Press the mode selection button to select
mode 3. The symbol is shown
on the LCD. If no further action is taken,
then charging will automatically start after 3
seconds. During charging, the charge
status display shows the progress of the
charge procedure (1 - 6 bars). When the
battery is fully charged, the charge status
display shows 6 bars.
Mode 4 - 12V (14.7V/1A)
Suitable for 12V batteries with a capacity
between 1.2Ah and 14Ah in cold state. This
charging mode is also designed for many AGM
batteries.
Press the mode selection button to select
mode 4. The symbol is
shown on the LCD. If no further action is
taken, then charging will automatically start
after 3 seconds. During charging, the
charge status display shows the progress
of the charge procedure (1 - 6 bars). When
the battery is fully charged, the charge
status display shows 6 bars.
Mode 5 - 12V (14.4V/4A)
Suitable for 12V batteries with a capacity
between 14Ah and 120Ah in normal state.
Charging mode for WET, MF batteries and most
GEL batteries.
Press the mode selection button to select
mode 5. The symbol is
shown on the LCD. If no further action is
taken, then charging will automatically start
after 3 seconds. During charging, the
charge status display shows the progress
of the charge procedure (1 - 6 bars). When
the battery is fully charged, the charge
status display shows 6 bars.
Mode 6 - 12V (14.7V/4A)
Suitable for 12V batteries with a capacity
between 14Ah and 120Ah in cold state. This
charging mode is also designed for many AGM
batteries.
Press the mode selection button to select
mode 6. The symbol is
shown on the LCD. If no further action is
taken, then charging will automatically start
after 3 seconds. During charging, the
charge status display shows the progress
of the charge procedure (1 - 6 bars). When
the battery is fully charged, the charge
status display shows 6 bars.
Mode memory function
The microprocessor inside the charger has mode
memory function, which means the unit can first
enter into the mode the users set last time. This
function can erase the users’ worry about
forgetting the setting for their owner batteries and
shorten the setting time for the users’
convenience.
The unit also can restart the charge after
restoration of power supply.
10-stage automatic charge
The charger uses a proprietary 10-stage charging
process designed to optimally charge and
maintain batteries.

6
Stage 1: Initialization
Checks the battery's condition to determine the
charge process. If the battery is deeply
discharged, it will enter into the pulse charge to
refresh the battery.
Stage 2: Gentle Charge
Starts the charging process with 1/2 value of
current you select if the battery is below 6V for 6V
modes or 12V for 12V modes, which can warm
up the batteries and avoid the battery suddenly
bulk charged. For 1A mode, the gentle charge
rate is 1A.
Stage 3 - 6: Constant Current (CC) Charge
Returns 85% of the battery capacity by charging
at 4 different output rates, which can charge the
battery more full. For 1A mode, the CC charge’s
output rate will keep 1A ONLY.
Stage 7: Constant Voltage (CV) Charge
Brings the charge level to 95% at max charge
voltage by gradually decreasing the current,
which limits battery gassing and prolong battery
life.
Stage 8: Float Charge
Finalizes the charging process and brings the
battery to maximum capacity at float charge
voltage. For 6V mode, there is no float charge.
Stage 9: Analysis
It will cut off the output and analyze whether the
battery can hold the capacity. It may enter into
the regeneration mode to deeply recover the
battery.
Stage 10: Maintenance
Monitors battery condition. If battery voltage falls
below its threshold, the charger restarts the
charge, which effectively & efficiently ensures the
battery at full charge and without the risk of
overcharge.
Pulse charge
This is an automatic charge function which
cannot be selected manually. If the battery
voltage is below 5.3V for 6V modes or 10.5V for
12V modes, the unit changes over to pulse
charge. This pulse charge will finish after the
battery is above 5.3V for 6V modes or 10.5V for
12V modes. Meanwhile the max time for pulse
charge is 30 minutes, and enters into normal
charge.
This process is able to refresh most flat, used or
overcharged batteries so that they can be
re-used.
NOTE: The battery is recognized to be
defective if the voltage is still below 4.5V for
6V modes or 9V for 12V modes after pulse
charge and plus 30-minute gentle charge.
Have the battery checked by a speciality
repair shop.
Regeneration mode
This is an automatic function which cannot be
selected manually. If the battery voltage falls
below 6V for 6V modes or 12V for 12V modes in
3 minutes after fully charged, the unit changes
over to regeneration mode.
This regeneration mode continues up to 2 hours.
This process will recover battery capacity by
applying a specialized high voltage (8V for 6V
modes or 16V for 12V modes) to soften down
sulfate from the battery plates.
NOTE: The battery is recognized to be
defective if the voltage still falls below 6V for
6V modes or 12V for 12V modes in 3 minutes
after the regeneration mode. Have the battery
checked by a speciality repair shop.
Protection function
The charger switches the electronics off, as soon
as there is an abnormal situation:
If the voltage between clamps is below
0.5V (including the reverse polarity, short
circuit and open circuit) or battery voltage
is above 16V for 12V modes or above 8V
for 6V modes, the symbol is shown
in the LCD.
If the battery is recognized to be defective,

7
the symbol is shown on the LCD.
If maximum charge time has been
exceeded, the symbol in shown on
the LCD.
NOTE: When the above errors occur on the
LCD, the LCD display’s back light flashes.
Overheat protection
The charger is designed to decrease the charging
current and even shut itself off if overheating is
detected. Once the charger cools down, it will
resume normal charging automatically.
NOTE: When output current is cut for
temperature inside the unit is too high, the
error symbol is shown on the LCD and
the display’s back light flashes.
Maintenance and care
The product may be stored not in damp
environment or in places with corrosive
gases, but at a dry place outside of the
range of children.
Cleaning the surface of the product and
wipes it off only with a dry cloth.
The product may not be dismantled. If the
product is damaged, contact the supplier or
manufacturer.
Maintenance and servicing are not required
under normal conditions.
Disposal
The packaging is made from environmentally
friendly material and can be disposed of at your
local recycling plant.
Do not dispose of this product in your normal
domestic waste!
European Directive 2012/19/EU requires that
worn-out products are collected separately and
fed into an environmentally compatible recycling
process.
Your local community or municipal authorities can
provide information on how to dispose of the
worn-out products.
Table of contents
Other MW POWER Batteries Charger manuals