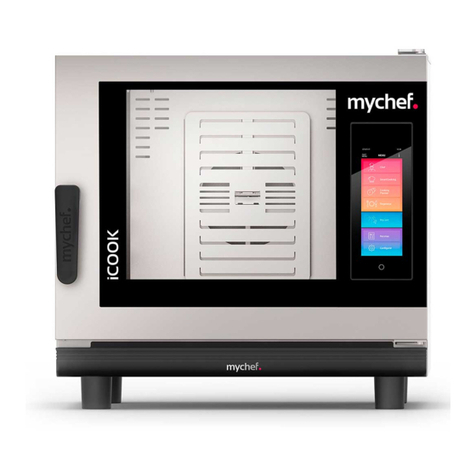
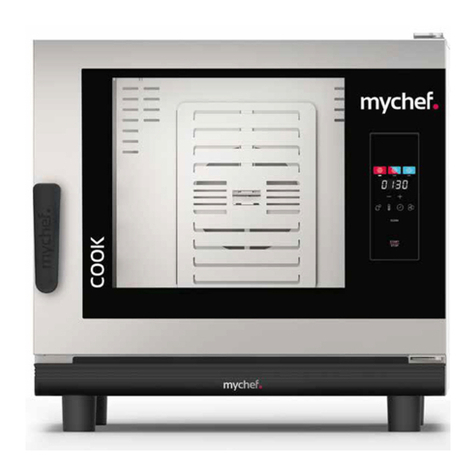
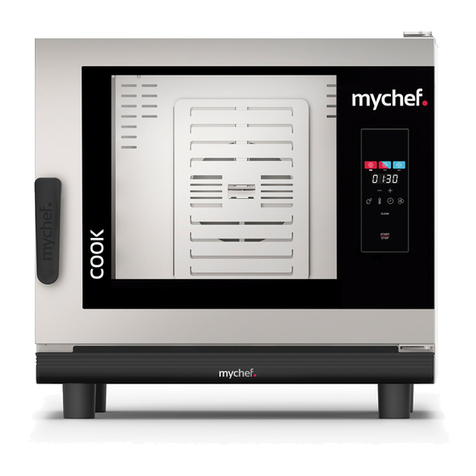
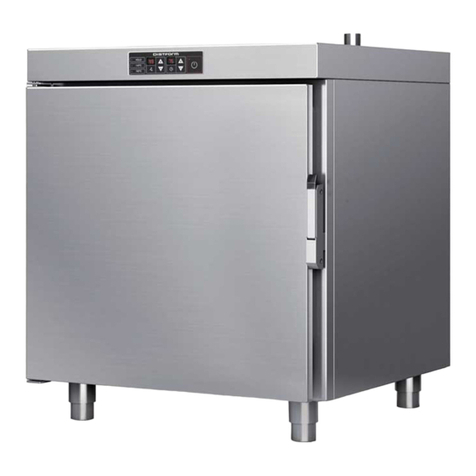
Mychef QUICK 1 Service manual

mychefcooking.com
PRODUCT MANUAL QUICK 1 - DT.MP.Q1.2202.2
1
QUICK 1
Product Manual
Installation, use and maintenance

mychefcooking.com
PRODUCT MANUAL QUICK 1 - DT.MP.Q1.2202.2
2
INDEX
1. GENERAL SAFETY AND ACCIDENT PREVENTION RULES ...............................4
1.1. Personnel in charge of the use of the equipment................................................ 4
1.2. Electrical hazard ....................................................................................................... 4
1.3. Thermal hazard......................................................................................................... 4
1.4. Corrosion hazard ..................................................................................................... 5
2. INTRODUCTION .............................................................................................6
3. TECHNICAL CHARACTERISTICS......................................................................7
3.1. Main features of the Mychef QUICK 1 ................................................................... 7
4. RECEPTION, TRANSPORT AND LOCATION ....................................................8
4.1. Reception.................................................................................................................. 8
4.2. Transport................................................................................................................... 8
4.3. Location..................................................................................................................... 9
5. INSTALLATION .............................................................................................12
5.1. Electrical connection ............................................................................................. 12
5.1.1. Single-phase connection 230V L+N ......................................................... 13
5.2. Catalytic filter installation ...................................................................................... 13
6. USE...............................................................................................................15
6.1. Control panel.......................................................................................................... 15
6.1.1. Switching on the equipment...................................................................... 19
6.1.2. Cooking control........................................................................................... 20
Temperature and time-controlled cooking with temperature
adjustment .................................................................................................... 20
Oven status indicators ................................................................ 21
6.1.3. Start of the cooking cycle ........................................................................... 22
6.1.4. End of cycle.................................................................................................. 23
6.1.5. Saving a programme .................................................................................. 23
6.1.6. Recovering a programme .......................................................................... 23
6.1.7. Quick memories .......................................................................................... 24
6.2. Errors and alarms ................................................................................................... 24
7. MAINTENANCE ............................................................................................27
7.1. Cleaning.................................................................................................................. 27
7.1.1. Suction and door gasket ............................................................................ 28
Aspiration ..................................................................................... 28
Door gasket.................................................................................. 29
mychefcooking.com
PRODUCT MANUAL QUICK 1 - DT.MP.Q1.2202.2
3
7.1.2. Outer casing................................................................................................. 30
7.1.3. Control panel ............................................................................................... 31
7.1.4. Cooling filter ................................................................................................ 31
7.1.5. Accessories .................................................................................................. 32
7.2. Preventive maintenance........................................................................................ 32

mychefcooking.com
PRODUCT MANUAL QUICK 1 - DT.MP.Q1.2202.2
4
1. GENERAL SAFETY AND ACCIDENT PREVENTION RULES
1.1. Personnel in charge of the use of the equipment
The appliance can be used by children aged 8 years and above and by persons with
reduced physical, sensory, or mental capabilities or lack of experience and knowledge, only
if they have received supervision or instruction concerning the hazards involved. Children
must not play with the appliance. Cleaning and maintenance work is the responsibility of
the user and must not be carried out by children without supervision.
Personnel performing any action on the oven, whether it be use, cleaning,
installation, handling, etc., must be aware of the safety regulations and
operating instructions.
Do not allow unauthorized personnel to use, handle or clean the
equipment.
1.2. Electrical hazard
Work on the electrical power supply and access to live parts may only be carried out by
qualified personnel under their own responsibility. In any case, such access must be carried
out with the equipment disconnected from the mains.
If the appliance is placed on a trolley or on tables that are mobile, do not allow it to move
while it is connected to the power supply in order to avoid possible damage to the wiring,
drain pipes or water inlet pipes. If the appliance is to be moved or repositioned, the cables
must be disconnected.
1.3. Thermal hazard
When the appliance is in operation, the door must be opened slowly and carefully to avoid
possible burns from steam or hot air escaping from inside the cooking chamber.
Accident hazard. Take care when using food pans in the oven when the top shelf is 160 cm
or more. There is a risk of injury from the hot contents of the trays.
Keep ventilation openings free of obstructions. Do not install the
equipment in the vicinity of flammable products. Avoid positioning the
oven near heat sources such as hobs, griddles, fryers, etc.
Check the safety distances in section Location.
DANGER OF ACCIDENT! Take care when using food containers in the oven
when the upper shelf is 160 cm or higher. There is a risk of injury from the
hot contents of the trays.

mychefcooking.com
PRODUCT MANUAL QUICK 1 - DT.MP.Q1.2202.2
5
While the oven is in operation, avoid touching metal parts and the door
glass, as they can exceed 60°C. Touch only the handle and the control
panel.
1.4. Corrosion hazard
When using cleaning products, special care and appropriate safety measures should be
taken when handling these products. Always read the safety data sheet of the different
chemical products before use and follow the instructions for use. These products in contact
with any part of the body are abrasive and can cause skin and eye irritations and
caustications.

mychefcooking.com
PRODUCT MANUAL QUICK 1 - DT.MP.Q1.2202.2
6
2. INTRODUCTION
This manual has been carefully prepared and revised in order to provide reliable
information and assistance for correct installation, use and maintenance that will ensure
proper operation and prolong the life of the oven. This manual is divided into parts3, the
first part dedicated to the installation of the equipment at the working point, the second
part to the use and the third part focused on the cleaning and maintenance of the oven.
Before carrying out any intervention or use of the equipment, it is necessary
to read this manual carefully and completely.
The manufacturer declines all implicit or explicit responsibility for any errors or omissions it
may contain.
- The oven must not be used by personnel who have not received any training, skills
or experience necessary for the correct operation of the equipment. Do not allow
children to use or play with the equipment.
- The owner of the equipment is obliged to have this manual read by the personnel
in charge of its use and maintenance, as well as to keep this manual in a safe place
so that it can be used by all users of the equipment and for future reference. If the
equipment is sold to other persons, this manual must be handed over to them.
- This oven must only be used for its intended purpose, i.e., cooking, heating,
regenerating or dehydrating food. Any other use may be dangerous and may result
in personal injury and damage to property.
- The equipment is shipped from the factory once it has been calibrated and passed
rigorous quality and safety tests to ensure its correct operation.
The manufacturer shall disclaim any liability for problems caused by
improper installation, modification, misuse or improper maintenance.

mychefcooking.com
PRODUCT MANUAL QUICK 1 - DT.MP.Q1.2202.2
7
3. TECHNICAL CHARACTERISTICS
3.1. Main features of the Mychef QUICK 1
QUICK 1
External measurements (W
x D x H)
410x 397x 598 mm
Capacity
31 x 31 x 18 cm
Servings/Hour
20
Table 1. Main features of Mychef QUICK 1 oven
The A-weighted sound pressure level of Mychef ovens is less than 70dB (A).

mychefcooking.com
PRODUCT MANUAL QUICK 1 - DT.MP.Q1.2202.2
8
4. RECEPTION, TRANSPORT AND LOCATION
Before installation, the dimensions of the site where the equipment is to be located and the
electrical connections must be verified.
4.1. Reception
Once the oven has been received, check that the model purchased corresponds to the
order.
Check that the packaging has not been damaged during transport and that no parts of the
equipment are missing. If you detect any anomaly or problem, contact your distributor
immediately.
4.2. Transport
The equipment should be transported in its original packaging to the location closest to the
point of installation to avoid damage as much as possible. It is recommended to keep the
original packaging until the equipment is properly installed and operational.
When moving the equipment and placing it in its workspace, the following remarks should
be taken into account:
-The dimensions of the different models to pass through narrow places (corridors,
doors, narrow spaces). See chapter 0.
-Handling must be carried out by the personnel necessary to move the load of the
furniture, taking into account the current occupational safety regulations at the place
of installation.
-During transport, the oven must always be in an upright position. It must be lifted
perpendicular to the floor and transported parallel to the floor.
-Make sure that it does not tip over during transport and that it does not hit any
objects.

mychefcooking.com
PRODUCT MANUAL QUICK 1 - DT.MP.Q1.2202.2
9
Figure 1. Oven fixing points
The oven must never be held by the door.
4.3. Location
-Place the oven at a convenient distance from the wall so that electrical connections
can be made. There must be a minimum distance between the oven parts so that it
can ventilate and cool properly. This minimum distance is:
o50mm on the left and right sides
o50mm at the rear
o50mm at the top
-If there are sources of heat or steam near the equipment (cooker, grill, griddle, fryer,
pasta cooker, kettle, tilting frying pan, etc.), these must be at a distance of more than
1 metre.
-Check that the oven is not exposed to hot air or vapours in the areas where the
cooling fans are located (front right area and rear left area).

mychefcooking.com
PRODUCT MANUAL QUICK 1 - DT.MP.Q1.2202.2
10
Figure 2. Suction zone for refrigeration
Under no circumstances obstruct the breathing zones or place any element
that could hinder the air intake. Do not place any heat source that could heat
up the cooling air.
-Once it is in place in the workspace, check that it is level.
Figure 3. Example of a suitable installation site
1000mm
50mm
50mm
50mm
50mm

mychefcooking.com
PRODUCT MANUAL QUICK 1 - DT.MP.Q1.2202.2
11
Be extremely careful with the cooling zones of the oven. If it draws in fumes
or hot air, this can drastically reduce the life span of the components.
For the installation of stacked Mychef ovens, please follow the instructions
supplied with the stacking kit.
Under no circumstances should breathing zones be obstructed or anything that could
hinder aspiration be placed.

mychefcooking.com
PRODUCT MANUAL QUICK 1 - DT.MP.Q1.2202.2
12
5. INSTALLATION
5.1. Electrical connection
Check that the voltage at the point where the oven is to be connected coincides with the
operating voltage of the equipment.
The following table indicates the electrical characteristics of each of the devices:
Voltage
Power
(kW)
Current
(A)
Cable cross-section
(mm2)
QUICK 1 EU
230/3L/50-60
3.6
16
2,50
QUICK 1 UK
230/3L/50-60
2.9
13
2,50
Table 2. Electrical wiring characteristics
Before carrying out any electrical work, make sure that there is no electrical current at the
connection point of the equipment.
The equipment must be connected to the mains via an all-pole circuit breaker with a contact
opening distance of more than 3mm. Also install a class A residual current device and
overcurrent protection.
Always ensure effective grounding.
Connect the device to an equipotential bonding system using the contact specially
provided for this purpose (see equipotential bonding sign on the bottom left-hand side of
the device). If two devices are stacked, both devices must be connected to the equipotential
bonding system.
Connection to an equipotential bonding system ensures additional safety
in the event of simultaneous earth leakage and earth leakage fault.
The wiring and other safety devices used for the electrical installation must have the
appropriate cross-section for the equipment in question.
Always comply with the applicable regulations for connecting the equipment
to the low-voltage mains.
Before starting the electrical installation, check that the electrical requirements of the oven
and the mains supply are the same.

mychefcooking.com
PRODUCT MANUAL QUICK 1 - DT.MP.Q1.2202.2
13
Never connect a phase to neutral or earth. Check that the voltages of the
installation correspond to those of the equipment.
The following sub-chapters show the possible connection types for Mychef ovens. The
voltage of each oven can be found on the oven identification sticker.
5.1.1. Single-phase connection 230V L+N
Colour
Cable
■
Brown
L1
■
Blue
Neutral
■
Green-yellow
Grounding
Table 3. Single phase cable 230V L+N
5.2. Catalytic filter installation
If the catalytic filter accessory has been purchased, the following instructions for correct
installation shall be followed:
-Unscrew the screws holding the plates on the sides of the chamber so that they can
be removed.
-Unscrew the screws holding the blade protection plate.
-Remove the blade protection plate and screw on the filter holder with two screws.
-Insert the protection plate at an angle (Figure 5) into the chamber and place the filter
in the filter holder.
-Replace the plates with the corresponding screws

mychefcooking.com
PRODUCT MANUAL QUICK 1 - DT.MP.Q1.2202.2
14
Figure 4. Assembling the filter holder to the protection plate
Figure 5. Filter insertion
In order to remove the protection plate, the catalytic filter must first be
removed, by carrying out the operation inside the chamber.
Make sure you have cooled down completely in order to handle the
boards.
The catalytic filter is an accessory. Everything not required for installation
is included in the filter installation kit.

mychefcooking.com
PRODUCT MANUAL QUICK 1 - DT.MP.Q1.2202.2
15
6. USE
6.1. Control panel
The control panel of the QUICK 1 oven with convection cooking combined with the 3D
impingement technology allows you to cook food quickly with excellent results. In addition,
it has eight quick access memories.
The following figure shows the control panel of a Mychef QUICK oven. It consists of a central
screen with displays, indicators, and buttons.
Figure 6. Mychef QUICK 1 Control

mychefcooking.com
PRODUCT MANUAL QUICK 1 - DT.MP.Q1.2202.2
16
The functionality of each is explained below:
Figure 7. Control panel detail
Block
Function
Description
A
Preheat icon
Icon identifying preheat status.
B
Preheat indicator
On, indicates that we are in the preheat status. The oven is
warming up to reach the cooking temperature.
C
Ready icon
Icon identifying the ready status.
D
Cooking indicator
On, indicates that the oven is in the ready status. The oven
is ready to start cooking.
E
CoolDown icon
Icon identifying cooldown status.
F
CoolDown indicator
On, indicates that the oven is in the CoolDown status. The
oven is cooling down.
G
Visualization display
Displays the selected parameter: temperature, cooking
time.

mychefcooking.com
PRODUCT MANUAL QUICK 1 - DT.MP.Q1.2202.2
17
H
Programme button
Allows you to record or retrieve a programme.
I
Adjustment button -
Decreases the selected parameter: programme,
temperature, or time.
J
Adjustment button +
Increases the selected parameter: programme,
temperature, or time.
K
Cooldown button
The oven enters the CoolDown phase to cool the inner
chamber.
L
Temperature button
Temperature selection button.
M
Time button
Time selection button.
N
Quick memory button
block M1...M8
With a long press, it saves the current parameters in a
specified memory.
With a short press, it executes the cooking procedure in
the memory.
O
START/STOP button
On/Off and oven start/stop button.
If the oven is on, but not cooking, pressing lightly will start
preheating.
If the oven is preheating, pressing lightly will skip
preheating.
If the oven is on and cooking, pressing lightly will cancel
the cooking cycle.
Table 4. Description control panel
The central display is a very important part of interacting with the oven, as it indicates the
value of each cooking parameter.
Figure 8. Central display

mychefcooking.com
PRODUCT MANUAL QUICK 1 - DT.MP.Q1.2202.2
18
The display format of the parameters is explained below:
Icon
Function
The temperature of the chamber is displayed with a T in the first
digit. The temperature value in degrees Celsius is then
displayed.
The cooking time is shown by the two central dots. The two digits
on the left are the minutes and the two digits on the right are the
seconds.
Cooking can also be continuous. In this case, CONT appears on
the display. For continuous cooking, press the Adjustment
button - until CONT appears on the display.
The programme is shown with a P in the first digit, followed by
the programme number.
This icon indicates that a cooking process has been completed.
The DOOR message appears when the door is opened during a
cooking process.
The PREHEAT message is displayed during preheating
processes with the oven, alternately with the current
temperature of the cooking chamber.
The LOAD message indicates that the oven has reached the
preheating temperature and the oven can now be loaded.
Closing the door will start the cooking cycle.

mychefcooking.com
PRODUCT MANUAL QUICK 1 - DT.MP.Q1.2202.2
19
In the event of an error, the first two digits of the display show
ER, followed by the error number. Refer to the error chapter for
more information on this.
It is possible to modify the operating parameters of the oven. In
the parameter editing menu, the central display shows a P,
followed by the parameter number. The two digits to the right
show the parameter value. Refer to the configuration menu
chapter for more information on this.
The Cool message is displayed during the cooldown status with
the oven.
Table 5. Description of messages on the central screen
6.1.1. Switching on the equipment
The equipment is switched on or off by pressing the START/STOP button for two seconds.
In order to protect the oven from possible overheating, some protection
elements may operate even when the oven is switched off. When the oven
is at a safe temperature, they will automatically switch off.
If the unit does not turn on, check the condition of the safety thermostat, located on the back
of the unit. To do this, first remove a black plastic plug located next to the power cable
gland.
Figure 9. Access to the safety thermostat

mychefcooking.com
PRODUCT MANUAL QUICK 1 - DT.MP.Q1.2202.2
20
6.1.2. Cooking control
Temperature and time-controlled cooking with temperature adjustment
When the oven is turned on, it automatically switches to the Preheat status, the Preheat
temperature will be the temperature that the oven has recorded from the last baking that
has been carried out in it. In this state, the oven automatically brings the temperature of the
cooking chamber to the temperature selected by the user so that when the door is opened
and the food is loaded, the temperature is the desired one. The oven automatically
calculates the temperature in the cooking chamber and decides whether a preheating
process should be carried out.
The temperature and time parameters are set with the +/- buttons after pressing the
TEMPERATURE and TIME buttons respectively.
In case we select a higher temperature than the one we have in the chamber; the oven will
go into preheat mode until that temperature is reached.
Figure 10. Preheat indicator
When the set temperature has been reached, the oven will alert the user with a buzzer and
indicate "Load".
Figure 11. Charging indicator
Once the oven is ready to cook, open the door and load it with food. Once the oven is
loaded and the door is closed, press the START/STOP button so that the time starts to count
down until cooking is finished. At this point, the time indicator will show the code word
Other manuals for QUICK 1
1
Table of contents
Other Mychef Oven manuals

Mychef
Mychef BAKERSHOP User manual

Mychef
Mychef BAKERSHOP 3 460X330 Quick start guide

Mychef
Mychef Evolution User manual

Mychef
Mychef COOK PRO User manual

Mychef
Mychef iBAKE User manual

Mychef
Mychef S Series User manual

Mychef
Mychef EVOLINE User manual

Mychef
Mychef iBAKE User manual

Mychef
Mychef iCOOK User manual

Mychef
Mychef COOK Series User manual
Popular Oven manuals by other brands

Miele
Miele H 6100 BM Operating and installation instructions

Bosch
Bosch HBG656L 1 Series User manual and installation instructions

KHIND
KHIND OT1801 instruction manual

Bosch
Bosch HBA63B251B instruction manual

KitchenAid
KitchenAid KEBS277YAL2 parts list

Ovention
Ovention Matchbox M360-12 Installation and operating manual