manuals.online logo
Brands
  1. Home
  2. •
  3. Brands
  4. •
  5. MYERS
  6. •
  7. Water Pump
  8. •
  9. MYERS DS33P1 User manual

MYERS DS33P1 User manual

OWNER’S MANUAL
Stainless Steel
Submersible Sump Pumps
©2005 253P7100 (3/17/05)
1101 Myers Parkway
Ashland, OH 44805
Phone:
1-419-289-1144
Fax:
1-419-289-6658
Web Site:
http://www.myerspump.com
DS33P1, DS50P1, DS75P1
Installation/Operation/Parts
For further operating, installation,
or maintenance assistance:
Call 1-419-289-1144
General Safety Information 2
DESCRIPTION
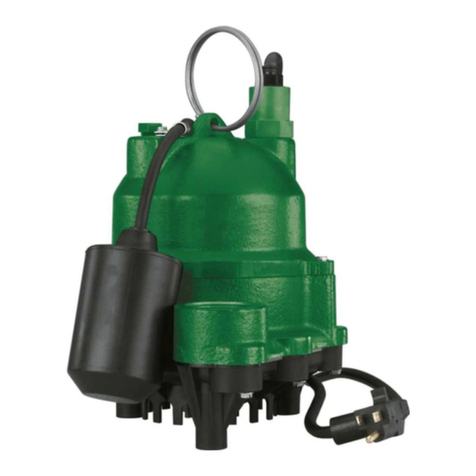
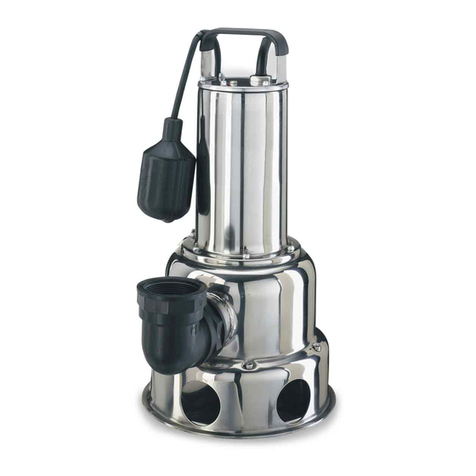
These Myers Stainless Steel Submersible Sump Pumps are
designed for drainage of sump pits and flooded basements,
dewatering flooded areas, and to provide laundry drainage.
Operates automatically. Has a 115V, 60 Hz., single phase, per-
manent split capacitor motor. Pump casing, suction strainer,
impeller and shaft are all stainless steel. Permanently lubricated
ball bearings never need lubrication. Automatic thermal over-
load protection. Equipped with a 15’ 18/3 grounding-type
power cord and tethered float switch.
Non-clog cast stainless steel impeller, ceramic shaft facings, and
stainless steel oil chamber for seal lubrication.
SPECIFICATIONS
Power supply required.............................................115V, 60 HZ.
Motor duty.................................................................Continuous*
Dedicated Circuit Requirement (minimum) ....................15 Amps
Pump Discharge .......................................................1-1⁄4" MNPT
Discharge Adapter:..........................................1-1⁄4" FNPT Elbow
1-1⁄4" MNPT-1-1⁄2" FNPT Adapter
Passes solids up to: .................................................................3/4"
*NOTE: For continuous operation, water depth must be at
least 2".
UNPACKING AND INSPECTION
Handle with care. Check items received against packing list to
be sure that all equipment has been received. Inspect for ship-
ping damage. If found, file claim with carrier immediately.
GENERAL SAFETY INFORMATION
READ AND FOLLOW
SAFETY INSTRUCTIONS!
Electrically powered sump pumps normally give many years of
trouble-free service when correctly installed, maintained, and
used. However, unusual circumstances (interruption of power to
the pump, dirt/debris in the sump, flooding that exceeds the
pump’s capacity, electrical or mechanical failure in the pump,
etc.) may prevent your pump from functioning normally. To pre-
vent possible water damage due to flooding, consult your retailer
about a secondary AC sump pump, a DC backup sump pump,
and/or a high water alarm. See the “Troubleshooting Chart” in
this manual for information about common sump pump prob-
lems and remedies.
Know the pump application, limitations, and potential hazards.
Disconnect power before servicing.
Release all pressure within system before servicing any component.
Drain all water from system before servicing.
Secure discharge line before starting pump. An unsecured dis-
charge line will whip, possibly causing personal injury and/or
property damage.
Check hoses for weak or worn condition before each use, mak-
ing certain that all connections are secure.
Periodically inspect sump, pump, and system components. Keep
free of debris and foreign objects. Perform routine maintenance
as required.
Personal Safety:
1. Wear safety glasses at all times when working with pumps.
2. Keep work area clean, uncluttered, and properly lighted –
replace all unused tools and equipment.
3. Keep visitors at a safe distance from work area.
4. Make workshop child-proof – with padlocks, master switch-
es, and by removing starter keys.
When wiring an electrically driven pump, follow all electrical
and safety codes that apply.
This equipment is only for use on 115 volt (single phase) and is
equipped with an approved 3-conductor cord and 3-prong,
grounding-type plug.
To reduce risk of electric shock, pull plug
before servicing. This pump has not been investigated for use in swim-
ming pool areas. Pump is supplied with a grounding conductor and
grounding-type attachment plug. Be sure it is connected only to a proper-
ly grounded grounding-type receptacle. Where a 2-prong wall receptacle
is encountered, it must be replaced with properly grounded 3-prong
receptacle installed in accordance with codes and ordinances that apply.
All wiring should be performed by a qualified electrician.
Make certain power source conforms to requirements of your
equipment.
PERFORMANCE
SPECIFICATIONS
Motor Minimum Liquid Switch Pumps
Full Load Circuit Req. Temperature Setting Down
Model HP Amps RPM (Amps) Range On Off To
DS33P1 1/3 2.8 3450 15 32°/120° F 12.0" 6.0" 1-3/8"
DS50P1 1/2 4.1 3450 15 32°/130° F 12.0" 6.0" 1-3/8"
DS75P1 3/4 6.4 3450 15 32°/130° F 12.0" 6.0" 1-3/8"
GPM of Water @ Total Feet of Head
Model HP 5’ 10’ 15’ 20’ Shutoff
DS33P1 1/3 16.0 8.5 1.0 – 16.0’
DS50P1 1/2 34.0 25.0 15.5 7.0 23.5’
DS75P1 3/4 45.5 34.0 21.5 12.0 26.2’
Installation / Operation 3
Protect electrical cord from sharp objects, hot surfaces, oil, and
chemicals. Avoid kinking cord. Replace or repair damaged or
worn cords immediately.
Do not handle pump or pump motor with wet hands or when
standing on wet or damp surface, or in water.
Do not use this pump in a fish pond.
Risk of electrical shock. Can burn or kill. If your
basement has water or moisture on floor, do not walk on wet
area until all power has been turned OFF. If shut-off box is in
basement, call electric company or hydro authority to shut-off
service to house, or call your local fire department for instruc-
tions. Remove pump and repair or replace. Failure to follow this
warning can result in fatal electrical shock. Oil on the pump or
in the sump may indicate motor leakage and electrical shock
hazard. Turn OFF power and check pump for oil leakage from
impeller area. Replace pump if it leaks.
NOTE: This unit is not designed for applications involving salt
water or brine! Use with salt water or brine will void warranty.
Pump water only with this pump.
INSTALLATION
1. Install pumps in sump pit with minimum diameter of 12".
Sump depth should be 18". Construct sump pit of tile, con-
crete, steel, or plastic. Check local codes for approved
materials.
2. Install pump in pit so that switch operating mechanism has
maximum possible clearance.
3. Pump should not be installed on clay, earth, or sand surfaces.
Clean sump pit of small stones and gravel which could clog
pump. Keep pump inlet screen clear.
NOTE: Do not use ordinary pipe joint compound on plastic
pipe. Pipe joint compound can attack plastics.
4. Install discharge plumbing. Use rigid plastic pipe and wrap
threads with Teflon tape or use Plasto Joint Stik1. Screw pipe
into pump hand tight +1 to 1-1⁄2 turns.
Risk of flooding. If a flexible discharge hose is
used, make sure pump is secured in sump to prevent movement.
Failure to secure pump may allow pump movement, switch
interference, and prevent pump from starting or stopping.
5. To reduce motor noise and vibrations, a short length of rub-
ber hose (1-7⁄8" I.D., e.g. radiator hose) can be connected
into discharge line near pump using suitable clamps.
6. Install an in-line check valve to prevent flow backwards
through pump when pump shuts off.
7. Power Supply: Pump is designed for 115 V., 60 Hz., opera-
tion and requires a minimum 15 amp dedicated circuit. Both
pump and switch are supplied with 3-wire cord sets with
grounding-type plugs. For automatic operation, switch plug is
inserted directly into outlet and pump plug inserts into oppo-
site end of switch plug. For manual operation, pump plug is
inserted directly into outlet.
1Lake Chemical Co., Chicago, Illinois
Pump should always be electrically grounded to
a suitable electrical ground such as a grounded water pipe or
a properly grounded metallic raceway or ground wire system.
Do not cut off round ground pin.
8. If pump discharge line is exposed to outside sub-freezing
atmosphere, portion of line exposed must be installed so any
water remaining in pipe will drain to the outfall by gravity.
Failure to do this can cause water trapped in discharge to
freeze which could result in damage to pump.
9. After piping and check valve have been installed, unit is
ready for operation.
10. Check operation by filling sump with water and observing
pump operation through one complete cycle.
Failure to make this operational check may
lead to improper operation, premature failure, and flooding.
OPERATION
Risk of electric shock. Do not handle a pump or
pump motor with wet hands, or when standing on wet or damp
surface or in water.
1. Shaft seal depends on water for lubrication. Do not operate
pump unless it is submerged in water as seal may be dam-
aged if allowed to run dry.
2. Motor is equipped with automatic reset thermal protector. If
temperature in motor should rise unduly, switch will cut off
all power before damage can be done to motor. When motor
has cooled sufficiently, switch will reset automatically and
restart motor. If protector trips repeatedly, pump should be
removed and checked as to cause of difficulty. Low voltage,
long extension cords, clogged impeller, very low head or lift,
etc., could cause cycling.
3. Pump will not remove all water. If manually operated pump
is operating and suddenly no water comes out of discharge
hose, shut OFF unit immediately. Water level is probably
very low and unit has broken prime.
NOTE: For continuous operation, water depth must be at least 2"
(5 cm).
Risk of electric shock. Before attempting to
check why unit has stopped operating, disconnect power from
unit. Do not handle pump with wet hands or when standing on
wet or damp surfaces, or in water.
NOTE: No repair parts are available for these pumps.
Troubleshooting 4
SYMPTOM POSSIBLE CAUSE(S) CORRECTIVE ACTION
Pump won’t 1. Blown fuse. 1. If blown, replace with fuse of proper size.
start or run. 2. Low line voltage. 2. If voltage under recommended minimum, check
size of wiring from main switch on property. If OK,
contact power company or hydro authority.
3. Defective motor. 3. Replace pump.
4. Defective float switch. 4. Replace switch.
5. Impeller. 5. If impeller won’t turn, locate source of binding and
clean out with hose or remove.
6. Float obstructed. 6. Remove obstruction.
Pump starts and 1. Backflow of water from piping. 1. Install or replace check valve.
stops too often.2.Faulty float switch. 2. Replace switch.
Pump will not 1. Defective float switch. 1. Replace switch.
shut off. 2. Restricted discharge
(obstacle in piping). 2. Remove pump and clean pump and piping.
3. Float obstructed. 3. Remove obstruction.
Pump operates but 1. Low line voltage. 1. If voltage under recommended minimum, check
delivers little or size of wiring from main switch on property. If OK,
no water. contact power company or hydro authority.
2. Something caught in impeller. 2. Clean out impeller or replace pump.
3. Worn or defective parts or 3. Clean impeller if plugged; otherwise replace pump.
plugged impeller.
4. Airlock (check valve installed 4. Drill a 1/16" - 1/8" dia. hole between pump
without vent hole). discharge & check valve.
NOTE: This pump has no serviceable parts inside case. Opening
case will ruin pump. If obstructions or blockages of impeller can-
not be cleaned out from the outside (for instance, by washing out
with a garden hose), replace pump.
Hazardous voltage; can shock, burn, or kill.
Unplug pump before attempting to clean or work on pump.
MYERS LIMITED WARRANTY
During the time periods and subject to the conditions hereinafter set forth, F.E. Myers will repair or replace to the original user or consumer any portion of your
new MYERS product which proves defective due to defective
materials or workmanship of MYERS. Contact your nearest Authorized MYERS Dealer for warranty service. At all times MYERS shall have and possess the sole
right and option to determine whether to repair or replace defective equipment, parts, or components. Damage due to lightning or conditions beyond the con-
trol of MYERS is NOT COVERED BY THIS WARRANTY.
WARRANTY PERIOD
Pumps: 12 months from date of installation or 18 months from date of manufacture.
Tanks: 5 years from date of purchase.
Labor, etc. Costs: MYERS shall IN NO EVENT be responsible or liable for the cost of field labor or other charges incurred by any customer in removing and/or
re-affixing any MYERS product, part or component thereof.
THIS WARRANTY WILL NOT APPLY: (a) to defects or malfunctions resulting from failure to properly install, operate or maintain the unit in accordance with
printed instructions provided; (b) to failures resulting from abuse, accident or negligence; (c) to normal maintenance services and the parts used in connection
with such service; (d) to units which are not installed in accordance with applicable local codes, ordinances and good trade practices; or (e) unit is used for pur-
poses other than for what it was designed and manufactured, and (f) if three-phase submersible motors are installed on a single-phase power supply using a
phase converter or if three-phase power is supplied by only two transformers, making an open Delta system.
RETURN OR REPLACED COMPONENTS: Any item to be replaced under this Warranty must be returned to MYERS in Ashland, Ohio, or such other place as
MYERS may designate, freight prepaid.
PRODUCT IMPROVEMENTS: MYERS reserves the right to change or improve its products or any portions thereof without being obligated to provide such a
change or improvement for units sold and/or shipped prior to such a change or improvement.
WARRANTY EXCLUSIONS: MYERS SPECIFICALLY DISCLAIMS THE IMPLIED WARRANTIES OF MERCHANTABILITY AND FITNESS FOR A PARTICULAR PUR-
POSE AFTER THE TERMINATION OF THE WARRANTY PERIOD SET FORTH HEREIN.
Some states do not permit some or all of the above warranty limitations and, therefore, such limitations may not apply to you. No warranties or representations
at any time made by any representative of MYERS shall vary or expand the provisions hereof.
LIABILITY LIMITATION: IN NO EVENT SHALL MYERS BE LIABLE OR RESPONSIBLE FOR CONSEQUENTIAL, INCIDENTAL OR SPECIAL DAMAGES RESULT-
ING FROM OR RELATED IN ANY MANNER TO ANY MYERS PRODUCT OR PARTS THEREOF. PERSONAL INJURY AND/OR PROPERTY DAMAGE MAY
RESULT FROM IMPROPER INSTALLATION. MYERS DISCLAIMS ALL LIABILITY, INCLUDING LIABILITY UNDER THIS
WARRANTY, FOR IMPROPER INSTALLATION–MYERS RECOMMENDS FOLLOWING THE INSTRUCTIONS IN THE INSTALLATION MANUAL. WHEN IN
DOUBT, CONSULT A PROFESSIONAL.
Some states do not allow the exclusion or limitation of incidental or consequential damages, so the above limitation or exclusion may not apply to you.
This Warranty gives you specific legal rights and you may also have other rights which vary from state to state.
In the absence of suitable proof of the purchase date, the effective date of this Warranty will be based upon the date of manufacture.
DETERMINATION OF UNIT DATE OF MANUFACTURE: Submersible Sump Pump (8-95) month and year stamped on pump nameplate; Column Sump Pump
month and year on red warranty tag.
MYERS
1101 Myers Parkway, Ashland, Ohio 44805-1989
Phone: 419-289-1144 • Fax: 419-289-6658 • www.femyers.com

This manual suits for next models

2

Other MYERS Water Pump manuals

MYERS FlexVane MES106 User manual

MYERS

MYERS FlexVane MES106 User manual

MYERS MCI033 User manual

MYERS

MYERS MCI033 User manual

MYERS MRGD300MC2 Guide

MYERS

MYERS MRGD300MC2 Guide

MYERS S50HTPC1 Guide

MYERS

MYERS S50HTPC1 Guide

MYERS DE Series User manual

MYERS

MYERS DE Series User manual

MYERS WHR5H Series Manual

MYERS

MYERS WHR5H Series Manual

MYERS SP75 Series Guide

MYERS

MYERS SP75 Series Guide

MYERS ME3F Series Guide

MYERS

MYERS ME3F Series Guide

MYERS 8T-550 Owner's manual

MYERS

MYERS 8T-550 Owner's manual

MYERS ME45MC -11 Series User manual

MYERS

MYERS ME45MC -11 Series User manual

MYERS VRS10A-11 Manual

MYERS

MYERS VRS10A-11 Manual

MYERS E54-30 Installation instructions

MYERS

MYERS E54-30 Installation instructions

MYERS MRGD200MC2 User manual

MYERS

MYERS MRGD200MC2 User manual

MYERS MDC33 Series Guide

MYERS

MYERS MDC33 Series Guide

MYERS MWH50 Series Manual

MYERS

MYERS MWH50 Series Manual

MYERS S40HT Series Guide

MYERS

MYERS S40HT Series Guide

MYERS MC50 User manual

MYERS

MYERS MC50 User manual

MYERS SR1830 Manual

MYERS

MYERS SR1830 Manual

MYERS MYERS S33 Troubleshooting guide

MYERS

MYERS MYERS S33 Troubleshooting guide

MYERS HJ Supplement

MYERS

MYERS HJ Supplement

MYERS ME3F Series User manual

MYERS

MYERS ME3F Series User manual

MYERS SSM33 Series User manual

MYERS

MYERS SSM33 Series User manual

MYERS BP5 User manual

MYERS

MYERS BP5 User manual

MYERS WHR User guide

MYERS

MYERS WHR User guide

Popular Water Pump manuals by other brands

Silverline 633872 user manual

Silverline

Silverline 633872 user manual

SAMES KREMLIN REXSON 2B588 user manual

SAMES KREMLIN

SAMES KREMLIN REXSON 2B588 user manual

Wilo TWU 3 Series Installation and operating instructions

Wilo

Wilo TWU 3 Series Installation and operating instructions

Bosch 0 986 580 943 installation instructions

Bosch

Bosch 0 986 580 943 installation instructions

moyno G2 Service manual

moyno

moyno G2 Service manual

GORMAN-RUPP 03H1-GR Installation, operation and maintenance manual

GORMAN-RUPP

GORMAN-RUPP 03H1-GR Installation, operation and maintenance manual

Enerpac PAM-1000 Series instruction sheet

Enerpac

Enerpac PAM-1000 Series instruction sheet

Zyno Medical Z-800 Instructions for use

Zyno Medical

Zyno Medical Z-800 Instructions for use

KSB Delta Primo F Installation and operating manual

KSB

KSB Delta Primo F Installation and operating manual

Speck pumps S90 owner's manual

Speck pumps

Speck pumps S90 owner's manual

Riken Keiki RP-D58 AC operating manual

Riken Keiki

Riken Keiki RP-D58 AC operating manual

FLOWTECH flowboost F.V Operation and maintenance manual

FLOWTECH

FLOWTECH flowboost F.V Operation and maintenance manual

Bell HP250 AP Use and maintenance manual

Bell

Bell HP250 AP Use and maintenance manual

GORMAN-RUPP PUMPS 81 1/2B2-B Installation, operation, and maintenance manual with parts list

GORMAN-RUPP PUMPS

GORMAN-RUPP PUMPS 81 1/2B2-B Installation, operation, and maintenance manual with parts list

Aqua ECO WASH instruction manual

Aqua

Aqua ECO WASH instruction manual

HEISSNER HFP7000-00 Instructions for use

HEISSNER

HEISSNER HFP7000-00 Instructions for use

Pfeiffer Vacuum UNO 35 operating instructions

Pfeiffer Vacuum

Pfeiffer Vacuum UNO 35 operating instructions

Wilo Sub TWI 4 Installation and operating instructions

Wilo

Wilo Sub TWI 4 Installation and operating instructions

manuals.online logo
manuals.online logoBrands
  • About & Mission
  • Contact us
  • Privacy Policy
  • Terms and Conditions

Copyright 2025 Manuals.Online. All Rights Reserved.