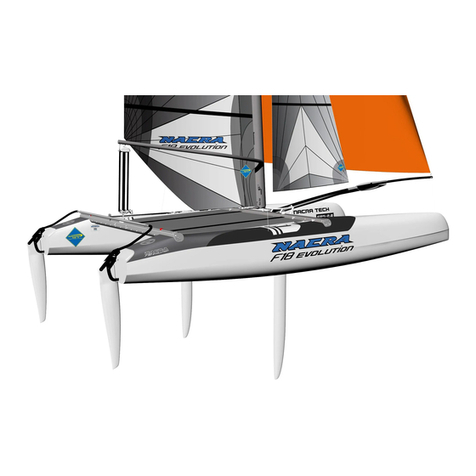
Nacra 500 MK2 User manual

1.
ASSEMBLY MANUAL
CAREFULLY READ THIS MANUAL BEFORE OPERATING YOUR NACRA.
!
500 MK2

2.
About Nacra Sailing
Since 1975 Nacra has always been about empowering sailors. Getting the best out of yourself
and your team with Nacra supplying the equipment. Reaching new heights and pushing your
boundaries, that’s Nacra Sailing! Nacra & Performance Sails are based in The Netherlands.
Our Dutch company took over the original Nacra factory (Santa Ana, California) in 2007 with
all its rights concerning the brand Nacra. Nacra has been originally founded in 1975 and
draws its knowledge therefore from a long history of building and supplying catamarans to
the world of sailing.
Address
Hellingweg 110 -116
2583 DX Scheveningen
Netherlands
Oice: +31(0) 70 338 2900
Fax: +31(0) 70 338 2901
Email: info@nacrasailing.com
2022 - All rights reserved Nacra Sailing Disclaimer General Conditions

3.
Welcome!
Dear Customer,
Thank you for purchasing a Nacra! Before you start using this Nacra, read this operator’s
manual and owner’s manual carefully and familiarize yourself with this boat and its operations.
For your safety and a longer operating lifespan of your brand new Nacra, follow the instructions
and warning notices in this manual and the owner’s manual carefully.
Besides manuals, we have an extensive dealer network around the world. Naturally, these
Nacra dealers know everything there is to know about your Nacra and can provide you with the
best service possible. So please call your dealer in your region for any servicing needs. Make
sure that only genuine spares are used for your Nacra to ensure optimal performance.
This manual will familiarize you with the operation and maintenance of your new Nacra. The
manual provides you with important safety information which should be read and understood
before moving on to assemble your Nacra.
Is this your first sailboat? Or are you not familiar with this kind of sailboat? For your comfort
and safety, please ensure that you obtain handling and operating experience before
assuming control of this Nacra catamaran. Nacra Sailing experience centers, National Sailing
Federations, or yacht clubs will be pleased to advise you about sailing schools or competent
instructors.
Please feel free to contact your local dealer whenever you have any queries. Manuals can also
be found on our website:
https://www.nacrasailing.com/support/

4.
Icon reading guide
Grease part with watertight lithium-based grease
Safety remark
Assemble in the shown order
Measure
Do not exceed the recommended 30 Nm, over
tightening the bolts results in damaged threads.

5.
Rudder
Crossbar
Main sheet
Traveller sheet
Mainsail
Helmsman
Jibsheet
Jib
Hiking strap
Trampoline
Pro grip
Joystick
Traveller
Rear beam
Crew
Shroud
Front beam
Trapeze
Hull
Bow
- controls direction of boat
- connects both tiller arms
Tiller arm - connects rudder to crossbar
- controls traveller position
- controls the power of the sail
- controls steering and main sail
- main power source of the catamaran
- controls the Jib’s angle to the wind
- secondary power source
- provides grip on slippery hull
- supports sailors and is the main interaction area
- supports the lower leg when hanging
- the way to control the rudder
- controls the main sail angle to the wind
- connects the two hulls
- controls the jib and heel
- keeps the mast up
- connects the hulls
- allows sailors to hang outside of the boat
- provides buoyancy
- front of the boat
Glossery

6.
Trim sheet
Jib
Sea
state wind strength Mast
rake*
Diamond
tension
forstay
tension
Jib block
position on
beam
3 to 8knots 5,2° 170kg 100kg inboard
8to 12 knots 5,2° 190kg 100kg inboard
12 to 18 knots 5,6° 220kg 100kg middle
18 to 25 knots 5,6° 250kg 100kg outboard
3 to 8knots 5,2° 170kg 100kg inboard
8to 12 knots 5,2° 190kg 100kg inboard
12 to 18 knots 5,6° 220kg 100kg middle
18 to 25 knots 5,6° 250kg 100kg outboard
3 to 8knots 5,2° 170kg 100kg inboard
8to 12 knots 5,2° 190kg 100kg middle
12 to 18 knots 5,6° 220kg 100kg middle
18 to 25 knots 5,6° 250kg 100kg outboard
Trimsheet
Mast
mediumlarge
* Mast rake can be measured by measuring the angle difference
between transom and mast. This needs to be done with 100kg
forestay tension and can be done with your phone by using a level
app. Always measure rake with the mast rotatated in the middle
Conditions
flat

7.
500 MK2 1
About Nacra Sailing 2
Welcome! 3
Icon reading guide 4
Glossery 5
Trim sheet 6
Table of contents 7
Setup 9
1. Basic platform assembly 10
1.1. Beam assembly threaded 12
1.2. Front crossbar pre-bend 14
1.3. Trampoline track on hull 15
1.4. Trampoline tensioning rear lacing 17
1.5. Bridle with connector 18
1.6. Quick righting line 500mk2 19
2. Basic mast assembly 20
2.1. Diamond wires 22
2.2. Fixed Spreaders 23
2.3. Diamond tension 25
2.4. Forestay full battened jib 26
2.5. Forestay furling jib 27
2.6. Fixing the stays 28
3. Mainsail setup 29
3.1. Main halyard 30
3.2. Mainsheet 1:8 31
4. Jib setup 32
4.1. Bridle with furler 33
4.2. Jib sheet 1 to 2 35
5. Rudders 36
5.1. Kick up rudder 37
5.2. Kick up rudder sensitivity adjustment 39
5.3. Rudder alignment 40
6. Trapeze setup 42
6.1. Trapeze shockcord through trampoline 43
6.2. Trapeze wires steel 44
6.3. Can’t miss trapeze wires (optional) 45
6.4. Adjustable trapeze wires (optional) 46
7. Cunningham system 47
7.1. Cunningham 1:8 48
8. Spinnaker system 49
8.1. Divisible bowsprit 50
8.2. Snuerbag 51
8.3. Spinnaker halyard 52
8.4. Spinnaker halyard Furler 53
8.5. Spinnaker snuer system 500MK2 55
8.6. Spinnaker system furling 60
Rigging 64
9. Setting the mast 66
9.1. Preparation 67
9.2. Preparation shroud adjuster 68
9.3. Preparation trapeze non-adjustable 69
9.4. Preparation trapeze adjustable 70
9.5. Raising the mast 71
9.6. Adjusting the stays 74
10. Mainsail rigging 75
10.1. Batten tensioner 76
10.2. Top batten 77
10.3. Traveler system without splittail 78
10.4. Raising the mainsail 79
11. Jib rigging 80
11.1. Hoisting the furling jib 500MK2 81
11.2. Hoisting the fully battened jib 500MK2 82
11.3. Furling the furling jib 83
11.4. Jib cunningham non adjustable 84
11.5. Jib sheet 1 to 2 hook in 85
11.6. Cunningham 1 to 8 non continous with shockcord 86
11.7. Cunningham 1 to 8 87
12. Spinnaker rigging 88
12.1. Bowsprit divisible snuer 89
12.2. Bowsprit divisible furler 90
12.3. Spinnaker snuer system 500MK2 91
12.4. Spinnaker furling system rigging 94
After Sails 97
12.5. Lowering the mainsail 98
12.6. Lowering the jib 99
12.7. Lowering the furling spinnaker 101
12.8. Lowering the mast 102
13. NOTES 103
13.1. Maintenance 104
13.2. Repair 105
14. Parts 500mk2 Sport 106
14.1. Arrival of parts 106
14.2. Rigbox 107
14.3. Rigbox assembly kits 108
14.4. Line Lengths 112
14.5. CONNECT WITH YOUR LOCAL NACRA DEALER 113
Table of contents

8.

Setup
Setting up the boat after purchase or long time storage

1. Basic platform assembly

11.

12.
1.1. Beam assembly threaded
Tools needed:
- Torque wrench
- 5/16 or 8 mm hex socket
- Grease
Take time to align the crossbars !
1.
8x
8x
1x 1x
2x
8x
Steel Glassfiber
1x
1x
2.
3.
500 mk2
1. Space the hulls aproximately 2.5m
parralel from each other. Use the
cardboard cradles or cattrax to support
the hulls.
2. Place both crossbars.
3. Insert all beam bolts
before tensioning.
Grease the bolts using
the supplied grease.

13.
Do not exceed the recommended 30 Nm, over
tightening the bolts results in damaged threads.
4.
5. You can use the supplied 8mm allen
key to tension the bolts.
4.

14.
Nacra front beams are delivered with pre bend right from the
factory. However, this should be checked.
• There should always be a pre-bend on the front
crossbar. This is been achieved by the tension on the
dolphinstriker.
• On new beams the tension on the dolphinstriker must
be reset aer:
- 2 hours of sailing and
- 10 hours of sailing
• check the tension without rig tension.
• During the season check the pre-bend regularly.
1.2. Front crossbar pre-bend
1. Release the tension on the nut located on top.
2. Release the tension on the nut located under the crossbar.
3. Put grease on both nuts.
4. Measure 15mm from top side of the crossbar to the
bottom side of the upper nut.
5. Tension the nut underneath the crossbar until both nuts
are tightened.
Check pre-bend always without rig tension on.
Tools needed:
- Wrench 22mm or 7/8 inch
- Wrench 19mm or 1/2 inch
15mm

15.
1.3. Trampoline track on hull
1x 1x
6mm 3mm
2. Make sure the trampoline is centered
5. Ideally with two persons, slowly and evenly pull the sides
into the tracks on the hulls.
Check if the trampoline does not get stuck at the
front edge of the track. Pulling hard when this
happens can damage your trampoline.
1. Slide the front of the trampoline into the track of the
front beam. The front top has a pocket opening in the
middle. Check if the top points up.
Pulling the trampoline in can be heavy, this becomes easier
over time when the trampoline stretches a bit. You can use
soap on the sides of the trampoline to lubricate.
Rear lace line
3. Loosen all crossbar bolts.
4. Use dishwasher soap to lubricate the sides of the
trampoline.
Tools needed:
- Torque wrench
- 5/16 or 8 mm hex socket
- Dishwasher soap

16.
6. Insert the trampoline tie rod into the trampoline, making
sure that the sides are covered in cloth. Enter the rod via
the hole in the side of the trampoline.
8. Tension the trampoline bolts according to the platform
assembly chapter.
9. Make a small bowline in the port end of the rope.
10. Loop the rope through the tie rod from top bottom, port
to starboard.
7. For the last bit of pulling you can use a rope through the
rear trampoline rod. Do not use the grommets in the
trampoline. As these can rip your trampoline.

17.
Make sure the trampoline is in the middle of the
catamaran.
1.4. Trampoline tensioning rear lacing
A well tensioned trampoline is paramount to its longevity
and your comfort on the boat. A correctly tensioned
trampoline is tight enough to stand on without much
deflection.
1. Loop the laces using the trampoline tie buttons.
2. Tension the trampoline loop by loop from port to
starboard.
3. You can use a wrench and a long nose plier to apply more
pulling force. Pinch the rope under tension at the tie
button. And tighten the rope using the wrench to prevent
the rope from cutting in your hands.
4. Aer tightening, go one or two buttons back to secure the
line.
5. Tie the rear lacing line with a half-hitch knot. Continue
until you reach the end of the line.
Tools needed:
- Long nose plier
- Wrench or screwdriver
You will need to re-tighten the trampoline aer the first
weeks or uses. The material needs time to set.

18.
2x
1. Mount the bridle wires on the bridle connector. Use the
clevis pins 1/2 x 1/4.
1.5. Bridle with connector
1x 2x 2x
20mm 1/2 x 1/4
3. For a snuer system: Install the ring 3x20 ss under the fork
terminal on port side as shown in the picture.
If you are installing a spinnaker kit also do the
following steps.
4. For the 500MK2: Install bowsprit connector plates on
both bridle terminals.
2. Connect the bridle to the bridle pins.
1x
500mk2 only

19.
1.6. Quick righting line 500mk2
1. Attach the shockcord with a bowline to the starboard
a trampoline lashing under the trampoline.
2. Feed the other end of the shockcord through the
20mm ring in the middle of the trampoline.
3. Feed the line through the ring in the a middle of the
trampoline.
4. Attach the other ring to the end of the shock cord
using a bowline knot.
5. Make an eight knot in the end of the righting line.
6. Feed the other end through the ring under the front
cross beam.
8mm 5mm
righting line shockcord
2x
20mm
7. Then through the ring attached to the shock cord.
8. Back to the front cross beam, through the eyelet.
9. Make an eight knot in the end of the righting line.

2. Basic mast assembly
Table of contents
Other Nacra Boat manuals