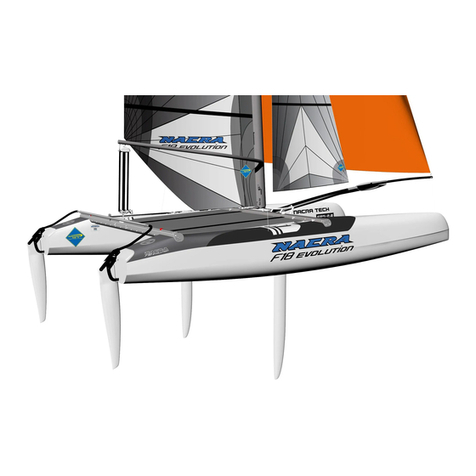
Nacra F16 User manual

Assembly manual
Dear Customer,
Welcome to the Nacra family. We wish to thank you that you choose for Nacra Sailing.
It’s our constant endeavour to provide you with products that oer excellent performance
throughout their ownerships period. Which is why, in addion to producing great catama-
rans, we have also set up an extensive dealer network around the world.
Naturally, these Nacra Dealers knows everything there is to know about your catamaran and
provides you with the best service possible. So please nd your dealer in your region on
www.nacrasailing.com for any servicing needed and make sure that only genuine spares are
used for your Nacra.
This manual will familiarize you with the operaon and maintenance of your new Nacra. It
will also provide you with the important safety informaon which should be read and under-
stood before moving on to the assembly manual. The Assembly & operang manuals of our
catamarans can be found under the ‘aer-sales’ buon on our website;
www.nacrasailing.com.
If this is your rst sailboat, or you are changing to a new type of sailboat you are not familiar
with? For your own comfort and safety, please ensure that you obtain handling and operang
experience before assuming control of the catamaran. Nacra Sailing or Naonal Sailing Feder-
aons or yacht clubs will be pleased to advise you about sailing schools or competent instruc-
tors.
When you have any query, please feel free to contact your local Dealer.
Happy Sailing.

Introduction
Welcome to the Nacra Family!
First we want to thank you for choosing one of our 4 high performance catamarans.
It’s our constant endeavor to empower sailiors with excellent catamarans that oer excellent performance throughout their
ownership period. Which is why, in addion to producing great catamarans, we have also set up an extensive dealer
network around the world.
Naturally, these Nacra Dealers knows everything there is to know about your catamaran and provides you with the best
service possible. So please nd your dealer in your region on www.nacrasailing.com for any servicing needed and make sure
that genuine spares are used for your Nacra.
For assembling your catamaran the right way and for technical support a clear assembly manual is needed. In the Nacra
racing assembly manual you can nd everything you need for; building your Nacra from out of the box, rigging your Nacra,
seng the sails and for further back-up informaon about assambling your Nacra. Please take your me to get familiarised
with all the parts and with our instrucon wrien in the assembly manual.
The Nacra racing assembly manual is meant for:
For specied tuning check our tuning guides on www.nacrasailing.com
Happy sailing.

Table of content
0. Tools ........................................................................................................................ 7
1. Plaorm assembly ................................................................................................. 8
1.1 Hull assembly................................................................................................... 8
1.2 Front crossbar pre-bend ................................................................................. 9
1.3 Trampoline .................................................................................................... 10
1.4 Trapeze shockcord ........................................................................................ 11
1.5 Righng line................................................................................................... 11
1.6 Mast rotaon.................................................................................................12
1.7 Spihalyard blocks ........................................................................................... 12
1.8 Spinnaker blocks............................................................................................ 12
1.9 Spin tack system ............................................................................................ 13
2. Mast assembly ..................................................................................................... 14
2.1 Diamond wires............................................................................................... 14
2.2 Spreaders ....................................................................................................... 15
2.3 Diamond tension ........................................................................................... 16
2.4 Spreader rake................................................................................................. 16
2.5 Spinhalyard .................................................................................................... 17
2.6 Main halyard..................................................................................................17
2.7 Fixing the stays .............................................................................................. 18
2.8 Jibhalyard....................................................................................................... 19
2.9 Cunningham system ...................................................................................... 20
3. Rudders ................................................................................................................ 21
4. Rigging .................................................................................................................. 22
4.1 Preparaon ....................................................................................................22
4.2 Raising the mast............................................................................................. 23
4.3 Lowering the mast ......................................................................................... 25
4.4 Snuerbag......................................................................................................26
4.5 Spipole ........................................................................................................... 27
4.6 Jibsheet .......................................................................................................... 28
4.7 Tackline/ cunningham/ boom ....................................................................... 29
4.8 Mastrotaon..................................................................................................29
4.9 Spinhalyard .................................................................................................... 30
4.10Spinsheet .......................................................................................................30
4.11Mainsheet 1:10.............................................................................................. 31

5. Seng the sails ....................................................................................................32
5.1 Spinnaker ....................................................................................................... 32
5.2 Raising the jib ................................................................................................. 33
5.3 Lowering the jib..............................................................................................33
5.4 Baens............................................................................................................ 34
5.5 Raising the mainsail........................................................................................35
5.6 Lowering the mainsail ....................................................................................36
6. Parts...................................................................................................................... 38
6.1 arrival of parts................................................................................................ 38
6.2 Rigbox ............................................................................................................39
6.3 Crossbar kit .................................................................................................... 40
6.4 Spreader aachment kit................................................................................ 40
6.5 Diamond adjuster kit ..................................................................................... 40
6.6 1:16 cunningham kit ......................................................................................40
6.7 Misc kit...........................................................................................................41
6.8 Rigging set......................................................................................................42
6.9 standard vs. Race .......................................................................................... 43

NACRA EMPOWERING SAILORS SINS 1975
0. Tools
1. Torque wrench
socket 1/2
socket 5/16 hex
4. Wrench 17 mm
3. Wrench 9/16
5. Wrench 22 mm
6. Allen tool 3mm
7. Flat Screwdriver
8. Philips screwdriver
2. Wrench 7/16 2x
9. long nose Plier
10. Pump Plier
11. “Loose” tension gauge: xed
12 Grease: waterght + lithium based

NACRA EMPOWERING SAILORS SINS 1975
1. Platform assembly
1. Place the starboard and port hull next to each other
and make sure that the hulls are facing the same way
2. Open the crossbar kit and grease the eight beambolt
inserts on the hulls.
use a big wheel trolley and sterns to level the hulls .
3. Place the crossbars in the crossbar sockets on the
hulls and make sure that the crossbars are facing
the right way.
The front crossbar has a jib track mounted, which
should be on top and facing the front of the boat.
The rear crossbar has two eyelets mounted on the
back which should be facing the back of the boat.
Take me to align the crossbars !
4. Grease all bolts and make sure the berglass washer is at the boem and the metal washer on top .
The washers for the front crossbar are allready put in the slot on top of the front crossbar.
5. Handght all the bolts before pung tension on them.
6. Aer hand ghtening the bolts, use a torque wrench to ghten the beambolts to 30 Nm maximum.
Do not exceed the recommended 30 Nm, over ghtening the bolts results in damaged threads.
1.1 Hull assembly
Tools needed:
- torgue wrench
- sockets

NACRA EMPOWERING SAILORS SINS 1975
Grease the pre-drilled holes next to the
daggerboardcase. Screw the harken cam
cleat on the hulls using the harken screws.
Make sure the nylock nut locks the bolt, but the
staymaster must be able to pivot. As shown in
the picture.
Mount the staymasters onto the hull with the
bolt and nylock nut. The nylock nut should be
inboard.
1.2 Front crossbar pre-bend
There should always be a pre-bend on the front crossbar. This is been achieved by the tension on the
dolphinstriker.
On new beams the tension on the dolphinstriker must be reset aer: -2 hours of sailing and
-10 hours of sailing!
During the season check the pre-bend regularly.
1. Release the tension on the nut located on top.
2. Release the tension on the nut located under the crossbar
3. Put grease on both nuts!
4. Measure 15mm from top crossbar to underside nut
4. screw the nut under the crossbar unl both nuts are ghtend.
When the mastpin starts to twist, xade it with the pump plier
wrench. Protect the mastpin from wearing!
Tools needed:
- wrench 7/16
- philips screwdriver
Tools needed:
- wrench 22
- pump plier

NACRA EMPOWERING SAILORS SINS 1975
3. Loop the rear lacing line through the e
rod as shown in the picture. Start at the
port side of the trampoline!
6. Tie the rear lacing line with
half hitch knot
7. Tie the side lace line to the
loop closest to the front
crossbar. Loop the lacing
line making sure the span-
nerbands and loop look
exactly the same as shown
in the picture
8. Make a loop with the side
lacing line at the last
9. go back two spanner bands
and take the lacing line
through te loop
10. e the lacing line with half-
hitch nut at the back of the
pre last spanner.
4. Loop the laces using the
trampoline e buons
5. Aer ghtening go back
one buon
Make sure the trampoline is in the middle of the catamaran.
The trampoline must
be in the middle of the
boat and in a straight
line before pung
tension on the line!!
1.3 Trampoline
1. Unscrew a beamcap on one side. Then slide the
front edge of the trampoline into the designated
slot. The hiking straps should be facing up.
2. Insert the trampoline e-rod into the
slot in the rear of the trampoline.

NACRA EMPOWERING SAILORS SINS 1975
Tie the footstraps using the hiking
strap es.
Use the strapeye on the rear crossbar
to e the footstrap in the middle.
1.4 Trapeze shockcord
1. Make a loop in the
trapeze shockcord.
2. Use the ring adjusted
in the middle of the
crossbar under the
trampoline to guide
the shockcord.
3. Tie the shockcord
on the rear lacing
line on port and
starboard side.
NOTE: F18 Infusion
The shockcord goes through the
tube in the hull.
1.5 RIghtning line
1. Tie one end of the rightning line on the
mastpin under the front crossbar, then
go through the eye in the middle of the
trampoline.
2. Tie a knot at the top of the trampoline
en put the remaining line in the
pocket.

NACRA EMPOWERING SAILORS SINS 1975
1.6 mast rotation
Take the mast rotaon
line and aach one end
to the staymaster
2. Go through the
harken cleat and
under the side
lacing line.
3. Use the grommet located in the middle
of the trampoline. Put the remaining
line in the pocket.
1.7 Spinnakerhalyard blocks
1. Tie a carbo 29mm block in the middle of
the spin halyard shockcord. Lead the
shockcord under the hiking straps
2. Use the small grommets in the trampoline
and e both ends to the rear lacing line.
3. Mount a 29mm carbo block with the trampoline
block e.
Make sure you do two loops!
1.8 Spinnaker blocks
Aach the 57 mm carbo ratchmac single spinnakerblocks on
the strap eyes on the hull. Tie the spinnakerblock shockcord
between the spinnakerblocks.

NACRA EMPOWERING SAILORS SINS 1975
1.9 Spin tack system
1. Mount the tack-releaseline. Tie a gure
8 knot on the port side underneath the
trampoline. Aach the ring 4x 25 at the
other end on the starboard side under-
neath the trampoline.
2. Feed one end of the tackline through the
block located underneath the front cross-
bar next to the mastpin. Then lead the
tackline through the ring, the cleat and the
16mm block next to the cleat.
3. Aer the 16mm block use the grommet
on the starboard side of the trampoline
4. Tie the tackline shockcord to the end of
the tackline and lead the shockcord
through the grommet on the starboard
side of the trampoline
5. Take the other end of the tackline shock-
cord and use the small grommet in the
middle of the V-bar to exit. Tie a loop in
the shockcord. This loop will be used to
e onto the middle of the spinsheet.
Note:
The F18 infusion and Carbon 20 has the tackline
guided by a 29mm carbo block aached on the
staymaster.

NACRA EMPOWERING SAILORS SINS 1975
2. Mast assembly
2.1 Diamond wires
It is preferable to place the mast on supports
while building the mast.
1. Get the brass ng from the rigbox kit dia-
mond adjuster and the diamond wires.
2. Lead the diamond wire through the slots in
the mast. Grease the threads of the diamond
wires and t one wire into the brass ng.
3. To t the other diamond wire into the brass
ng let another person coorperate by
turning the diamond wire at the other end.
4. Grease the diamond adjuster bolt and adjust the
washers and mastbase in the order as shown on
the picture.
Place the mastbase on the mast and pull the
diamondwires further through the diamond slots
in the mast.
5. Bend the diamond wire tang away
from the mast
6. Adjust the diamondwires on the diamondwire
tang with the two clevis pins 1/4 x 1/2 from the
spreader aachment rigbox kit.
The ring must be on the outside! Tape the Ring!
Tools needed:
- long nose plier
The brassng is asymmetric. Make sure
the brassng is in the same posion as
shown in the pictures!

NACRA EMPOWERING SAILORS SINS 1975
2.2 spreaders
3. Assemble the two spreader bars using the clevis
pins 3/16 x 5/8.
Now mount the spreaders on the mast with the
spreaderp facing forward.
The splitrings must face the boom of this
mast!
4. Take the spreader p cover and a monel-
wire piece. Wind the wire around the
spreader arm and put the two ends
through the cover. Slide the cover over
the spreader arm
7. Twist the two ends into each other.
8. Cut o the excess monel wire and ensure it is bent
neatly onto the diamond wires to prevent the wire
from tearing the sails.
9. Use vulkanizing tape to tape the spreader ends and
the pins and rings
1. Grease the spreader p 2. The spreaderp must be inserted at least
1cm! Lateron you can set the prefered
spreader rake.
5. Slide the diamond wires into the slots of
the spreaders.
Make sure the diamond wire is comple-
tely in the slot!
6. Twist the wire ends around each side of
the diamond wire.
Tools needed:
- long nose plier
Protect your sails, make sure no sharp wire ends
are scking out!

NACRA EMPOWERING SAILORS SINS 1975
2.3 diamond tension
1. Put tension on the diamond wires by ghtening the mast bolt with an wrench size
17mm. Use the “loose” tension gauge to measure the tension on the diamonds.
Set the tension on 38 (280 KG/280 lbs)
2. Aer pung tension on the mast check if the mast is straight. Take a look along the
rail from mast base to mast top.
If the mast is bended to starboard:
Unleash the diamond tension
Detach the port diamond wire at the tang and shorten the wire with 1 full
twist clockwise.
Aach the port diamond wire at the tang and put tension on the mast bolt
again. Redo this process if necessary
If the mast is bended to port:
Unleash the diamond tension
Detach the starboard diamond wire at the tang and shorten the wire with 1
full twist clockwise.
Aach the starboard diamond wire at the tang and put tension on the mast
bolt again. Redo this process if necessary
3. Tape the rings of the diamond tang when done.
Measure the spreaderrake by pung a baen on the diamond stays next to the spreaders. Measure
to the back of the rail
2.4 spreader rake
You can easily change the spreader rake by unleashing the tension on the diamonds and
adjusng the spreader p.
Tools needed:
- wrench 17mm
- “Loose” tension gauge
For specied tuning sengs, check the
trimsheets on www.nacrasailing.com

NACRA EMPOWERING SAILORS SINS 1975
2.5 spinaker halyard
1. Take the spin bale line and a carbo 29 mm block. Lead
one end of the spin bale line through the pre drilled holes
in the mast and e a gure 8 knot. Lead the other end of
the spin bale line through the middle of the block before
mounng it to the mast.
Tape the ends of the bale line to slide easily through the
pre drilled holes!
2. Adjust the block line to the top of the
block and the strapeye above. Fixate the
block on the same height as the bale line!
3. Adjust the big bullet pivong. The cleat is
facing downwards
top
4. Pull the spinaker halyard throug the topblock
5. Aach the dynema wire end of the spinaker halyard
temporary to the big bullet
2.6 Main halyard
1. Mount the mast sheeve with the clevis
pin 1/4 x 3/4 WL
Tape the ring!
2. Lead the main halyard line rst around the mast
sheeve. Then through both eyes of the main
halyard swifel and guide the line towards the
mastbase, using a small screwdriver
Make sure the line goes through both eyes of
the main halyard swivel!

NACRA EMPOWERING SAILORS SINS 1975
3. Tie a gure 8 knot at the boom
of the mast
4. Tie the other end of the main halyard line with a
gure 8 knot to the eyelet on the main halyard
ring. Tie everything temporally to the mast.
1. Take the shackle 8mm 5/16, 2 nylon washers, the
shrouds and forestay. Adjust them as shown in the
picture. The fore stay must be in the middle.
Make sure the ring of the forestay is inwards!
2. Take the shackle 6mm 1/4, 2 nylon washers and the
trapeze wires. Put the shackle through the middle
hole and adjust a trapeze wire on each side.
Tighten both shackles rmly!
2.7 Fixing the stays
3. Secure the shackle using the last monel
wire piece. Do as shown in the picture.
Cut the excess wire and bend it back
through the hole of the shackle pin before
taping it!
4. Tape the monel wire piece using the vulcani-
zing tape.
Check for sharp edges and tape if necessary!
5. Unscrew the wire-end of the staymaster and
mount it to the fork terminal of the shroud.
Use the clevis pins 1/4x5/8.
Tools needed:
- long nose plier

NACRA EMPOWERING SAILORS SINS 1975
2.8 jibhalyard
1. Take the jibhalyard and go
through the eye of the adjusted
forestay.
TOP
2. Both ends go through the ring at the forestay
check if the ring is located at the mastside.
3. Adjust one end with a bowline at the
eyelet of the S-hook. The other end is
adjusted with a gure-8 knot using the
small hole

NACRA EMPOWERING SAILORS SINS 1975
2.9 Cunningham system
1. Take the 1:16 cunningham
kit and e the d12 5mm
line to the 16 mm double
blocks.
2. Loop the cunninghamline
through the blocks as
shown on the drawing.

NACRA EMPOWERING SAILORS SINS 1975
3. rUDDERS
1. Assemble the upper and lower casng on
the rudderblade. Use a at screwdriver
2. Use the self locking slot for the nylock nut at the port
side of the casngs!
3. Put the boat on high support or a
trailer to allign the rudders. High
enough to lock down the rudders
7. Measure the length between the middle of
the rudders at the back and front of the
rudders. Measure at the same horizontal level!
8. The rudders must face 2 mm inwards, this is
adjustable by changing the rod length.
9. Check if the rod lenght is the same at both
sides before you screw in the phillipscrew.
5. Take the Philips screw out of the llerarm.
6. Place the ller extension in between the arms
check if the connector for the joysck is on
top!!
Rod
lenght
10. Fix the sliding bolt for the kick up tension, with the
rudder locked in. Push the bolt forward and x the bolt
while you’re sll pushing forward. Use two 7/16 wren-
ches.
11. Finally check the bolt of the eye screw of the lower
casng. The bolt must be xed by pung the nut on
tension. Use a 9/16 wrench. This bolt is also used to ad-
just the rudder rake.
Tools needed:
- at screwdriver
- philips screwdriver
- 7/16 wrench 2x
- 9/16 wrench
10
11

NACRA EMPOWERING SAILORS SINS 1975
10
1. Mount the bridle wires, stay adjuster and
compression pole on the bridle connec-
on ng.
Use the clevis pins 1/2 x 1/4
2. Adjust the ring 3x20 ss under the bridle
on each side as shown in the picture.
3. Place the mast with care on the trampoline with
the masrack down, support the back of the
mast to prevent it from scratching!
4. Check if the rigging and the shackles are
connected on the mast as have shown in the
manual.
5. Aach the schrouds to the staymaster to the
staymaster use the clevispin 1/4 x 5/8 WL .
Make sure the staymaster is at his maximum
length:10!
6. Aach the adjustable trapeze to the trapeze
wires. Check page ...how to assemble the sys-
tem.
7. Tie the adjustable trapeze wire to the trapeze
shockcords.
Check if the shrouds and trapeze wires are in
the right order before raising the mast!!
4. Rigging
4.1 preparation
Note: The F18 Infusion has no compressi-
on pole and bridle connecon ng but
a spi pole holder ring.
This manual suits for next models
3
Table of contents
Other Nacra Boat manuals