NAiS FP Series User manual

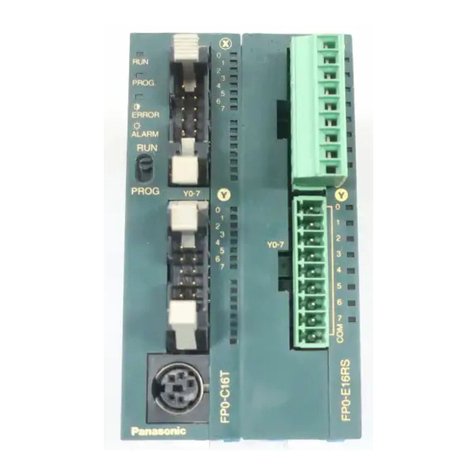
PROGRAMMABLE CONTROLLER
FP0
Hardware Manual
FP0 Hardware Manual ACGM0084END V3.4 5/2001Matsushita Electric Works, Ltd.
is a global brand name of Matsushita Electric Works.

BEFORE BEGINNING
This manual and everything described in it are copyrighted. You may not copy this
manual, in whole or part, without written consent of Matsushita Electric Works, Ltd.
Matsushita Electric Works, Ltd. pursues a policy of continuous improvement of the
design and performance of its products, therefore, we reserve the right to change the
manual/product without notice. In no event will Matsushita Electric Works, Ltd. be
liable for direct, special, incidental, or consequential damage resulting from any
defect in the product or its documentation, even if advised of the possibility of such
damages.
LIMITED WARRANTY
If physical defects caused by distribution are found, Matsushita Electric Works, Ltd.,
will replace/repair the product free of charge. Exceptions include:
DWhen physical defects are due to different usage/treatment of the
product other than described in the manual.
DWhen physical defects are due to defective equipment other than the
distributed product.
DWhen physical defects are due to modifications/repairs by someone
other than Matsushita Electric Works, Ltd.
DWhen physical defects are due to natural disasters.
EMS–DOS and Windows are registered trademarks of Microsoft Corporation.
EIBM Personal Computer AT is registered trademark of the International Business
Machines Corporation.

Before You Start
Installation
environment Do not use the unit where it will be exposed to the following:
DDirect sunlight and ambient temperatures
outside the range of 0_C to 55_C/32_F to
131_F.
DAmbient humidity outside the range of 30% to
85% RH and sudden temperature changes
causing condensation.
DInflammable or corrosive gas.
DExcessive vibration or shock.
DExcessive airborne dust or metal particles.
DWater in any form including spray or mist.
DBenzine, paint thinner, alcohol or other
organic solvents or strong alkaline solutions
such as ammonia or caustic soda.
DInfluence from power transmission lines, high
voltage equipment, power cables, power
equipment, radio transmitters, or any other
equipment that would generate high switching
surges.
Static electricity
DIn dry locations, excessive static electricity
can cause problems. Before touching the unit,
always touch a grounded piece of metal in
order to discharge static electricity.
Cleaning
DDo not use thinner–based cleaners because
they deform the unit case and cause the
colors to fade.
Power supplies
DAn insulated power supply with an internal
protective circuit should be used. The power
supply for the FP0 control unit operation is a
non-insulated circuit, so if an incorrect
voltage is directly applied, the internal circuit
may be damaged or destroyed. If using a
power supply without a protective circuit,
power should be supplied through a
protective element such as a fuse.

Power supply
sequence
DHave the power supply sequence such that
the power supply of the FP0 control unit turns
OFF before the power supply for I/O.
DIf the power supply for I/O is turned OFF
before the power supply of FP0 control unit,
the FP0 control unit will detect the input
fluctuations and may begin an unscheduled
operation.
Before turning
ON the power When turning ON the power for the first time, be sure to take the
precautions given below.
DWhen carrying out assembly, check to make
sure that there are no scraps of wiring,
particularly conductive fragments, adhering to
the unit.
DVerify that the power supply wiring, I/O wiring,
and power supply voltage are all correct.
DSufficiently tighten the installation screws and
terminal screws.
DSet the mode switch to PROG. mode.

Important Symbols
The following symbols are used in this manual:
Whenever the warning triangle is used, especially important
safety instructions are given. If they are not adhered to, the
results could be:
personal injury and/or
significant damage to instruments or their contents, e.g.
data
Note
Contains important additional information or indicates that you
should proceed with caution.
Example:
Contains an illustrative example of the previous text section.
next page Indicates that the text will be continued on the next page.
!

iMatsushita Electric Works (Europe) AG
Table of Contents
Chapter 1 Overview
1.1 Control Units 1-2. . . . . . . . . . . . . . . . . . . . . . . . . . . . . . . . . . . . . . . . . . . . . . . . . .
1.2 Expansion Units 1-3. . . . . . . . . . . . . . . . . . . . . . . . . . . . . . . . . . . . . . . . . . . . . . .
1.2.1 Expansion I/O Units 1-3. . . . . . . . . . . . . . . . . . . . . . . . . . . . . . . . . . . .
1.2.2 Intelligent Unit and Link Unit 1-4. . . . . . . . . . . . . . . . . . . . . . . . . . . . .
1.2.3 FP0 Power Supply Unit 1-5. . . . . . . . . . . . . . . . . . . . . . . . . . . . . . . . .
1.3 Expansion with Units 1-6. . . . . . . . . . . . . . . . . . . . . . . . . . . . . . . . . . . . . . . . . . .
1.4 Combinating Units 1-7. . . . . . . . . . . . . . . . . . . . . . . . . . . . . . . . . . . . . . . . . . . . .
1.5 Programming Tools 1-9. . . . . . . . . . . . . . . . . . . . . . . . . . . . . . . . . . . . . . . . . . . . .
Chapter 2 Control Units
2.1 Parts and Terminology 2-2. . . . . . . . . . . . . . . . . . . . . . . . . . . . . . . . . . . . . . . . . .
2.1.1 Status Indicator LEDs 2-4. . . . . . . . . . . . . . . . . . . . . . . . . . . . . . . . . . .
2.1.2 Mode Switch 2-4. . . . . . . . . . . . . . . . . . . . . . . . . . . . . . . . . . . . . . . . . . .
2.1.3 Tool Port 2-4. . . . . . . . . . . . . . . . . . . . . . . . . . . . . . . . . . . . . . . . . . . . . .
2.2 Specifications 2-5. . . . . . . . . . . . . . . . . . . . . . . . . . . . . . . . . . . . . . . . . . . . . . . . .
2.2.1 General Specifications 2-5. . . . . . . . . . . . . . . . . . . . . . . . . . . . . . . . . .
2.2.2 Weight 2-5. . . . . . . . . . . . . . . . . . . . . . . . . . . . . . . . . . . . . . . . . . . . . . . .
2.2.3 Current Consumed by the Control Unit 2-6. . . . . . . . . . . . . . . . . . . .
2.2.4 Performance Specifications 2-8. . . . . . . . . . . . . . . . . . . . . . . . . . . . . .
2.2.5 Input Specifications 2-11. . . . . . . . . . . . . . . . . . . . . . . . . . . . . . . . . . . . .
2.2.6 Output Specifications 2-13. . . . . . . . . . . . . . . . . . . . . . . . . . . . . . . . . . .
2.3 Internal Circuit Diagram 2-15. . . . . . . . . . . . . . . . . . . . . . . . . . . . . . . . . . . . . . . . .
2.3.1 Relay Output Type 2-15. . . . . . . . . . . . . . . . . . . . . . . . . . . . . . . . . . . . .
2.3.2 Transistor Output Type 2-16. . . . . . . . . . . . . . . . . . . . . . . . . . . . . . . . . .
2.4 Pin Layouts 2-19. . . . . . . . . . . . . . . . . . . . . . . . . . . . . . . . . . . . . . . . . . . . . . . . . . .
2.4.1 C10RS/C10CRS 2-19. . . . . . . . . . . . . . . . . . . . . . . . . . . . . . . . . . . . . . .
2.4.2 C14RS/C14CRS 2-19. . . . . . . . . . . . . . . . . . . . . . . . . . . . . . . . . . . . . . .
2.4.3 C16T/C16CT 2-20. . . . . . . . . . . . . . . . . . . . . . . . . . . . . . . . . . . . . . . . . .
2.4.4 C16P/C16CP 2-20. . . . . . . . . . . . . . . . . . . . . . . . . . . . . . . . . . . . . . . . . .
2.4.5 C32T/C32CT 2-21. . . . . . . . . . . . . . . . . . . . . . . . . . . . . . . . . . . . . . . . . .
2.4.6 C32P/C32CP/T32CP 2-22. . . . . . . . . . . . . . . . . . . . . . . . . . . . . . . . . . .

Table of Contents FP0 Hardware
ii Matsushita Electric Works (Europe) AG
Chapter 3 Expansion I/O Units
3.1 Parts and Terminology 3-2. . . . . . . . . . . . . . . . . . . . . . . . . . . . . . . . . . . . . . . . . .
3.2 Specifications 3-4. . . . . . . . . . . . . . . . . . . . . . . . . . . . . . . . . . . . . . . . . . . . . . . . .
3.2.1 General Specifications 3-4. . . . . . . . . . . . . . . . . . . . . . . . . . . . . . . . . .
3.2.2 Input Specifications 3-4. . . . . . . . . . . . . . . . . . . . . . . . . . . . . . . . . . . . .
3.2.3 Output Specifications 3-5. . . . . . . . . . . . . . . . . . . . . . . . . . . . . . . . . . .
3.3 Internal Circuit Diagram 3-7. . . . . . . . . . . . . . . . . . . . . . . . . . . . . . . . . . . . . . . . .
3.3.1 Relay Output Type 3-7. . . . . . . . . . . . . . . . . . . . . . . . . . . . . . . . . . . . .
3.3.2 Transistor Output Type 3-8. . . . . . . . . . . . . . . . . . . . . . . . . . . . . . . . . .
3.3.3 Expansion Input Units 3-11. . . . . . . . . . . . . . . . . . . . . . . . . . . . . . . . . . .
3.3.4 Expansion Output Units 3-12. . . . . . . . . . . . . . . . . . . . . . . . . . . . . . . . .
3.4 Pin Layouts 3-15. . . . . . . . . . . . . . . . . . . . . . . . . . . . . . . . . . . . . . . . . . . . . . . . . . .
3.4.1 E8RS 3-15. . . . . . . . . . . . . . . . . . . . . . . . . . . . . . . . . . . . . . . . . . . . . . . . .
3.4.2 E16RS 3-16. . . . . . . . . . . . . . . . . . . . . . . . . . . . . . . . . . . . . . . . . . . . . . . .
3.4.3 E16T 3-16. . . . . . . . . . . . . . . . . . . . . . . . . . . . . . . . . . . . . . . . . . . . . . . . .
3.4.4 E16P 3-17. . . . . . . . . . . . . . . . . . . . . . . . . . . . . . . . . . . . . . . . . . . . . . . . .
3.4.5 E32T 3-18. . . . . . . . . . . . . . . . . . . . . . . . . . . . . . . . . . . . . . . . . . . . . . . . .
3.4.6 E32P 3-19. . . . . . . . . . . . . . . . . . . . . . . . . . . . . . . . . . . . . . . . . . . . . . . . .
3.4.7 E8X 3-20. . . . . . . . . . . . . . . . . . . . . . . . . . . . . . . . . . . . . . . . . . . . . . . . . .
3.4.8 E16X 3-20. . . . . . . . . . . . . . . . . . . . . . . . . . . . . . . . . . . . . . . . . . . . . . . . .
3.4.9 E8YT 3-21. . . . . . . . . . . . . . . . . . . . . . . . . . . . . . . . . . . . . . . . . . . . . . . . .
3.4.10 E8YP 3-21. . . . . . . . . . . . . . . . . . . . . . . . . . . . . . . . . . . . . . . . . . . . . . . . .
3.4.11 E16YT 3-22. . . . . . . . . . . . . . . . . . . . . . . . . . . . . . . . . . . . . . . . . . . . . . . .
3.4.12 E16YP 3-23. . . . . . . . . . . . . . . . . . . . . . . . . . . . . . . . . . . . . . . . . . . . . . . .
Chapter 4 Analog I/O Unit
4.1 Parts and Terminology 4-2. . . . . . . . . . . . . . . . . . . . . . . . . . . . . . . . . . . . . . . . . .
4.1.1 Analog Mode Switch Setting 4-3. . . . . . . . . . . . . . . . . . . . . . . . . . . . .
4.1.2 Analog I/O Terminal 4-4. . . . . . . . . . . . . . . . . . . . . . . . . . . . . . . . . . . .
4.2 Specifications 4-5. . . . . . . . . . . . . . . . . . . . . . . . . . . . . . . . . . . . . . . . . . . . . . . . .
4.2.1 General Specifications 4-5. . . . . . . . . . . . . . . . . . . . . . . . . . . . . . . . . .
4.2.2 Analog Input Specifications 4-5. . . . . . . . . . . . . . . . . . . . . . . . . . . . . .
4.2.3 Analog Output Specifications 4-7. . . . . . . . . . . . . . . . . . . . . . . . . . . .
4.3 A/D Conversion Characteristics 4-9. . . . . . . . . . . . . . . . . . . . . . . . . . . . . . . . . .
4.4 D/A Conversion Characteristics 4-12. . . . . . . . . . . . . . . . . . . . . . . . . . . . . . . . . .
4.5 Wiring 4-13. . . . . . . . . . . . . . . . . . . . . . . . . . . . . . . . . . . . . . . . . . . . . . . . . . . . . . . .
4.5.1 Analog Input Wiring 4-13. . . . . . . . . . . . . . . . . . . . . . . . . . . . . . . . . . . . .
4.5.2 Analog Output Wiring 4-14. . . . . . . . . . . . . . . . . . . . . . . . . . . . . . . . . . .
4.6 Boosting the Precision of the Thermocouple Range 4-16. . . . . . . . . . . . . . . .

Table of Contents
FP0 Hardware
iiiMatsushita Electric Works (Europe) AG
4.7 Averaging Function 4-17. . . . . . . . . . . . . . . . . . . . . . . . . . . . . . . . . . . . . . . . . . . . .
4.7.1 Averaging for Voltage Ranges and Current Ranges 4-17. . . . . . . . .
4.7.2 Averaging for a Thermocouple Range 4-18. . . . . . . . . . . . . . . . . . . . .
Chapter 5 FP0 I/O Link Unit (MEWNET–F)
5.1 FP0 I/O Link Unit (MEWNET–F) 5-2. . . . . . . . . . . . . . . . . . . . . . . . . . . . . . . . .
5.1.1 Operating Condition Display LEDs 5-2. . . . . . . . . . . . . . . . . . . . . . . .
5.1.2 Station Number Selection Switches 5-3. . . . . . . . . . . . . . . . . . . . . . .
5.1.3 Operation Mode Selection Switches 5-3. . . . . . . . . . . . . . . . . . . . . .
5.2 Precautions for Handling 5-4. . . . . . . . . . . . . . . . . . . . . . . . . . . . . . . . . . . . . . . .
5.3 Specifications 5-5. . . . . . . . . . . . . . . . . . . . . . . . . . . . . . . . . . . . . . . . . . . . . . . . .
5.3.1 General Specifications 5-5. . . . . . . . . . . . . . . . . . . . . . . . . . . . . . . . . .
5.3.2 Performance Specifications 5-5. . . . . . . . . . . . . . . . . . . . . . . . . . . . . .
5.3.3 Master and Slave Stations 5-6. . . . . . . . . . . . . . . . . . . . . . . . . . . . . . .
5.3.4 Recommended Cables 5-6. . . . . . . . . . . . . . . . . . . . . . . . . . . . . . . . . .
5.3.5 Terminal Pin Layout 5-7. . . . . . . . . . . . . . . . . . . . . . . . . . . . . . . . . . . .
5.3.6 Communication Line Wiring Diagram 5-7. . . . . . . . . . . . . . . . . . . . .
5.3.7 Related Product Names and Numbers 5-8. . . . . . . . . . . . . . . . . . . .
5.4 Using the FP0 I/O Link Unit 5-9. . . . . . . . . . . . . . . . . . . . . . . . . . . . . . . . . . . . .
5.4.1 Operation Mode 5-9. . . . . . . . . . . . . . . . . . . . . . . . . . . . . . . . . . . . . . . .
5.4.2 Parallel Versus Serial Connection 5-9. . . . . . . . . . . . . . . . . . . . . . . .
5.4.3 FP0 Connections 5-10. . . . . . . . . . . . . . . . . . . . . . . . . . . . . . . . . . . . . . .
5.4.4 Remote I/O System Communication Error Flag (FP0) 5-11. . . . . . .
5.4.5 I/O Number 5-11. . . . . . . . . . . . . . . . . . . . . . . . . . . . . . . . . . . . . . . . . . . .
Chapter 6 Power Supply Unit
6.1 Power Supply Unit, FP0–PSA2 6-2. . . . . . . . . . . . . . . . . . . . . . . . . . . . . . . . . .
6.2 Specifications 6-3. . . . . . . . . . . . . . . . . . . . . . . . . . . . . . . . . . . . . . . . . . . . . . . . .
Chapter 7 I/O Allocation
7.1 I/O Number 7-2. . . . . . . . . . . . . . . . . . . . . . . . . . . . . . . . . . . . . . . . . . . . . . . . . . .
7.2 Control Unit 7-3. . . . . . . . . . . . . . . . . . . . . . . . . . . . . . . . . . . . . . . . . . . . . . . . . . .
7.3 Expansion I/O Unit 7-4. . . . . . . . . . . . . . . . . . . . . . . . . . . . . . . . . . . . . . . . . . . . .
7.4 Analog I/O Unit 7-5. . . . . . . . . . . . . . . . . . . . . . . . . . . . . . . . . . . . . . . . . . . . . . . .
7.5 Link Unit 7-6. . . . . . . . . . . . . . . . . . . . . . . . . . . . . . . . . . . . . . . . . . . . . . . . . . . . . .

Table of Contents FP0 Hardware
iv Matsushita Electric Works (Europe) AG
Chapter 8 Installation
8.1 Important Notes 8-2. . . . . . . . . . . . . . . . . . . . . . . . . . . . . . . . . . . . . . . . . . . . . . . .
8.2 Adding Expansion Units 8-5. . . . . . . . . . . . . . . . . . . . . . . . . . . . . . . . . . . . . . . .
8.3 Attachment to DIN Rails 8-7. . . . . . . . . . . . . . . . . . . . . . . . . . . . . . . . . . . . . . . .
8.4 Installation Using FP0 Slim Type Mounting Plate 8-8. . . . . . . . . . . . . . . . . . .
8.5 Installation Using FP0 Flat Type Mounting Plate 8-9. . . . . . . . . . . . . . . . . . .
Chapter 9 Wiring
9.1 Safety Instructions 9-2. . . . . . . . . . . . . . . . . . . . . . . . . . . . . . . . . . . . . . . . . . . . .
9.1.1 Interlock Circuit 9-2. . . . . . . . . . . . . . . . . . . . . . . . . . . . . . . . . . . . . . . .
9.1.2 Emergency Stop Circuit 9-2. . . . . . . . . . . . . . . . . . . . . . . . . . . . . . . . .
9.1.3 Start Up Sequence 9-2. . . . . . . . . . . . . . . . . . . . . . . . . . . . . . . . . . . . .
9.1.4 Momentary Power Failures 9-2. . . . . . . . . . . . . . . . . . . . . . . . . . . . . .
9.1.5 Protecting Power Supply and Output Sections 9-3. . . . . . . . . . . . .
9.2 Wiring the Power Supply to the Control Unit 9-4. . . . . . . . . . . . . . . . . . . . . . .
9.3 Grounding 9-6. . . . . . . . . . . . . . . . . . . . . . . . . . . . . . . . . . . . . . . . . . . . . . . . . . . .
9.4 Input Wiring 9-7. . . . . . . . . . . . . . . . . . . . . . . . . . . . . . . . . . . . . . . . . . . . . . . . . . .
9.4.1 Sensors 9-7. . . . . . . . . . . . . . . . . . . . . . . . . . . . . . . . . . . . . . . . . . . . . . .
9.4.2 LED-Equipped Reed Switch 9-8. . . . . . . . . . . . . . . . . . . . . . . . . . . . .
9.4.3 Two-Wire Type Sensor 9-8. . . . . . . . . . . . . . . . . . . . . . . . . . . . . . . . . .
9.4.4 LED-Equipped Limit Switch 9-8. . . . . . . . . . . . . . . . . . . . . . . . . . . . . .
9.5 Output Wiring 9-10. . . . . . . . . . . . . . . . . . . . . . . . . . . . . . . . . . . . . . . . . . . . . . . . . .
9.5.1 Protective Circuit for Inductive Loads 9-10. . . . . . . . . . . . . . . . . . . . .
9.5.2 Precautions for Using Capacitive Loads 9-11. . . . . . . . . . . . . . . . . . .
9.6 Wiring the Terminal Block Socket 9-12. . . . . . . . . . . . . . . . . . . . . . . . . . . . . . . .
9.7 Wiring the MIL Connector 9-14. . . . . . . . . . . . . . . . . . . . . . . . . . . . . . . . . . . . . . .
9.7.1 Contact Puller Pin for Rewiring 9-15. . . . . . . . . . . . . . . . . . . . . . . . . . .
9.8 Wiring the RS232C Port 9-16. . . . . . . . . . . . . . . . . . . . . . . . . . . . . . . . . . . . . . . .
Chapter 10 Trial Operation
10.1 Before Turning ON the Power 10-2. . . . . . . . . . . . . . . . . . . . . . . . . . . . . . . . . . .
10.2 Turning the Power ON 10-3. . . . . . . . . . . . . . . . . . . . . . . . . . . . . . . . . . . . . . . . . .

Table of Contents
FP0 Hardware
vMatsushita Electric Works (Europe) AG
Chapter 11 Self-Diagnostic and Troubleshooting
11.1 Self-Diagnostic Function 11-2. . . . . . . . . . . . . . . . . . . . . . . . . . . . . . . . . . . . . . . .
11.1.1 Allowing Duplicated Output 11-2. . . . . . . . . . . . . . . . . . . . . . . . . . . . . .
11.1.2 Continuing After an Operation Error 11-2. . . . . . . . . . . . . . . . . . . . . .
11.2 Troubleshooting 11-3. . . . . . . . . . . . . . . . . . . . . . . . . . . . . . . . . . . . . . . . . . . . . . .
11.2.1 ERROR/ALARM LED is Flashing 11-3. . . . . . . . . . . . . . . . . . . . . . . . .
11.2.2 ERROR/ALARM LED is ON 11-5. . . . . . . . . . . . . . . . . . . . . . . . . . . . .
11.2.3 All LEDs are OFF 11-5. . . . . . . . . . . . . . . . . . . . . . . . . . . . . . . . . . . . . .
11.2.4 Diagnosing Output Malfunction 11-6. . . . . . . . . . . . . . . . . . . . . . . . . . .
11.2.5 Communication Error with Programming Software 11-8. . . . . . . . . .
11.2.6 PROTECT ERROR is Displayed 11-9. . . . . . . . . . . . . . . . . . . . . . . . .
11.2.7 Program Mode does not Change to RUN 11-9. . . . . . . . . . . . . . . . . .
11.3 Error Codes 11-10. . . . . . . . . . . . . . . . . . . . . . . . . . . . . . . . . . . . . . . . . . . . . . . . . . .
11.3.1 Total-Check Function 11-10. . . . . . . . . . . . . . . . . . . . . . . . . . . . . . . . . . .
11.3.1.1 Syntax Check Error 11-10. . . . . . . . . . . . . . . . . . . . . . . . . .
11.3.1.2 Self-Diagnostic Error 11-11. . . . . . . . . . . . . . . . . . . . . . . . .
11.3.2 Syntax Check Error Codes 11-11. . . . . . . . . . . . . . . . . . . . . . . . . . . . . .
11.3.3 Self-Diagnostic Error Codes 11-12. . . . . . . . . . . . . . . . . . . . . . . . . . . . .
Appendix A System Registers
A.1 System Registers A-2. . . . . . . . . . . . . . . . . . . . . . . . . . . . . . . . . . . . . . . . . . . . . .
A.1.1 Types of System Registers A-2. . . . . . . . . . . . . . . . . . . . . . . . . . . . . .
A.1.2 Checking and Changing System Register Settings A-2. . . . . . . . .
A.1.3 Precautions When Setting System Registers A-3. . . . . . . . . . . . . . .
A.1.4 Content of System Register Settings A-4. . . . . . . . . . . . . . . . . . . . . .
A.2 Tables of System Registers A-6. . . . . . . . . . . . . . . . . . . . . . . . . . . . . . . . . . . . .
Appendix B Special Internal Relays
B.1 Special Internal Relays B-2. . . . . . . . . . . . . . . . . . . . . . . . . . . . . . . . . . . . . . . . .
Appendix C Special Data Registers
C.1 Special Data Registers C-2. . . . . . . . . . . . . . . . . . . . . . . . . . . . . . . . . . . . . . . . .

Table of Contents FP0 Hardware
vi Matsushita Electric Works (Europe) AG
Appendix D Dimensions
D.1 C10RS–10CRS–14RS–14CRS/E8RS–16RS D-2. . . . . . . . . . . . . . . . . . . . . .
D.2 C16T–16CT–16P–16CP/E16T–16P–8X–8YT–8YP D-3. . . . . . . . . . . . . . . .
D.3 C32T–32CT–32P–32CP/E32T–32P–16X–16YT–16YP D-4. . . . . . . . . . . . .
D.4 Analog I/O Unit D-5. . . . . . . . . . . . . . . . . . . . . . . . . . . . . . . . . . . . . . . . . . . . . . . .
D.5 I/O Link Unit D-6. . . . . . . . . . . . . . . . . . . . . . . . . . . . . . . . . . . . . . . . . . . . . . . . . . .
D.6 Power Supply Unit D-7. . . . . . . . . . . . . . . . . . . . . . . . . . . . . . . . . . . . . . . . . . . . .
D.7 Mounting on DIN Rail D-8. . . . . . . . . . . . . . . . . . . . . . . . . . . . . . . . . . . . . . . . . . .
D.8 FP0 Slim Type Mounting Plate D-9. . . . . . . . . . . . . . . . . . . . . . . . . . . . . . . . . . .
D.8.1 Dimensions When Using FP0 Slim Type Mounting Plate D-10. . . . .
D.9 FP0 Flat Type Mounting Plate D-11. . . . . . . . . . . . . . . . . . . . . . . . . . . . . . . . . . .
Index
Record of Changes

Chapter 1
Overview

FP0 HardwareOverview
1-2 Matsushita Electric Works (Europe) AG
1.1 Control Units
The in–/output units provide different amount of points, are equipped with/without
RS232C port and with terminals or MIL connectors.
Terminal type
10 points
FP0-C10RS
Input: 6
Relay output: 4
()
10 points with
RS232C
FP0-C10CRS FP0-C14CRS
14 points with
RS232C port
FP0-C14RS
14 points
Input: 8
Relay output: 6
()
MIL type
Input: 8
Transistor output: 8
16 points
NPN open collector: FP0-C16T
PNP open collector: FP0-C16P
Input: 8
Transistor output: 8
NPN open collector: FP0-C16CT
PNP open collector: FP0-C16CP
16 points with RS232C port
() ()
PNP open collector: FP0-T32CP
32 points with RS232C port
Input: 16
Transistor output: 16
NPN open collector: FP0-C32T
PNP open collector: FP0-C32P
32 points
Input: 16
Transistor output: 16
()()
32 points with
RS232C port

FP0 Hardware 1.2 Expansion Units
1-3Matsushita Electric Works (Europe) AG
1.2 Expansion Units
Expansion units provide digital and analog in–/outputs.
1.2.1 Expansion I/O Units
There are combined in–/output units, input units, and transistor output units. They are
either equipped with terminals or with MIL connectors.
Terminal type
8 points
Input: 4
Relay output: 4
16 points
FP0-E16RS
(
FP0-E8RS
)()
Input: 8
Relay output: 8
MIL type
Input: 8
Transistor output: 8
16 points 32 points
Input: 16
Transistor output: 16
NPN open collector: FP0-E16T
PNP open collector: FP0-E16P NPN open collector: FP0-E32T
PNP open collector: FP0-E32P
() ()
8 inputs 16 inputs
FP0-E8X FP0-E16X

FP0 HardwareOverview
1-4 Matsushita Electric Works (Europe) AG
MIL type, continued
NPN open collector: FP0-E8YT
PNP open collector: FP0-E8YP NPN open collector: FP0-E16YT
PNP open collector: FP0-E16YP
8 transistor outputs 16 transistor outputs
1.2.2 Intelligent Unit and Link Unit
The analog unit provides 2 inputs and 1 output.
Analog I/O unit Input: 2 channels
Output: 1 channel
FP0-A21
()
The FP0 I/O Link Unit works as the slave station of a remote I/O system. The FP0 I/O
Link Unit exchanges I/O information with the master unit.
FP0 I/O Link Unit
FP0–IOL
Input: 32 points
Output: 32 points
()

FP0 Hardware 1.2 Expansion Units
1-5Matsushita Electric Works (Europe) AG
1.2.3 FP0 Power Supply Unit
The power supply unit FP0–PSA2 provides stabile 24V DC distribution voltage for a
broad spectrum of applications.
FP0 Power Supply Unit
FP0–PSA2
FP0–PSA2
+
+
+
–
–
–
OUTPUT
INPUT

FP0 HardwareOverview
1-6 Matsushita Electric Works (Europe) AG
1.3 Expansion with Units
Be sure to check that the units are added according to the restrictions below.
Notes A maximum of three expansion I/O units, analog I/O units, or
I/O link units can be connected to one control unit.
Maximumpossible expansion: total of 3 units
Control unit
(CPU) First
expansion unit Second
expansion unit Third
expansion unit
There are no restrictions on the combination of different types
of control and expansion units.
A combination of relay output types and transistor output
types is also possible.
The expansion unit can be attached directly to the control unit
easily. Special expansion cables, backplanes, and so forth,
are unnecessary as the expansion unit employs a stacking
system that uses expansion connector and expansion hooks
on the surface of the unit itself.
Controllable I/O Points
CPU type CPU only Expansion unit is of the same
output type as CPU Expansion unit is a transistor
output type
C10R 10 points max. 58 points max. 106 points
C14R 14 points max. 62 points max. 110 points
C16T/C16P 16 points max. 112 points max. 112 points
C32T/C32P 32 points max. 128 points max. 128 points

FP0 Hardware 1.4 Combinating Units
1-7Matsushita Electric Works (Europe) AG
1.4 Combinating Units
Relay Output Units
10
Input: 6 Output: 4 10
Input: 6 Output: 4
=
14
Input: 8 Output: 6 14
Input: 8 Output: 6
=
18
Input: 10 Output: 8 10
Input: 6 Output: 4 8
Input: 4 Output: 4
=+
22
Input: 12 Output: 10 14
Input: 8 Output: 6 8
Input: 4 Output: 4
=+
26
Input: 14 Output: 12 10
Input: 6 Output: 4 16
Input: 8 Output: 8
=+
10
Input: 6 Output: 4 8
Input: 4 Output: 4 8
Input: 4 Output: 4
++
30
Input: 16 Output: 14 14
Input: 8 Output: 6 16
Input: 8 Output: 8
=+
14
Input: 8 Output: 6 8
Input: 4 Output: 4 8
Input: 4 Output: 4
++
34
Input: 18 Output: 16 10
Input: 6 Output: 4 16
Input: 8 Output: 8 8
Input: 4 Output: 4
=++
10
Input: 6 Output: 4 8
Input: 4 Output: 4 8
Input: 4 Output: 4
+++
38
Input: 20 Output: 18 14
Input: 8 Output: 6 16
Input: 8 Output: 8 8
Input: 4 Output: 4
=++
14
Input: 8 Output: 6 8
Input: 4 Output: 4 8
Input: 4 Output: 4
+++
42
Input: 22 Output: 20 10
Input: 6 Output: 4 16
Input: 8 Output: 8 16
Input: 8 Output: 8
=++
10
Input: 6 Output: 4 16
Input: 8 Output: 8 8
Input: 4 Output: 4 8
Input: 4 Output: 4
+++
46
Input: 24 Output: 22 14
Input: 8 Output: 6 16
Input: 8 Output: 8 16
Input: 8 Output: 8
=++
14
Input: 8 Output: 6 16
Input: 8 Output: 8 8
Input: 4 Output: 4 8
Input: 4 Output: 4
+++
50
Input: 26 Output: 24 10
Input: 6 Output: 4 16
Input: 8 Output: 8 16
Input: 8 Output: 8 8
Input: 4 Output: 4
=+++
54
Input: 28 Output: 26 14
Input: 8 Output: 6 16
Input: 8 Output: 8 16
Input: 8 Output: 8 8
Input: 4 Output: 4
=+++
58
Input: 30 Output: 28 10
Input: 6 Output: 4 16
Input: 8 Output: 8 16
Input: 8 Output: 8
=+++
62
Input: 32 Output: 30 14
Input: 8 Output: 6 16
Input: 8 Output: 8 16
Input: 8 Output: 8
=+++
=
=
=
=
=
=
Total number of
I/O points Control
unit First
expansion
I/O unit
Second
expansion
I/O unit
Third
expansion
I/O unit
+++
=

FP0 HardwareOverview
1-8 Matsushita Electric Works (Europe) AG
Transistor Output Units
16
Input: 8 Output: 8 16
Input: 8 Output: 8
=
32
Input: 16 Output: 16
32
Input: 16 Output: 16
=
16
Input: 8 Output: 8 16
Input: 8 Output: 8
=+
48
Input: 24 Output: 24 32
Input: 16 Output: 16 16
Input: 8 Output: 8
=+
16
Input: 8 Output: 8 32
Input: 16 Output: 16
=+
16
Input: 8 Output: 8 16
Input: 8 Output: 8
=++
64
Input: 32 Output: 32 32
Input: 16 Output: 16 32
Input: 16 Output: 16
=+
32
Input: 16 Output: 16 16
Input: 8 Output: 8 16
Input: 8 Output: 8
=++
16
Input: 8 Output: 8 32
Input: 16 Output: 16 16
Input: 8 Output: 8
=++
16
Input: 8 Output: 8 16
Input: 8 Output: 8
=+++
80
Input: 40 Output: 40 32
Input: 16 Output: 16 32
Input: 16 Output: 16 16
Input: 8 Output: 8
=++
32
Input: 16 Output: 16 16
Input: 8 Output: 8 16
Input: 8 Output: 8
=+++
16
Input: 8 Output: 8 32
Input: 16 Output: 16 32
Input: 16 Output: 16
=++
16
Input: 8 Output: 8 32
Input: 16 Output: 16 16
Input: 8 Output: 8 16
Input: 8 Output: 8
=+++
96
Input: 48 Output: 48 32
Input: 16 Output: 16 32
Input: 16 Output: 16
=++
32
Input: 16 Output: 16 32
Input: 16 Output: 16 16
Input: 8 Output: 8 16
Input: 8 Output: 8
=+++
16
Input: 8 Output: 8 32
Input: 16 Output: 16 32
Input: 16 Output: 16 16
Input: 8 Output: 8
=+++
112
Input: 56 Output: 56 32
Input: 16 Output: 16 32
Input: 16 Output: 16 16
Input: 8 Output: 8
=+++
16
Input: 8 Output: 8 32
Input: 16 Output: 16 32
Input: 16 Output: 16
=+++
128
Input: 64 Output: 64 32
Input: 16 Output: 16 32
Input: 16 Output: 16
=+++
Total number of
I/O points Control
unit First
expansion
I/O unit
Second
expansion
I/O unit
Third
expansion
I/O unit
+++
=

FP0 Hardware 1.5 Programming Tools
1-9Matsushita Electric Works (Europe) AG
1.5 Programming Tools
Type Description Order
number
PC software FPWIN Pro Program editing windows software for use with
commercially available computers. (System required: IBM
compatible with Pentium 1 processor, 60MB free hard disk,
CD–ROM drive, 32MB RAM (recommended), and
Windows 3.11/95/98/2000/NT.)
FPWINPro
C/F/S/U
DED/END/
FRD
FPWIN GR Program editing windows software for use with
commercially available computers. (System required: IBM
compatible with Pentium 100MHz processor, 15MB free
hard disk, 32MB RAM (recommended), and Windows
95/98/NT.)
FPWINGR
FD
By summer
2001: Ital.
and Span.
versions
FP PC cable Cable needed for connection between the tool port of FP0
control unit and the RS232C port (25 pins) of RS232C port
adapter.
AFC8513
(3m/9.84ft.)
(see note 2)
Programmer FP programmer II
Ver. 2 (see note 1)Handheld programming device AFP1114V2
FP peripheral cable Cable needed for connection between the tool port of FP0
control unit and the FP programmer II’s communication
port.
AFC8521
(1m/3.28ft.)
AFC8523
(3m/9.84ft.)
Notes 1) When FP programmers (AFP1112A/AFP1114) are used, reading
and writing of the following FP0 instructions are not possible
and the functions cannot be used.
–High–speed counter function (related
instructions: F166/F167)
–Pulse output function (related instructions:
F168/F169)
–PWM output function (related instruction: F170)
–1ms unit timer instruction (TML)
–32–bit auxiliary timer instruction (F183)
–Changing the communication baud rate to
19,200bps (factory setting is 9600bps)
2) If the FP PC cable (AFC8513) is to be connected to a computer
(IBM PC/AT compatible), use a commercially available 9 pin –
25 pin port adapter.
Other manuals for FP Series
2
This manual suits for next models
1
Table of contents
Other NAiS Controllers manuals