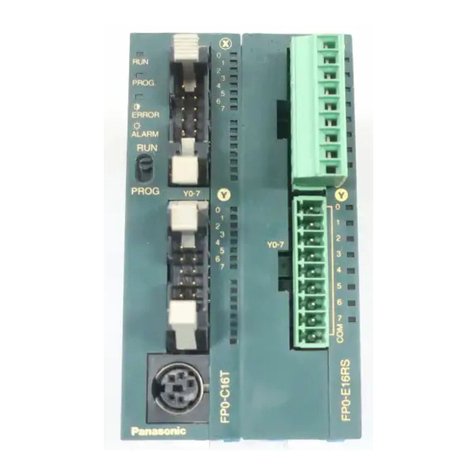
NAiS AFP3434 Manual

FP3 Positioning Unit Setting Software
Control Configurator P3
Operational Guide Book
http://www.naisplc.com/
n Applicable Unit Type
l FP3 Positioning Unit F-type (Line-driver type)
AFP3434/AFP3435/AFP3436
l FP3 Positioning Unit F-type (Transistor type)
AFP3431/AFP3432
l FP3 Positioning Unit E-type
AFP3431E/AFP3432E
Control Configurator P3 Operational Guide Book
ARCT1F338E ’01.09

! Caution
Compact disks attached with the product never be play back with audio CD players and speakers of
computers.
Lauder sound by the playback may injure your ears and break down your speakers of a computer.
Description of copyright and a registered trademark
(1) The copyright of this product is reserved by Matsushita Electric Works, Ltd.
(2) You may not legally copy, reprint, and rent this software and this manual in whole or part, without written
consent of Matsushita Electric Works, Ltd.
(3) The Specifications and the manual might be changed without notice.
(4) Despite of Article (3), Matsushita Electric Works, Ltd. will not be liable for any results of executing the
product.
Microsoft, MS-DOS, Windows 95, Windows 98,Windows Me, Windows NT, Windows 2000,
Excel are registered trademarks of Microsoft Corporation.
The other names of corporations and products are each corporation's trademarks and/or registered
trademarks.
This manual does not mention TMR in its body.

PREFACE
We appreciate your purchase of our software product.
This "Introduction guidance" is published to tell beginners
about setup and operating outline of the product.
Please understand a content of this booklet very well to use
the product correctly.
In addition, see the online help of the product for details of the
way of use.
Would you please…
Tell us if you find something dubious or of errors in this
manual despite our heed to publication of the booklet as
possible.
i

ii

Table of Contents
1. Preparation & Overview ......................................................................1-1
1.1 Installing the Software ....................................................................................1-2
1.2 Setting Up a Desktop Shortcut .......................................................................1-6
1.3 Starting and Exiting.........................................................................................1-8
2. Connection with PC ..............................................................................2-1
2.1 Connecting methods ......................................................................................2-2
2.1.1 E-type .................................................................................................................2-3
2.1.2 F-type ( Line-driver type )...................................................................................2-4
2.1.3 F-type ( Transistor type )....................................................................................2-5
3. Name of each part..................................................................................3-1
3.1 Screen and menus .........................................................................................3-2
4. Setting parameters.................................................................................4-1
4.1 Setting parameters .........................................................................................4-2
4.2 List of Parameter Settings ..............................................................................4-4
4.3 Exiting parameter settings ..............................................................................4-6
5. Outline of data editing...........................................................................5-1
5.1 Data view........................................................................................................5-2
5.2 Editing data.....................................................................................................5-3
5.3 Contents of data .............................................................................................5-4
iii

6. LOCAL mode........................................................................................ 6-1
6.1 Before beginning… ........................................................................................ 6-2
6.2 Teaching ( Trial operation ) ............................................................................ 6-4
6.3 Teaching ( Data entry )................................................................................... 6-6
6.4 Transferring data............................................................................................ 6-7
6.5 Software homing operation ............................................................................ 6-8
6.6 Positioning operation...................................................................................... 6-9
7. RUN mode ............................................................................................. 7-1
7.1 Setting mode to RUN ..................................................................................... 7-2
8. Saving a file............................................................................................ 8-1
8.1 Saving a file.................................................................................................... 8-2
9. Printing a file ......................................................................................... 9-1
9.1 Printing a file................................................................................................... 9-2
9.1.1 Printing ...............................................................................................................9-2
9.1.2 Setting print items ..............................................................................................9-3
iv

Prior to use …
This manual gives brief explanations on Configurator P3 Installation.
As for the positioning unit itself and peripheral devices, refer to their hardware manuals.
Hardware Requirements:
Operation System .................................. Windows95 OSR2( Ver.4.00.950B ) or more, / 98 / Me
WindowsNT( Ver.4.0 or later ) / 2000
Required hard disk space...................... 15MB or more
Available CPU grade ............................. Pentium 200MHz or higher
Lowest-capacity memory....................... 32MB or more
Available resolution................................ 800 x 600 or higher
Color grade ............................................ 256 colors or more
Applicable Positioning Unit Types:
All the unit types of FP3 positioning unit made by MEW.
F-type
• FP3 Line-driver type
AFP3434 ( 1-Axis unit )
AFP3435 ( 2-Axis unit )
AFP3436 ( 3-Axis unit )
• FP3 Transistor type
AFP3431 ( 1-Axis unit )
AFP3432 ( 2-Axis unit )
E-type
• FP3 Line-driver type
AFP3431E ( 1-Axis unit )
AFP3432E ( 2-Axis unit )
Applicable Networks:
• RS232C ( C-NET ) Connection
• Ethernet Connection
• Modem Connection
v

vi

Chapter 1
Preparation & Overview
1.1 Installing the Software ............................................................................... 1-2
1.2 Setting Up a Desktop Shortcut ................................................................. 1-6
1.3 Starting and Exiting Configurator P3 .......................................................... 1-8

1.1 Installing the Software
Installing the Software on a personal computer
Descriptions on how to install Configurator P3 to PC are given here. Conduct installation based on the following
procedure.
To logon to Windows NT・Windows 2000, please use an authorized user name of "Administrator".
1. Exit any working applications.
Please exit all the working applications, if any.
2. Set the setup CD in place.
Please mount the Configurator P3 setup CD in the CD drive.
3. Select "Run…".
Either click "Start" button at the lower left of the screen, or press [Ctrl] + [Esc]
keys to display the Windows menu, and select "Run…".
4. Enter the name of the file to be run.
When "Run…" is selected, the dialog box shown
at the left appears. Enter d:\setup.exe and click
on "OK" button.
NOTE:
The drive name (d:) may vary depending on the
computer environment.
1-2

5. A confirmation message is displayed.
The setup program is started and a confirmation
message is displayed.
Check the contents and click on "Next >" button. To
interrupt the operation, click "Cancel" button.
6. Confirm the licensing agreement.
A dialog box is displayed in which the licensing
agreement can be confirmed.
To indicate agreement with all of the licensing items,
click "Yes" button.
The setup process begins.
Selecting "No" cancels the Configurator P3 setup
procedure.
7. Register your user information.
A user information dialog box is displayed. Fill in
the data for the "Name", "Company Name", and
"Serial No." items, and click on "Next >" .
The serial number is printed on the user card
included in the Configurator P3 package.
Make sure it is entered correctly.
The information entered here can be confirmed on
the splash screen when the Configurator P3 is
started, and under "About" in the "Help" menu.
1-3

8. Select the destination to which the program is to be installed.
A confirmation dialog box is displayed,
showing the folder in which the program in
the displayed folder, click "Next >" button.
The folder displayed from the beginning,
"C:\Program Files\NAiS Control", may be
used. To install the program is in a different
folder, click "Browse…" button specify a
folder.
9. Select the program folder.
A confirmation dialog box is displayed, showing
the program folder.
To use the displayed folder, click "Next >"
button.
The "NAiS Control" folder displayed from the
beginning may be used. To change to a
different folder, enter the name of the folder.
10. The installation begins.
A message is displayed on the screen,
indicating that installation is in progress, and the
Configurator P3 setup begins.
1-4

11. Confirm the Readme file display.
When the setup process is finished, a dialog
box is displayed, indicating that the setup has
been completed.
To display the Readme file, click on the "Yes"
button.
12. Confirm rebooting of the computer.
When the entire process has been completed,
a dialog box is displayed, indicating that the
computer should be rebooted.
Select either the "Yes, I want to restart my
computer now" button, or the "No, I will restart
my computer later" button, and click on the
"Finish" button.
The computer must be rebooted before the
Configurator P3 can be used, so rebooting is
recommended at this point.
13. The Configurator P3 group icon is displayed.
If the setup process is concluded without rebooting the computer, the
Configurator P3 group icon is displayed on the computer.
To start the Configurator P3, click group icon.
REFERENCE
The group icon mentioned above is displayed only when the installation has just been
completed. For information on starting the program, see section 1.3 "Starting and Exiting the
Configurator P3", and section 1.2 "Setting Up a Desktop Shortcut".
CAUTION
Never remove the CD while the installation is in progress.
1-5

1.2 Setting Up a Desktop Shortcut
If an icon called "Shortcut to Configurator P3" is created on the desktop, the Configurator P3 can be started
simply by double-clicking on that icon. This is faster and simpler than the usual starting procedure.
The Configurator P3 shortcut icon is not automatically created as part of the usual installation process. To
create the icon, follow the procedure below.
1. Select the shortcut creation menu.
Without selecting any icon, click the right button of the mouse on the
desktop.
Then select "New" Î"Shortcut" from the menu.
2. Enter the file name.
When the shortcut creation menu is selected, a
dialog box like that shown at the left is displayed,
so that the file name can be input.
In our explanation, we will proceed by clicking the
"Browse…" button.
3. Search for the Configurator P3 file.
Clicking on the "Browse…" button displays the
file reference dialog box shown at the left. Open
the folders in the following order : [Program
Files] Î[NAiS Control] Î[Configurator] Î
[P3]
Select the installed Configurator P3 file, eigher
by clicking on "Open" button, or double-clicking
with the mouse.
1-6

4. Click "Next >" button.
When the Configurator P3 is selected, the file
name is input appears again.
Click on the "Next >" button to proceed.
5. Select the name of the shortcut.
Select a name to be displayed beneath the
shortcut icon, and click on the "Finish"
button.
■The name "ConfigP3.exe", which is displayed
from the beginning , may also be used. To
change to another name, enter that name.
6. This completes creation of the shortcut icon.
You have now finished creating your shortcut icon to be displayed on the desktop.
If the procedure has been successfully completed, the icon showed at the left will be displayed.
Double-clicking on this icon starts the Configurator P3.
1-7

1.3 Starting and Exiting
Starting procedure
1. Start the Configurator P3
Using either of the methods described below to start the Configurator P3.
•Start from the Configurator
group icon.
Double-click icon.
•Start from the shortcut icon you
created.
Double-click icon.
•Start from the Windows
Start menu.
Click "Start" button, or press
[Ctrl] + [Esc] keys to display
the Windows menu and start
from the "Programs" menu.
Select [NAiS Control] Î
[Configurator] Î
[Configurator P3].
2. Select a unit type.
When Configurator P3 is started in one of the above ways, a dialog box to select a unit type appears on the
screen.
Select an appropriate unit type and axis mode by clicking its radio button, and then click [OK] button.
1-8

3. The initial screen of Configurator P3 appears.
When Configurator P3 is started normally, the following initial screen is displayed.
■Hint
To upload parameters or positioning point data from the positioning unit, click [OK].
When Configurator P3 is started, select [Online] Î[Upload from unit].
You may change the unit type later.
When Configurator P3 is started, select [Online] Î[Unit type & Axis mode…].
A dialog box to select a unit type appears.
■Exit Configurator P3.
To exit Configurator P3, click [File] on the menu bar, and select [Exit] on the displayed menu.
You can also exit it by clicking [Close] at the upper right corner of the screen.
1-9

1-10

Chapter 2
Connection with PC
2.1 Connecting methods ................................................................................. 2-2
2.1.1 E-type .......................................................................................... 2-3
2.1.2 F-type ( Line-Driver type ) ........................................................... 2-4
2.1.3 F-type ( Transistor type ) ............................................................. 2-5

2.1 Connecting methods
It is necessary to connect the positioning unit to PC to utilize its functions fully such as downloading data edited
in Configurator P3 to the positioning unit, uploading data of the positioning unit from Configurator P3, and
performing operation at LOCAL mode.
The followings describe methods to connect the positioning unit to PC under each communication type,
supported by Configurator P3.
CAUTION
Do not connect the communication cable to the CPU unit.
2-2
This manual suits for next models
6
Table of contents
Other NAiS Controllers manuals