Step 2 Locate an area that is between the trusses to install the
solar attic fan (southern exposure is recommended). Mount the
curb to the deck centering the curb over the space between the
trusses. Using a reciprocating saw, cut out opening. DO NOT
CUT STRUCTURAL FRAMING.
Step 3 Place curb over opening and toe-nail into existing roofing
using galvanized nails. If necessary, build blocking to ensure the
curb is secure. Wrap curb with roofing material to prevent leaking.
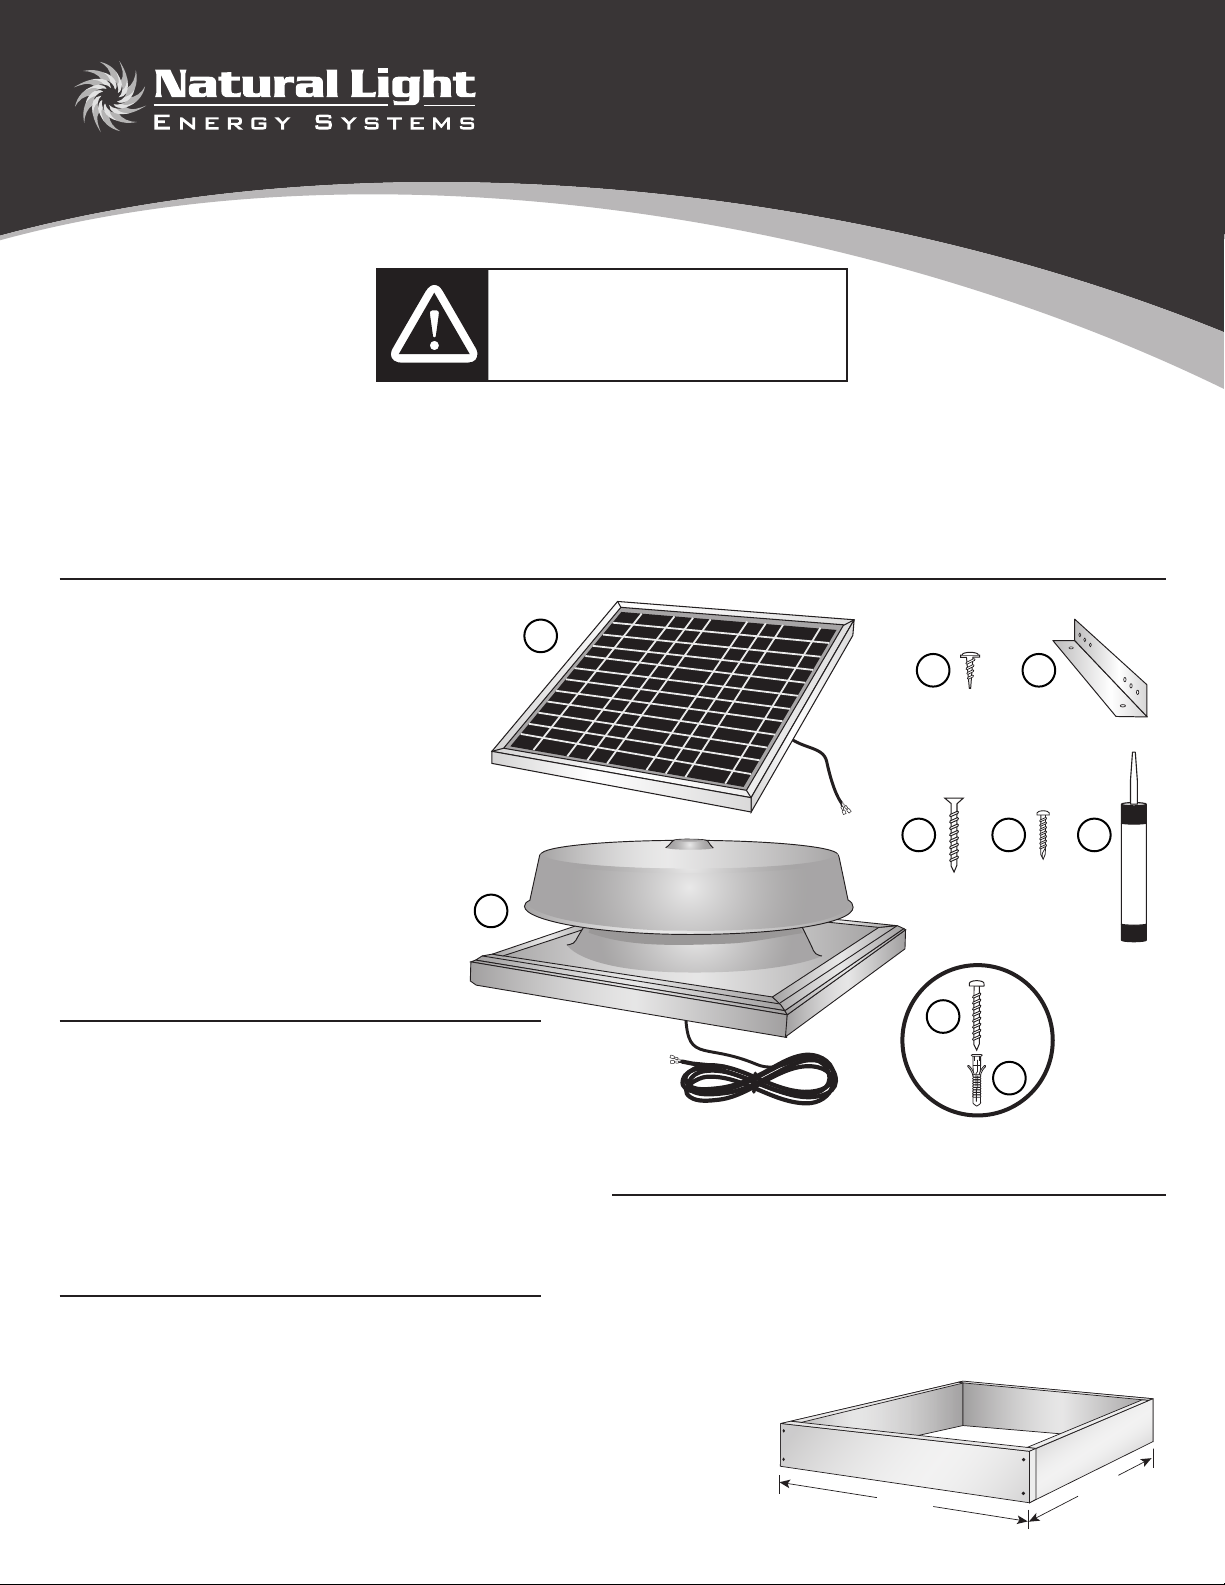
Step 4 Attached the solar attic fan to the curb using (4) screws
provided (C) through the pre-drilled holes on the solar attic fan
curb lip.
Step 5 Locate area to install the solar panel on the roof where
it will gather the most amount of sunlight (southern exposure is
recommended). Drill a small hole on the roof under where the
solar panel will be installed. Push the power cable through the
hole into the attic space. Caulk around hole to prevent leaking.
Step 6 Attach the L-brackets (D) to the long sides of the solar
panel with the self-tapping (F) screws into the pre-drilled holes
on the panel frame. Attach solar panel to roof using the pro-
vided wood screws (E). Caulk around the wood screws to pre-
vent leaks.
FOR TILE ROOFS: Pre-drill hole in tile to accommodate the
anchors provided (I). Tap anchors into holes and secure
L-bracket using provided screws (H).
Step 7 From inside the attic, locate the power cable from the
attic fan unit and connect it to the power cable from the solar
panel. Connect the black wire to the black wire and the red wire
to the red wire - see Figure 6. For additional protection, wrap the
connection with electrical tape. Secure any loose wires inside
the attic using wire staples (not provided).
curb flashed with roofing material
roofing
sheathing
Figure 3
Figure 2
Tile Roof
Install
▲
Figure 6
Figure 5
Figure 4
Step 2
Locate an area that is between the trusses to install the solar attic
fan (southern exposure is recommended). Mount the curb to the
deck centering the curb over the space between the trusses. Using
a reciprocating saw, cut out opening. DO NOT CUT STRUCTURAL
FRAMING.
Step 3
Place curb over opening and toe-nail into existing roofing using
galvanized nails. If necessary, build blocking to ensure the curb is
secure. Wrap curb with roofing material to prevent leaking.
Step 4
Attached the solar attic fan to the curb using (4) screws provided
(C) through the pre-drilled holes on the solar attic fan curb lip.
Step 5
Locate area to install the solar panel on the roof where it will gather
the most amount of sunlight (southern exposure is recommended).
Drill a small hole on the roof under where the solar panel will be
installed. Push the power cable through the hole into the attic
space. Caulk around hole to prevent leaking.
Step 6
Attach the L-brackets (D) to the long sides of the solar panel with
the self-tapping (F) screws into the pre-drilled holes on the panel
frame. Attach solar panel to roof using the provided wood screws
(E). Caulk around the wood screws to prevent leaks.
FOR TILE ROOFS: Pre-drill hole in tile to accommodate the
anchors provided (I). Tap anchors into holes and secure
L-bracket using provided screws (H).
Step 7
From inside the attic, locate the power cable from the attic fan unit
and connect it to the power cable from the solar panel. Connect
the black wire to the black wire and the red wire to the red wire -
see Figure 6. For additional protection, wrap the connection with
electrical tape. Secure any loose wires inside the attic using wire
staples (not provided).