Table Mounts (for all models except SST300 and HDSSW065)
Use a table mount for applications where the height and tilt
of the ScreenStar lens must be adjusted.
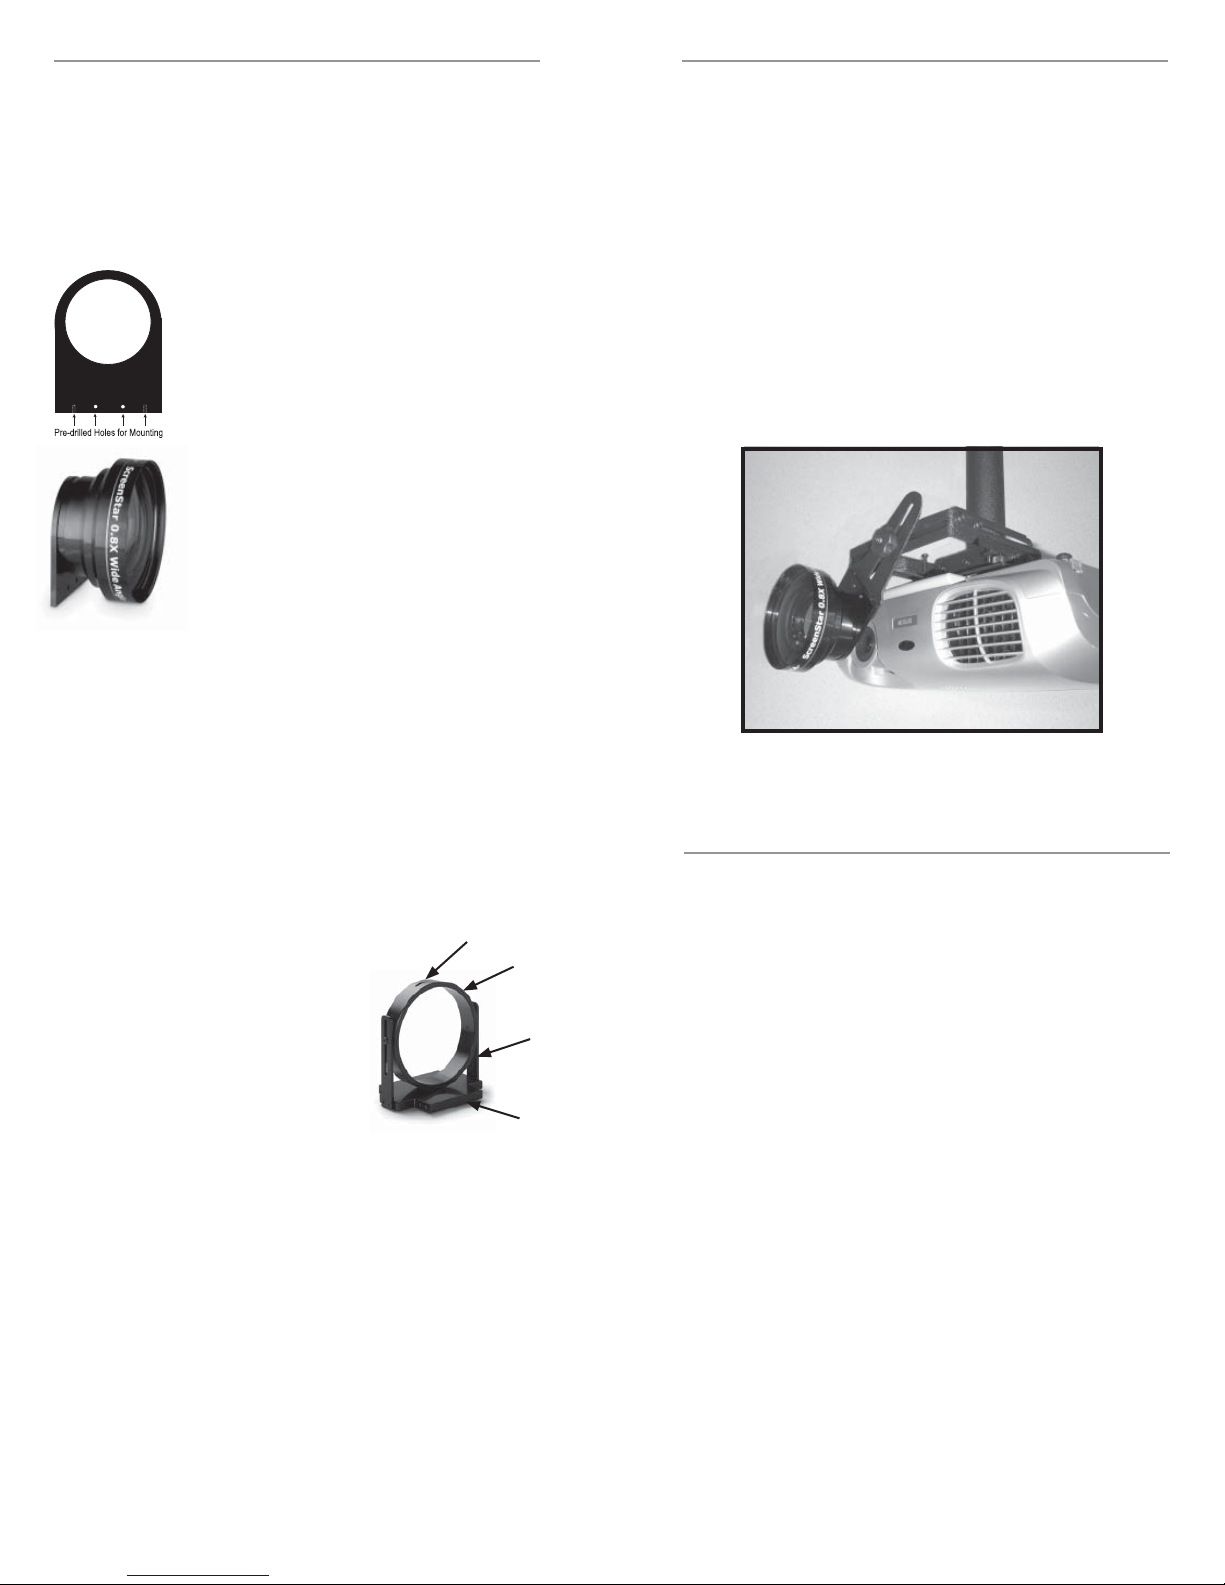
Attaching the Table Mount
Slip the ScreenStar lens into the
mount ring. Tighten the top screw
with Allen wrench (included).
Place the table mount in front of
your projector so the ScreenStar
lens is directly in front of the
prime lens.
If the ScreenStar lens is not directly in the center of the
prime lens, you will need to adjust the height and tilt.
Loosen the two (2) Allen screws on each side of the
posts in order to slide the ScreenStar lens up/down. Tilt
the ring to angle the lens. Tighten the Allen screws to
secure the lens into place.
To adjust your image size, refer to “Positioning Your Screen-
Star Lens” (opposite page).
Pre-drilled base holes in each mount allow you to hard-
mount the table mount to a surface.
Application note: Many small projectors have a steep throw
angle (the angle of the image relative to the axis of the prime
lens). Proper use of the ScreenStar lens is best achieved by
positioning the ScreenStar in the mount so the prime lens
image is parallel to the axis of the ScreenStar.
1.
2.
3.
Positioning Your ScreenStar Lens
Increasing and Decreasing Image Size
Once you have mounted your ScreenStar conversion lens
using the stabilizing leg or table mount, you are ready to
change your picture size or throw distance.
Wide angle ScreenStar Lenses
To achieve a larger projected image, keep your projec-
tor in the same location and place the ScreenStar lens in
front of the projector’s prime lens. This will increase your
image size. The amount of increase will depend on the
ScreenStar model you have selected.
To keep the same image size (decreased throw
distance), move the projector closer to the screen.
Telephoto ScreenStar Lenses
To achieve a smaller projected image, keep your pro-
jector in the same location and place the ScreenStar lens
in front of the projector’s prime lens. This will decrease
your image size. The amount of decrease will depend
on the ScreenStar model you have selected.
To keep the same image size (increased throw
distance), move the projector farther away from
the screen.
1.
2.
1.
2.
Mounting Your ScreenStar Lens
Ceiling Mount (for all models except SST300 and HDSSW065)
If you plan to use your ScreenStar lens with a ceiling mount-
ed projector, you will require an adapter. Chief Manufacturing
and Premier Mounts both offer ceiling mount adapters that
allow you to easily attach your ScreenStar lens to a ceiling
mounted projector.
To order a Chief Manufacturing ceiling mount adapter,
call Chief directly at 800-582-6480 or 952-894-6280 and
ask for part number NAV-1 (shown below). To order the
Premier Mounts ceiling mount adapter, contact Premier
Mounts at 800-368-9700 or 714-528-2072 and ask for part
number PP-NVT.
Mounting Your ScreenStar Lens
Stabilizing Leg (for all models except SST300*)
A stabilizing leg comes standard with ScreenStar
conversion lens models. When using the ScreenStar lens on
a table, with a typical small DLP or small format LCD projec-
tor, the stabilizing leg is all you need. It allows you to simply
place the ScreenStar lens in front of the projector’s prime
lens.
Attaching the Stabilizing Leg
To attach the stabilizing leg, simply
thread the leg onto the back of the lens
and place it in front of your projector’s
prime lens. (To remove the leg, simply
unthread in the same manner.)
If you prefer to hard-mount the stabi-
lizing leg to a surface, it is pre-drilled
with two sets of threaded holes and
includes four matching screws for easy
mounting on most surfaces. You can
choose which pre-drilled holes to use
depending on how you wish to mount
the stabilizing leg (from the front or from
beneath a surface).
Ring
Post
Top Screw
Base
*If you wish to mount a SST300 model, please contact
Navitar directly at 800-828-6778 or 585-359-4000.


