Navitel R5 User manual


EN
NAVITEL R5 | 1
Introduction
Dear Customer!
Thank you for purchasing this NAVITEL® product.
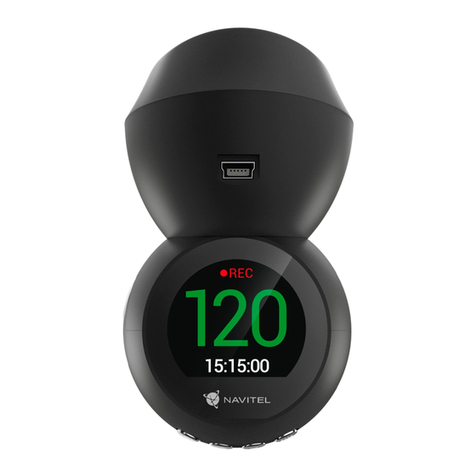
NAVITEL R5 is a multifunctional high-denition dash cam with many functions and features that are described in this User Manual. Please read the
manual carefully before using the device and keep it for future reference.
Device layout
1. Adhesive mount (3M sticker)
2. Mini-USB port for charging
3. Menu
4. Up
5. Down
6. OK
7. Mount lock
8. Speaker
9. Reset
10. Mini-USB port
11. Microphone
12. Power
13. Camera
14. microSD slot
15. LED indicator
16. Display
7
8
13
11
1412
15 16
9
10
3
4
5
6
1 2

2 | USER MANUAL
EN
Note: the specications may change due to upgrades.
Specifications
Processor MSTAR AIT8336
Display 2”, TN
Camera SONY 307 (night vision)
Recording format MOV
Video resolution 1920×1080, 30 fps
Image format JPG
Image resolution 2 MP
View angle 170°
Lens 4-layer glass
Storage microSD card
microSD card capacity Max. 64 GB
USB mini-USB 2.0
Battery 180 mAh
Power 5 V, 1.5 А
Microphone / speaker Yes
GPS-alert cameras / warnings / speed
Language
Czech, English,
French, German,
Hungarian, Italian,
Polish, Romanian,
Russian, Slovak,
Spanish, Ukrainian

EN
NAVITEL R5 | 3
Installation
1. Put the microSD card into the dash cam. Use a high-speed SD card (Class10 or above); capacity should be within 8-64 GB.
• To avoid malfunctions of the dash cam and / or SD-card, don’t insert and remove SD-card during dash cam
operation.
• Before using a microSD card, please format it inside the dash cam to avoid data errors. For formatting the SD-card
in Menu mode select Format SD-card and conrm it.
2. Secure the dash cam on the windshield with the mount.
3. Connect the car charger to the cigarette lighter socket.
4. Connect the car charger to the GPS antenna input (mini-USB). When connecting the car charger directly to the dash cam
mini-USB port, the GPS operation is not available.
5. Adjust the dash cam position.
6. Turn the power on; check whether the dash cam is installed correctly. If the dash cam is installed correctly, the indicator will
glow red; the dash cam will start up and begin recording.
Precautions
• Use only the original charger adapter. Using another adapter may negatively aect the device’s battery. Use accessories only approved by manufacturer.
• Permissible ambient temperature in operating mode: 0 to +35 °С. Storage temperature: +5 to +45 °С. Relative humidity: 5% to 90% without condensation (25 °С).
• Put the device away from re sources to avoid explosion or re.
• Do not expose the device to physical impacts.
• Avoid contacting the device with sources of electromagnetic radiation.
• Keep the lens clean. Do not use chemicals or detergents to clean the product; always turn o the device before cleaning.
• Strictly follow the laws and regulatory acts of the region where the device is used.This device can not be used for illegal purposes.
• Do not disassemble or repair device by yourself. In case of device failure, contact the service center.

4 | USER MANUAL
EN Buttons
Button Functions
Power
Press shortly to turn the device on.
Press and hold for 2 seconds to turn the device o.
Press to switch between Record (STBY), Capture, Video and Photo modes.
In Record mode (REC), press to lock / unlock a le (protected le cannot be deleted or overwritten).
In Menu press to choose the next menu section.
Menu Press to enter Menu.
In Menu, press to exit any menu or list of functions.
Up / Down
In Record mode, press Down to turn the microphone on / o.
In Video / Photo mode, press to select the previous / next le.
In Menu, press to choose the previous / next Menu item.
ОК
In Record mode (STBY), press to start recording.
In Record mode (REC), press to stop recording.
In Capture mode, press to take a picture.
In Video mode, press to select a le, or pause / resume video.
In Photo mode, press to select a le.
In Menu, press to select a Menu item.
Reset If the device is not responding, press to reset.
Note: the built-in battery is designed only for recording an emergency event in parking mode and turning o the device correctly when the power is
turned o; for the full operation of the device in any mode, a constant power connection is required.
NAVITEL s.r.o. hereby declares that the device NAVITEL R5 is compatible with the European directive RED 2014/53/EU.
The full text of Declaration of conformity is available at the following internet address:
www.navitel.cz/en/declaration_of_conformity/r5

EN
NAVITEL R5 | 5
Device functions
Format SD-card
Formatting a microSD card in the DVR is necessary for the correct operation of the device. Before using a microSD
card or in case of data error, please format the microSD card. For formatting the SD-card in Menu mode select Format
SD-card and conrm it.
Record Connect the device to an external power supply and it will start recording automatically. Press the OK button to stop
recording. Press OK again to record another video. Each video will be saved automatically.
Capture In Record mode (STBY), press the Power button to enter Capture mode, press the OK button to take a photo (it will
be saved automatically).
Video
In Record mode (STBY), press the Power button twice to enterVideo mode; press the Up and Down buttons to select
a le; press the OK button to play a le. During playback, press OK to pause/unpause; press the Up and Down keys
to fast forward/rewind.
Photo In Capture mode, press the Power button twice to enter Photo mode; press the Up and Down buttons to select a le;
press the OK button to play a le.
Record audio Record video with or without sound.
Lock le
In Record mode (REC), press Power to protect the current recording. A key symbol will appear at the bottom of the
screen. In Video / Photo mode, select a le, press Menu and select Protect, then Lock Current or Lock All. Protected
les cannot be deleted or overwritten. Select Unlock Current / Unlock All to remove protection.
Loop recording This feature allows you to save a video as a set of les given in the duration menu. If the memory card runs out of
space, the unprotected les will be overwritten in the order in which they were created.
G-sensor If the vehicle is hit by something, the DVR will automatically lock the current video.

6 | USER MANUAL
EN Parking monitor In shutdown state, if vibration is detected, the device will turn on automatically and start recording. The le will be
protected (locked).
Battery Red indicator lights up when the device is plugged into an external power supply; as the battery is charging, the red
light will gradually dim; the red light going out means the battery is full.
LCD OFF The device can automatically shut o the screen to reduce power consumption; time interval can be set in the Screen
Saver menu.
GPS location Device supports built-in GPS chipset and GPS antenna, it can show longitude, latitude and other information on your
current location. Press GPS Status to check GPS dates.
USB-connection *
When connecting the device to a PC using a USB cable, two connection options will appear:
1) Mass Storage: play, copy and delete les.
2) Record: standard mode.
* This function is available only in rmware version 1.7.62 and higher.

EN
NAVITEL R5 | 7
Digital Speed
The Digital speed feature is used to display time and vehicle speed calculated with the help of GPS signal [1]. Modes:
• Speed
–
current speed is displayed constantly [B],
• Speed + time
–
current speed [B] and time [C] are displayed.
All information is displayed on a black screen.
In Record mode (REC), •REC or •are displayed [A].
If the vehicle is still, 0 is displayed.
If there is no GPS-signal, – – – [2] is displayed.
Note. A weak GPS signal may be caused by bad weather conditions and other external factors. Please consult your vehicle speedometer.
[1] [2]
15:15:00
60
mph
REC
15:15:00
mph
REC
A
B
C

8 | UŽIVATELSKÁ PŘÍRUČKA
CZ
Úvod
Vážený zákazníku!
Děkujeme Vám za nákup produktu NAVITEL®.
NAVITEL R5 je multifunkční digitální video rekordér (DVR) s vysokým rozlišením, s mnoha funkcemi a vlastnostmi, které jsou popsány vtéto uživatelské
příručce. Před použitím zařízení si prosím pečlivě přečtěte tuto příručku a uchovejte ji pro pozdější použití.
Vnější vzhled
1. Držák do auta (3M nálepka) s
GPS anténou
2. Výstup antény GPS (mini USB)
3. Menu
4. Nahoru
5. Dolů
6. OK
7. Uzamykání držáku
8. Reproduktor
9. Reset
10. Port mini-USB
11. Mikrofon
12. Zapnutí / Vypnutí
13. Kamera
14. Slot microSD
15. Indikátor
16. Displej
7
8
13
11
1412
15 16
9
10
3
4
5
6
1 2

CZ
NAVITEL R5 | 9
Poznámka: specikace se může změnit v případě novější verze zařízení.
Specikace
Čip MSTAR AIT8336
Displej 2”, TN
Kamera SONY 307 (night vision)
Formát záznamu videa MOV
Rozlišení videa 1920×1080, 30 fps
Formát obrazu JPG
Rozlišení obrazu 2 MP
Úhel záběru 170°
Typ objektivu 4-vrstvá skleněná čočka
Úložiště microSD karta
Kapacita microSD karty Max. 64 GB
USB mini-USB 2.0
Baterie 180 mAh
Napájení 5 V, 1.5 А
Mikrofon / reproduktor Ano
GPS upozornění kamery / varování / rychlost
Jazyk
angličtina, čeština,
francouzština, italština,
maďarština, němčina,
polština, rumunština,
ruština, slovenština,
španělština, ukrajinština

10 | UŽIVATELSKÁ PŘÍRUČKA
CZ
Instalace
1. Vložte microSD kartu do zařízení. Použijte vysokorychlostní SD kartu (třída 10 či vyšší); kapacita by měla být v rozmezí
8-64 GB.
• Nemanipulujte s SD kartou během používání kamery.
• Abyste předešli chybám v datových úlohách, prosím naformátujte kartu microSD uvnitř kamery. Pro formátování
SD karty vyberte v Menu možnost Formátovat SD kartu a potvrďte.
2. Připevněte držák se zařízením na čelní sklo.
3. Připojte adaptér do zásuvky zapalovače.
4. Připojte autonabíječku do mini-USB portu v GPS anténě. Při připojení nabíječky do mini-USB portu přímo v kameře není
GPS k dispozici.
5. Nastavte pozici kamery.
6. Zapněte napájení; zkontrolujte, zda je zařízení správně nainstalováno. Pokud je zařízení nainstalováno správně, rozsvítí se
červená kontrolka; zařízení se spustí a začne nahrávat.
Opatření
• Používejte originální adaptér určený tomuto zařízení. Použití jiného adaptéru může mít negativní vliv na baterii zařízení. Používejte pouze příslušenství
schválené výrobcem.
• Přípustná teplota okolního prostředí v provozním režimu: 0 až +35 °С. Skladovací teplota: +5 až +45 °C. Relativní vlhkost: 5% až 90% bez kondenzace (25 °C).
• Udržujte zařízení mimo dosah ohně, zabráníte tak výbuchu či požáru.
• Nevystavujte přístroj fyzickým nárazům.
• Zabraňte kontaktu zařízení se zdroji elektromagnetického záření.
• Udržujte objektiv v čistotě. Nepoužívejte k čištění zařízení chemikálie ani čistící prostředky; vždy před čištěním zařízení vypněte.
• Důsledně dodržujte vnitrostátní právní předpisy. Zařízení nesmí být použito pro nezákonné účely.
• Nerozebírejte ani sami neopravujte zařízení. V případě poruchy zařízení se obraťte na servisní středisko.

CZ
NAVITEL R5 | 11
Tlačítka
Tlačítko Funkce
Zapnutí / Vypnutí
Krátce stiskněte pro podržte k zapnutí zařízení.
Stiskněte a po dobu 2 sekund podržte k vypnutí zařízení.
Stiskněte propřepínání mezi režimy Záznam (STBY), Snímek, Video a Fotky.
V režimu Záznam (REC) stiskněte pro uzamknutí souboru (zamknuté soubory nemohou být smazány ani přepsány).
V Menu stiskněte pro výběr dalšího Menu.
Menu Stiskněte pro vstup do Menu.
V Menu stiskněte pro ukončení jakéhokoliv menu nebo seznamu funkcí.
Nahoru / Dolů
V režimu Záznam stiskněte tlačítko Dolů pro vypnutí / zapnutí mikrofonu (nahrávání zvuku).
V režimu Video / Fotky stiskněte pro výběr následující / předchozí souboru.
V Menu stiskněte pro výběr následující / předchozí položky v Menu.
OK
V režimu Záznam (STBY) stiskněte pro začátek nahrávání.
V režimu Záznam (REC) krátce stiskněte pro ukončení nahrávání.
V režimu Snímek stiskněte pro pořízení snímku.
V režimu Video stiskněte pro výběr souboru nebo pro pozastavení a znovu spuštění videa.
V režimu Fotky stiskněte pro výběr souboru.
V Menu stiskněte pro výběr položky v Menu.
Reset Pokud zařízení neodpovídá, stiskněte tlačítko reset pro resetování zařízení.
Poznámka: vestavěná baterie je určena pouze pro nouzové záznamy v režimu parkování a pro správné vypnutí zařízení po odpojení napájení;
pro plný provoz v jakémkoliv režimu je nutné konstantní připojení k napájení.
NAVITEL s.r.o. tímto prohlašuje, že zařízení NAVITEL R5 je kompatibilní se směrnicí RED 2014/53/EU.
Úplné znění Prohlášení o shodě je k dispozici na následující internetové adrese:
www.navitel.cz/cz/declaration_of_conformity/r5

12 | UŽIVATELSKÁ PŘÍRUČKA
CZ
Funkce zařízení
Formátování SD karty
Formátování karty microSD v autokameře je nezbytné pro správnou funkci zařízení. Před použitím karty microSD
nebo v případě chyby dat zformátujte kartu microSD. Pro formátování vyberte v Menu možnost “Formátovat SD
kartu” a potvrďte ji.
Záznam
Po připojení zařízení k externímu zdroji napájení, zařízení automaticky zahájí nahrávání. Stisknutím tlačítka OK
nahrávání zastavíte. Opětovným stisknutím tlačítka OK můžete nahrát další videozáznam. Každý záznam se
automaticky uloží.
Snímek Pokud je zařízení v režimu Záznam (STBY), stiskněte tlačítko
Zapnutí / Vypnutí
pro přechod do režimu Snímek,
stisknutím lačítka OK pořídíte snímek, který se automaticky uloží.
Video
Pokud je zařízení v režimu Záznam (STBY), stiskněte dvakrát tlačítko
Zapnutí / Vypnutí
pro přechod do režimu Video,
pomocí tlačítek Nahoru / Dolů procházíte soubory, stisknutím tlačítka OK přehráváte soubory. Při přehrávání souboru
stiskněte tlačítko OK pro pauzu / konec pauzy; tlačítka Nahoru / Dolů prorychlý posun vpřed / vzad.
Fotky Pokud je zařízení v režimu Snímek, stiskněte dvakrát tlačítko
Zapnutí / Vypnutí
pro přechod do režimu Fotky, pomocí
tlačítek Nahoru a Dolů procházíte soubory, stisknutím tlačítka OK přehráváte soubory.
Audio záznam Nahrávání videa se zvukem nebo beze zvuku.
Ochrana souboru
V režimu Záznam (REC) stiskněte tlačítko
Zapnutí / Vypnutí
k zamknutí souboru. V režimu Video / Fotky vyberte
soubor, který chcete uzamknout. Stiskněte tlačítko Menu, možnost Uzamknout a vyberte buďto Uzamknout aktuální
anebo Uzamknout vše. Zamknuté soubory nemohou být smazány ani přepsány. Pro odemknutí souboru vyberte
možnost Odemknout aktuální / Odemknout vše.

CZ
NAVITEL R5 | 13
Záznam do smyčky Tato funkce umožňuje uložit video jako sadu souborů v takové délce, jakou jste si určili v menu možností. Pokud je na
paměťové kartě nedostatek místa, nechráněné soubory budou přepsány v pořadí, v jakém byly vytvořeny.
G-sensor Při nárazu vozidla zařízení automaticky uzamkne a uloží aktuální video.
Parkovací režim V případě, že je zařízení v pohotovostním režimu a zaregistruje vibrace, automaticky začne nahrávat videozáznam.
Napájení baterie Červená kontrolka se rozsvítí, pokud je přístroj připojen kexternímu zdroji napájení; čím více bude červená kontrolka
tmavnout, tím více je baterie nabita; pokud je baterie zařízení plně nabitá, kontrolka zhasne.
Spořič obrazovky Zařízení automaticky vypne displej kvůli snížení spotřeby energie; časový interval lze nastavit vmenu spořiče obrazovky.
GPS lokace Zařízení podporuje vestavěný chipset a anténu GPS. Je tedy možné zobrazit zeměpisnou délku, země pisnou šířku a
další informace o aktuální poloze. Pro kontrolu dat GPS stiskněte tlačítko Stav GPS.
USB-připojení *
Při připojení zařízení k počítači pomocí kabelu USB se zobrazí dvě možnosti připojení:
1) Mass Storage: přehrávání, kopírování a mazání souborů.
2) Record: standardní režim.
* Tato funkce je k dispozici pouze ve verzi rmwaru 1.7.62 a vyšší.

14 | UŽIVATELSKÁ PŘÍRUČKA
CZ
Digitální měřič rychlosti
Digitální rychloměr se používá k zobrazení vypočtené aktuální rychlosti
na základě signálu GPS a času [1]. Režimy:
• Rychlost
–
rychlost [B] se zobrazuje na displeji,
• Rychlost + čas
–
zobrazí se rychlost [B] a čas [C].
Všechny informace jsou na černém pozadí.
V režimu Záznam (REC) se zobrazí indikátor nahrávání (•REC a •) [A].
Pokud vozidlo stojí, na displeji je 0.
Pokud není k dispozici signál GPS, zobrazí se – – – [2].
Poznámka. Slabý signál GPS může být zapříčiněn špatným počasím a dalšími okolními vlivy. Řiďte se především údaji na tachometruVašeho vozidla.
[1] [2]
15:15:00
60
mph
REC
15:15:00
mph
REC
A
B
C

DE
NAVITEL R5 | 15
Einleitung
Sehr geehrter Kunde!
Vielen Dank für den Kauf dieses NAVITEL®- Produktes.
Der NAVITEL R5 ist ein multifunktionaler HD-DVR mit vielen Funktionen und Eigenschaften, die in diesem Benutzerhandbuch beschrieben sind. Bitte
lesen Sie das Handbuch vor Gebrauch des Gerätes sorgfältig durch und bewahren Sie es zum späteren Nachschlagen auf.
Anordnung des Geräts
1. Selbstklebender Halter
(Sticker 3M)
2. Mini-USB-Anschluss zum Laden
3. Menü
4. Nach oben
5. Nach unten
6. OK
7. Schloss
8. Lautsprecher
9. Reset
10. Mini-USB-Anschluss
11. Mikrofon
12. Ausschalter
13. Kamera
14. Einschub für microSD Karte
15. LED-Lichtanzeige
16. Bildschirm
7
8
13
11
1412
15 16
9
10
3
4
5
6
1 2

16 | BENUTZERHANDBUCH
DE
Bemerkung: in Folge von Aktualisierungen kann sich diese Spezikation ändern.
Spezikation
Prozessor MSTAR AIT8336
Display 2”, TN
Kamera SONY 307 (night vision)
Aufzeichnungsformat MOV
Videoauösung 1920×1080, 30 fps
Bildformat JPG
Bildauösung 2 MP
Sichtwinkel 170°
Linse 4-Schicht Glas
Speicherkarte microSD karta
Kapazität der microSD-Karte Max. 64 GB
USB mini-USB 2.0
Batterie 180 mAh
Stromversorgung 5 V, 1.5 А
Mikrofon / Lautsprecher Ja
GPS-Alarm Kameras / Warnungen /
Geschwindigkeit
Sprache
Englisch, Französisch,
Deutsch, Italienisch,
Polnisch, Rumänisch,
Russisch, Slowakisch,
Spanisch, Tschechisch,
Ungarisch, Ukrainisch

DE
NAVITEL R5 | 17
Installation
1. Legen Sie eine microSD-Karte in den DVR. verwenden Sie eine Hochgeschwindigkeits-microSD-Karte (mindestens Class 10), die
Kapazität sollte 8-64 GB betragen.
• Um Fehlfunktionen des digitalen DVR und / oder der SD-Karte zu vermeiden, müßen Sie die SD-Karte während des
DVR-Betriebs weder einlegen noch entnehmen.
• Bevor Sie eine microSD-Karte verwenden, formatieren Sie diese im DVR, um Datenfehler zu vermeiden. Um eine
SD-Karte zu formatieren, wählen Sie im Menümodus SD-Karte formatieren und bestätigen Sie es.
2. Befestigen Sie das Gerät an der Frontscheibe mittels des Halters.
3. Schließen Sie das Ladegerät an der Steckdose des Zigarettenanzünders an.
4. Schließen Sie das Ladegerät des Fahrzeugs an den GPS-Antenneneingang (Mini-USB) an. Wenn Sie das Ladegerät des
Fahrzeuges direkt an den Mini-USB-Anschluss des DVR an schließen, ist der GPS-Betrieb nicht verfügbar.
5. Passen Sie die Position der Kamera an.
6. Schalten Sie das Gerät ein; kontrollieren Sie, ob das Gerät richtig installiert ist. Wenn das Gerät richtig installiert ist, wird die
Kontrollleuchte rot leuchten; das Gerät schaltet sich ein und beginnt aufzunehmen.
Hinweise
• Verwenden Sie unseren speziellen Adapter; die Verwendung eines anderen Adapters kann einen unwiederbringlichen Schaden am Gerät verursachen.
Verwenden Sie nur Zubehör, das vom Hersteller zugelassen wurde.
• Zulässige Umgebungstemperatur im Betriebsmodus: 0 °C bis +35 °С. Lagerungstemperatur: +5 °C bis +45 °С. Relative Luft-feuchtigkeit: 5% bis 90%
ohne Kondensation (25 °C).
• Halten Sie das Gerät von Feuerquellen fern, um Explosionen oder Brand zu vermeiden.
• Setzen Sie das Gerät keinen physikalischen Einwirkungen aus.
• Vermeiden Sie, das Gerät mit elektromagnetischen Strahlungsquellen in Kontakt zu bringen.
• Halten Sie das Objektiv sauber. Verwenden Sie keine Chemikalien oder Reinigungsmittel bei der Reinigung des Produkts. Schalten Sie das Gerät vor
dem Reinigen immer aus.
• Halten Sie gründlich die entsprechenden innerstaatlichen Rechtsvorschriften ein. Dieses Produkt darf nicht für ungesetzliche Zwecke verwendet warden.
• Sie dürfen das Gerät nicht selbst reparieren oder zerlegen. Wenden Sie sich im Falle eines Gerätefehlers an das Servicecenter.

18 | BENUTZERHANDBUCH
DE
Tasten
Taste Funktion
Ausschalter
Durch Drücken, wenn Sie das Gerät einschalten möchten.
Drücken und Halten Sie ihn mindestens 2 Sekunden, wenn Sie das Gerät ausschalten möchten.
Drücken Sie zwischen den modi Record (STBY), Capture, Video und Foto um.
Im modus Record (REC) drücken, um eine Datei zu sperren (geschützte Dateien können nicht gelöscht oder
überschrieben werden).
Im Menü drücken, um den nächsten Menübereich auszuwählen.
Menü Drücken, um auf das Einstellungsmenü aufzurufen.
Im Menü drücken, um ein Menü oder eine Funktionsliste zu verlassen.
Nach oben / Nach unten
Im modus Record die Nach unten Taste drücken, um das Mikrofon ein- oder auszuschalten.
Im modusVideo / Foto drücken, um den nächsten / vorherigen Datei auszuwählen.
Im Menü drücken, um den nächsten / vorherigen Menüpunkt.
ОК
Im modus Record (STBY) drücken, um die Aufnahme zu starten.
Im modus Record (REC) drücken, um die Aufnahme zu stoppen.
Im modus Capture drücken, um eine Aufnahme zu machen.
Im modusVideo drücken, um eine Datei auszuwählen oder ein Video anzuhalten oder fortzusetzen.
Im modus Foto drücken, um eine Datei auszuwählen.
Im Menü drücken, um einen Menüpunkt.
Reset Wenn das Gerät nicht reagiert, drücken um zurückzusetzen.
Hinweis: die eingebaute Batterie ist nur zur Aufzeichnung eines Notfalls im Parkmodus und zur ordnungsgemäßen Ausschaltung des Geräts bei abgeschalteter
Stromversorgung vorgesehen; für vollständiges Funktionieren des Geräts in allen Betriebsmodi ist eine permanente Stromversorgung erforderlich.
NAVITEL s.r.o. erklärt hiermit, dass NAVITEL R5 mit der Richtlinie RED 2014/53/EU kompatibel sind.
Der vollständige Text der Konformitätserklärung ist unter folgender Internetadresse verfügbar:
www.navitel.cz/de/declaration_of_conformity/r5

DE
NAVITEL R5 | 19
Funktionen des Geräts
SD-Karte formatieren
Eeine microSD-Karte in einem DVR zu formatieren ist für die korrrekte Arbeit des Gerätes erforderlich. Befor
Sie eine mictoSD-Karte verwenden oder bei Datenfehlern, formatieren Sie die microSD-Karte. Um eine SD-Karte zu
formatieren, wählen Sie im Menümodus SD-Karte formatieren und bestätigen Sie es.
Record
Schließen Sie das Gerät an eine externe Stromversorgung an und die Aufnahme wird automatisch gestartet. Drücken
Sie die OK-Taste, um die Aufnahme zu beenden. Drücken Sie erneut OK, um ein weiteres Video aufzunehmen. Jedes
Video wird automatisch gespeichert.
Capture Drücken Sie im modus Record (STBY) die Ausschalter, um in den modus Capture zu wechseln, und drücken Sie die
OK-Taste, um eine Aufnahme (Foto) zu machen (Speicherung erfolgt automatisch).
Video
Drücken Sie im modus Record (STBY) zweimal die Ausschalter, um in den modus Video zu wechseln. Drücken Sie
die Nach oben / Nach unten, um eine Datei auszuwählen. Drücken Sie die OK-Taste, um eine Datei wiederzugeben.
Drücken Sie während der Wiedergabe auf OK, um die Wiedergabe zu unterbrechen / fortzusetzen. Drücken Sie die
Nach oben / Nach unten für schnellen Vor- / Rücklauf.
Foto Drücken Sie im modus Capture zweimal die Ausschalter, um in den modus Foto zu wechseln. Drücken Sie die Nach
oben / Nach unten, um eine Datei auszuwählen. Drücken Sie die OK-Taste, um eine Datei wiederzugeben.
Tonaufnahme Nehmen Sie das Video mit oder ohne Ton auf.
Sperrdatei
Drücken Sie im modus Video (REC) auf Ausschalter, um die aktuelle Aufnahme zu schützen. Ein Schlüssel symbol
erscheint unten auf dem Bildschirm. Wählen Sie im modus Video / Foto eine Datei aus, drücken Sie Menü und wählen
Sie Schützen, dann Aktuelle sperren / Alle sperren. Geschützte Dateien können nicht gelöscht oder überschrieben
werden. Wählen Sie Aktuelle entsper ren / Alle entsperren aus, um den Schutz aufzuheben.
Table of contents
Languages:
Other Navitel Dashcam manuals

Navitel
Navitel R600 User manual

Navitel
Navitel R480 2K User manual

Navitel
Navitel AR200 NV User manual

Navitel
Navitel CR900 User manual

Navitel
Navitel R2 User manual

Navitel
Navitel R300 GPS User manual

Navitel
Navitel R600 GPS User manual

Navitel
Navitel MR250 User manual

Navitel
Navitel XR2600 PRO User manual

Navitel
Navitel R67 2K User manual

Navitel
Navitel MSR200 User manual

Navitel
Navitel R1000 User manual

Navitel
Navitel XR2550 User manual

Navitel
Navitel MSR200 User manual

Navitel
Navitel MSR205 User manual

Navitel
Navitel MR255 N User manual

Navitel
Navitel R10 User manual

Navitel
Navitel R600 User manual

Navitel
Navitel R9 User manual
Navitel
Navitel MR150 NV User manual