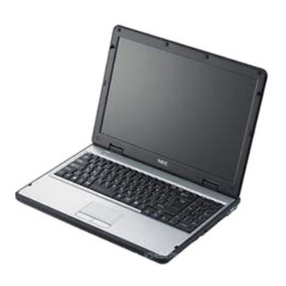
NEC LAVIE PM9560 User manual

User’s Guide
Note: The illustrations, screenshots, icons, and on-screen text shown in this document may differ from the ones you actually encounter.
Note: This equipment has been tested and found to comply with the limits for a Class B digital device, pursuant to part 15 of the FCC Rules. These limits are
designed to provide reasonable protection against harmful interference in a residential installation. This equipment generates, uses and can radiate
radio frequency energy and, if not installed and used in accordance with the instructions,may cause harmful interference to radio communications.
However, there is no guarantee that interference will not occur in a particular installation. If this equipment does cause harmful interference to radio or
television reception, which can be determined by turning the equipment off and on, the user is encouraged to try to correct the interference by one or
more of the following measures: Reorient or relocate the receiving antenna. Increase the separation between the equipment and receiver. Connect the
equipment into an outlet on a circuit different from that to which the receiver is connected. Consult the dealer or an experienced radio/TV technician for
help.
PC-PM75GNAR
First Edition March 2020
1Checking Included Accessories.............................................. 2
2Connection of Included Accessories ...................................... 3
3Windows Setup....................................................................... 3
4Names of the Parts................................................................. 6
5Keyboard ................................................................................ 9
6The NX Pad ............................................................................ 9
7External Display.................................................................... 10
8Wireless LAN Function......................................................... 10
9Bluetooth®function ...............................................................11
10 System Configuration............................................................12
11 Application ............................................................................12
12 Factory Reset........................................................................12
13 Support .................................................................................14
14 SPEC ....................................................................................14
Caution..................................................................................16
This User’s Guide contains information primarily specific to this computer, assuming that the user is able to perform basic Windows
operations and understands how to use help in its installed applications to resolve problems.

2
1Checking Included Accessories
Checking that all included accessories are present
Please open up the box and check that all included items and accessories are
present. Please contact the place of purchase if any items are missing or
damaged.
1. Check contents of the box.
2. Confirm that the model number and serial number on the
base unit matches the model number and serial number
written on the warranty.
If numbers do not match, please contact the place of purchase immediately.
Please also keep your written warranty in a safe place for future reference.
If the computer malfunctions during the warranty period, we shall provide
repair services based on the conditions specified in the warranty.
For repairs after the warranty period has expired, please consult the place of
purchase or one of our specified customer service locations. If the functions
can be restored by repairs, we will perform repairs for a fee with request from
the customer.
Base unit
AC adapter
Power cord
User’s Guide
Instructions For Safe Use
Terms and Conditions for using software
(For Customer) (Please read this before opening the package)
(MICROSOFT SOFTWARE LICENSE AGREEMENT WITH COMPUTER
MANUFACTURER OR SOFTWARE INSTALLER, OR MICROSOFT)
Note The battery is installed in the computer. When removing or installing the battery
pack, please consult 121 Contact Center or Business PC Repair Center.
model number and serial number

3
2Connection of Included Accessories
Important points for connections
• Do not touch the connector terminals when connecting any items.
Failure to do so may cause damage.
Connecting power sources
Connect the AC adapter.
1.
Insert the AC adapter into the power input jack ( ).
2.
Connect the power cord to the AC adapter.
3.
Insert the other end of the power cord into a wall outlet.
When the AC adapter is connected, the battery will start to recharge and the
battery recharge indicator will turn on.
Once the battery is fully charged, the battery recharge indicator will turn off.
Depending on the battery charging conditions, there are some cases where
the battery recharge indicator does not illuminate. This happens when the
battery has been charged to at least 95% capacity.
3Windows Setup
When you first power up your new computer, it is necessary to perform
Windows setup.
Important points during setup
Always follow the procedure written in the manual.
Setup may not be able to be successfully completed if you omit any steps,
press keys other than the ones indicated on the screen, or operate any
switches.
• Do not connect any external peripheral devices.
Never connect any peripheral devices (printers, memory, etc.) other than
the items outlined in "Connecting Included Accessories" (p.2). Please
connect or install such peripheral devices after "Windows Setup" had been
completed.
• Do not connect a LAN cable and make sure that the wireless LAN is turned
OFF.
To ensure safe connection of this product to the network, connect a LAN
cable or turn on the wireless LAN only after Windows setup and firewall
configuration has been completed.
• Do not turn off the power during setup.
The setup program is running normally even if the screen appears to stop.
Please keep following the steps in the manual.
• Do not leave the computer unattended during setup.
Do not leave the computer unattended until Windows setup has completed
and power is turned OFF as it includes screens which require key
operations.
• Applying updates during setup
If your computer is connected to the Internet, you may be prompted to
apply updates before or after the setup is completed depending on the
model being used and status of the computer such as "There are updates
available for your PC", but it is recommended that you do not apply any
updates here.
• After purchase, be sure to fully charge the battery before use.
• Do not remove the AC adapter before Windows setup has completed.
1
2
3
USB connector
AC adapter Power cord

4
Preparation for setup
During Windows setup, you are required to enter the name of the person who
will be using the computer (user name), as well as the computer name. Please
choose these names in advance.
Turning ON the power
1.
Open the computer lid.
2.
Press the power switch.
Setup Procedure
For the user name and computer name, use single-byte alphanumeric characters
only (20 or less).
If the following symbols or if certain strings are used for any part of the user name or
computer name, Windows setup may not be completed and some applications may
not run correctly.
• Non-standard characters, all symbols, spaces
• Restricted strings
CON, PRN, AUX, CLOCK$, NUL, COM1-COM9, LPT1-LPT9, NONE
If the AC adapter is not properly connected, the power is not turned on by pressing
the power switch when you first turn the power on. Check the connection of the AC
adapter again.
Please securely support the keyboard side when opening and closing the LCD
display. In order to prevent excess force from being directly applied to the LCD
screen, please handle the screen around the border area.
Power switch
• Never turn OFF the power during Windows setup. Turning OFF the power switch
or pulling out the power cord in the middle of this process may lead to damage.
• It may take several minutes for the screen to appear after pressing the power
switch. During this time, the NEC logo may appear, or the screen may turn black,
this is not a malfunction. Please wait until the screen appears without turning off
the power.
If not operated for a while during setup, the system automatically enters the power
saving mode and the screen goes dark. Press [Shift] on the keyboard or operate the
NX pad. If there is still nothing on the screen, lightly press the power switch on the
unit.

5
1.
The "Let's Start with region. Is this right?" screen is displayed.
Select your country or region from the list.
Click on the "Yes" button.
2.
The "Is this the right keyboard layout?" is displayed.
Select the desired keyboard layout.
Click on the "Yes" button.
3.
The "Want to add a second keyboard layout?" is displayed.
You can either follow the instructions for adding another keyboard layout
or click on "Skip" to go to the next screen.
4.
On the "Let's connect you to a network" screen, select from the
available networks, type in your user name and password if necessary,
and then click the "Connect" button.
5.
The "There’s more to discover when you connect to the internet" is
displayed.
Click the "Connect now" button.
6.
The "Windows 10 License Agreement screen displays" screen is
displayed.
Read the license agreement, and click the "Accept" buttom to continue.
7.
The "Who’s going to use this PC?" screen is displayed.
Enter the name of the PC user. Click on the "Next" button.
8.
The "Create a super memorable password" screen is displayed.
Enter a password.
9.
The "Confirm your password" screen is displayed.
Re-enter the password.
10.
The "Create security questions for this account" screen is displayed.
Select the security questions. Click on the "Next" button.
11.
Enter the answer to the first security question. Click on the "Next"
button.
12.
Enter the answer to the second security question. Click on the "Next"
button.
13.
Enter the answer to the third security question. Click on the "Next"
button.
14.
The "Use your face to sign in faster and more securely" screen is
displayed.
Click on the "Set up" button.
15.
The "Do more across devices with activity history" screen is displayed.
Click on the "No" button.
16.
The "Get help from your digital assistant" screen is displayed.
Click on the "Accept" button.
17.
The "Choose privacy settings for your device" screen is displayed.
Click on the "Accept" button.
18.
When the desktop screen appears, the Windows setup is complete.
Do not enter the following character strings since they are used in the PC system.
CON, PRN, AUX, CLOCK, $, NUL, COM1 to COM9, LPT1 to LPT9, NONE
If a screen saying there are updates available appears here, select do not apply.
If a message about Windows license authentication appears, follow the instructions
on the screen. License authentication is performed automatically by connecting to
the Internet.

6
When the setup screen is not displayed
When [Press F2 to Enter BIOS Setup] is displayed on the screen when you
turn the power on, please carry out the following procedure.
1.
Pres the <F2> key.
The BIOS setup utility will then be displayed.
2.
Use the number keys to enter the current hour (24 hour time format)
and then press <Enter>.
3.
Use the [Tab], [<], and [>] keys to move to desired position and in the
same manner, set the rest of the time and date in the order of minutes,
seconds, month, day, and year.
4.
Press the <F9> key.
The setup confirmation screen should come up.
5.
Select [Yes] and then press <Enter>.
This will load the default factory setting values.
6.
Press the <F10> key.
The setup confirmation screen should come up.
7.
Select [Yes] and then press <Enter>.
The BIOS setup utility should now be finished and Windows will
automatically restart.
After this, please refer to "Setup Procedure" and continue on with the
process.
4Names of the Parts
Names and descriptions of each part
Front
1 Webcam lamp Lamp that lights up when the webcam is in use.
2 Webcam Webcam to use video phone (used for video chat) and taking
pictures.
3Built-in
microphone
Microphone used when using video chat or recording videos.
4 LCD display Displays the computer screen. It can also be used as a touch
panel if the model is equipped with it.
1
2
3
4
5, 6
7
8

7
Right side
5Powerswitch
()
A switch for turning on the power. It is also used to return from the
power saving mode. However, to turn off the power (shut down),
click and click "Shutdown". Note that turning the power
OFF/ON puts a burden on the computer, so wait at least 5
seconds when turning OFF the power and turning it ON again.
important
If Windows has clearly stopped, the computer can be forced to
power OFF by pressing the power switch for more than 4
seconds. In this case, the data being created will be deleted.
When power is not supplied to the main unit due to insufficient
battery capacity, the power cannot be turned ON even by
pressing the power switch.
The operation when the power switch is pressed while the
computer is running can be changed from the "Control Panel".
6 Built-in
fingerprint
sensor
For models with fingerprint authentication, the power switch has a
built-in fingerprint sensor that can be used to sign into Windows.
7 Keyboard Press the keys to enter characters or operate the screen.
8 NX pad The mouse pointer on the screen moves when you trace the pad
with your fingertips. Move the mouse pointer to the screen or icon
and press the pad to operate.
1HDMIoutput
terminal
Connector for connecting an HDMI-compatible large-screen TV
or an external display with an HDMI terminal.
2USB3.1
connector
(supports
power-off USB
charging
function)
USB 3.1 connector (supports power-off USB charging function)
Connector for connecting USB compatible devices. Supports up
to USB 3.1 standard. This connector can be used for charging
with a USB cable even when the computer is turned off. Check
with the manufacturer or distributor of the peripheral device to see
if it can be used with this computer. If the plug has a mark, insert
it with the mark facing up.
3 USB3.1 Type-C
connector
A terminal for connecting headphones or a headphone
microphone(4-pole mini plug) for smartphones. A terminal for
connecting external speakers and audio equipment to output and
input audio signals.
1
2
3
4

8
Left side, back
4Powerlamp
()
Lamp that lights up when the power is turned ON.
* If you continue to use the computer with only battery power
while the battery level is low, the computer automatically go into
sleep mode.
Power Lamp
Status
When the AC adapter
is connected
When the AC adapter
is disconnected
Lights in blue The power is ON
Blue flashing Sleep state
Lit orange – The power is ON and
the battery is low
Blinking
orange –
one of the following
• The power is ON and
the battery is low
• In sleep mode,
battery level is low
Off Power is off or the computer is in sleep mode*
Notes on using USB compatible devices
• When connecting or disconnecting a USB compatible device, wait at
least 3 seconds.
• If the USB device is not recognized properly, unplug it from the USB
connector and plug it in again.
• Do not plug in or unplug the USB compatible device during the power
saving state, during transition to the power saving state, or during
recovery. Also, do not operate the connected USB compatible device
during the transition to the power saving mode.
• The maximum power supply capacity per USB connector is as follows.
- When the computer is turned on:
USB3.1 Type-C connector, USB3.0 Type-C connector: 1.5A USB3.1
connector: 0.9A
-Wheninsleepmode:
A few tens of mA about
1 Headphone /
headphone
microphone
terminal ( )
A terminal for connecting headphones or a headphone
microphone(4-pole mini plug) for smartphones. A terminal for
connecting external speakers and audio equipment to output and
input audio signals.
2microSD
memory card
slot ( )
Slot for installing "microSD memory card", "microSDHC memory
card", "microSDXC memory card". Insert the memory card with
the front side facing up.
3 Battery
charging lamp
Lamp that lights up when the battery is charging.
When the battery charging lamp is charging, the battery level may
be displayed as 100% in Windows, but this is due to an error
when displaying the battery level in Windows and is not a
malfunction. Also, check the charging lamp for completion of
battery charging.
1
2
3
*1: Results in an error when the battery is charging, or error when
the battery life is dead or deteriorates.
*2: If the battery is already fully charged or almost fully charged,
the lamp may not light up and further charging may not be
possible.
Battery charge
lamp status
Battery charge status
Solid orange Battery charging
Flashing orange Battery error*1
Off The AC adapter is not connected or
charging is complete*2

9
Bottom
5Keyboard
Using the keys
By pressing the function key <Fn> in combination with another key, you can
easily change common computer settings. These functions are called
"Hotkeys".
[Fn] + [F1] : Audio on / off
[Fn] + [F2] : Airplane mode on / off
[Fn] + [F3] : Display switching
[Fn] + [F4] : Switching power plans
[Fn] + [F5] : Meeting function switching
[Fn] + [F6] : Microphone on / off
[Fn] + [F7] : Decrease brightness
[Fn] + [F8] : Increase brightness
[Fn] + [F9] : Decrease volume
[Fn] + [F10] : Increase volume
[Fn] + [F11] : [ScrLk]
[Fn] + [Pause / Break] : [Break]
[Fn] + [Insert / PrtSc] : [PrtSc]
[Fn] + [Delete / SysRq] : [SysRq]
[Fn] + [ ] : [PgUp]
[Fn] + [ ] : [PgDn]
[Fn] + [ ] : [Home]
[Fn] + [ ] : [End]
[Fn] + space : NX pad enable / disable
6The NX Pad
This section covers the NX pad usage and extended feature settings, as well
as the driver update process.
Using NX Pad
When settings are at the factory default values, the following operations can
be performed with the NX pad.
Configuring the NX pad
The NX pad settings can be changed from "Touchpad".
"Touchpad" is displayed using the following procedure.
1.
Display "Settings".
2.
Click or tap "Devices".
3.
Click or tap "Touchpad".
1 Ventilation holes Holes for releasing the heat inside the main unit.
2 Speakers Outputs audio.
1
2
Moving the
mouse pointer
Trace the pad with your finger in the direction you want to move the
mouse pointer.
Click in an area* other than the bottom right of the pad and release
immediately.
*: It may be difficult to click the upper part of the pad.
Right-click Press the lower right part of the pad and release immediately.
Double-click Move the mouse pointer over an icon or folder, and then click twice
quickly.
Drag Move the mouse pointer over an icon, folder, etc., hold down the pad
and trace in the direction you want to move it on the pad.

10
7External Display
Switching Display Outputs
Display outputs can be switched using the keyboard.
1.
Press <Fn> + <F3> keys.
Available outputs are displayed.
8Wireless LAN Function
The wireless LAN standard supported by this device is "IEEE802.11ac/a/b/g/
n".
Federal Communication Commission Interference
Statement
This device complies with Part 15 of the FCC Rules. Operation is subject to
the following two conditions: (1) This device may not cause harmful
interference, and (2) this device must accept any interference received,
including interference that may cause undesired operation.
This equipment has been tested and found to comply with the limits for a
Class B digital device, pursuant to Part 15 of the FCC Rules. These limits are
designed to provide reasonable protection against harmful interference in a
residential installation. This equipment generates, uses and can radiate radio
frequency energy and, if not installed and used in accordance with the
instructions, may cause harmful interference to radio communications.
However, there is no guarantee that interference will not occur in a particular
installation. If this equipment does cause harmful interference to radio or
television reception, which can be determined by turning the equipment off
and on, the user is encouraged to try to correct the interference by one of the
following measures:
• Reorient or relocate the receiving antenna.
• Increase the separation between the equipment and receiver.
• Connect the equipment into an outlet on a circuit different from that to
which the receiver is connected.
• Consult the dealer or an experienced radio/TV technician for help.
FCC Caution: Any changes or modifications not expressly approved by the
party responsible for compliance could void the user's authority to operate
this equipment.
This transmitter must not be co-located or operating in conjunction with any
other antenna or transmitter.
Operations in the 5.15-5.25GHz band are restricted to indoor usage only.
This device meets all the other requirements specified in Part 15E, Section
15.407 of the FCC Rules.
Radiation Exposure Statement:
The product comply with theFCC portable RFexposure limit set forth for an
uncontrolled environment and are safe forintended operation as described in
this manual. The further RFexposure reduction can be achieved if the product
can be kept as far as possible from the user bodyor set the device tolower
output power ifsuchfunction is available.
FOR COUNTRY CODE SELECTION USAGE (WLAN DEVICES)
Note: The country code selection is fornon-US model only and is not
available toall US model. Per FCC regulation, all WiFi product
marketed in US mustfixed to US operation channels only.
Wireless LAN function ON/OFF
Be sure to turn OFF the wireless LAN function if it affects other devices, when
not using the wireless LAN function, or uses this computer in an environment
where the wireless LAN function cannot be used. At the time of purchase, the
wireless LAN function is on.
Switch using the keyboard
Press [Fn] + [F2].
Each time you press the key, Airplane mode switches ON/OFF. Airplane mode
on / off and wireless devices (Wi-Fi, Bluetooth, etc.) are not linked, so when
• To perform wireless communication using 40MHz and 80MHz bandwidths, the
connected wireless LAN device must also support those bandwidths.
• Be sure to set the security to "WPAPSK (AES)" or "WPA2-PSK (AES)" when
performing wireless communication based on the IEEE802.11n and
IEEE802.11ac standards. If any other security is set, the IEEE802.11n and
IEEE802.11ac standards cannot be used.
11
you want to turn on the wireless LAN function, perform the following "Switch
using Network connection". Check and turn on the Windows wireless LAN
function.
Switch with "Network Connection"
The wireless LAN function can be turned ON/OFF using standard Windows
functions.
<Turn ON>
1.
Display the Control Panel.
2.
Click or tap "Network and Internet".
3.
Click or tap "Network and Sharing Center".
4.
Click or tap "Change adapter settings".
The Network Connections screen is displayed
5.
Right-click or press and hold "Wi-Fi" and click or tap "Enable".
"Wi-Fi" may be numbered.
<Turn OFF>
1.
Display the Control Panel.
2.
Click or tap "Network and Internet".
3.
Click or tap "Network and Sharing Center".
4.
Click or tap "Change adapter settings".
The Network Connections screen is displayed
5.
Right-click or press and hold "Wi-Fi'' and click or tap "Disable".
Check the connection status
"Connection status" is displayed with an illustration in the notification area
at the bottom right of the screen. Click or tap to check the wireless network
that is currently connected.

Checking the wireless LAN information (E-label)
1.
Press the F2 key when the computer is booting to launch the BIOS
setup menu.
2.
Select "Main".
3.
Select "Wireless certification information".
9Bluetooth®function
The Bluetooth®standard supported by this device is "V5.0".
A maximum of 7 (theoretically) Bluetooth devices can be connected
simultaneously.
Notes on Bluetooth
• Before using the Bluetooth function, be sure to read the attached "Safety
Instructions".
• If many Bluetooth devices are used at the same time, the communication
load may increase and affect the operation.
• Some Bluetooth devices may have specifications that cannot be used
simultaneously.
• There may be functional differences even with the same type of Bluetooth
device.
• The Bluetooth function is not guaranteed to work with all Bluetooth devices.
Check the operating environment of the Bluetooth device and whether it
can be connected.
Switching the Bluetooth function ON/OFF
If (Bluetooth device) is displayed in the notification area at the bottom right
of the screen, the Bluetooth function is on.
To switch the Bluetooth function ON/OFF, follow the steps below.
1.
Display "Settings".
2.
Click or tap "Devices" - "Bluetooth and other devices".
3.
Set "Bluetooth" to "ON" or "OFF"
Bluetooth function settings
Preparing for connection
Preparation when using the Bluetooth function for the first time.
1.
Check that the Bluetooth function is ON.
If multiple drivers have been installed, please wait for a while until the
installation is complete.
If it is already "On", go to the "Connect Bluetooth device" procedure.

12
2.
Turn tablet mode off.
If it is off, go to the next step.
3.
Click or tap in the notification area at the bottom right of the screen and
wait until the (Bluetooth device) icon appears and the driver is ready.
4.
If you are prompted to restart, restart your computer.
Connecting a Bluetooth device
1.
Turn ON the Bluetooth compatible information device.
Refer to the manual that comes with the device to prepare it connection
(pairing mode).
2.
Display "Settings".
3.
Click or tap "Devices" - "Bluetooth and other devices".
4.
Confirm that the Bluetooth function is ON.
5.
Click or tap "Add Bluetooth or other device".
"Add device" is displayed.
6.
Click or tap "Bluetooth".
7.
Click or tap the Bluetooth compatible information terminal displayed on
the "Add device" screen.
Once paired, it will appear in "Your device is ready to go!".
8.
Click or tap "Finish".
• When connecting to a Windows 10 Bluetooth device, you may need to
enter a passcode. In that case, enter the passcode, click or tap "Next", and
then follow the instructions on the screen.
• To check the registered devices, perform steps 1 to 3 above and check
with "Mouse, Keyboard, Pen" or "Other devices".
10 System Configuration
The BIOS setup utility
Entering the BIOS setup utility
1.
Turn the power on and immediately press <F2> key several times.
The BIOS setup utility will then be displayed.
The basic hardware environment can be set in the "Main" menu, "Advanced"
menu, "Security" menu, and "Boot" menu of the BIOS Setup Utility.
11 Application
LAVIE Easy Settings
LAVIE easy settings can be used to change the battery settings.
12 Factory Reset
If the Windows status is not good, such as frequent errors or freezes, or
extremely slow operation, you can restore your computer to its original or
default state.
Factory reset procedure
1.
Turn OFF the computer.
2.
Connect the AC adapter to the computer.
important • If factory reset is done, the data and settings on your computer will be
lost. Before starting work, please take a backup of the necessary data
and settings.
• If there is not enough free space on the hard disk, factory reset may
not be possible.
• If factory reset is performed with an external hard disk connected, the
data on the hard disk may be deleted.
• In general, remove all commercially available peripheral devices when
performing factory reset.
• Do not turn OFF the power during factory reset because it may cause
a malfunction.
• Factory reset may take a long time depending on the model you are
using, the options selected for factory reset, and the status of the
computer. It is not a malfunction even if "Restoring this PC to its
default state (XX%)" is displayed for a long time.
If you have trouble entering the BIOS setup utility, please try to change the timing
when pressing the <F2> key.

13
3.
Turn on the computer and when the power lamp lights up, press [F2]
repeatedly until the utility the BIOS setup utility is displayed.
4.
Use [ ] and [ ] to select the "Exit" or "Save & Exit" menu, use [ ]
and [ ] to select "HDD Recovery", and press [Enter].
When a confirmation screen appears, select "Yes" and press [Enter].
When a screen of the keyboard layout selection appears, click "US".
5.
When the "Choose an option" screen appears, click or tap
"Troubleshoot".
6.
When the "Troubleshoot" screen appears, click or tap "Reset this PC".
7.
When the "Reset this PC" screen appears, Click or tap "Keep my files".
8.
Click or tap "Just remove my files".
9.
Click or tap on the "Reset" button.
10.
Click "Restore to default".
The factory reset will start.
After factory reset is complete, the computer will restart.
After this, please see "When the factory reset is complete".
When factory reset is complete
When the factory reset is complete, see "Setup work procedure" (p.15) to
complete the setup.
During setup, an application installation screen may appear. The device will
restart automatically after the setup is complete.
Factory reset procedure using the recovery drive
In addition to the factory reset procedure described above, you can also write
the data for factory reset to a USB flash drive, create a "Recovery drive", and
perform factory reset.
Preparation for creating a recovery drive
• A USB memory is required to create a recovery drive. The capacity of the
USB memory to be used is displayed on the "Create Recovery Drive"
screen. Please follow the instructions on the screen.
• When you create a recovery drive, all data on the USB memory will be
deleted.
• The recovery drive cannot be divided and written to multiple USB memory
devices.
1.
Remove all peripheral devices (memory, printer, scanner, etc.).
2.
Click "(Start)" - "Windows System" - "Control Panel".
3.
Click or tap "System and Security".
4.
Click or tap "Security and Maintenance".
5.
Click or tap "Recovery".
6.
Click or tap "Create a recovery drive".
7.
Click or tap the "Yes" button on the User Account Control dialog box
8.
When "Create a recovery drive" appears, make sure that "Back up
system files to the recovery drive." is checked click or tap "Next".
9.
Insert the USB flash drive into the computer when the message
"Connect a USB flash drive" appears.
10.
When "Select the USB flash drive" appears, make sure that the USB
flash drive is selected and click or tap "Next".
11.
When "Create the recovery drive" appears, click or tap "Create".
This completes the creation of the recovery drive.
Factory reset using the recovery drive
1.
Prepare the created recovery drive (USB flash drive)
2.
Turn OFF the computer.
3.
Connect the AC adapter.
4.
Insert the recovery drive into the computer.
5.
Turn ON the main unit and when the power lamp lights up, press [F2]
repeatedly until the BIOS setup utility is displayed.
6.
Use [ ] and [ ] to display the "Exit" or "Save & Exit" menu.
important • Generally, select "Delete only files".
If you select "Clean drive completely", it may take a very long time to
complete. Use this option when selling or transferring the device.
• If "PC has multiple drives" is displayed before this step, select "Only
drives with Windows installed".

14
7.
Use [ ] and [ ] to select the device name of the recovery drive in the
[Boot Override] field and press [Enter].
In general, "Windows Boot Manager" and the recovery drive device set in
step 4 are displayed. Select a device other than "Windows Boot
Manager".
The computer will restart.
8.
When a screen of the keyboard layout selection appears, click "US".
9.
When the "Choose an option" screen appears, click or tap
"Troubleshoot".
10.
When the "Troubleshoot" screen appears, click or tap "Recover from
drive".
11.
Click "Only delete files".
12.
Next, follow the instructions on the screen.
13.
Click "Recover".
The factory reset will start.
When the factory reset is complete, the setup screen will appear. Please
remove the recovery drive from your computer.
After this, please see "When the factory reset is complete".
13 Support
See below for support information.
• Manufacturer: NEC
• Phone: Support Information.
Please see below for details about technical support.
• Website: http://121ware.com/navigate/support/overseas/
14 SPEC
important If the computer starts up normally, you may not have selected a recovery
drive device. Turn OFF the computer and try again from step 5.
important Do not turn OFF the computer during factory reset. If the power is turned
OFF, the computer may malfunction.
Model PC-PM75GNAR-N
Product LAVIE Pro Mobile
Processor Intel Core i7-8565U (4C/ 8T, 1.8/4.6GHz, 8MB)
Graphics Integrated Intel UHD Graphics 620
Chipset Integrated in CPU
Memory 8GB Soldered LPDDR3 SDRAM, Dual-channel capable
Display 13.3" FHD (1920x1080) IPS, LED back light, 300nits, Anti-glare
Multi-touch None
Storage 512GB SSD M.2 2280 PCIe
Optical None
Media Reader Support SD/SDHC/SDXC, Push-In/Push-Out slot type.
Support UHS-II
Ports One USB 3.1 Type-A Gen 2 (with the function of Power off USB charge),
One USB 3.1 Type-C Gen 2, One USB 3.1 Type-C Gen 1 (with the
function of DC-IN (Power Delivery 3.0)), HDMI 1.4b, headphone /
microphone combo jack, microSD card reader, security keyhole
* Depending on many factors, actual data transfer speed may be lower
than theoretical speed
Ethernet None
WLAN + Bluetooth 11ax, 2x2 + BT5.0
Color Classic Bordeaux
Camera HD 720p
Microphone Stereo microphone
Audio Support HD Audio, YAMAHA Audio Engine, stereo speakers, 2W x 2
Keyboard Non-backlit, English
Touchpad Precision multi-touch touchpad
Mouse None
Fingerprint Reader Touch type, Support Windows Hello
Dimensions
(W x D x H)
xx.xx" x xx.xx" x x.x"
307.8mm x 215.7mm x 15.5mm
Weight x.xx lb / x.x kg

15
Power Consumption
(Standard/Max/
Sleep Mode)
x.xw/Approx.65w/x.xw
Battery Integrated Li-ion 49Wh battery, supports Rapid Charge (charge up to
80% in 1hr)
Max battery life MobileMark 2014: x.x hrs
* Battery life varies significantly with settings, usage, & other factors
Power Adapter 65W USB Type-C
Operating System Windows 10 Home 64, English
Bundled Software Office Trial

16
Caution
(1) Unauthorized reproduction of all or part of the contents of this guide is
prohibited.
(2) The contents of this guide are subject to change without prior notice.
(3) Although the contents of this guide have been prepared with the
utmost care, if you notice any questionable points, errors or omissions,
please contact the 121 Contact Center. We will replace the missing
pages and copies with disarranged pages.
(4) Note that the Company is not liable for any claims for loss, lost profits,
etc. caused by the operation of this device, irrespective of (3).
(5) This device is used for medical equipment, nuclear facilities and
equipment, aerospace equipment, transportation facilities and
equipment, facilities and equipment related to human life.
(5) This device is not intended to be used for installation or control in
equipment and machinery related to human life such as medical
equipment, nuclear equipment and machinery, aerospace equipment,
transportation equipment and machinery or equipment that require
high reliability.
(6) Overseas maintenance / repair services is limited to the models that
are covered by the overseas warranty service [NEC UltraCareSM
International Service] repair services will be performed in Japan after
picking up from the target areas specified by the Company. For details
of the service and target models, see the following website.
http://121ware.com/navigate/support/overseas/
(7) Use only Windows 10 Home or Windows 10 Pro installed in the internal
storage of this unit and the CD-ROM and DVD-ROM that are provided
with the device.
(8) Any reproduction or distribution of all or part of the software without the
permission of the copyright holder, or distributing a copy, is an
infringement of the copyright.
(9) Hardware maintenance information is being saved.
Microsoft, Windows, Internet Explorer, Excel, Office logo, OneNote,
Outlook and PowerPoint are trademarks of Microsoft Corporation and /
or its affiliates.
Intel, Intel Core and Intel are registered trademarks or trademarks of
Intel Corporation in the United States and other countries.
Company names and product names described in this manual are
trademarks or registered trademarks of the respective companies.
This manual suits for next models
1
Table of contents
Other NEC Laptop manuals

NEC
NEC VERSA SXI Guide

NEC
NEC VERSA 2000 WINDOWS 98 - UPGRADE INFORMATION User manual

NEC
NEC VersaPro VC User manual

NEC
NEC Versa 2500 Series User manual

NEC
NEC ShieldPRO N22A User manual

NEC
NEC VERSA SXI User manual

NEC
NEC VERSA P User manual

NEC
NEC VERSA S1300 Series User manual

NEC
NEC VERSA SXI Instruction Manual

NEC
NEC Versa LX User manual

NEC
NEC VERSA S9100 Series User manual

NEC
NEC Versa E6000 Installation instructions

NEC
NEC VERSA 2400 - SERVICE User manual

NEC
NEC MobilePro 880 User manual

NEC
NEC VERSA P User manual

NEC
NEC J6N User manual

NEC
NEC ShieldPRO FC-N21S User manual

NEC
NEC VERSA 2205C User manual

NEC
NEC VERSA SXI User manual

NEC
NEC Versa LX User manual