manuals.online logo
Brands
  1. Home
  2. •
  3. Brands
  4. •
  5. Necta
  6. •
  7. Coffee Maker
  8. •
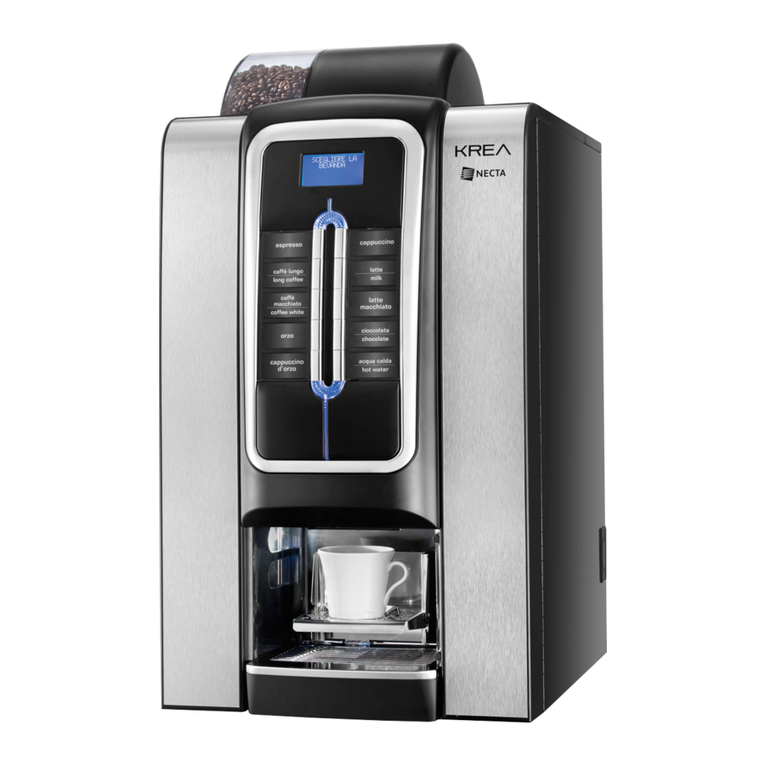
  9. Necta KREA TOUCH User manual

Necta KREA TOUCH User manual

KREA TOUCH ES
U5215EN00 05-2018
Below are some simple instructions for loading products and clean-
ing your appliance.
Warnings are highlighted with
this symbol
toUch
scrEEN
UppEr
paNEl
coffEE
bEaN
coNtaiNEr
solUblE
powdEr
coNtaiNEr
liqUid
rEsidUE
tray
solid
rEsidUE
tray
NozzlEs
oN
/
off
switch
mixEr
tray
brEwiNg
UNit
covEr
door
mixEr
lock
cUp
sUpport
cUp
sENsor
KREA TOUCH ES
21
21
21
prodUct loadiNg
tray clEaNiNg“daily opEratioNs” fUNctioN
Product loading
1. Open the appliance door
2. Lift the upper panel
Product loading
1. Load coffee beans through the port (A)
2. Load the soluble products into container (B), making sure that the
powder is not compressed
3. If the soluble product level control is active, use the “Daily opera-
tions” function to enter the quantity of product loaded
liquid residue tray
1. When the message “TRAY FULL” is displayed, open the appliance
door
2. Grab the tray on its sides, lift slightly and pull
3. Press on hook B to unhook lid A of the liquid residue tray
4. Empty and wash the tray
solid residue trays
1. When the message “Solid residue tray” is displayed, open the appli-
ance door
2. Grab the liquid residue tray on its sides, lift slightly and pull
3. Remove the solid residue tray, empty and wash it.
4. Reposition the tray in the reverse order
5. From the “daily operations” functions, reset the counter that man-
ages the “solid residue tray” function
b
a
Write down the programmed
access password
1. From the selection screen, tap to access the menu
2. Enter the programmed password
1. Tap to access the menu
2. Touch the “daily operations” function
3. Access the desired function
• Container filling: to indicate the quantity of product loaded
• Residue product reset: to cancel the “residue tray full” display
• Washing functions
4. Tap and then to exit the menu
Ensure that the products to be loaded have been
stored correctly and have not expired
1
2
A
B
1
2
3
4
7
5
1 2 3
4 6
7 8
5
0
Menu
KREA TOUCH ES
65
43
21
Mixer disassembly
1. Raise the soluble product conveyor (D)
2. Remove the tube (A) from the mixer
3. Turn the mixer fixing lever (B) counterclockwise
4. Remove the mixer (C)
a
b
c
d
Mixer disassembly
Separate all components: funnel (A), mixer ring (B), water conveyor (C)
and rear cover (D), if present
Mixer blender fan disassembly
Gently tug to remove the mixer fan
Nozzle and mixer tray disassembly
1. Remove tubes from the nozzles and separate the nozzles from the
support
2. Unscrew the knurl (A) of the mixing bowl (B)
3. Remove the mixer tray
a
b
13
2
Component sanitization
1. Wash all components with a sanitizing solution, making sure you
remove residues and visible films using brushes and/or brushes.
2. Rinse and dry all parts thoroughly
Mixer blender fan assembly
1. Reposition and push the mixer fan
2. Make sure it is inserted completely, until it clicks
mixEr aNd NozzlE clEaNiNg
To avoid altering the taste of drinks, do not use highly
scented detergents and/or solvents
1
3
2
a
b
c
d
KREA TOUCH ES
1211
109
87
clEaNiNg complEtE
Mixer assembly
1. Reassemble the components and reposition the mixer
Mixer assembly
1. Turn the lever (A) clockwise to fasten the mixer to the appliance
2. Reconnect tubes to the mixers
3. Lower the soluble powder nozzles
Brewing unit cleaning assembly and cleaning
1. Remove the cover from the brewing unit
2. Turn the coffee outlet nozzle (A) 90° and pull it towards you
3. Operate the group stop lever (B) by turning it horizontally
4. Remove the coffee group
Brewing unit cleaning
1. We recommend removing coffee residues from and around the
brewing unit at every loading or at least weekly.
2. Dust residues off using a brush or a small vacuum cleaner
3. Rinse the brewing group under a water jet
4. Reposition the brewing group following the operations in reverse
order
To avoid oxidation or chemical aggression
risks, use neutral cleaning products (avoid
using solvents).
Dispensing unit cleaning
To clean the dispensing compartment and the cup holder, use a soft
cloth moistened with cleaning solution.
For the cup sensor to work properly, the sensor window must be kept
clean.
Nozzle and mixer tray assembly
1. Reposition the mixer tray (B)
2. Twist on the knurl (A)
3. Reposition the nozzles and connect their respective tubes
4. Close the door and rinse the mixer to remove any detergent residue.
31
2
1
3
2
4
5
Make sure that the couplers are inserted
correctly in the mixer
a
b
a
2
1

Other Necta Coffee Maker manuals

Necta Colibri Specification sheet

Necta

Necta Colibri Specification sheet

Necta KORO Fresh Brew User manual

Necta

Necta KORO Fresh Brew User manual

Necta Colibri User manual

Necta

Necta Colibri User manual

Necta Necta Colibri Espresso User manual

Necta

Necta Necta Colibri Espresso User manual

Necta Koro Espresso User manual

Necta

Necta Koro Espresso User manual

Necta Korinto Espresso Owner's manual

Necta

Necta Korinto Espresso Owner's manual

Necta Kobalto espresso User manual

Necta

Necta Kobalto espresso User manual
Necta Colibri Service manual

Necta

Necta Colibri Service manual

Necta Koro User manual

Necta

Necta Koro User manual

Necta Kobalto Owner's manual

Necta

Necta Kobalto Owner's manual

Necta Brio 250 User manual

Necta

Necta Brio 250 User manual

Necta Korinto UL User manual

Necta

Necta Korinto UL User manual

Necta Krea Espresso User manual

Necta

Necta Krea Espresso User manual

Necta Koro Espresso User manual

Necta

Necta Koro Espresso User manual

Necta KIKKO ES6 User manual

Necta

Necta KIKKO ES6 User manual

Necta brio 3 Owner's manual

Necta

Necta brio 3 Owner's manual

Necta Korinto UL 120V User manual

Necta

Necta Korinto UL 120V User manual

Necta Kikko Max P250U00 Owner's manual

Necta

Necta Kikko Max P250U00 Owner's manual

Necta BRIO "Easy Serving Espresso" User manual

Necta

Necta BRIO "Easy Serving Espresso" User manual

Necta KORO FRESH-BREW User manual

Necta

Necta KORO FRESH-BREW User manual

Necta Astro Installation guide

Necta

Necta Astro Installation guide

Necta KORO PRIME ES User manual

Necta

Necta KORO PRIME ES User manual
Necta Korinto Espresso User manual

Necta

Necta Korinto Espresso User manual
Necta Brio Espresso User manual

Necta

Necta Brio Espresso User manual

Popular Coffee Maker manuals by other brands

Bosch Tassimo TAS 1000UC user manual

Bosch

Bosch Tassimo TAS 1000UC user manual

Morphy Richards IB47002 manual

Morphy Richards

Morphy Richards IB47002 manual

Keurig K-1500 Use & care guide

Keurig

Keurig K-1500 Use & care guide

Goldmaster GM-9900 user manual

Goldmaster

Goldmaster GM-9900 user manual

Stentorfield Viision 2000 Range Programming manual

Stentorfield

Stentorfield Viision 2000 Range Programming manual

Kaffee Partner multiBona3 Cleaning instructions

Kaffee Partner

Kaffee Partner multiBona3 Cleaning instructions

WMF Series 8400 bistro user manual

WMF

WMF Series 8400 bistro user manual

Bunn 392 OPERATING AND INSTALLATION Manual

Bunn

Bunn 392 OPERATING AND INSTALLATION Manual

SEVERIN CAFISSIMO KA 5117 - datasheet

SEVERIN

SEVERIN CAFISSIMO KA 5117 - datasheet

Philips HD2004 user guide

Philips

Philips HD2004 user guide

Oster BVSTEM6601R instruction manual

Oster

Oster BVSTEM6601R instruction manual

Marvel MVA-802 instruction manual

Marvel

Marvel MVA-802 instruction manual

Black & Decker CM4200 Series manual

Black & Decker

Black & Decker CM4200 Series manual

Braun PureFlavor KF502AN instructions

Braun

Braun PureFlavor KF502AN instructions

DeLonghi ELETTA EXPLORE ECAM450-86-T quick start guide

DeLonghi

DeLonghi ELETTA EXPLORE ECAM450-86-T quick start guide

SEVERIN KA 5995 Instructions for use

SEVERIN

SEVERIN KA 5995 Instructions for use

Princess CAFE CAMPING 500W Instructions for use

Princess

Princess CAFE CAMPING 500W Instructions for use

Unic Phoenix-R Technical instructions

Unic

Unic Phoenix-R Technical instructions

manuals.online logo
manuals.online logoBrands
  • About & Mission
  • Contact us
  • Privacy Policy
  • Terms and Conditions

Copyright 2025 Manuals.Online. All Rights Reserved.