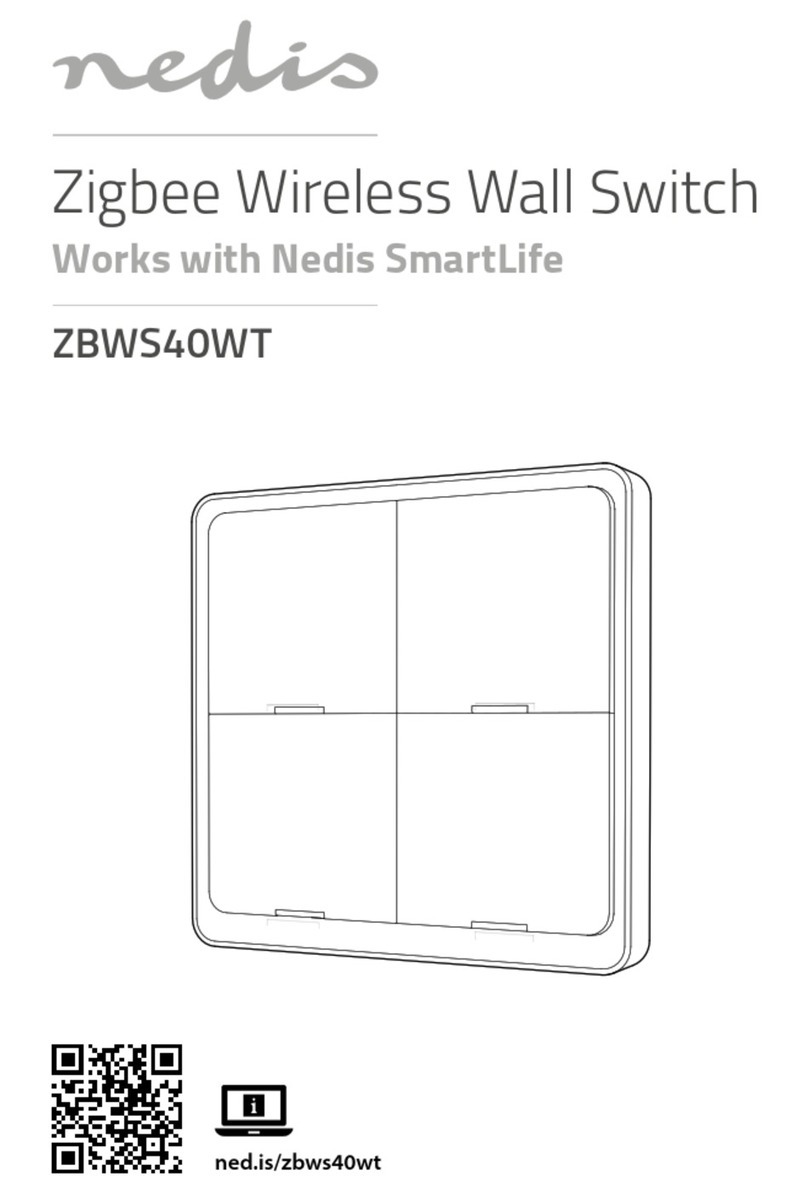
nedis Zigbee ZBWS40WT User manual

ned.is/zbws40wt
Zigbee Wireless Wall Switch
Works with Nedis SmartLife
ZBWS40WT

aQuick start guide 3
cKurzanleitung 7
bGuide de démarrage rapide 11
dSnelstartgids 15
jGuida rapida all’avvio 18
hGuía de inicio rápido 22
iGuia de iniciação rápida 26
eSnabbstartsguide 30
gPika-aloitusopas 34
fHurtigguide 37
2Vejledning til hurtig start 41
kGyors beüzemelési útmutató 45
nPrzewodnik Szybki start 48
xΟδηγός γρήγορης εκκίνησης 52
1Rýchly návod 56
lRychlý návod 60
yGhid rapid de inițiere 63

3
aQuick start guide
Zigbee Wireless Wall Switch ZBWS40WT
For more information see the extended manual online: ned.is/
zbws40wt
Intended use
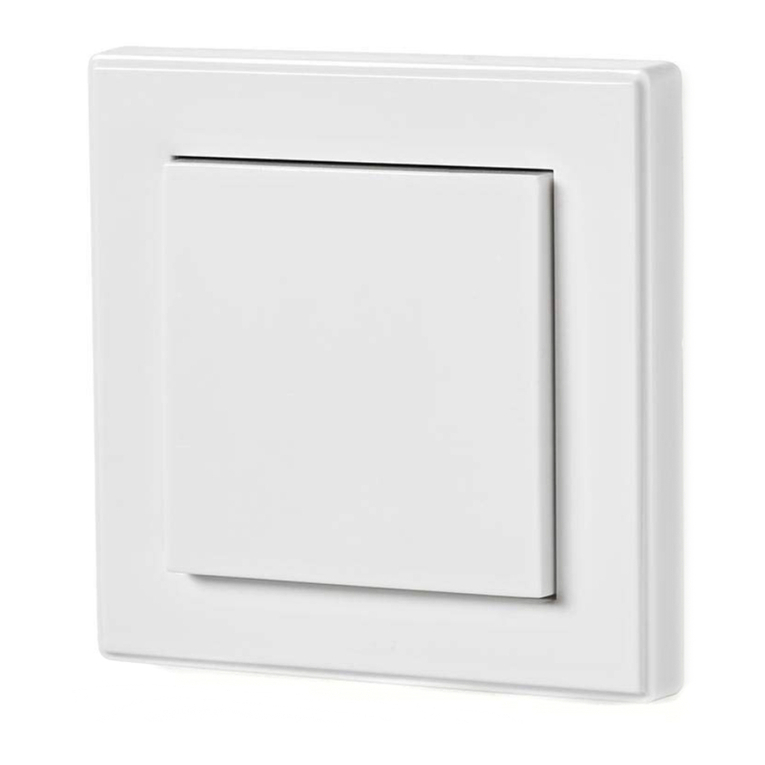
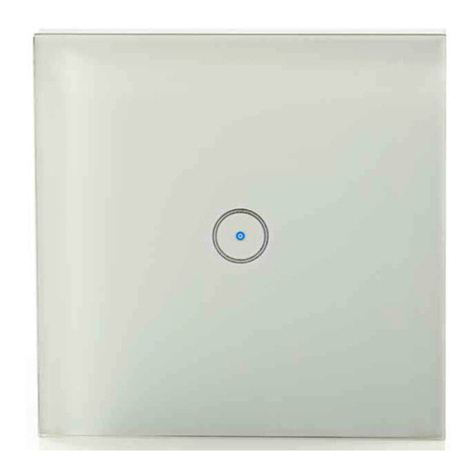
The Nedis ZBWS40WT is a wireless, battery powered wall switch.
With this wall switch you can control linked products from the Nedis SmartLife
product line.
You can connect the product wirelessly to the Nedis SmartLife app via the
Zigbee gateway.
The switch has four buttons, each of which has three available commands: single
tap, double tap and long press.
Each button also has a LED light.
When you have connected the product to the app, you can link the three
commands of the Zigbee Wireless Wall Switch to your other Nedis SmartLife
products and control them.
1
5
3
5
2
5
4
5
A

4
The product is intended for indoor use only.
The product is not intended for professional use.
Any modication of the product may have consequences for safety, warranty
and proper functioning.
Specications
Product Zigbee Wireless Wall Switch
Article number ZBWS40WT
Dimensions (l x w x h) 86 x 86 x 13 mm
Type of battery CR2032 button cell battery
Battery lifetime Up to 1 year
Commands Single tap/double tap/long press
Temperature range -10 °C - +45 °C
Operating humidity < 90 % RH
Main parts (image A)
1Button 1
2Button 2
3Button 3
4Button 4
5LED light
Safety instructions
-
WARNING
• Ensure you have fully read and understood the instructions in this document
before you install or use the product. Keep the packaging and this document
for future reference.
• Only use the product as described in this document.
• Do not use the product if a part is damaged or defective. Replace a damaged
or defective product immediately.
• Do not drop the product and avoid bumping.
• Do not expose the product to water or moisture.
• This product may only be serviced by a qualied technician for maintenance
to reduce the risk of electric shock.
• Children should be supervised to ensure that they do not play with the
product.
• Do not dismantle, open or shred secondary cells or batteries.

5
• In the event of a cell leaking, do not allow the liquid to come in contact with
the skin or eyes. If contact has been made, wash the aected area with
copious amounts of water and seek medical advice.
• Always keep button cell batteries, both full and empty, out of reach of
children to avoid the chance of swallowing. Dispose of used batteries
immediately and safely. Button cell batteries can cause serious internal
chemical burns in as little as two hours when swallowed. Keep in mind that
the rst symptoms may look like child diseases like coughing or drooling.
Seek immediate medical attention when you suspect that batteries have
been swallowed.
• Some wireless products may interfere with implantable medical devices and
other medical equipment, such as pacemakers, cochlear implants and
hearing aids. Consult the manufacturer of your medical equipment for more
information.
• Do not use the product at locations where the use of wireless devices is
prohibited due to potential interference with other electronic devices, which
may cause safety hazards.
Check the contents of the package
Check that all parts are present and that no damage is visible on the parts.
If parts are missing or damaged, contact the Nedis B.V. service desk via the
website: www.nedis.com.
Placing the battery
1. Slide the front side of the product to the left to open the battery
compartment.
2. Place the battery inside. Observe the plus (+) and minus (–) marks on the
battery and product and ensure correct placement.
The product automatically switches on.
3. Slide the front side of the product back on to close the battery compartment.
Connecting to the Zigbee gateway
Make sure the Zigbee gateway is connected to the Nedis SmartLife app.
For information on how to connect the gateway to the app, consult the manual
of the gateway.
1. Open the Nedis Smartlife app on your phone.
Select the Zigbee gateway to enter the gateway interface.
2. Tap Add subdevice.

6
The app asks if the product is in pairing mode. LED light A5blinks to indicate
pairing mode is active.
3. Press LED already Blink if A5is blinking.
4If A5is not blinking, press and hold button A3for 10 seconds to activate
the pairing mode manually.
After a few seconds, the product appears on the interface.
4. Rename the product by tapping above the current name.
5. Tap Done to conrm and save the connection.
Programming buttons
The product has three commands: single tap, double tap and long press. Each
command can be assigned to a dierent action for a linked Nedis SmartLife
product.
1. Open the Nedis Smartlife app on your phone.
2. Tap Smart scenes at the bottom of the home screen.
3. Tap Automation to open the automation interface.
4. Tap +in the top right corner.
5. Choose one of the commands in the app under Condition.
6. Specify what you want the command to do with a linked Nedis SmartLife
product.
7. Tap Save.
Removing the product from the app
1. Open the Smart Button interface in the app.
2. Tap the pencil icon in the top right corner.
3. Tap Remove Device.
Declaration of Conformity
We, NEDIS, as manufacturer, declare that product ZBWS40WT from the brand
Nedis, produced in China was tested according to all relevant CE standards /
regulations and passed all tests.
The complete Declaration of Conformity ( + safety datasheet if applicable ) can
be found and downloaded via http://webshop.nedis.com
For other compliant-related information, please contact customer service desk
for support:

7
via website: http://www.nedis.com
NEDIS B.V., De Tweeling 28,
5215 MC ’s-Hertogenbosch, THE NETHERLANDS
cKurzanleitung
Zigbee Wireless Wall Switch ZBWS40WT
Weitere Informationen nden Sie in der erweiterten Anleitung online:
ned.is/zbws40wt
Bestimmungsgemäße Verwendung
Der Nedis ZBWS40WT ist ein kabelloser, batteriebetriebener Wandschalter.
Mit diesem Wandschalter können Sie verbundene Produkte aus der Nedis
SmartLife-Produktlinie steuern.
Sie können das Produkt kabellos über das Zigbee-Gateway mit der Nedis
SmartLife-App verbinden.
Der Schalter hat vier Tasten, von denen jede über drei Befehle verfügt: einfaches
Tippen, doppeltes Tippen und langes Drücken.
Jede Taste hat auch eine LED-Leuchte.
Wenn Sie das Produkt mit der App verbunden haben, können Sie die drei
Befehle des Zigbee Wireless Wall Switch mit Ihren anderen Nedis SmartLife-
Produkten verbinden und diese steuern.
Das Produkt ist nur zur Verwendung innerhalb von Gebäuden gedacht.
Das Produkt ist nicht für den professionellen Einsatz gedacht.
Jegliche Modikation des Produkts kann Folgen für die Sicherheit, Garantie und
ordnungsgemäße Funktionalität haben.
Spezikationen
Produkt Zigbee Wireless Wall Switch
Artikelnummer ZBWS40WT
Größe (L x B x H) 86 x 86 x 13 mm
Batterietyp CR2032-Knopfzellenbatterie
Batterie-Lebensdauer Bis zu 1Jahr

8
Befehle Einfaches Tippen/doppeltes Tippen/langes
Drücken
Temperaturbereich -10 °C - +45 °C
Betriebsfeuchtigkeit < 90 % RLF
Hauptbestandteile (Abbildung A)
1Taste 1
2Taste 2
3Taste 3
4Taste 4
5LED-Licht
Sicherheitshinweise
-
WARNUNG
• Vergewissern Sie sich, dass Sie die Anweisungen in diesem Dokument
vollständig gelesen und verstanden haben, bevor Sie das Produkt installieren
oder verwenden. Heben Sie die Verpackung und dieses Dokument zum
späteren Nachschlagen auf.
• Verwenden Sie das Produkt nur wie in diesem Dokument beschrieben.
• Verwenden Sie das Produkt nicht, wenn ein Teil beschädigt ist oder es einen
Mangel aufweist. Ersetzen Sie ein beschädigtes oder defektes Produkt
unverzüglich.
• Lassen Sie das Produkt nicht herunterfallen und vermeiden Sie Kollisionen.
• Setzen Sie das Produkt keinem Wasser oder Feuchtigkeit aus.
• Dieses Produkt darf nur von einem ausgebildeten Techniker gewartet
werden, um die Gefahr eines Stromschlags zu reduzieren.
• Kinder müssen beaufsichtigt werden, um sicherzustellen, dass sie nicht mit
dem Produkt spielen.
• Batterien oder Akkus dürfen nicht zerlegt, geönet oder zerstört werden.
• Im Falle eines Auslaufens der Batterie darf die Flüssigkeit keinesfalls mit der
Haut oder den Augen in Kontakt kommen. Sollte es dennoch zu Kontakt
kommen, waschen Sie den betroenen Bereich mit reichlich Wasser ab und
holen Sie ärztlichen Rat ein.
• Bewahren Sie volle und leere Knopfzellenbatterien immer außerhalb der
Reichweite von Kindern auf, um die Gefahr des Verschluckens zu vermeiden.
Die Entsorgung verbrauchter Batterien sollte immer unverzüglich und auf
sichere Weise erfolgen. Knopfzellenbatterien können beim Verschlucken
innerhalb von nur zwei Stunden schwere innere chemischeVerätzungen
verursachen. Beachten Sie, dass die ersten Anzeichen dafür wie Symptome

9
von Kinderkrankheiten wie Husten oder vermehrter Speicheluss aussehen
können. Suchen Sie sofort einen Arzt auf, wenn Sie den Verdacht haben, dass
Batterien verschluckt wurden.
• Einige kabellose Produkte können implantierbare medizinische Geräte und
andere medizinische Geräte wie Herzschrittmacher, Cochlea-Implantate und
Hörgeräte stören.Wenden Sie sich für weitere Informationen an den
Hersteller Ihres medizinischen Geräts.
• Verwenden Sie das Produkt nicht an Orten, an denen die Verwendung von
drahtlosen Geräten aufgrund möglicher Interferenzen mit anderen
elektronischen Geräten verboten ist, da dies zu Sicherheitsrisiken führen
kann.
Überprüfen Sie den Inhalt der Verpackung
Kontrollieren Sie, ob alleTeile vorhanden sind und dass keine Beschädigungen
an den Teilen erkennbar sind. Falls Teile fehlen oder beschädigt sind,
kontaktieren Sie den Nedis B.V. Kundendienst über die Webseite: www.nedis.
com.
Einlegen der Batterie
1. Schieben Sie die Vorderseite des Produkts nach links, um das Batteriefach zu
önen.
2. Legen Sie die Batterie ein. Beachten Sie die Plus (+) und Minus (–)
Markierungen auf Batterie und Produkt und achten Sie auf die richtige
Polarität.
Das Produkt schaltet sich automatisch ein.
3. Schieben Sie die Vorderseite des Produkts wieder zurück, um das Batteriefach
zu schliessen.
Verbinden mit dem Zigbee-Gateway
Stellen Sie sicher, dass das Zigbee-Gateway mit der Nedis SmartLife-App
verbunden ist.
Informationen zum Verbinden des Gateways mit der App nden Sie im
Handbuch des Gateways.
1. Önen Sie die Nedis SmartLife-App auf Ihrem Smartphone.
Wählen Sie das Zigbee-Gateway, um die Gateway-Oberäche aufzurufen.
2. Tippen Sie auf Add subdevice.
Die App fragt, ob sich das Produkt im Kopplungsmodus bendet. Die LED-
Leuchte A5blinkt, um anzuzeigen, dass der Kopplungsmodus aktiv ist.
10
3. Tippen Sie auf LED already Blink, wenn A5blinkt.
4Wenn A5nicht blinkt, halten Sie die Taste A310 Sekunden lang gedrückt,
um den Kopplungsmodus manuell zu aktivieren.
Nach einigen Sekunden erscheint das Produkt auf der Schnittstelle.
4. Benennen Sie das Produkt um, indem Sie über dem aktuellen Namen tippen.
5. Tippen Sie auf Done zur Bestätigung und um die Verbindung zu speichern.
Programmieren von Tasten
Das Produkt verfügt über drei Befehle: einfaches Tippen, doppeltes Tippen und
langes Drücken. Jeder Befehl kann einer anderen Aktion für ein verknüpftes
Nedis-SmartLife-Produkt zugewiesen werden.
1. Önen Sie die Nedis SmartLife-App auf Ihrem Smartphone.
2. Tippen Sie am unteren Rand des Startbildschirms auf Smart scenes.
3. Tippen Sie auf Automation, um die Automatisierungsoberäche zu önen.
4. Tippen Sie auf„+“ in der oberen rechten Ecke.
5. Wählen Sie in der App unter Condition einen der Befehle aus.
6. Geben Sie an, was der Befehl mit einem verknüpften Nedis SmartLife-Produkt
tun soll.
7. Tippen Sie auf Save.
Entfernen des Produkts aus der App
1. Önen Sie die Smart Button-Schnittstelle in der App.
2. Tippen Sie auf das Stift-Symbol in der oberen rechten Ecke.
3. Tippen Sie auf Remove Device.
Konformitätserklärung
Wir, NEDIS, erklären als Hersteller, dass das Produkt ZBWS40WT der Marke Nedis,
hergestellt in China, gemäß allen relevanten CE-Standards und -Richtlinien
getestet wurde.
Die vollständige Konformitätserklärung ( + Sicherheitsdatenblatt, falls
zutreend) steht im http://webshop.nedis.de zum Download bereit.
Für weitere konformitätsrelevante Informationen wenden Sie sich bitte an den
Customer Service Desk:

11
über die Website: http://www.nedis.com
NEDIS B.V., De Tweeling 28,
5215 MC ’s-Hertogenbosch, NIEDERLANDE
bGuide de démarrage rapide
Zigbee Wireless Wall Switch ZBWS40WT
Pour plus d'informations, consultez le manuel détaillé en ligne : ned.
is/zbws40wt
Utilisation prévue
Le Nedis ZBWS40WT est un interrupteur mural sans l alimenté par pile.
Avec cet interrupteur mural, vous pouvez contrôler les produits appairés de la
gamme de produits Nedis SmartLife.
Vous pouvez connecter le produit sans l à l’application Nedis SmartLife via la
passerelle Zigbee.
L’interrupteur dispose de quatre boutons, chacun proposant trois commandes:
un appui simple, un appui double et un appui long.
Chaque bouton est également équipé d’un voyant LED.
Une fois le produit connecté à l’application, vous pouvez appairer les trois
commandes du Zigbee Wireless Wall Switch à vos autres produits Nedis
SmartLife et les contrôler.
Le produit est prévu pour un usage intérieur uniquement.
Le produit n’est pas destiné à un usage professionnel.
Toute modication du produit peut avoir des conséquences sur la sécurité, la
garantie et le bon fonctionnement.
Spécications
Produit Zigbee Wireless Wall Switch
Article numéro ZBWS40WT
Dimensions (L x l x H) 86 x 86 x 13 mm
Type de batterie Pile bouton CR2032
Durée de vie de la pile Jusqu’à 1 an

12
Commandes Appui simple/Appui double/Appui long
Plage de température -10 °C - +45 °C
Humidité en
fonctionnement
< 90 % HR
Pièces principales (image A)
1Bouton 1
2Bouton 2
3Bouton 3
4Bouton 4
5Lampe LED
Consignes de sécurité
-
AVERTISSEMENT
• Assurez-vous d'avoir entièrement lu et compris les instructions de ce
document avant d'installer ou d'utiliser le produit. Conservez l'emballage et
le présent document pour référence ultérieure.
• Utilisez le produit uniquement comme décrit dans le présent document.
• Ne pas utiliser le produit si une pièce est endommagée ou défectueuse.
Remplacez immédiatement un produit endommagé ou défectueux.
• Ne pas laisser tomber le produit et éviter de le cogner.
• Ne pas exposer le produit à l'eau ou à l'humidité.
• Ce produit ne peut être réparé que par un technicien qualié an de réduire
les risques d'électrocution.
• Les enfants doivent être surveillés an de s’assurer qu’ils ne jouent pas avec le
produit.
• Ne pas démonter, ouvrir ou déchiqueter des piles secondaires.
• En cas de fuite d’une pile, ne pas laisser le liquide entrer en contact avec la
peau ou les yeux. En cas de contact, lavez la zone touchée à grande eau et
consultez un médecin.
• Gardez toujours les piles bouton, chargées et déchargées, hors de portée des
enfants an d’éviter tout risque d’ingestion. Jetez les piles usagées
immédiatement et en toute sécurité. Si elles sont avalées, les piles bouton
peuvent provoquer de graves brûlures chimiques internes en seulement
deux heures. Gardez à l'esprit que les premiers symptômes peuvent
ressembler à des maladies infantiles comme la toux ou la bave. Si vous
pensez que des piles ont été avalées, consultez immédiatement un médecin.

13
• Certains produits sans l peuvent interférer avec des appareils médicaux
implantables et d'autres équipements médicaux, tels que des stimulateurs
cardiaques, des implants cochléaires et des aides auditives. Pour plus
d'informations, consultez le fabricant de votre équipement médical.
• Ne pas utiliser le produit dans des endroits où l'utilisation d'appareils sans l
est interdite en raison d'interférences potentielles avec d'autres appareils
électroniques, ce qui peut entraîner des risques pour la sécurité.
Vérier le contenu de l'emballage
Vériez que toutes les pièces soient présentes et qu’aucun dommage ne soit
visible sur les pièces. Si des pièces manquent ou sont endommagées, contactez
le service clientèle de Nedis B.V. via le site Web : www.nedis.com.
Mettre la pile
1. Faites glisser la face avant du produit vers la gauche pour ouvrir le
compartiment à pile.
2. Mettez la pile à l’intérieur. Respectez les marquages positif (+) et négatif (-)
sur la pile et le produit et assurez-vous de la positionner correctement.
Le produit se met automatiquement sous tension.
3. Faites glisser la face avant du produit pour fermer le compartiment à pile.
Connexion à la passerelle Zigbee en cours
Assurez-vous que la passerelle Zigbee soit connectée à l’application Nedis
SmartLife.
Pour plus d'informations sur la connexion de la passerelle à l'application,
consultez le manuel de la passerelle.
1. Ouvrez l'application Nedis Smartlife sur votre téléphone.
Pour accéder à l'interface de la passerelle, sélectionnez la passerelle Zigbee.
2. Appuyez sur Add subdevice.
L’application demande si le produit est en mode appairage. Le voyant LED A5
clignote pour indiquer que le mode appairage est actif.
3. Appuyez sur LED already Blink si A5clignote.
4Si A5ne clignote pas, appuyez et maintenez le bouton A3pendant 10
secondes pour activer le mode appairage manuellement.
Au bout de quelques secondes, le produit apparaît sur l’interface.
4. Renommez le produit en appuyant au-dessus du nom actuel.
5. Appuyez sur Done pour conrmer et sauvegarder la connexion.

14
Boutons de programmation
Le produit propose trois commandes: un appui simple, un appui double et un
appui long. Chaque commande peut être aectée à une action diérente pour
un produit Nedis SmartLife appairé.
1. Ouvrez l'application Nedis Smartlife sur votre téléphone.
2. Appuyez sur Smart scenes en bas de l'écran d'accueil.
3. Appuyez sur Automation pour ouvrir l'interface d'automatisation.
4. Appuyez sur « +» dans le coin supérieur droit.
5. Choisissez l’une des commandes de l’application sous Condition.
6. Spéciez ce que vous voulez que la commande exécute avec un produit
Nedis SmartLife appairé.
7. Appuyez sur Enregistrer.
Supprimer le produit de l’application
1. Ouvrez l’interface du bouton intelligent dans l’application.
2. Appuyez sur l’icône crayon dans le coin supérieur droit.
3. Appuyez sur Remove Device.
Déclaration de conformité
Nous, NEDIS, en tant que fabricant, déclarons que le produit ZBWS40WT de
la marque Nedis, fabriqué en Chine, a été soumis à des tests conformément à
toutes les réglementations/normes CE en vigueur et que celui-ci a passé tous ces
tests avec succès.
La déclaration de conformité complète (+ la che de données de sécurité, le cas
échéant) est disponible et peut être téléchargée à l’adresse suivante : http://
webshop.nedis.com.
Pour en savoir plus sur la conformité, veuillez contacter notre centre de service à
la clientèle pour plus d’assistance :
sur le site web : http://www.nedis.com
NEDIS B.V., De Tweeling 28,
5215 MC ’s-Hertogenbosch, PAYS-BAS

15
dSnelstartgids
Zigbee Wireless Wall Switch ZBWS40WT
Zie voor meer informatie de uitgebreide handleiding online: ned.is/
zbws40wt
Bedoeld gebruik
De Nedis ZBWS40WT is een draadloze, op batterijen werkende wandschakelaar.
Met deze wandschakelaar kunt u gekoppelde producten uit de Nedis SmartLife
productlijn bedienen.
U kunt het product draadloos via de Zigbee-gateway met de Nedis SmartLife
app verbinden.
De schakelaar heeft vier knoppen, waarvan elke drie beschikbare commando's
heeft: enkele tik, dubbele tik en lang indrukken.
Elke knop heeft ook een LED-lampje.
Wanneer u het product met de app hebt verbonden, kunt u de drie commando's
van de Zigbee draadloze wandschakelaar koppelen aan uw andere Nedis
SmartLife producten en deze bedienen.
Het product is enkel bedoeld voor gebruik binnenshuis.
Het product is niet bedoeld voor professioneel gebruik.
Elke wijziging van het product kan gevolgen hebben voor veiligheid, garantie en
correcte werking.
Specicaties
Product Zigbee Wireless Wall Switch
Artikelnummer ZBWS40WT
Afmetingen (l x b x h) 86 x 86 x 13 mm
Batterijtype CR2032 knoopcelbatterij
Levensduur van de
batterij
Tot 1 jaar
Commando’s Enkele tik/dubbele tik/lang drukken
Temperatuurbereik -10 °C - +45 °C
Operationele
vochtigheid
< 90 % RH

16
Belangrijkste onderdelen (afbeelding A)
1Knop 1
2Knop 2
3Knop 3
4Knop 4
5LED lamp
Veiligheidsvoorschriften
-
WAARSCHUWING
• Zorg ervoor dat u de instructies in dit document volledig gelezen en
begrepen heeft voordat u het product installeert of gebruikt. Bewaar de
verpakking en dit document voor toekomstig gebruik.
• Gebruik het product alleen zoals in dit document beschreven.
• Gebruik het product niet als een onderdeel beschadigd of defect is. Vervang
een beschadigd of defect product onmiddellijk.
• Laat het product niet vallen en voorkom stoten.
• Stel het product niet bloot aan water of vocht.
• Dit product mag voor onderhoud alleen worden geopend door een erkend
technicus om het risico op elektrische schokken te verkleinen.
• Kinderen moeten onder toezicht staan om ervoor te zorgen dat ze niet met
het product spelen.
• Demonteer, open of plet secundaire cellen of batterijen niet.
• Als een cel lekt, laat de vloeistof dan niet met de huid of de ogen in contact
komen. Als dit toch gebeurt, moet u de vloeistof direct met veel water
afspoelen en medische hulp inroepen.
• Houd zowel volle als lege knoopcelbatterijen altijd buiten het bereik van
kinderen om inslikgevaar te voorkomen. Gooi gebruikte batterijen
onmiddellijk en op een veilige manier weg. Binnen twee uur na inslikken
kunnen knoopcelbatterijen door een chemische reactie ernstige inwendige
brandwonden veroorzaken. NB: de eerste symptomen kunnen lijken op
kinderziektes zoals hoesten of kwijlen. Wanneer u vermoedt dat er batterijen
zijn ingeslikt, moet u onmiddellijk een arts raadplegen.
• Sommige draadloze apparaten kunnen storing veroorzaken op
implanteerbare medische apparaten en andere medische apparatuur, zoals
pacemakers, cochleaire implantaten en hoortoestellen. Voor meer informatie,
raadpleeg de fabrikant van uw medische apparatuur.
• Gebruik het product niet waar het gebruik van draadloze apparaten
verboden is. Dit kan een storing van andere elektronische apparaten en dus
veiligheidsrisico's veroorzaken.

17
Inhoud van de verpakking controleren
Controleer of alle onderdelen aanwezig zijn en of er geen zichtbare schade is op
de onderdelen. Indien onderdelen ontbreken of beschadigd zijn, neem dan via
onderstaande website contact op met de Nedis B.V. service desk: www.nedis.
com.
Het plaatsen van de batterij
1. Schuif de voorkant van het product naar links om het batterijcompartiment
te openen.
2. Plaats de batterij erin. Let op de plus (+) en min (-) markeringen op de batterij
en product en zorg ervoor dat het correct geplaatst wordt.
Het product schakelt automatisch in.
3. Schuif de voorkant van het product terug om het batterijcompartiment te
sluiten.
Verbinding maken met de Zigbee gateway
Zorg ervoor dat de Zigbee-gateway met de Nedis SmartLife-app verbonden is.
Raadpleeg de handleiding van de gateway voor meer informatie over het
verbinden van de gateway met de app.
1. Open de Nedis Smartlife app op je telefoon.
Selecteer de Zigbee-gateway om de gateway-interface te openen.
2. Tik op Add subdevice.
De app vraagt of het product in de koppelingsmodus staat. Controlelampje A5
knippert om aan te geven dat de koppelingsmodus actief is.
3. Druk op LED already Blink als A5knippert.
4Als A5niet knippert, houd de knop A3gedurende 10 seconden ingedrukt
om de koppelingsmodus handmatig te activeren.
Na een paar seconden verschijnt het product op de interface.
4. Wijzig de naam van het product door boven de huidige naam te tikken.
5. Tik op Done om de verbinding te bevestigen en op te slaan.
Knoppen programmeren
Het product heeft drie commando's: enkele tik, dubbele tik en lang indrukken.
Elk commando kan worden toegewezen aan een andere actie voor een
gekoppeld Nedis SmartLife product.
1. Open de Nedis Smartlife app op je telefoon.
2. Tik op Smart scenes onderin het startscherm.

18
3. Tik op Automation om de automatiseringsinterface te openen.
4. Tik op +in de rechterbovenhoek.
5. Kies een van de commando's in de app onder Condition.
6. Geef aan wat u m.b.v. het commando met een gekoppeld Nedis SmartLife
product wilt doen.
7. Tik op Save.
Het product uit de app verwijderen
1. Open de Smart Button-interface in de app.
2. Tik op het potloodpictogram in de rechterbovenhoek.
3. Tik op Remove Device.
Verklaring van overeenstemming
Wij, NEDIS, verklaren als fabrikant dat het product ZBWS40WT van het merk
Nedis, geproduceerd in China, is getest conform alle relevante CE-normen/
voorschriften en alle tests succesvol heeft afgelegd.
De volledige conformiteitsverklaring (en het blad met veiligheidsgegevens
indien van toepassing) kan worden gevonden en gedownload via http://
webshop.nedis.com
Voor andere informatie met betrekking tot de naleving neemt u contact op met
de klantenservice voor ondersteuning:
via de website: http://www.nedis.com
NEDIS B.V., De Tweeling 28,
5215 MC ’s-Hertogenbosch, NEDERLAND
jGuida rapida all’avvio
Zigbee Wireless Wall Switch ZBWS40WT
Per maggiori informazioni vedere il manuale esteso online: ned.is/
zbws40wt
Uso previsto
Il Nedis ZBWS40WT è un interruttore a parete wireless alimentato a batteria.
Con questo interruttore a parete è possibile controllare i prodotti collegati della
linea Nedis SmartLife.

19
Il prodotto può essere collegato via wireless all’app Nedis SmartLife tramite il
gateway Zigbee.
L’interruttore è dotato di quattro pulsanti, ognuno dei quali ha tre comandi
disponibili: singolo tocco, doppio tocco e lunga pressione.
Ogni pulsante presenta anche una spia LED.
Una volta connesso il prodotto all’app, è possibile collegare i tre comandi dello
Zigbee Wireless Wall Switch ad altri prodotti Nedis SmartLife per controllarli.
Il prodotto è inteso solo per utilizzo in interni.
Il prodotto non è inteso per utilizzi professionali.
Eventuali modiche al prodotto possono comportare conseguenze per la
sicurezza, la garanzia e il corretto funzionamento.
Speciche
Prodotto Zigbee Wireless Wall Switch
Numero articolo ZBWS40WT
Dimensioni (p x l x a) 86 x 86 x 13 mm
Tipo di batteria Batteria con pila a bottone CR2032
Durata della batteria Fino a 1 anno
Comandi Singolo tocco/doppio tocco/lunga pressione
Intervallo di temperatura -10 °C - +45 °C
Umidità d’esercizio < 90 % UR
Parti principali (immagine A)
1Pulsante 1
2Pulsante 2
3Pulsante 3
4Pulsante 4
5Spia LED
Istruzioni di sicurezza
-
ATTENZIONE
• Assicurarsi di aver letto e compreso pienamente le istruzioni presenti nel
documento prima di installare o utilizzare il prodotto. Conservare la
confezione e il presente documento per farvi riferimento in futuro.
• Utilizzare il prodotto solo come descritto nel presente documento.
• Non utilizzare il prodotto se una parte è danneggiata o difettosa. Sostituire
immediatamente un prodotto danneggiato o difettoso.

20
• Non far cadere il prodotto ed evitare impatti.
• Non esporre il prodotto all’acqua o all’umidità.
• Il prodotto può essere riparato e sottoposto a manutenzione esclusivamente
da un tecnico qualicato per ridurre il rischio di scosse elettriche.
• I bambini devono essere sottoposti a supervisione per assicurarsi che non
giochino con il prodotto.
• Non smontare, aprire o tagliare le celle o batterie secondarie.
• In caso di perdita di una cella, non lasciare che il liquido venga in contatto
con la pelle o con gli occhi. In caso di contatto, lavare l’area in questione con
acqua abbondante e rivolgersi a un medico.
• Tenere sempre lontano dalla portata dei bambini le batterie a bottone, sia
cariche che scariche, per evitare la possibilità di ingestione. Smaltire le
batterie usate immediatamente e in sicurezza. Le batterie a bottone possono
causare ustioni chimiche interne gravi in meno di due ore dall’ingestione.
Tenere presente che i primi sintomi potrebbero essere simili a quelli di
malattie infantili, come la tosse o l’eccessiva salivazione. Rivolgersi
immediatamente a un medico se si sospetta che le batterie siano state
ingerite.
• Alcuni prodotti wireless possono interferire con dispositivi medici
impiantabili e altre apparecchiature mediche come pacemaker, impianti
cocleari e apparecchi acustici. Consultare il produttore della propria
apparecchiatura medica per maggiori informazioni.
• Non utilizzare il prodotto in aree in cui l’utilizzo di dispositivi wireless è
vietato a causa delle potenziali interferenze con altri dispositivi elettronici
che potrebbero mettere in pericolo la sicurezza.
Controllare i contenuti della confezione
Controllare che siano presenti tutte le parti e che non siano visibilmente
danneggiate. Se dovessero esservi parti mancanti o danneggiate, contattare il
servizio assistenza di Nedis B.V. tramite il sito web: www.nedis.com.
Inserimento della batteria
1. Far scorrere il lato frontale del prodotto verso sinistra per aprire il vano della
batteria.
2. Inserire la batteria al suo interno. Rispettare i segni più (+) e meno (–) presenti
sulla batteria e sul prodotto e assicurarsi del corretto inserimento.
Il prodotto si accende automaticamente.
Other manuals for Zigbee ZBWS40WT
1
Table of contents
Languages:
Other nedis Switch manuals

nedis
nedis WIFIPS10WT User manual

nedis
nedis Zigbee ZBWS40WT User manual

nedis
nedis RFPS110WT User manual

nedis
nedis VSWI34721AT User manual

nedis
nedis VSWI3482AT User manual

nedis
nedis HDMI Matrix User manual

nedis
nedis RFWS10WT User manual

nedis
nedis WIFIPS10 Series User manual

nedis
nedis VSWI3473AT User manual

nedis
nedis ASWI2652BK User manual