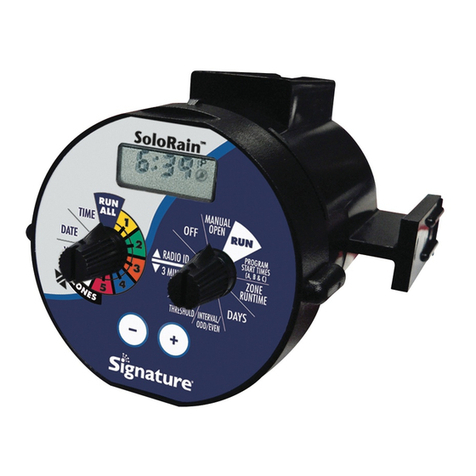
Nelson 8100 Series User manual

NEls@ltl.
8100 Series
Residential Gontrol let
Programming and lnstallation Guide
. MODELS:
810418'174 (4 zone)
8106/8176 (6 zone)
o External transformer
. Single Program
o 3 start times
. oaily, 2nd or 3rd day interval,
and 0dd/Even schedules
. Pump/Master valve terminal block
. Rain switch/Sensor terminal block
. Replaceable fuse lor surge protection
. Vertically aligned mounting holes
for ease of installation
. Quick relerence instruction card
Betore installin0 and programming, we recommend you read these instructi0ns caretully
brproperoperation. ltyouhaveanyquestionsorcomments,pleasecallourTechnical
Services Department at 1-888-NELS0N-8 0r visit us 0nline at w.LRNelson.com.
TABLE OF CONTENTS:
English version
Spanish versijn (Versi6n espafrjla)
French veEion (Version frangaise )
NErs@il.
[.8. llelson Gorporation
900-07243
0ne Sprinkler Lane
Peoria, lllinois 61615
Tel. (309) 690-2200
Fax. (309) 693-0363
Toll Free 1-888-NELS0N-8
www.LRNelson.com
Printed ln u.s.A.
@ 2000, L.R. Nelson Corporation
Pages
2-9
1018
19-27
(€

I NSTALLATIOI{ INSTRUCTIOIIS
1 . Select an lND00R location near a shndad lail AC clctt
outlet (230V AC outlet lor models 8'1748176)-
httpoftarrt.
- D0 NOT plug in transformer until you IEE rr* I
wiring connections.
- D0 NOT install outdoors or where unft utf be ogoscd &ecily
to adverse weather and/or direct sun[g[t-
- D0 1{0T install in area where temperafrses aB Fsstil tr C
(32' F) or higher than 55'C (131" D.
- 00 NOT install on same outlei, or lim, e drr lif arnnt
draw products.
2. a) Screw one #1 0 screw in the wall af fn l:ifi yut'd fa
to view the LCD. Leave a slight gnp bdwr hd d
screw and wall.
b) Place the keyhole on the back of the cuffionrtrc
screw and slide unit downward to sd ql scrr-
c! Remove access door from bottom-fiod d ui d seanrc
thr0ugh center screw hole with minimun lyr'scrr-
3.Wire valves using l8AWG color-coded, mtili-strri *eci
burial wire. D0 NOT exceed 800 feet wire nns"
- Use one wire per station plus one 'common rire'.
- All valve wires MUST be connected before AC pow b spbd.
f,otE Connecti0ns that will be buried undergrilrd dml hE€l
connections and be approved lor undergrBnd lEa
- The common wire should connect all Etv€s and bcqrc a
single wire that connects to the termirnl nEbd ltr-
4.lt using a pump start relay, or master nfue, corrEd riG b
terminal marked 'MV'.
WABIllll0: Do not connect pump direcfly to cortroh-
A pump-start relay must be used.
flOE Check local reoulations to ensure compliance dh rt -i|.".trlbl I
installation codes.
5.<OPTIONAb lf connecting a rain or moisture sensor, remove
jumper wire, and install a normally closed sensor to terminals
marked 'R'and'RS'.
CAWOII: Jumper wire must be in place if no sensor is used
for proper operation
6. Connect transformer wires t0 terminals marked 'AG'.
- Plug transformer into electrical socket
- LCD will light
CAUfl0lI: D0 NOT plug in transformer until ALL wiring is
checked and complete.
7. lnstall two AA alkaline batteries (not included). Do not use
NiCad or rechargeable batteries.
tAtEi Batteries maintain real time and retain the prooram in the event of a power
outage. The unit can be programmed under battery power only, however,
the conkoller will not operate the valves without AC power.
Replace bafteries 1nce peryear. When replacing batteries, d0 not
unplug transf,rmer, or y\ur program will be lost.
IIEFAULT M0llE: lf the batteries fail during a power outage, or there
are no batteries in the unit, the timer will reset to factory defaults
(see page 8 for details). After the power resumes, unit will run
factory default program until reprogrammed (As long as dial
remains in 'Run' position)
XotE 55 and SO will only be on models 8106/8176 (6 zone models)

r-.--_)?
t-5 iJ
Set12m24F*
only available on po*v1p - t try 10 wf, dey
Press -r. or v to adrance beturcen modes
Press ilEIXT
Nole: nEI:f only wo,*s fu 10 wrd delay
$et hour
Press .r. or v to adwrrce hour
Press NETT
(Set AM / PM imlktur il h 121nr nde,
Press NEXJ)
Set Start Time 1
Press r or v to set time
- tine advances in 15 ninute increnents
Press NEXT for Start Time 2
lset start Time 2
Repeat step 1 if Start Time 2 needed
Press NEXT for Start Time 3
Nole: 'OFF'position between 11:45 and 12:00
Press ^ or v t0 increase or decrease run
time in one minute increments (1 t0 99)
Press NEXT to program station 2
lset Run Tine 2thru I (or 6l
Repeat Step 1 for each successive stati0n
Nole: '1FF p1sition between 99 and 1 minute
Daily schedule
Dtion of individual days to watet (i.e. M0, Tu, Fr)
PreSS ^ to choose day (dropret stays lit)
Press v to skip day (dropret not rit)
Automatically advances with each key press
Press NEXT for 2nd or 3rd day schedule
- Last chosen schedule is selected
,/ set minubs
: i ii i i* Press r e1 v to dvalrce mirutes
'f ::_, Press ilExr
,,
---ffillser
day
:l ij i 'l- Press r or v to adrarrce day
"l ) Press I{EXT
"r --, ffisetmonth
ill | | l"' Press.r.or vtoadancemontr
'[" j Press NEXT
a:;;lftSerYear
I i ii i l* Press.r. or v toadvdrloeyear
L "" -J Press NExr
;,-"'= _
, ....*'_- ESetdayolthereet
ij i ij i l' Press r. or v t0 adrance water droplet
Press NEXT (refirms to Winning of loop)

SETTIIIG WATER DAYS lcontinuedl r \\
\.-_--lrior."
Tsetting 2nd orSl tarsrtle
- Allows selection of vawirrg My 2 hys u eEry 3 days
Press rto select 2nd day trooasqrs fir)
Press v to deselect 2nd day OH$ orer 3rd day)
- Last chosen schedub is *lffi
Press rto select 3rd day (aopu stavs rit)
Press vto deselect 3rd dilt (Hnrs over 2nd day)
- Last chosen schedule is ffi
Press NEXT for Odd or Even day schedule
.l Sehing odd orErer leyscHe
Allows watenng on dirys ol nwih tt6t re dd or Nen
nunbers (i.e. - qdd will rtu m lst, M 5h, e.)
Press rto select Odd day tmpldstays rir)
Press vto deselect (Xd day (H*orcrewt)
- Last chosen schedule is sMd
Press :to select Even day (oropusa,s rft)
Press v to deselect Ewn day 6ts over oooy
- Last chosen schedub is selffild
Press NEXT lor Daily schedule
Note: The unit has a default schedule of everyday
Place dial in'Run' oositior
to run plogmm
- Cunent time and current day will display
on the LCD. (See Rain Shutoff)
Placing dial in '0FF'position
suspends your program from running.
Your program is retained.
Return to 'RUN' position to run program
Press NEXT to activate and step through
run times
Press .r. or v to set run time
- Changing run tines in cycle m1de will N1T change
your programmed run times
- Pressing NEXI after the last stati1n, 4 or 6
depending 0n nodel. returns t0 qFF position
-Phce
diaiin RUlt position
- Cycle runs your current progran imnediately
- T0 end running cycle, turn dial t0 '1FF'p\siti1n
RU]I]II]{G STATIO]IS MAIIUATTY MANUTN
Manual runs one station only , --.lsetstationtomanual /
Press NEXT uniil desired station is displayed
Press ror v to set run time
- Pressng NEXT after the last stati\n, 4 0r 6
depending on model. returns t0 1FF p1sition
-Ptace
diaiin RUlt position
- Set sktion will run inmediately
- To end running manual, turn dial t0'jFF position
NAilSHUTOFF .A
Sensor oueffide
- LCD display at left will blink indicating the rain
sensor has suspended the program
- To override the rain sensor - Run a Manual
or Cycle
- Place dial in Run position to activate -
run pr0gram
- Unit will reset when sensor dries out.
a
RUN
'oFF'PoSlTl0t fl
ll' I FF l-*
runs your cuffenl prcgnn imnedialely
.l sut $tation to Gycte

IIEFAUTTS TE
12 ilou 0lock
flME 12:OO AM
DATE 01/01/00
IIAY SUNDAY
START TIMES 1 @ 8:00 AM
RUII TIMES
SCHEITUIE
sElts0R
RESEI
SPEGIFICAIIOilS
2-OFF
3. OFF
20 Minutes each zone
Every Day
Normally closed
To reset unit to factory defaults, unplug
transformer and remove batteries, wait for
LCD to turn off, then plug transformer back
in and re-install batteries
Maximum of one pump start relay or master valve and
one stalion. Each station can operate only one solenoid.
Temperature0petating 0" to 55'C (32" to 131'F)
Storage 0'to 70"C (32'to 158'F)
Batteries
Two AA alkaline batteries required (not included)
Surge Protection
112 amp replaceable fuse
y{US:jFlS.eIglq'o-dlrcari0ns,r0rhjs unir norexpre$$tyapprwed bythe pany re$D0rlsible torc0[Ilpli.
ance cout0 votd me users autfrority Io operate Ihe equlpmenl.
NOtF: This equrpmenl has been tested and lound to comoN wilh the timib tor a Ctass B di.iht device
pursuant t0 Part 15 0f the FCC Rules. These Iimits are deiidned to 0rovide reasonable Drotdction aoaiiisl
harmlul interlerence in a residential installation. This equiDftent oeierates. uses. and can ndiare rddio ire-
quency e0ergy and, il not inslalled aod used in accordaicd with the inslructions. mav cause harmlul inter:
lerence l0 radro c0mnunicalions. Howevet there is no ouarantee that interterence fiill not occur in e Dar-
ljcularinstallation. lfthisequipmentdoescauseharmfulinterlerencetoradioortelevisjonreceDtion_iihich
can be determined by tlrnin! lhe equipmenl otl an on. the user is encouraqed to try to cofied fhe interler
ence Dy one 0r more 01 fie lollowing measures:
- Reorient or relocate the receivino antenna
- llcrease the separalion behveen-the equipment and receiver
- qonnect the equipment jnto an outlet on a circuit difterent from that to which the receiver is connected
- uonsull the dealer or an experienced radio TV technician lor help
SITADUT NADO If,TEBFENEXCE NEGUIATIOTS
il0TE: This digital aDparatus does not exceed the Class I limjts lor mdio noise emissions from dioitat
apparatus set out in the radi0 inlerference requlalions ol the Canadian Deoartment of Communicatjons.
Limited Watranty
L.R. Nelson Corporation ('Nelson ) watranrs this electronic product to be tree 0t delects in material and
woil(manshipforaperiod0fone(1)yearlrcmtheorigtnaldateolpurchase. lntheeventolsuchdetects,
lelson will repair 0r replace, at its oDlion, the 0roduct-or the delective oart.
lhrs warranty does not extend to damaqe to aNelson producl or Dan rbsulliflo lrom accident. misuse_
alteratiqn, neglect. abuse, imotoper insfallation or norital wear arid teal 0r lo'exterior aDDearance and
c_010! Ihis watranly extends 0nlV l0 the orioinal user ol the Nelson Droduct.
[ oelect arses in a nelson prcduct 0r part Within the watranly period, you should conhq V@r insta[ing
conilaclor Nelson retailer distributor or L.R. Nelson Corporjtibn at oie ol the lollowjng ld@tions:
1961 lriraloma Ave. 5660 Commerce Drive
Suite B units 2. 3
Placentia, CA 92670 orlando. FL 32839-2978
(7141 s93-0496 {800) 743-1020
Fil C/1 4) 993-0496 Fax (4071 648-0924
Nelson may, at its oDtion, require that the product or Dart be returned lo a Nelson seruice Doint or vour
rctailer 0r distributor nelson will determine whelher the claimed detect is covered bv the idarentu: ll
covemqe is found, the oroduct will be reoaired or re0laced. Please all0w 4 t0 6 weefu for comolelion ol
reparrs 0r replacelnent and retum of lhe product or 0art. ll a 0roduct or Dan is reolaced, the rdDlacement
is wafianted only for the remainder of the origrnal pioduct or pad watranv period.
This watranw gives you sDecilic leqal riqhts, and you may also have other rights whrch vary lrom state to
state. L.R.Nefson.dorpoialion.doe'snofauthorizdanvpilsonlocriaidtririflntlriiiiiirioiigiiidiidiiiadiiity
rn connection with Nelson products.
Ll you have anv questions concernino lhe watrantv or ils aDolication. olease write to L.B. Nelsof,
C0rD0ration, one SDrinkler Lane. Pedria. illinois 61615. lJ.S:A. Anentlon: Cusromer Scrui.f,
CLAII/lED DEFECTIVE MERCHANDISE POLICY
Products relurned to the retailer distribulor and claimed delective must be insDected bv the Nelson sales
representative to determine waranty compliance. It aDDroval is oranted, Drodilcts will'be re0aired or
replaced or a credil memorandum covering the net puichase Drici will be issued.
Transf ormer (inpuUoutput)
8104,8106 AC
8174,8176 AC
Stations
24V
24V
120V
230V 60Hz / AC
50Hz /AC 12VA
't2vA 0ne Sorinkler Lane
Peorial lL 61615
1309) 690-2200
Fd (309) 692-5M7
This manual suits for next models
4
Table of contents
Other Nelson Controllers manuals

Nelson
Nelson SmartZone EZ 8504 Installation guide

Nelson
Nelson CM-2201 User manual

Nelson
Nelson SoloRain DuraLife 8020 User manual

Nelson
Nelson WINDOW+ User manual

Nelson
Nelson SoloRain 8010 User manual

Nelson
Nelson ez pro User manual

Nelson
Nelson EZ Pro Jr Installation guide

Nelson
Nelson MR User guide

Nelson
Nelson MR User manual