Neomeris 850909 User manual
User Manual
Neomeris Basic
pH/Temperature
Pocket-Tester
pH-/°C-/°F-Meter in
pocket size
www.neomeris.de
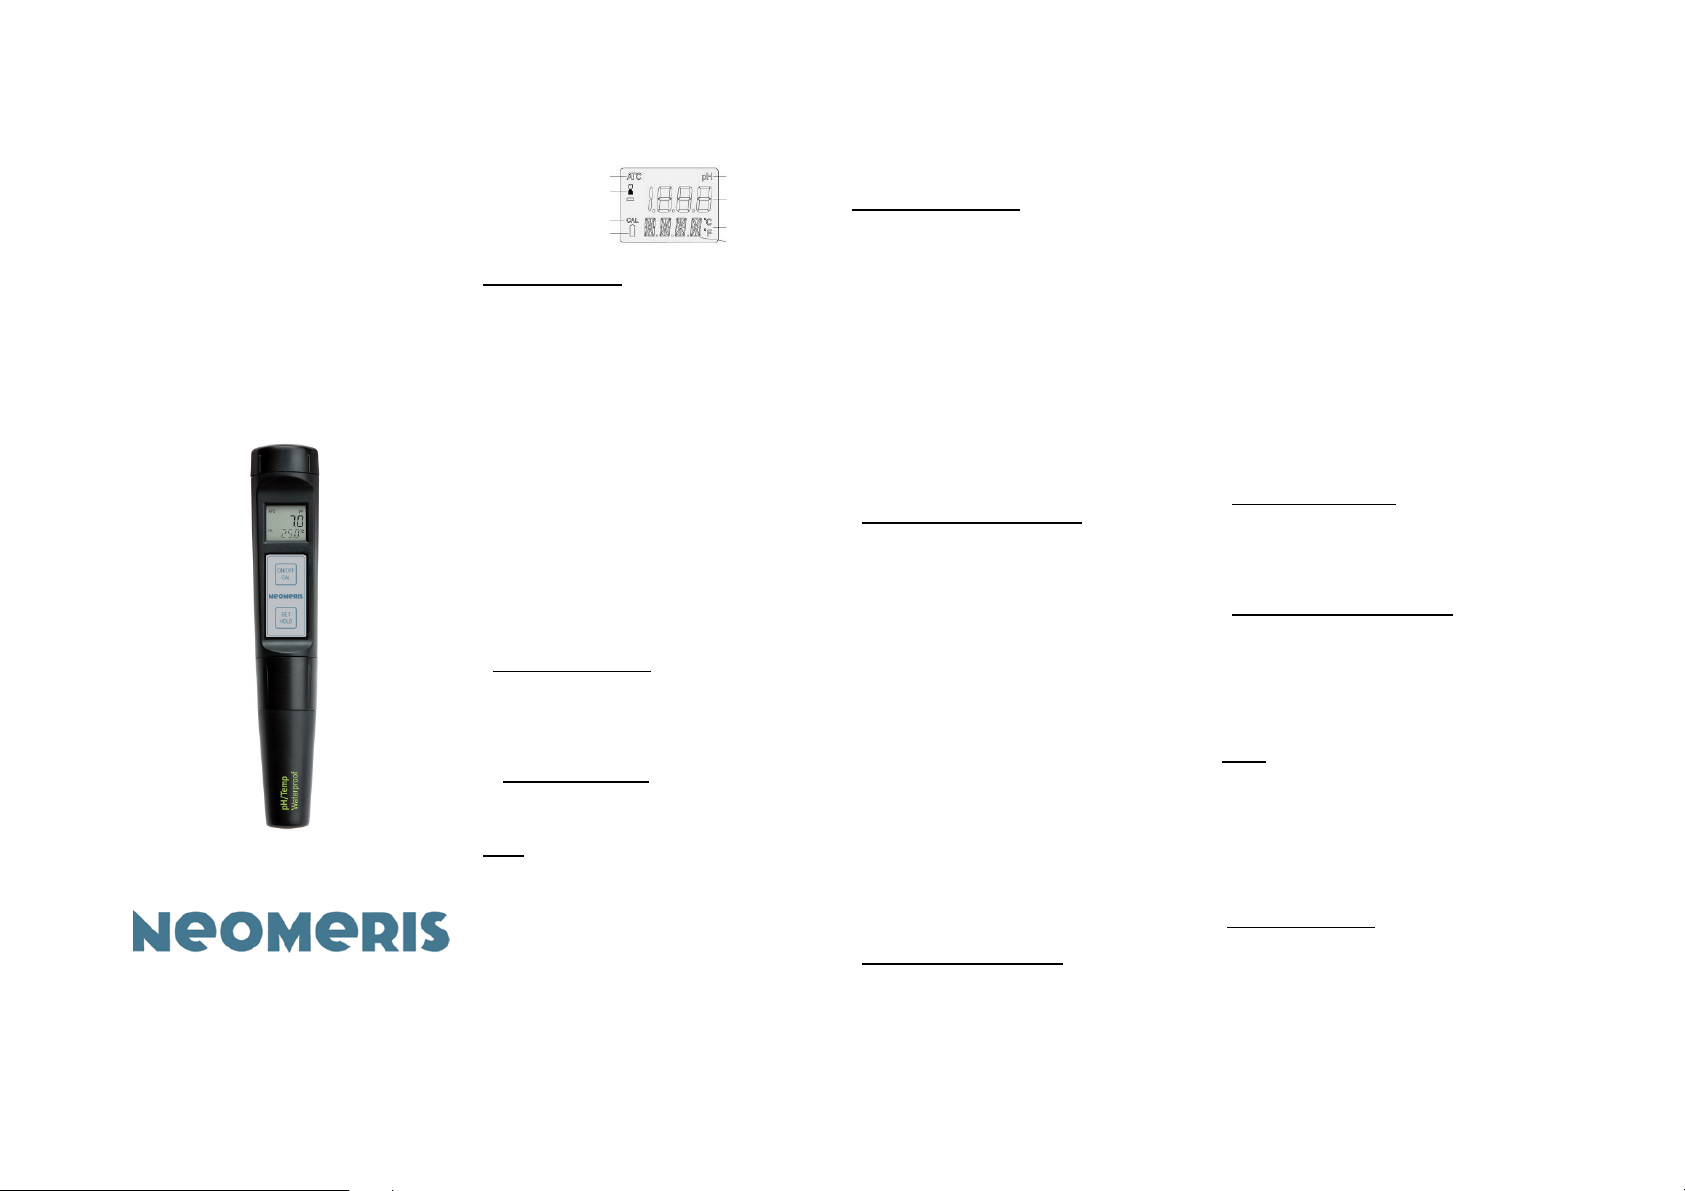
Automatic Temperature Measuring unit
Compansation Indicator on main LCD
Instability Indicator Main LCD
Calibration Indicator Temperature
Low Battery Indicator reading
Secondary LCD
Operational Guide
• Remove the electrode cap and immerse the
meter in Neomeris KCL electrolyte solution
(890707) for 2 hours to activate the electrode.
• Turn the meter on by pressing the ON/OFF
button. All the used segments on the LCD will be
visible for 1 second or as long as the button is
pressed.
• Immerse the electrode in the solution to be
tested. Stir gently and wait for the reading to
stabilize, i.e. the instability indicator (hourglass)
on the LCD turns off.
• The pH value is automatically compensated for
temperature and will be displayed on the main
LCD, while the temperature is shown on the
lower part of the LCD.
• To freeze the display, while in measurement
mode, press and hold the SET/HOLD button.
The “HOLD” message appears on the secondary
display and the reading will be frozen on the
LCD. Press any button to return to normal mode.
• To turn the meter off, press the ON/OFF
button. The “OFF” message will appear on the
secondary display. Release the button.
Note:
• Before taking any measurement, make sure the
meter is calibrated (the CAL tag is on).
• Always switch off the meter after use. Rinse the
electrode with water to minimise contamination
and store it in the protective cap with a few drops
of KCL (890707) or pH7 (890688) solution.
NEVER USE DISTILLED OR DEIONIZED
WATER FOR STORAGE PURPOSE
Calibration Procedure
For better accuracy, frequent calibration of the
tester is recommended. Calibration is also
necessary after electrode replacement, after
testing aggressive chemicals and where extreme
accuracy is required.
• From normal operation mode, press and hold
the ON/OFF/CAL button until the “OFF” message
on the secondary LCD is substituted by “CAL”.
Release the button.
• The instrument enters the calibration mode by
displaying “pH 7.01 USE” (or “pH 6.86 USE” if
the NIST buffer set was selected).
• For a single-point calibration, immerse the
electrode in any buffer, i.e. pH 4.01, 7.01 (or
6.86), 10.01 (or 9.18).
• The meter activates the automatic buffer
recognition. If no valid buffer is detected, the
meter keeps the USE indication active for 12
seconds, and then replaces it with WRNG,
indicating that the sample being measured is not
a valid buffer. Otherwise, if a valid buffer is
detected, then its value is shown on the primary
display, and REC appears on the secondary
LCD.
• If the pH 7.01 (or pH 6.86) was used, press the
SET button to exit the Calibration mode and the
“OK 1” message will appear on the display. The
first calibration point is stored and the meter
returns to normal measurement mode.
It is always recommended to perform a
2-point calibration to obtain more accurate
measurement results.
• For a two-point calibration, immerse the
electrode in pH 7.01 (or pH 6.86) buffer solution.
• After the first point has been accepted, the
meter will then ask for the second buffer and the
message „pH 4.01 USE” will appear.
• Rinse the electrode and immerse it in the
second solution (pH 4.01, 10.01 or 9.18).
• If a valid buffer value is detected, the REC
message is displayed and the meter completes
the calibration procedure. The LCD shows the
accepted value with the „OK 2” message and the
instrument returns to the normal measurement
mode. Otherwise, if no valid buffer is detected,
the meter displays the WRNG message
Note: When the calibration procedure is
completed, the CAL tag is turned on.
• To quit the procedure and return to the last
calibration data, after entering the calibration
mode press the ON/OFF button. The secondary
LCD displays “ESC” for 1 second and then the
meter returns to the normal measurement mode.
• To reset to the default values and clear a
previous calibration, press the SET/HOLD button
after entering the calibration mode and before
the first point is accepted. The secondary LCD
displays “CLR” for 1 second, the meter resets to
the default calibration and the CAL tag on the
LCD turns off.
Setup
Setup mode allows the selection of temperature
(°C or °F) and pH buffer set for calibration.
To enter the Setup mode, press the ON/OFF
button until “CAL” on the secondary LCD is
replaced by “TEMP” and the current temperature
unit (e.g. TEMP °C). Then:
•for °C/°F selection: use the SET/HOLD button;
then press the ON/OFF button once to enter the
buffer set selection or twice to return to the
normal measurement mode.

• to change the calibration buffer set: after
setting the temperature unit, press ON/OFF
once and select the buffer set (“pH 7.01 BUFF”
or “pH 6.86 BUFF” for NIST) by using the
SET/HOLD button. Press ON/OFF to return to
the normal measurement mode.
Electrode Replacement
• Remove the protective cap and unscrew the
plastic ring on the top of the electrode.
• Pull out the Neomeris pH-electrode and
replace it with a new one.
• Make sure the gaskets are in place before
screwing back the ring.
Battery Replacement
•When the batteries become weak, the
battery symbol on the LCD will light up to
advise that only a few hours of working
time is remaining.
•The meter is also provided with BEPS
(Battery Error Prevention System), which
avoids any erroneous readings due to low
battery level by automatically switching the
meter off.
•It is recommended to replace the batteries
immediately.
•To replace the batteries unscrew the
battery compartment cap and replace all
four 1.5V batteries while paying attention
to their polarity.
•Make sure the gasket is in place before
screwing back the cap.
•Batteries should only be replaced in a
nonhazardous area using the battery type
specified in this instruction manual.
Warranty:
These instruments are warranted against defects in
materials and manufacturing for a period of two years
from the date of purchase. Probe is warranted for 6
months. If during this period the repair or replacement of
parts is required, where the damage is not due to
negligence or erroneous operation by the user, please
return the parts to us and the repair will be done free of
charge. Damages due to accidents, misuse, tampering
or lack of prescribed maintenance are not covered.
Specifications
Range:
-2.0 to 16.0 pH
-5.0 to 60.0°C / 23.0 to 140.0°F
Resolution:
0.1 pH
0.1°C / 0.1°F
Accuracy (@25°C):
±0.1 pH
±0.5°C / ±1°F
Typical EMC-Deviation:
±0.1 pH
±0.3°C / ±0.6°F
Temperature Compensation:
Automatic, from -5 to 60°C
Calibration:
Automatic, 1 or 2 points
with 2 sets of memorized buffers (pH 4.01, 7.01,
10.01 or 4.01, 6.86, 9.18)
Probe:
Replaceable
(pH- probe part nr. 850915)
Environment:
-5 to 50°C; 100% RH max.
Battery type:
4 x 1.5V; IEC LR44, A76
Battery life:
Approx. 300 hours of use
Auto-off:
After 8 minutes of non-use
Dimensions:
200 x dia 38 mm
Weight: 100 g
Accessories
850915 pH-replacement probe for
Neomeris Basic pH/Temp. Pocket-
Tester
890687 Neomeris buffer solution pH 4.01,
+-0,01 @25°C, 1 bottle 250ml, red
colored
890688 Neomeris Pufferlösung pH 7.00,
+-0,01 @25°C, 1 bottle 250ml, green
colored
890689 Neomeris Pufferlösung pH 9,21,
+-0,02 @25°C, 1 bottle 250ml, blue
colored
890690 Neomeris Pufferlösung pH 10,01,
+-0,02 @25°C, 1 bottle 250ml, yellow
colored
890707 Neomeris
Electrolyte solution 3 mol/l KCI,
1 bottle 250ml
Part-Nr.: 850909
Order through our website
www.heylneomeris.shop
or write to us:
Gebrüder Heyl Vertriebsgesellschaft für
innovative Wasseraufbereitung mbH
Max-Planck-Str. 16 – 31135 Hildesheim,
Germany
E-Mail: vertrieb@heylneomeris.de
www.neomeris.de

Other Neomeris Test Equipment manuals


Popular Test Equipment manuals by other brands


Redtech
Redtech TRAILERteck T05 user manual

Venmar
Venmar AVS Constructo 1.0 HRV user guide

Test Instrument Solutions
Test Instrument Solutions SafetyPAT operating manual

Hanna Instruments
Hanna Instruments HI 38078 instruction manual

Kistler
Kistler 5495C Series instruction manual

Waygate Technologies
Waygate Technologies DM5E Basic quick start guide

StoneL
StoneL DeviceNet CK464002A manual

Seica
Seica RAPID 220 Site preparation guide

Kingfisher
Kingfisher KI7400 Series Training manual

Kurth Electronic
Kurth Electronic CCTS-03 operating manual

SMART
SMART KANAAD SBT XTREME 3G Series user manual

Agilent Technologies
Agilent Technologies BERT Serial Getting started