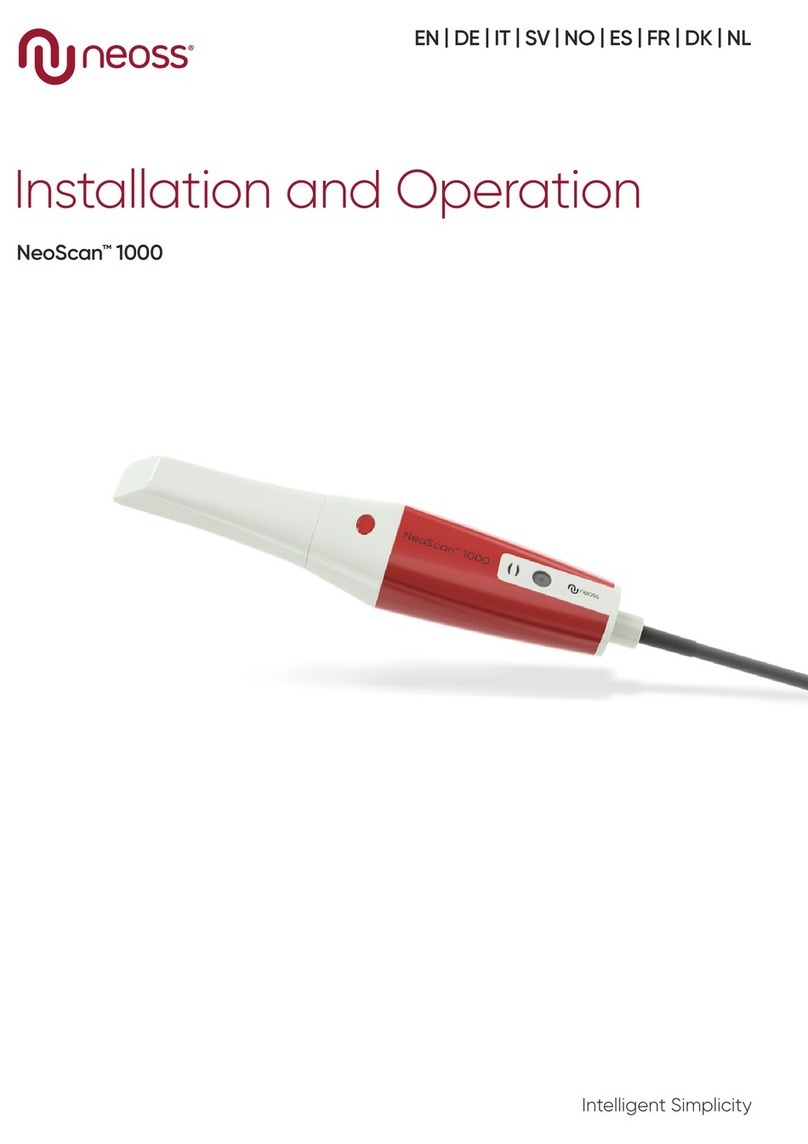
Neoss NeoScan 2000 User manual

EN, DA, FR, DE, IT, NO, PT, ES, SV
Installation and Operation
NeoScan™ 2000

Dear Valued Customer,
We are delighted that you have made a purchase of the NeoScan™ 2000 and
we assure you that your satisfaction is our top priority.
To help you get started, we have included a quick guide along with this
manual. This handy reference will provide you with essential information and
instructions to make the most of your product.
For more detailed information and comprehensive guidelines, we encourage
you to download the Instruction for Use (IFU) from our website. Simply visit
www.neoss.com/neoscan/download to access the IFU.
Should you encounter any issues or have any questions regarding your
purchase, our dedicated support team is ready to assist you. You can contact
our local customer support, the details of which are outlined below.
Alternatively, feel free to reach out to your local distributor for assistance.
We hope that your purchase brings you great satisfaction and fulfills your
expectations. Should you require any further assistance, please do not
hesitate to reach out to us.
Best regards,
Neoss Group
Customer support
For support, please visit our webpage:
neoss.com/neoscan#support
Email support
DE: neoscan.support.de@neoss.com
DK: neoscan.support.dk@neoss.com
ES: neoscan.support.es@neoss.com
FR: neoscan.support.fr@neoss.com
IT: neoscan.support.it@neoss.com
NL: neoscan.support.nl@neoss.com
NO: neoscan.support.no@neoss.com
SE: neoscan.support.se@neoss.com
UK: neoscan.support.uk@neoss.com
US: neoscan.support.us@neoss.com
Other: neoscan.support@neoss.com

NeoScan™ 2000 Installation and operation manual
ENGLISH
3
Notice
The information in this document is subject to
change. Neither Neoss AB nor Neoss Ltd or any of
its subsidiaries shall be liable for errors contained
herein or for incidental damages in conjunction
with the furnishing, performance, or use of this
material. No part of this publication may be
reproduced without the permission of the
manufacturer.
All trademarks and registered trademarks are the
property of their respective holders.
The NeoScan™ 2000 is intended for professional
use only.
U.S. Federal law restricts this device to sale by or
on the order of a dentist.
Manual Name: NeoScan 2000 User Manual:
Installation and Operation
Part Number: 16004
Revision: 1
Date: 2023-09
NeoScan™ 2000

Contents
NeoScan™ 2000 Installation and operation manual4
1 – Safety information 5
Conventions 5
2 – NeoScan 2000 overview 6
Nomenclature 6
Computer system requirements 7
Charging the battery 7
Charging holder overview 8
Wireless connection 9
3 – Setting up the NeoScan 2000 10
Setting up the scanner 10
Using the scanner charging holder 10
Installing the desktop charging holder 11
Installing the wall mount charging holder 12
4 – Getting started 13
Accessing the software user interface 13
Audio prompts 14
Preparing the teeth 14
Preparing the scanner 14
Starting scanning 15
Scanning approach 15
Scanning protocol 15
5 – Maintenance 16
Cleaning, disinfection, sterilizing 16
Clean and disinfect the scanner 16
Clean and sterilize the scanner tip 17
Precautions before use 18
6 – Troubleshooting 19
NeoScan 2000 troubleshooting instructions 19

NeoScan™ 2000 Installation and operation manual // Safety information
ENGLISH
5
1 – Safety information
Conventions
The following special messages emphasize information or indicate potential risks to personnel or
equipment.
WARNING: Avoids injury to yourself or others by following
the safety instructions precisely
CAUTION: Alerts you to a condition that might cause
serious damage or cause problems.
NOTE: Provides extra information and hints.
WARNING: We recommend that you consult this document before using the device.
All trademarks and registered trademarks are the property of their respective holders.
The device is intended for professional use only.
U.S. Federal law restricts this device to sale by or on the order of a dentist.
If any serious incident occurs in relation to the device, the user must report it to Neoss AB and to the
competent authority of its Member State in the European Union.

NeoScan™ 2000 Installation and operation manual // NeoScan 2000 overview6
2 – NeoScan 2000 overview
Nomenclature
1
3
5
6
4
7
8
2
10
9
1– Handpiece
2– Scanner Tip
3– Scan Button
Press once to start scanning, press again to stop scanning
4– Mode Indicator
Upper jaw scan mode
Lower jaw scan mode
Buccal bite registration mode
5– Mode Switch Button
Press this button to switch between dierent modes
6– Status Indicator
Blinking slowly: starting up
Blinking rapidly: preparing network
Breathing: ready to be connected to the software
On: Connected to the software and selected as active scanner
7– Battery Indicator
Solid green: battery level higher than 50%
Solid yellow: battery level between 20% and 50%
Blinking yellow: battery level lower than 20%
Breathing green: charging and battery level higher than 50%
Breathing yellow: charging and battery level lower than 50%
Solid green: fully charged
8– Lens Window
9– Charging Holder
10 – USB Cable (1 m length)

NeoScan™ 2000 Installation and operation manual // NeoScan 2000 overview
ENGLISH
7
Computer system requirements
For the computer system requirements, see the NeoScan™ 2000 User Manual: Safety, Regulatory and
Technical Specifications.
It is MANDATORY to check that your computer system
configuration is compatible with the computer system
requirements for the NeoScan 1000 software.
Charging the battery
A fully charged battery can support up to 2 hours of scan time. When the Battery Indicator flashes
yellow, it means the battery is low and needs to be charged in time. To charge, the scanner needs to be
inserted into the Charging Holder.
The Charging Holder must be connected to a USB Type C power source to be functional.
You can also continue to use the scanner by replacing the battery, follow these steps to replace the
battery.
• Turn the battery cover with a coin to unlock.
• Take out the low battery and insert a charged one.
WARNING: Please use the battery specified (Li-18650-3.6V 3500mAh-PCM-Cap).

NeoScan™ 2000 Installation and operation manual // NeoScan 2000 overview8
• Close the battery cover by turning it to lock.
• The Charging Holder holds a spare Battery and keeps the battery level at approximately 80%. Open
the battery cover by turning it to unlock and you will be able to take the battery out.
NOTE: Please fully charge the battery before use.
Charging holder overview
Place the scanner in the Charging Holder when you are not using it.
NOTE: The scanner will automatically shut down if it is idle for more than 3 minutes. If you need to use it
again, press any button on the scanner, or take it out of the Charging Holder.

NeoScan™ 2000 Installation and operation manual // NeoScan 2000 overview
ENGLISH
9
Wireless connection
The scanner connects to the software through a wireless connection. Before using the scanner, a
compatible wireless adapter needs to be connected to the computer that runs the software.
NOTE: Expand the wireless adapter to maximize the network signal strength.
After the compatible wireless adapter is connected, Select the scanner you want to connect from the
Scanner list window at the bottom right of the software and click the connect button.
Indicates a wireless scanner Indicates a wired scanner

NeoScan™ 2000 Installation and operation manual // Setting up the NeoScan 200010
3 – Setting up the NeoScan 2000
Setting up the scanner
To set up the scanner, follow these steps:
• Visit www.neoss.com/neoscan/download and download the installation file and instructions
according to the product model.
• Double-click the software installation file.
• Choose a language from the drop-down list and click Ok to install.
• Follow the instructions on the screen to complete the installation.
• Firmly slide the Scanner Tip onto the end of the scanner.
• Short press any button to start the scanner.
• After the scanner is powered on, open the software and connect the scanner through the wireless
network.
Using the scanner charging holder
The Charging Holder can be used standing on a flat plane or mounted on the wall.

NeoScan™ 2000 Installation and operation manual // Setting up the NeoScan 2000
ENGLISH
11
Installing the desktop charging holder
To place the Charging Holder on a desktop, follow these steps:
• Select a clean surface area.
• Insert one end of the charging cable into the bottom of the charger.
• Insert the charger with the connected charging cable into the base.
• Insert the charging cable into the holder bracket.
• Pass the other end of the cable through the hole reserved on the base.
• Insert the scanner into the Charging Holder.

NeoScan™ 2000 Installation and operation manual // Setting up the NeoScan 200012
Installing the wall mount charging holder
To mount the Charging Holder on the wall, follow these steps:
• Select an area that you can access easily.
• Insert the screws through the holes in the holder bracket to ax it to a solid surface.
Insert one end of the charging cable into the bottom of the charger.
Insert the Charging Holder into the holder bracket.
Insert the scanner into the Charging Holder.
CAUTION: If the Charging Holder is not properly installed, there is a risk that the Charging Holder can
fall o the wall, resulting in damage to the scanner.

NeoScan™ 2000 Installation and operation manual // Getting started
ENGLISH
13
4 – Getting started
Accessing the software user interface
To access the software user interface, follow these steps:
• Launch the software, the software will automatically pop up the login window.
• If you don’t have an account, click the Sign up button to register the organization, and complete the
email verification.
• Type your account information in the username and password fields, click the Log in button.
• The Patient Information dialog box will pop up.
• Do one of the following:
– Enter patient information and tooth number information and click OK.
– Click Skip and continue without patient information.
• Click Connect button to connect wireless scanner in Scanner List.
If the scanner is not activated, the scanner activation dialog will be displayed. Follow the instructions
on the screen to complete the scanner activation.
• Click the Option menu button and select Preferences.
• Customize the configuration options.
• You can now start acquiring 3D models.

NeoScan™ 2000 Installation and operation manual // Getting started14
Audio prompts
Scanning sound
When the Enable scanning sound option is enabled, your computer will play a continuous sound when
you are successfully scanning. If the sound stops, it means the scan has stopped. If you need to
continue, please return to the previous scanning area until the scanner resumes scanning and your
computer plays a continuous sound. When a bite registration relationship is successfully scanned, your
computer will also play a short sound.
Warning sound
When the Enable warning sound option is enabled, if the cumulative scanning time of the current case
exceeds the recommended threshold and your computer may not be able to maintain the peak
scanning performance, your computer will play a short warning sounds.
NOTE: If your computer does not have speakers, these options will not take eect.
Preparing the teeth
• If there is a preparation area, retract the gingiva by gingival restriction cords. And extract the cords
just before scanning the preparation.
• Before starting the scan, dry the teeth thoroughly.
• During the scan, re-dry the teeth moderately.
Preparing the scanner
The Scanner Tip attached to the Handpiece provides sanitary shield for patients. Always disinfect the
body of the scanner and perform sterilization on the Scanner Tip after each use.
CAUTION: Scanner Tips are shipped non-sterile. You must sterilize them before the first use.
CAUTION: Avoid any liquid from leaking into the air outlet near the Scanner Tip mount or the air inlet at
the rear of the Handpiece, otherwise the Handpiece may be damaged.

NeoScan™ 2000 Installation and operation manual // Getting started
ENGLISH
15
To prepare the scanner, follow these steps:
• Make sure the Lens Window at the base of the scanner is clean by wiping it with a moist, lint-free
cloth or lens tissue.
• Slide the Scanner Tip onto the scanner as shown below.
Starting scanning
To start scanning, place the Scanner Tip on the surface of the tooth to stabilize the scanner and press
the Scan button. Wait until a 3D model appears on the 3D model display screen, and then slowly move
it along the arch at 0-5mm from the teeth.
Scanning approach
The recommended scanning method is to start with a molar, since it has greater details for easier
identification. Change the scanning angle to less than 60 degrees during scanning to allow the
surfaces to overlap, if the overlap is too small, the alignment may be lost.
Scanning protocol
The recommended scanning protocol consisting of 3 sweeps: occlusal, lingual and buccal to ensure
good data coverage of all surfaces.
It is recommended to start the first sweep from the occlusal surface, and you should start with the first
molar.
The second sweep can scan both the lingual and buccal sides, and the third scan covers the opposite
side of the second sweep.

NeoScan™ 2000 Installation and operation manual // Maintenance16
5 – Maintenance
Cleaning, disinfecting, sterilizing
Perform the following maintenance activities on your scanner and accessories regularly.
To ensure maximum hygienic safety for the patient, carefully follow the instructions to prepare the
scanner for use.
To ensure maximum hygienic safety for the patient and to minimize the risk of cross-contamination,
carefully perform the following maintenance activities on your scanner and accessories.
After each patient:
• Clean and disinfect the scanner. See “Clean and Disinfect the Scanner”.
• Clean the Scanner Tip, and then perform Autoclave Sterilization (See “Clean the Scanner Tip” and
“Sterilize the Scanner Tip”).
There are 2 models of Scanner Tip:
Model Size UDI-DI Manual
Cleaning
134°C
Sterilization
TP102N Large (01)06973993441034
TP103N Small (01)06973993441041
Clean and disinfect the scanner
General Warnings
WARNING
• Read and follow the warnings and personal protection instructions provided in the Safety Data Sheet
(SDS) for the disinfectant used to process the scanner.
• You must wear gloves while cleaning and disinfecting the scanner.
• The scanner must be disinfected with a recommended intermediate-level disinfectant solution with
tuberculocidal activity between patients.
• DO NOT use a disinfectant containing phenolics or iodophors; doing so will damage the surface
coating of the scanner.
• Never put the scanner in an autoclave device or immerse it in water or the disinfectant solution.
• Excessive fluids can damage the scanner.
• Do not use cotton, cloth, or tissues soaked with disinfectant to disinfect the scanner.
Clean the Scanner
• If the scanner is visibly contaminated with blood and/or body fluids, you must clean it before
disinfecting it.
• To clean the scanner, follow these steps:
– Dampen (do not soak) a lint-free cloth with lukewarm water.
– Remove the blood and/or body fluids with the dampened lint-free cloth.

NeoScan™ 2000 Installation and operation manual // Maintenance
ENGLISH
17
Disinfect the Scanner
After each patient, the scanner must be thoroughly disinfected.
To adequately disinfect the scanner, follow the disinfectant manufacturer’s instructions for the
appropriate contact time.
CAUTION: If the scanner is visibly soiled, it must be thoroughly cleaned prior to disinfecting. See “Clean
the Scanner”
To disinfect the scanner, follow these steps:
• Remove the Scanner Tip.
• Remove all visible soil (see “Clean the Scanner”).
• Use a commercially prepared intermediate level disinfectant wipe. Follow the manufacturer’s
instructions for contact time.
Recommended disinfectant wipes: CaviWipes™*
WARNING: Using a disinfectant that has not been approved may cause damage to the scanner.
• Thoroughly wipe all surfaces of the scanner, DO NOT allow liquid to enter through the gap, air outlet,
or pin holes.
WARNING: Do not rinse.
• Allow to air dry.
• After the scanner has dried, use a clean, lint-free cloth dampened with water to remove residual
disinfectant from the surface of the scanner.
Clean and sterilize the scanner tip
WARNING
• Wear gloves when handling a contaminated Scanner Tip.
• Read and follow the warnings and personal protection instructions provided in the manufacturer’s
SDS for the detergent used to clean the Scanner Tip.
• Do not soak the Scanner Tip in disinfectant for a long period.
• Dry the Scanner Tip thoroughly before mounting onto the scanner.
• Do not use an ultrasonic cleaning machine to clean the Scanner Tip.
• Do not soak the Scanner Tip with alcohol-based disinfectants.
Clean the Scanner Tip
To manually cleaning the Scanner Tip, follow these steps:
• Rinse excess soil from the Scanner Tip (2 minutes).
• Using a soft brush, apply enzymatic detergent solution (e.g., Metrex EmPower) to all surfaces.
• Rinse under clean, running water (2 minutes).
• Inspect Scanner Tip. If the Scanner Tip is not clean, repeat the last three steps.
• Use a lens tissue or lint-free cloth to remove any dust from the mirror in the Scanner Tip.
* CaviWipes are a trademark of Metrex Research, LLC.

NeoScan™ 2000 Installation and operation manual // Maintenance18
Sterilize the Scanner Tip
Scanner Tips shipped non-sterile. You must sterilize them before use.
CAUTION: If you limit the exposure time at 134° C to not more than 6 minutes, you can autoclave the
Scanner Tip up to 60 cycles.
To sterilize the Scanner Tip, follow these steps:
• Put the Scanner Tip into a sealed steam sterilization pouch.
• Place the Scanner Tip in a steam autoclave for sterilization.
– For TP102N and TP103N, exposure temperature should be set as 134° C.
– For TP102N and TP103N, exposure time should exceed 3 minutes.
– For TP102N and TP103N, exposure time should not exceed 6 minutes.
Precautions before use
Perform the following activities on your product and accessories before use.
Visually Inspecting the Scanner for Damage
Visually inspect the scanner for damage or signs of deterioration by doing the following:
• Inspect the Lens Window.
– Inspect around the buttons and contact points.
If damage is noted, do not use the scanner and contact your representative.
Visually Inspecting the Scanner Tip
Visually inspect the Scanner Tip for signs of deterioration by doing the following:
– Verify that the Scanner Tip is not damaged, and its components are not detached.
– Verify that the Scanner Tip mirror does not have any smudges or scratches on it.
If deterioration is noted, replace the Scanner Tip.
WARNING
• The Lens Window on the scanner is a delicate optical component. Mount the front Protective Cover
to protect the Lens Window from damage and dirt when the scanner is not in use.
• The mirror in the Scanner Tip is a delicate optical component. Its clean and undamaged surface is
critical to scan quality.
In the event that you see poor scan quality or an unclear video preview in the software, clean the
Scanner Tip mirror and the Lens Window of the Handpiece using a microfiber cleaning swab, applying
ethanol that is free of impurities.

NeoScan™ 2000 Installation and operation manual // Troubleshooting
ENGLISH
19
6 – Troubleshooting
NeoScan 2000 troubleshooting instructions
Problem Description Action
There is mismatching and overlap on the 3D
model.
Remove mismatched data and excessive tissue
using the Cut tool and rescan.
After bite registration, there is a gap or
intersection between the upper jaw and the
lower jaw.
• Set “Bite adjustment” to “Avoid intersections”
in Preferences.
• Delete the incorrect bite view, and rescan.
Precision degradation is observed, or images are
not well-stitched during acquisition.
Ensure that the Lens Window at the base of the
scanner is clean by wiping it with a moist, lint-
free cloth or lens tissue. Use a lens tissue or lint-
free cloth to remove any dust or water stains.
Make sure the Scanner Tip is firmly installed and
there are no dark edges on the live video.
Reconstruction of metallic preparations is
sometimes dicult.
• Adjust the scanner position (for example:
distance or angle) and scan more of the area.
• Move the surgical light away from the patient
to decrease light scatter.
• Turn on “Shining Surface” button.
The Scanner Tip is installed but not detected. No
live video is displayed, and the Scanner Tip not
detected icon is displayed at the bottom-right
of the interface.
Reinstall the Scanner Tip, and make sure the
Scanner Tip is in firm contact with the scanner.
Fogging appears on the inner surface of the lens
window at the base of the scanner.
• Mount a completely dry tip on the scanner,
and place the scanner in the holder or set it on
the desk, and wait until the fogging fades. If
the fogging does not disappear completely
after 24 hours, contact your local service
provider for assistance.
• Ensure that the tip is thoroughly dry before
mounting on the scanner, and do not use a
cloth soaked in disinfectant to clean the
scanner.
The scanner does not cast light, and a static
preview image is displayed in the video preview
screen.
Close the software, and then launch the
software again.
Scanner is not shown in the ‘Scanner List’ in the
software while the Status Indicator keeps
blinking in breathing mode.
Reset the network in the scanner. To do so, while
the Status Indicator is in breathing mode,
simultaneously press the Scan Button on both
sides for two seconds and release. The Status
Indictor should start blinking rapidly, then enter
breathing mode. The device should then be
shown in the ‘Scanner List’ in the software.

20 NeoScan™ 2000 Installations- og betjeningsvejledning
Bemærk
Oplysningerne i dette dokument kan blive ændret.
Hverken Neoss AB eller Neoss Ltd eller nogen af
dennes datterselskaber kan holdes ansvarlig for
fejl heri eller for hændelige skader i forbindelse
med anskaelsen, ydeevnen eller brugen af dette
materiale. Ingen del af denne publikation må
gengives uden tilladelse fra producenten.
Alle varemærker og registrerede varemærker
tilhører deres respektive ejere.
NeoScan™ 2000 er udelukkende beregnet til
professionel brug.
Føderal lovgivning i USA begrænser denne enhed
til at blive solgt af eller efter ordre fra
en tandlæge.
Vejledningens navn: Brugervejledning til NeoScan
2000: Installation og betjening
Varenummer: 16004
Revision: 1
Dato: 2023-09
NeoScan™ 2000
Table of contents
Languages:
Other Neoss Measuring Instrument manuals
Popular Measuring Instrument manuals by other brands

KROHNE
KROHNE VERSAFLOW SONIC 1000/TWS 9000 quick start
PCE Health and Fitness
PCE Health and Fitness PCE-CT 80HP user manual
GHM Greisinger
GHM Greisinger GMH 3431 operating manual

Chauvin Arnoux
Chauvin Arnoux C.A 6549 user manual
enphase
enphase RGM Hardware installation and operation manual

Veratron
Veratron A2C59501987 user manual
