Neptune MRX920 User manual

MRX920™ Getting Started Guide
(Versión en español disponible en www.neptunetg.com)


MRX920 Getting Started Guide
(Versión en español disponible en www.neptunetg.com)

Propriety Rights Notice
This manual is an unpublished work and contains the trade secrets and confidential
information of Neptune Technology Group Inc., which are not to be divulged to third
parties and may not be reproduced or transmitted in whole or part, in any form or by any
means, electronic or mechanical for any purpose, without the express written permission
of Neptune Technology Group Inc. All rights to designs or inventions disclosed herein,
including the right to manufacture, are reserved to Neptune Technology Group Inc. The
information contained in this document is subject to change without notice. Neptune
reserves the right to change the product specifications at any time without incurring any
obligations.
Trademarks Used in This Manual
ARB and R900 are a registered trademarks of Neptune Technology Group Inc. MRX920
and N_SIGHT are trademarks of Neptune Technology Group Inc.
Other brands or product names are the trademarks or registered trademarks of their
respective holders.
Regulatory Compliance
Federal Communication Commission (FCC) Statement:
FCC ID: P2SMRXV4
This device complies with Part 15 of the FCC Rules. Operation is subject to the following
two conditions: (1) This device may not cause harmful interference, and (2) this device
must accept any interference received, including interference that may cause undesired
operation. (US 47 CFR §15.19)
This equipment has been tested and found to comply with the limits for a Class B digital
device, pursuant to Part 15 of the FCC Rules. These limits are designed to provide
reasonable protection against harmful interference in a residential installation. This
equipment generates uses and can radiate radio frequency energy and, if not installed
and used in accordance with the instructions, may cause harmful interference to radio
communications. However, there is no guarantee that interference will not occur in a
particular installation.
Any changes or modifications not expressly approved by Neptune Tech-
nology Group Inc. for compliance could void the user's authority to
operate the equipment. (US 47 CFR §15.21)

If this equipment does cause harmful interference to radio or television reception, which
can be determined by turning the equipment off and on, the user is encouraged to try to
correct the interference by one of the following measures:
• Reorient or relocate the receiving antenna.
• Increase the separation between the equipment and receiver.
• Connect the equipment into an outlet on a circuit different from that to which the
receiver is connected.
• Consult the dealer or an experienced radio/TV technician for help.
RF Exposure
To comply with FCC/IC RF exposure limits for general population / uncontrolled
exposure, the antenna(s) used for this transmitter must be installed on non-permanent
objects and structures to provide a separation distance of at least 20 cm from all persons
(US 47 CFR §2.1091), and must not be co-located or operating in conjunction with any
other antenna or transmitter.
This Radio transmitter has been approved by the FCC to operate with the antenna types
listed below. Antenna types not included in this list, having a gain greater than the maximum
gain indicated for that type, are strictly prohibited for use with this device.
Approved Antenna List
Type: Omni-Directional
Gain: 5dBi
Impedance: 50 ohms
Freq: 896-970 MHz
Professional Installation
In accordance with section 15.203 of the FCC rules and regulations,
the MRX920 must be professionally installed by trained installers.
Industry Canada (IC) Notice:
IC: 4171B-MRXV4
This radio transmitter (4171B-MRXV4) has been approved by Industry Canada to
operate with the antenna types listed below with the maximum permissible gain and
required antenna impedance for each antenna type indicated. Antenna types not
included in this list, having a gain greater than the maximum gain indicated for that type,
are strictly prohibited for use with this device.
Le présent émetteur radio (4171B-MRXV4) a été approuvé par Industrie Canada pour
fonctionner avec les types d'antenne énumérés ci-dessous et ayant un gain admissible
maximal et l'impédance requise pour chaque type d'antenne. Les types d'antenne non
inclus dans cette liste, ou dont le gain est supérieur au gain maximal indiqué, sont
strictement interdits pour l'exploitation de l'émetteur.
undesired operation of the device

Approved Antenna List
Type: Omni-Directional
Gain: 5dB
iImpedance: 50 ohms
Freq: 896-970 MHz
This device complies with Industry Canada licence-exempt RSS standard(s).
Operation is subject to the following two conditions:
(1) This device may not cause interference; and
(2) This device must accept any interference, including interference that may cause
undesired opration of the device.
Le présent appareil est conforme aux CNR d'Industrie Canada applicables aux appareils
radio exempts de licence. L'exploitation est autorisée aux deux conditions suivantes:
(1) l'appareil ne doit pas produire de brouillage, et
(2) l'utilisateur de l'appareil doit accepter tout brouillage radioélectrique subi, même si le
brouillage est susceptible d'en compromettre le fonctionnement.
RF Exposure
Cet équipement est conforme aux limites d'exposition aux radiations dans un
environnement non contrôlé. Cet équipement doit être installé et utilisé à distance
minimum de 20 cm entre le radiateur et votre corps. Cet émetteur ne doit pas être co-
localisées ou opérant en conjonction avec tout autre antenne ou transmetteur.
NOM-208 Statement for Mexico
La operación de este equipo está sujeta a las siguientes dos condiciones:
(1) es posible que este equipo o dispositivo no cause interferencia perjudicial y
(2) este equipo o dispositivo debe aceptar cualquier interferencia, incluyendo la que
pueda causar su operación no deseada.
MRX920TM Getting Started Guide
Literature No. GS MRX920 v3 01.18
Part No. 12508-002
Neptune Technology Group Inc.
1600 Alabama Highway 229
Tallassee, AL 36078
Tel: (334) 283-6555
Fax: (334) 283-7293
Copyright © 2005-2018
Neptune Technology Group Inc.
All rights reserved.

Contents
MRX920 Getting Started Guide v
1Introduction
System Operations . . . . . . . . . . . . . . . . . . . . . . . . . . . . . . . . . . . . . . . . . . . . . . . . . . . . . . . . 1-2
About This Guide . . . . . . . . . . . . . . . . . . . . . . . . . . . . . . . . . . . . . . . . . . . . . . . . . . . . . . . . . 1-3
Conventions Used in this Guide . . . . . . . . . . . . . . . . . . . . . . . . . . . . . . . . . . . . . . . . . . . . . . 1-4
Product Support within North America . . . . . . . . . . . . . . . . . . . . . . . . . . . . . . . . . . . . . . . . . 1-4
Contacting Customer Support . . . . . . . . . . . . . . . . . . . . . . . . . . . . . . . . . . . . . . . . . . . . . . . 1-5
Phone . . . . . . . . . . . . . . . . . . . . . . . . . . . . . . . . . . . . . . . . . . . . . . . . . . . . . . . . . . . 1-5
Fax . . . . . . . . . . . . . . . . . . . . . . . . . . . . . . . . . . . . . . . . . . . . . . . . . . . . . . . . . . . . . 1-6
Email . . . . . . . . . . . . . . . . . . . . . . . . . . . . . . . . . . . . . . . . . . . . . . . . . . . . . . . . . . . 1-6
2Specifications
Physical Conditions . . . . . . . . . . . . . . . . . . . . . . . . . . . . . . . . . . . . . . . . . . . . . . . . . . . . . . . 2-1
Dimensions and Weight of the MRX920 . . . . . . . . . . . . . . . . . . . . . . . . . . . . . . . . . . . . . . . . 2-2
Hardware Requirements . . . . . . . . . . . . . . . . . . . . . . . . . . . . . . . . . . . . . . . . . . . . . . . . . . . . 2-3
3Getting Started
MRX920/MX900 Overview . . . . . . . . . . . . . . . . . . . . . . . . . . . . . . . . . . . . . . . . . . . . . . . . . . 3-1
MRX920 Features . . . . . . . . . . . . . . . . . . . . . . . . . . . . . . . . . . . . . . . . . . . . . . . . . . . . . . . . 3-2
LED Status Light Indicators . . . . . . . . . . . . . . . . . . . . . . . . . . . . . . . . . . . . . . . . . . . . . . 3-2

vi MRX920 Getting Started Guide
Contents
Bluetooth/USB Support . . . . . . . . . . . . . . . . . . . . . . . . . . . . . . . . . . . . . . . . . . . . . . . . . 3-3
Bluetooth Support . . . . . . . . . . . . . . . . . . . . . . . . . . . . . . . . . . . . . . . . . . . . . . . . . . 3-3
USB Connection . . . . . . . . . . . . . . . . . . . . . . . . . . . . . . . . . . . . . . . . . . . . . . . . . . . 3-3
Laptop . . . . . . . . . . . . . . . . . . . . . . . . . . . . . . . . . . . . . . . . . . . . . . . . . . . . . . . . . . . . . . 3-4
Software Installation . . . . . . . . . . . . . . . . . . . . . . . . . . . . . . . . . . . . . . . . . . . . . . . . . . . . . . . 3-4
Accepting the License Agreement . . . . . . . . . . . . . . . . . . . . . . . . . . . . . . . . . . . . . 3-6
Preparing to Install the Software . . . . . . . . . . . . . . . . . . . . . . . . . . . . . . . . . . . . . . . 3-6
For Windows 7 Users . . . . . . . . . . . . . . . . . . . . . . . . . . . . . . . . . . . . . . . . . . . . . . . 3-7
Installing MRX900 . . . . . . . . . . . . . . . . . . . . . . . . . . . . . . . . . . . . . . . . . . . . . . . . . . 3-7
Setting Up the Connection . . . . . . . . . . . . . . . . . . . . . . . . . . . . . . . . . . . . . . . . . . . . . . . . . . 3-8
Initial Bluetooth Connection . . . . . . . . . . . . . . . . . . . . . . . . . . . . . . . . . . . . . . . . . . . . . . 3-8
Initial USB Connection . . . . . . . . . . . . . . . . . . . . . . . . . . . . . . . . . . . . . . . . . . . . . . . . . . 3-8
Scan for Devices . . . . . . . . . . . . . . . . . . . . . . . . . . . . . . . . . . . . . . . . . . . . . . . . . . . 3-9
To Upgrade the Receiver . . . . . . . . . . . . . . . . . . . . . . . . . . . . . . . . . . . . . . . . . . . 3-10
Configuring the Driver . . . . . . . . . . . . . . . . . . . . . . . . . . . . . . . . . . . . . . . . . . . . . . 3-10
If Windows 7 or Higher Does Not Recognize Driver . . . . . . . . . . . . . . . . . . . . . . . 3-12
Updating the Driver . . . . . . . . . . . . . . . . . . . . . . . . . . . . . . . . . . . . . . . . . . . . . . . . 3-15
Accessing the MX900 Software . . . . . . . . . . . . . . . . . . . . . . . . . . . . . . . . . . . . . . . . . . . . . 3-18
Verifying the Laptop Date and Time . . . . . . . . . . . . . . . . . . . . . . . . . . . . . . . . . . . . . . . 3-18
If the Date and Time Do Not Match . . . . . . . . . . . . . . . . . . . . . . . . . . . . . . . . . . . 3-19
Starting MX900 . . . . . . . . . . . . . . . . . . . . . . . . . . . . . . . . . . . . . . . . . . . . . . . . . . . . . . 3-20
Setting Up the MRX920 . . . . . . . . . . . . . . . . . . . . . . . . . . . . . . . . . . . . . . . . . . . . . . . . . . . . 3-20
Installing the MRX920 in the Vehicle . . . . . . . . . . . . . . . . . . . . . . . . . . . . . . . . . . . . . . . . . . 3-21
Plugging in the Power Cable . . . . . . . . . . . . . . . . . . . . . . . . . . . . . . . . . . . . . . . . . . . . . . . . 3-21
Installing the Antenna . . . . . . . . . . . . . . . . . . . . . . . . . . . . . . . . . . . . . . . . . . . . . . . . . . . . . 3-23
Inserting the USB Flash Drive . . . . . . . . . . . . . . . . . . . . . . . . . . . . . . . . . . . . . . . . . . . . . . . 3-26
Starting the Software . . . . . . . . . . . . . . . . . . . . . . . . . . . . . . . . . . . . . . . . . . . . . . . . . . . . . . 3-27
Becoming Familiar with the MRX920 . . . . . . . . . . . . . . . . . . . . . . . . . . . . . . . . . . . . . . . . . 3-27
Navigation . . . . . . . . . . . . . . . . . . . . . . . . . . . . . . . . . . . . . . . . . . . . . . . . . . . . . . . 3-28
Software . . . . . . . . . . . . . . . . . . . . . . . . . . . . . . . . . . . . . . . . . . . . . . . . . . . . . . . . 3-29

Contents
MRX920 Getting Started Guide vii
4Troubleshooting
Troubleshooting the MRX920 . . . . . . . . . . . . . . . . . . . . . . . . . . . . . . . . . . . . . . . . . . . . . . . . 4-1
Troubleshooting Hardware Issues . . . . . . . . . . . . . . . . . . . . . . . . . . . . . . . . . . . . . . . . . . . . 4-2
Troubleshooting MX900 Software Issues . . . . . . . . . . . . . . . . . . . . . . . . . . . . . . . . . . . . . . . 4-4
Glossary
Index

Notes:
viii MRX920 Getting Started Guide
Contents

MRX920 Getting Started Guide ix
Figures
Figure Title Page
1.1 MRX920 Mobile Data Collector . . . . . . . . . . . . . . . . . . . . . . . . . . . . . . . . . . . . . . . . . . . . . 1-1
1.2 MRX920 Meter Reading Operations . . . . . . . . . . . . . . . . . . . . . . . . . . . . . . . . . . . . . . . . 1-2
2.1 MRX920 Dimensions . . . . . . . . . . . . . . . . . . . . . . . . . . . . . . . . . . . . . . . . . . . . . . . . . . . . . . 2-2
3.1 MRX920 Receiving/Processing Unit . . . . . . . . . . . . . . . . . . . . . . . . . . . . . . . . . . . . . . . . 3-2
3.2 InstallShield Wizard Preparing to Install Window . . . . . . . . . . . . . . . . . . . . . . . . . . . . 3-4
3.3 InstallShield Wizard MX900 Window . . . . . . . . . . . . . . . . . . . . . . . . . . . . . . . . . . . . . . . . 3-5
3.4 InstallShield Wizard Welcome Window . . . . . . . . . . . . . . . . . . . . . . . . . . . . . . . . . . . . . . 3-5
3.5 Neptune Software License Agreement . . . . . . . . . . . . . . . . . . . . . . . . . . . . . . . . . . . . . . 3-6
3.6 Ready to Install Program Window . . . . . . . . . . . . . . . . . . . . . . . . . . . . . . . . . . . . . . . . . . . 3-6
3.7 User Account Control Dialog . . . . . . . . . . . . . . . . . . . . . . . . . . . . . . . . . . . . . . . . . . . . . . . 3-7
3.8 Installing MRX900 Window . . . . . . . . . . . . . . . . . . . . . . . . . . . . . . . . . . . . . . . . . . . . . . . . . 3-7
3.9 Devices and Printers Network Settings . . . . . . . . . . . . . . . . . . . . . . . . . . . . . . . . . . . . . 3-10
3.10 Network and Setup Connections . . . . . . . . . . . . . . . . . . . . . . . . . . . . . . . . . . . . . . . . . . . 3-11
3.11 Local Area Connection 6 Properties . . . . . . . . . . . . . . . . . . . . . . . . . . . . . . . . . . . . . . . 3-11
3.12 Internet Protocol Version 4 . . . . . . . . . . . . . . . . . . . . . . . . . . . . . . . . . . . . . . . . . . . . . . . . 3-12
3.13 Selecting Neptune MRX920 Properties . . . . . . . . . . . . . . . . . . . . . . . . . . . . . . . . . . . . 3-13
3.14 Neptune MRX920 Properties . . . . . . . . . . . . . . . . . . . . . . . . . . . . . . . . . . . . . . . . . . . . . . 3-13
3.15 Neptune MRX920 Properties General Tab . . . . . . . . . . . . . . . . . . . . . . . . . . . . . . . . . 3-14
3.16 Update Driver Dialog . . . . . . . . . . . . . . . . . . . . . . . . . . . . . . . . . . . . . . . . . . . . . . . . . . . . . . 3-15
3.17 Update Driver Software . . . . . . . . . . . . . . . . . . . . . . . . . . . . . . . . . . . . . . . . . . . . . . . . . . . 3-15
3.18 Browse for Driver . . . . . . . . . . . . . . . . . . . . . . . . . . . . . . . . . . . . . . . . . . . . . . . . . . . . . . . . . 3-16
3.19 Windows Security Dialog . . . . . . . . . . . . . . . . . . . . . . . . . . . . . . . . . . . . . . . . . . . . . . . . . . 3-16
3.20 Update Driver Software Successful . . . . . . . . . . . . . . . . . . . . . . . . . . . . . . . . . . . . . . . . 3-17
3.21 Current Date and Time Dialog . . . . . . . . . . . . . . . . . . . . . . . . . . . . . . . . . . . . . . . . . . . . . 3-18
3.22 Incorrect Date and Time Dialog . . . . . . . . . . . . . . . . . . . . . . . . . . . . . . . . . . . . . . . . . . . . 3-19
3.23 MX900 Login Dialog . . . . . . . . . . . . . . . . . . . . . . . . . . . . . . . . . . . . . . . . . . . . . . . . . . . . . . 3-20
3.24 MRX920 Placed in Vehicle . . . . . . . . . . . . . . . . . . . . . . . . . . . . . . . . . . . . . . . . . . . . . . . . 3-21
3.25 Vehicle Power Supply Power Cable . . . . . . . . . . . . . . . . . . . . . . . . . . . . . . . . . . . . . . . . 3-22
3.26 Vehicle Power Supply Cable Inserted In Car . . . . . . . . . . . . . . . . . . . . . . . . . . . . . . . 3-23
3.27 Antenna Installation . . . . . . . . . . . . . . . . . . . . . . . . . . . . . . . . . . . . . . . . . . . . . . . . . . . . . . . 3-24
3.28 Antenna Cable Through Window . . . . . . . . . . . . . . . . . . . . . . . . . . . . . . . . . . . . . . . . . . 3-24

Figures
x MRX920 Getting Started Guide
Figure Title Page
3.29 Cable Protector . . . . . . . . . . . . . . . . . . . . . . . . . . . . . . . . . . . . . . . . . . . . . . . . . . . . . . . . . . 3-25
3.30 USB Port and Drive . . . . . . . . . . . . . . . . . . . . . . . . . . . . . . . . . . . . . . . . . . . . . . . . . . . . . . . 3-26
3.31 Navigating Within the Software . . . . . . . . . . . . . . . . . . . . . . . . . . . . . . . . . . . . . . . . . . . . 3-28

MRX920 Getting Started Guide xi
Tables
Table Title Page
2.1 Physical Specifications . . . . . . . . . . . . . . . . . . . . . . . . . . . . . . . . . . . . . . . . . 2-1
2.2 Dimensions and Weight of the MRX920 . . . . . . . . . . . . . . . . . . . . . . . . . . . . 2-2
2.3 Hardware Requirements . . . . . . . . . . . . . . . . . . . . . . . . . . . . . . . . . . . . . . . . 2-3
3.1 LED Status Light Indications . . . . . . . . . . . . . . . . . . . . . . . . . . . . . . . . . . . . 3-3
4.1 Hardware Troubleshooting Table . . . . . . . . . . . . . . . . . . . . . . . . . . . . . . . . . 4-2
4.2 MX900 Software Troubleshooting Table . . . . . . . . . . . . . . . . . . . . . . . . . . . 4-4

xii MRX920 Getting Started Guide
Notes:
Tables

MRX920 Getting Started Guide 1-1
Chapter 1 Introduction
The MRX920ΤΜ is a compact, portable, mobile data collection device
used for meter reading of Neptune radio frequency (RF) equipped water
meters. It is used in conjunction with the MX900 software to conduct
automatic meter reading. The data collected is then communicated
through the host software to the utility’s billing system.
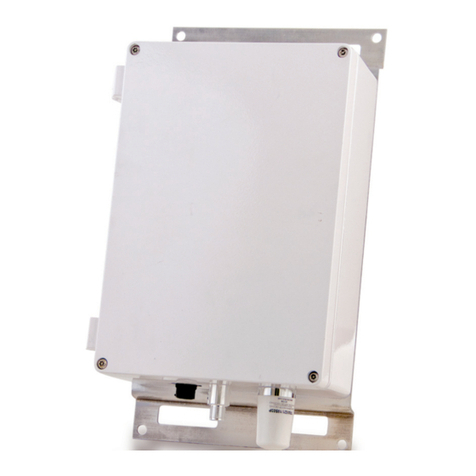
Figure 1.1 MRX920 Mobile Data Collector
The MRX920 provides the meter reading industry with many
advantages over current meter reading methods.
• Suitable for any size utility
• Portable and easy to set up
• Significantly reduced man-hours needed to collect readings
• Maximized meter reading success rates
• Improved meter reading accuracy

Introduction
1-2 MRX920 Getting Started Guide
• Access for meters that are “hard-to-read” or “dangerous-to-read”
• Increased safety and minimized liability exposure
System Operations
Operators use the N_SIGHTTM host software to make route assignments
for meter readers. The routes to be read are obtained from the utility
billing system and placed on a USB flash drive or accessed by use of a
Bluetooth connection for the meter readers. Routes are loaded into the
MX900 software. Each meter reader drives through the assigned routes
to collect data broadcast by R900®meter interface units (MIUs). When
complete, the meter readings can be uploaded to the N_SIGHT host
software. The host software transfers the customer information to the
billing computer to generate customer bills. See Figure 1.2.
Figure 1.2 MRX920 Meter Reading Operations
The MRX920 is only to be used for in-vehicle purposes.

Introduction
MRX920 Getting Started Guide 1-3
About This Guide
The MRX920™ Getting Started Guide describes the system and its
features. This guide also provides procedures on how to set up the
MRX920, use its MX900 software, exit, and close the unit. This guide
contains the following chapters:
Chapter Title Description
2 Specifications Provides a section that includes all product
specifications, including dimensions, weight,
and environmental conditions.
3 Getting Started with the
MRX920
Describes hardware setup instructions, power
and antenna connection, and instructions on
how to turn on the laptop computer. The chapter
also includes information on how to adjust sys-
tem settings including keyboard backlighting,
display intensity, and the beeper settings. It also
provides steps for installing and updating the
software.
4 Getting Started Provides an overview of the MRX920 and how
to get started using it. It contains procedures for
installing the MX900 software and installing the
antenna. and explains how
the product works.
The procedures for reading meters, reviewing
account information, reading missed meters,
using the data logger, using the mapping fea-
ture, and exiting the software are contained in
the HTML5 Help included in the MX900 soft-
ware.
5 Troubleshooting Provides diagnostics procedures for trouble-
shooting MRX920 problems.

Introduction
1-4 MRX920 Getting Started Guide
Conventions Used in this Guide
This guide uses the following icons and typographical conventions to
identify special information.
Product Support within North America
Neptune offers various methods to receive high-quality, responsive
Customer Support. However, before contacting Neptune, it is important
that you know the version number of the host software that your
MRX920 uses. This information is useful to the Customer Support
Specialist who addresses the call.
The Warning icon identifies actions that can cause injury to the user or
permanently damage the product.
The Caution icon identifies important information that is critical to ensuring that
data stored with the MRX920 is not lost.
The Note icon identifies information that clarifies a point within the text.
All small caps Refers to keys. Examples: ENTER, ALT, TAB
All bold initial caps Refers to field names, menus, buttons, and menu options. Example: Device field or
File menu.
+ between keys Refers to pressing the keys at the same time. Example: ALT+B
The version number of MX900 software is located on the title bar at the top of
your window.

Introduction
MRX920 Getting Started Guide 1-5
Contacting Customer Support
Within North America, Neptune Customer Support is available Monday
through Friday, 7:00 AM to 5:00 PM Central Standard Time by
telephone, email, or fax.
Phone
To contact Neptune Customer Support by phone, complete the
following steps.
1Call(800) 647-4832.
2 Select one of the following options.
• Press 1if you have a Technical Support Personal Identification
Number (PIN).
• Press 2if you do not have a Technical Support PIN number.
3 Enter the six digit PIN number and press #.
4 Select one of the following options.
• Press 2for Technical Support.
• Press 3for maintenance contracts or renewals.
•Press 4for Return Material Authorization (RMA) for Canadian
Accounts.
You are directed to the appropriate team of Customer Support
Specialists. The specialists are dedicated to you until the issue is
resolved to your satisfaction. When you call, be prepared to give
the following information.
• Your name and utility or company name.
• A description of what occurred and what you were doing at the
time.
• A description of any actions taken to correct the issue.

Introduction
1-6 MRX920 Getting Started Guide
Fax
To contact Neptune Customer Support by fax, send a description of your
problem to (334) 283-7497. Please include on the fax cover sheet the
best time of day for a Customer Support Specialist to contact you.
Email
To contact Customer Support by email, send your message with a
description of the problem to hhsupp@neptunetg.com.
Other manuals for MRX920
3
Table of contents
Other Neptune Data Logger manuals
