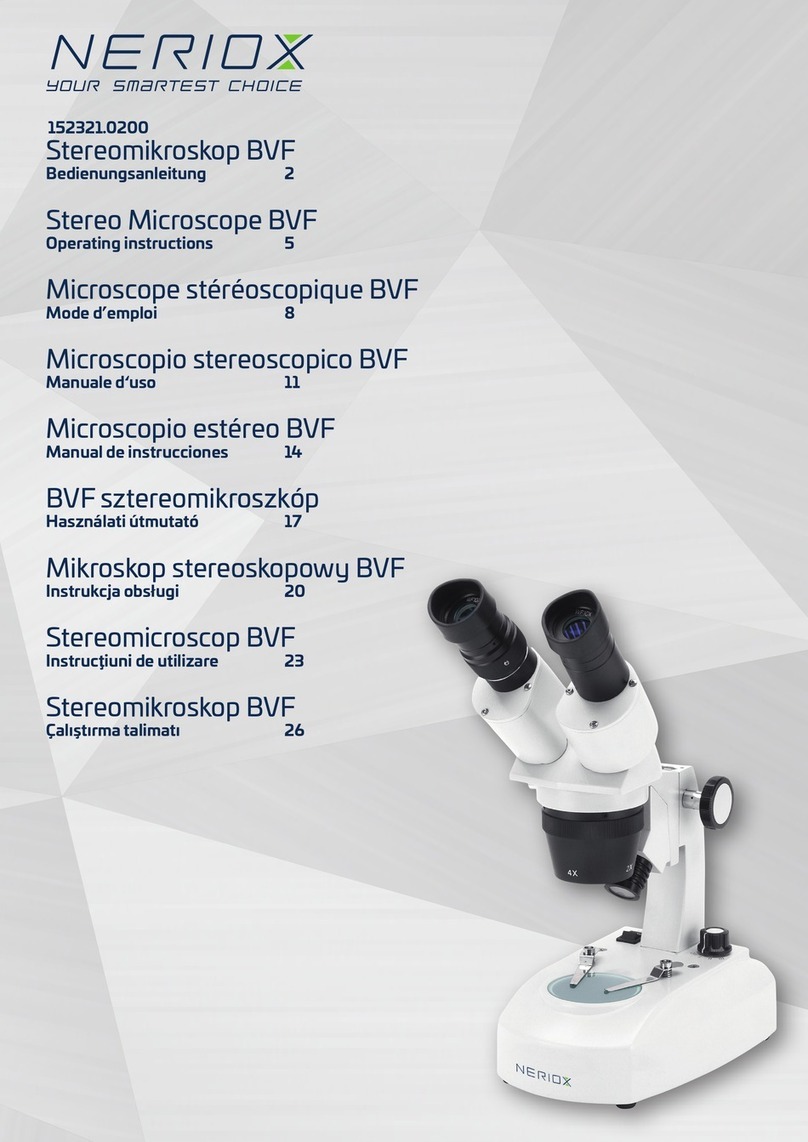
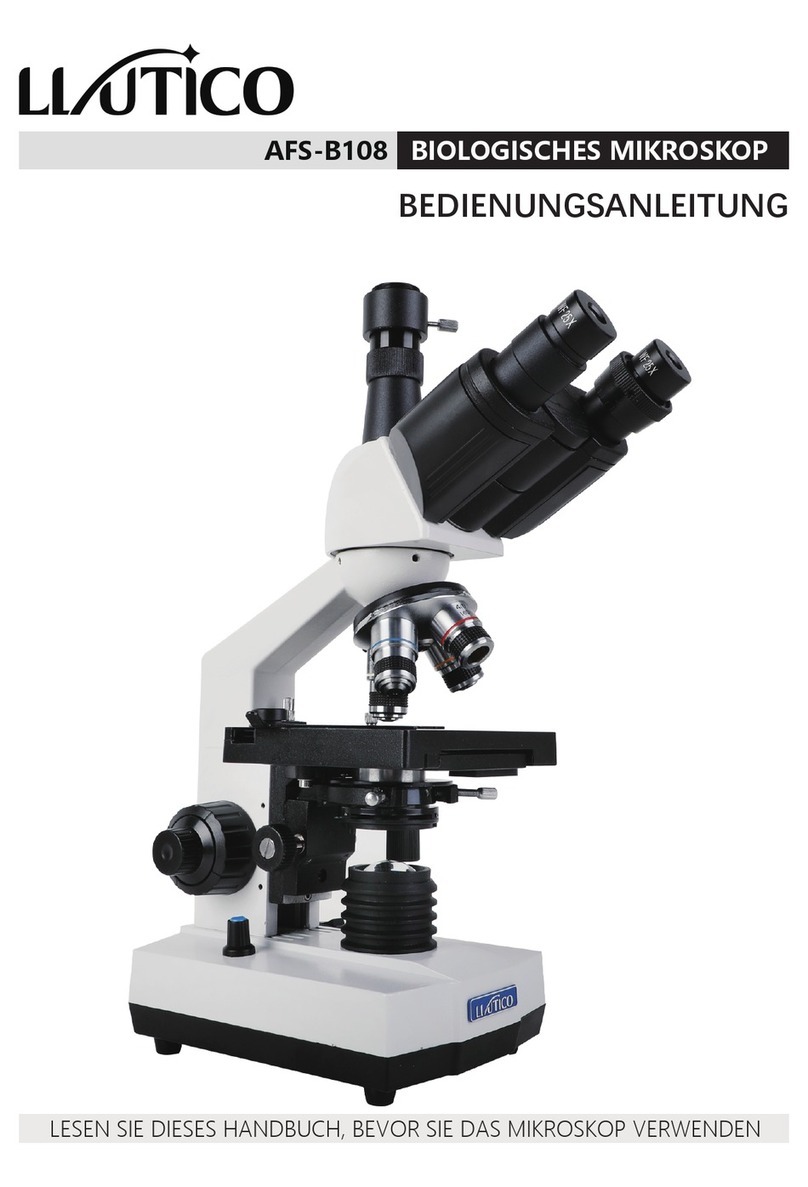
Neriox STEREO MICROSCOPE BVS User manual

1
Stereomikroskop BVS
Bedienungsanleitung 2
Stereo Microscope BVS
Operating instructions 5
Microscope stéréoscopique BVS
Mode d’emploi 8
Microscopio stereoscopico BVS
Manuale d‘uso 11
Microscopio estéreo BVS
Manual de instrucciones 14
BVS sztereomikroszkóp
Használati útmutató 17
Mikroskop stereoskopowy BVS
Instrukcja obsługi 20
Stereomicroscop BVS
Instrucţiuni de utilizare 23
Stereomikroskop BVS
Çalıştırma talimatı 26
152321.0100

2
Auau des Stereomikroskops
Im Folgenden nden Sie die Bezeichnung der einzelnen Bauteile, die auch auf der Abbildung dargestellt sind:
STEREOMIKROSKOP BVS
Bedienungsanleitung
Einleitung
Mit dem Kauf eines Stereomikroskops NERIOX haben Sie sich für ein Qualitätsprodukt entschieden.
Es ist geeignet zur Verwendung an Schulen, in Labors oder in der Industrie.
Das Stereomikroskop besteht aus zwei separaten Mikroskop-Tuben, die zu einer Einheit kombiniert werden, um schliesslich gleichzeitig auf das Objekt fokussiert werden zu
können. Jeder Tubus verfügt über jeweils ein Prisma, ein achromatisches Objektiv sowie ein Weitfeld-Okular. Hierdurch wird ein grosses, ebenes Sehfeld erzielt. Beide Augen
betrachten das Objekt jeweils unter einem geringfügig anderen Winkel, so dass ein stereoskopischer Eekt entsteht.
Bei normaler Verwendung reduziert sich derWartungsbedarf auf ein Minimum!
Diese Bedienungsanleitung gibt Informationen zu Auau, Handhabung und Wartung des Mikroskops.
152321.0100
8
1
11
12
14
10
9
8
2
3
4
5
13
6
7
1. Augenmuschel
2. Dioptrien-Einstellung
3. Objektiv-Revolver
4. Schalter für Beleuchtung
5. Objektklemmen
6. Objektscheibe
7. Stativfuss mit Beleuchtung
8. Auflichtbeleuchtung
9. Fokussierung
10. Prismengehäuse
11. Weitfeld-Okular
12. Klemmschraube Höhenverstellung
13. Hauptschalter (Power)
14. Stativsäule

3
Funktionsweise dereinzelnen Bauteile
Das Stereomikroskop besteht aus einem Stativfuss, einer vertikalen Stativsäule sowie einem Kopf mit Fokussiereinrichtung. Fassen Sie das Mikroskop immer am Stativ an,
wenn Sie es versetzen wollen.
Tubus
Die zwei Tuben haben eine 45° Neigung und können bei Bedarf um 360° gedreht werden.
Optische Spezikationen
Das Stereomikroskop verfügt jeweils über ein Paar 10x Weitfeld-Okulare sowie zwei Paar (nicht-austauschbare) achromatische 2x und 4x Objektive in einem drehbaren
Objektiv-Revolver. Die Gesamtvergrösserung des Mikroskops wird durch Multiplikation der Vergrösserung der Okulare mit der Vergrösserung der Objektive berechnet.
Die Okulare sind jeweils mit einer kleinen Schraube im Tubus xiert.
Objekttisch
Der Objekttisch hat eine integrierte Durchlichtbeleuchtung, eine transparente Objektscheibe sowie zwei Objektklemmen. Zusätzlich wird eine schwarz-weisse Objekt-
scheibe mitgeliefert.
Fokussieren
Mit der Fokussierung kann das Bild des Objekts scharf eingestellt werden. DerArbeitsabstand (Abstand zwischen Unterseite des Objektivs und Oberseite des Objekts)
beträgt ca. 75mm.
Objektiv-Revolver
Im drehbaren Objektiv-Revolver sind zwei Paar achromatische Objektive integriert. Durch Drehung des Objektiv-Revolvers um 180° wird eine andere Vergrösserung ein-
gestellt. Drehen Sie den Objektiv-Revolver bis Sie ein Klicken hören.
Beleuchtung
Dieses Modell verfügt über eine LED-Auflicht- und Durchlichtbeleuchtung
• LED: Auflichtbeleuchtung
• LED: Durchlichtbeleuchtung
Beide Beleuchtungen können gleichzeitig genutzt werden (Schalterfür Beleuchtung).
Vorbereiten des Stereomikroskops zur Nutzung
Nehmen Sie das Mikroskop aus der Verpackung und stellen Sie es auf einen stabilen Tisch. Stecken Sie den Netzstecker in eine Steckdose, betätigen Sie den Haupt-
schalter (POWER) und schalten Sie die Beleuchtung mit dem Schalter für Beleuchtung an. Schieben Sie danach die Augenmuscheln über die Okulare. Setzen Sie sich nun
bequem vor das Mikroskop und schauen Sie durch die Okulare.
Arbeiten mit dem Stereomikroskop
• Legen Sie ein Objekt auf die Objektplatte und stellen Sie die ideale Höhe zum Objekt mit der Höhenverstellung an der Stativsäule ein. Dann stellen Sie das Bild mit der
Fokussierung scharf.
• Stellen Sie den Pupillenabstand ein, indem Sie die Prismengehäuse aufeinander zu oder voneinander weg bewegen, bis Sie mit beiden Augen ein rundes Bild sehen.
• Im Normalfall sollten beide Okulartuben dieselbe Länge haben. Um einen etwaigen Unterschied zwischen den beiden Augen auszugleichen, verfahren Sie bitte wie
folgt: Nehmen Sie ein flaches Objekt und schauen Sie nur mit dem rechten Auge in das rechte Okular. Stellen Sie nun das Bild mit der Fokussierung scharf ein.
Schauen Sie nun nur mit dem linken Auge durch das linke Okular und benutzen Sie die Dioptrien-Einstellung auf dem linken Tubus, um ein scharfes Bild zu erhalten
• Die Modelle mit Beleuchtung haben ausserdem eine schwarz-weisse Objektplatte, die einfach ausgetauscht werden kann. Die schwarze Seite kann zur Beobachtung
von Objekten genutzt werden, die sich besservor einem dunklen Hintergrund darstellen lassen.
Achtung:
Bei Nutzung der schwarz-weissen Objektscheibe muss die Durchlichtbeleuchtung abgeschaltet sein!

4
Brütsch/Rüegger Werkzeuge AG, Heinrich Stutz-Strasse 20, Postfach, CH-8902 Urdorf, Tel. +41 44 736 63 63, Fax +41 44 736 63 00, www.neriox.tools, sales@brw.ch
Wartung und Reinigung
Decken Sie das Mikroskop nach der Nutzung immer mit einer Staubschutzhülle ab. Lassen Sie die Okulare immer im Mikroskop-Tubus montiert, damit kein Staub ins Gerät
eindringen kann.
Reinigung der Optik
Falls die Linsen des Okulars verschmutzt sind, können sie mit einem Stück Linsenpapier abgewischt werden (kreisförmige Bewegungen). Wenn dies keine Verbesserung
bringt, feuchten Sie das Linsenpapier mit einem Tropfen Xylol oderAlkohol an. Geben Sie niemals Xylol oderAlkohol direkt auf die Linsen!
Falls Schmutz deutlich im Sichtfeld zu erkennen ist, bendet er sich auf der untersten Linse des Okulars. Mit Hilfe eines Kreuzschraubenziehers (Grösse 00) können die
Okulare aus dem Tubus genommen werden. Säubern Sie nun die Aussenseite der Linse. Sollte immer noch Staub sichtbar sein, vergewissern Sie sich durch Drehung des
Okulars, ob der Staub wirklich im Okular ist. Sollte dies tatsächlich der Fall sein, drehen Sie vorsichtig die unterste Linse aus dem Gehäuse und reinigen sie.
Reinigung des Stativs
Staub kann mit einem Pinsel entfernt werden. Falls das Stativ stark verschmutzt ist, kann die Oberfläche mit einem nicht-aggressiven Reinigungsmittel gesäubert werden.
Vorgehen bei Problemen mit der Beleuchtung (Auflicht / Durchlicht)
Die eingebauten LED haben eine sehr lange Lebensdauer. Sollte mit der Beleuchtung ein Problem auftauchen, so senden Sie das Mikroskop an unser
Servicecenter → Servicecenter@brw.ch.
Warnung:
Tücher mit Kunststo-Fasern können die Beschichtung der Linsen beschädigen!
Warnung:
LED oder elektronische Teile dürfen nur von Fachpersonal repariert bzw. ausgetauscht werden! Bei Widerhandlung wird jede Haftung abgelehnt.
Reparaturen
Sollte eine Reparatur Ihres Mikroskops notwendig werden, so wenden Sie sich bitte an unser Servicecenter →Servicecenter@brw.ch
Periodische Wartung
Wünschen Sie eine periodische Wartung Ihres Mikroskops durch Brütsch RüeggerWerkzeuge AG, so wenden Sie sich bitte an unseren
Servicetechniker →Service.Messtechnik@brw.ch
MAN_BRW _vers. July. 19_art. BRW 152 321.0100

5
Design ofthe Stereo Microscope
Below you will nd the designation of the individual components, which are also shown in the illustration:
STEREO MICROSCOPE BVS
Operating instructions
Introduction
In purchasing a NERIOX stereo microscope, you have chosen a quality product.
It is suitable for use in schools and laboratories as well as in industry.
The Stereo Microscope consists of two separate microscope tubes, which are combined into one unit to allow simultaneous focusing on the object. Each tube has a prism, an
achromatic lens and a wide eld eyepiece. This creates a large, flat eld of view. Both eyes view the object at a slightly dierent angle, which creates a stereoscopic eect.
With normal use, the maintenance requirement is reduced to a minimum.
These operating instructions provide information on the design, handling and maintenance of the microscope.
152321.0100
8
1
11
12
14
10
9
8
2
3
4
5
13
6
7
1. Eyecup
2. Dioptre adjustment
3. Lens revolver
4. Switch for lighting
5. Object clamps
6. Object plate
7. Stand base with lighting
8. Incident illumination
9. Focusing
10. Prism housing
11. Wide eld eyepiece
12. Thumb screw for height adjustment
13. Main switch (power)
14. Stand column

6
Operating principle ofthe individual components
The Stereo Microscope consists of a stand base, a vertical stand column and a head with focusing device. Always hold the microscope by the stand when
you want to move it.
Tubes
The two tubes have a tilt angle of 45° and can be rotated by 360° if necessary.
Optical specications
The Stereo Microscope has a pair of 10x wide eld eyepieces and two pairs (non-interchangeable) of achromatic 2x and 4x lenses in a rotary lens revolver. The total
magnication of the microscope is calculated by multiplying the magnication of the eyepieces by the magnication of the lenses. The eyepieces are each xed in the
tube with a small screw.
Object stage
The object stage has integrated transmitted light illumination, a transparent object plate and two object clamps. A black and white object plate is also provided.
Focusing
Focusing is used to bring the image of the object into focus. The working distance (distance between the underside of the lens and the top of the object) is approx. 75mm.
Lens revolver
Two pairs of achromatic lenses are integrated in the rotary lens revolver. A dierent magnication is set by rotating the lens revolver by 180°. Turn the lens revolver until
you hear a click.
Illumination
This model is equipped with LED incident light and transmitted light illumination
• LED: Incident light illumination
• LED: Transmitted light illumination
Both lights can be used simultaneously (switch for lighting).
Preparing the Stereo Microscopefor use
Remove the microscope from its packaging and place it on a stable table. Insert the mains plug into a socket, press the main switch (POWER) and switch on the lighting
with the switch for lighting. Then slide the eyecups over the eyepieces. Now sit comfortably in front of the microscope and look through the eyepieces.
Working with the Stereo Microscope
Place an object on the object plate and set the ideal height for the object with the height adjustment mechanism on the stand column.
Then use the focusing mechanism to focus the image.
• Adjust the pupil distance by moving the prism housings towards or away from each other until you see a round image with both eyes.
• Normally, both eyepiece tubes should have the same length. To adjust for any dierence between the two eyes, please proceed as follows:
Take a flat object and look into the right eyepiece with your right eye only. Now use the focusing mechanism to focus the image.
Now look through the left eyepiece with your left eye only and use the dioptre adjustment mechanism on the left tube to get a sharp image.
• The models with illumination also have a black and white object plate that is easy to replace. The black side can be used to observe objects that are
better displayed against a dark background.
Attention:
When using the black and white object plate, the transmitted light illumination must be switched o!

7
Brütsch/Rüegger Werkzeuge AG, Heinrich Stutz-Strasse 20, Postfach, CH-8902 Urdorf, Tel. +41 44 736 63 63, Fax +41 44 736 63 00, www.neriox.tools, sales@brw.ch
Maintenance and cleaning
Always cover the microscope with a dust cover after use. Keep the eyepieces mounted in the microscope tube at all times, to prevent dust from getting into the device.
Cleaning the optics
If the lenses of the eyepiece are dirty, they can be wiped with a piece of lens paper (circular movements). If this does not bring an improvement, moisten the lens paper
with a drop of xylene or alcohol. Never apply xylene or alcohol directly on the lenses!
If dirt is clearly visible in the eld ofview, this is located on the lowest lens of the eyepiece. The eyepieces can be removed from the tube with the aid of a Phillips screw-
driver (size 00). Now clean the outside of the lens. If dust is still visible, make certain that the dust is really in the eyepiece by rotating the eyepiece. If this is denitely the
case, carefully unscrew the bottom lens from the housing and clean it.
Cleaning the stand
Dust can be removed with a brush. If the stand is very dirty, the surface can be cleaned with a non-aggressive cleaning agent.
Procedure for illumination problems (incident light /transmitted light)
The built-in LEDs have a very long service life. If there is a problem with the illumination, please send the microscope to our
Service Center → Servicecenter@brw.ch.
Warning:
Cloths with plastic bres can damage the coating of the lenses!
Warning:
LEDs or electronic parts may only be repaired or replaced by qualied personnel! In the event of non-compliance, any liability will be refused.
Repairs
If your microscope needs to be repaired, please contact our Service Center →Servicecenter@brw.ch
Periodic maintenance
If you require periodic maintenance of your microscope by Brütsch RüeggerWerkzeuge AG, please contact our
service technician →Service.Messtechnik@brw.ch
MAN_BRW _vers. July. 19_art. BRW 152 321.0100

8
Structure du microscope stéréoscopique
Vous trouverez ci-dessous la désignation des diérents composants, également représentés sur la gure :
MICROSCOPE STÉRÉOSCOPIQUE BVS
Mode d’emploi
Introduction
En achetant un microscope stéréoscopique NERIOX, vous avez opté pour un produit de qualité.
Il convient à une utilisation dans les écoles et les laboratoires ou dans l’industrie.
Le microscope stéréoscopique se compose de deux tubes de microscope distincts, combinés en un ensemble an de pouvoir nalement simultanément être mis au point
sur l’échantillon. Chaque tube est respectivement muni d’un prisme, d’un objectif achromatique ainsi que d’un oculaire à grand champ. Cela permet de bénécier d’un grand
champ visuel plan. Chaque œil scrute l’objet sous un angle légèrement diérent de manière à créer un eet stéréoscopique.
En cas d’utilisation normale, l’entretien requis est réduit au strict minimum !
Le présent manuel d’utilisation contient des informations à propos de la structure, de la manipulation et de l’entretien du microscope.
152321.0100
8
1
11
12
14
10
9
8
2
3
4
5
13
6
7
1. Bonnette
2. Réglage dioptrique
3. Revolver à objectifs
4. Interrupteur pour l’éclairage
5. Pinces pour échantillon
6. Porte-échantillon
7. Socle du statif avec éclairage
8. Éclairage épiscopique
9. Mise au point
10. Revolver
11. Oculaire à grand champ
12. Vis de serrage du réglage en hauteur
13. Interrupteur principal (POWER)
14. Colonne de statif

9
Principe de fonctionnement des diérents composants
Le microscope stéréoscopique se compose d’un socle du statif, d’une colonne de statifverticale ainsi que d’une tête avec dispositif de mise au point. Pour déplacer le
microscope, saisissez-le toujours par son statif.
Tube
Les deux tubes ont une inclinaison de 45° et peuvent être tournés de 360° en cas de besoin.
Spécications optiques
Le microscope stéréoscopique est respectivement muni d’une paire d’oculaires 10x à grand champ et de deux paires d’objectifs achromatiques 2x et 4x (non amovibles)
dans un revolver à objectifs rotatif. Le grossissement total du microscope se calcule en multipliant le grossissement des oculaires par le grossissement des objectifs. Les
oculaires sont respectivement xés à l’aide d’une petite vis à l’intérieur du tube.
Platine porte-échantillon
La platine porte-échantillon possède un éclairage diascopique intégré, un porte-échantillon transparent ainsi que deux pinces pour échantillon. Un porte-échantillon
supplémentaire noir et blanc est fourni avec le microscope.
Mise au point
La mise au point permet de régler la netteté de l’image de l’échantillon. La distance de travail (distance entre la face inférieure de l’objectif et la face supérieure de l’échan-
tillon) s’élève à env. 75 mm.
Revolver à objectifs
Deux paires d’objectifs achromatiques sont intégrées au revolver à objectifs rotatif. Une rotation de 180° du revolver à objectifs sélectionne un autre grossissement. Tour-
nez le revolver à objectifs jusqu’à ce qu’un clic soit audible.
Éclairage
Ce modèle est muni d’un éclairage épiscopique et d’un éclairage diascopique à DEL
• DEL : éclairage épiscopique
• DEL : éclairage diascopique
Les deux éclairages peuvent être utilisés simultanément (interrupteur pour l’éclairage).
Préparatifs en vue de l’utilisation du microscope stéréoscopique
Retirez le microscope de l’emballage et placez-le sur un plan de travail solide. Branchez la che d’alimentation dans une prise de courant, actionnez l’interrupteur principal
(POWER) puis allumez l’éclairage en appuyant sur l’interrupteur pour l’éclairage. Glissez ensuite les bonnettes sur les oculaires. Asseyez-vous maintenant confortable-
ment devant le microscope et regardez à travers les oculaires.
Travail avec le microscope stéréoscopique
• Placez un échantillon sur la platine porte-échantillon puis réglez la hauteur idéale par rapport à l’échantillon à l’aide du réglage en hauteur sur la colonne
de statif. Réglez ensuite la netteté de l’image à l’aide de la mise au point.
• Réglez l’écart interpupillaire en rapprochant ou en éloignant les revolvers l’un par rapport à l’autre jusqu’à ce vous voyez une image ronde avec les deux yeux.
• En temps normal, la longueur des deux tubes des oculaires devrait être identique. Pour compenser une éventuelle diérence entre les deux yeux, veuillez procéder
comme suit : prenez un échantillon plat et scrutez uniquement avec l’œil droit dans l’oculaire droit. Réglez maintenant la netteté de l’image à l’aide de la mise au point.
Regardez maintenant seulement avec l’œil gauche dans l’oculaire gauche et utilisez le réglage dioptrique sur le tube gauche pour régler la netteté de l’image
• Les modèles munis d’un éclairage sont également munis d’un porte-échantillon noir et blanc, qui peut facilement être remplacé. La face noire peut être employée p
our scruter les échantillons qui peuvent mieux être représentés sur un fond sombre.
Attention :
En cas d’utilisation du porte-échantillon noir et blanc, l’éclairage diascopique doit être éteint !

10
Brütsch/Rüegger Werkzeuge AG, Heinrich Stutz-Strasse 20, Postfach, CH-8902 Urdorf, Tel. +41 44 736 63 63, Fax +41 44 736 63 00, www.neriox.tools, sales@brw.ch
Entretien et nettoyage
Après l’utilisation, recouvrez toujours le microscope avec une housse antipoussière. Laissez toujours les oculaires montés dans le tube du microscope an d’exclure toute
pénétration de poussière à l’intérieur de l’appareil.
Nettoyage de l’optique
Si les lentilles de l’oculaire sont encrassées, vous pouvez les essuyer à l’aide d’un morceau de papier spécial lentilles (mouvements circulaires). Si le résultat n’est pas satis-
faisant, humidiez le papier spécial lentilles en y appliquant une goutte de xylène ou d’alcool. N’appliquez jamais directement de xylène ou d’alcool sur les lentilles !
Si des impuretés sont nettement visibles dans le champ visuel, celles-ci se trouvent sur la lentille tout en bas de l’oculaire. Les oculaires peuvent être retirés du tube à l’aide
d’un tournevis cruciforme (taille 00). Nettoyez maintenant la face extérieure de la lentille. Si vous voyez encore de la poussière, assurez-vous que la poussière se trouve
réellement à l’intérieur de l’oculaire en tournant ce dernier. Si tel est le cas, tournez avec précaution la lentille du bas hors du boîtier et nettoyez-la.
Nettoyage du statif
La poussière peut être éliminée à l’aide d’un pinceau. En cas d’encrassement important du statif, la surface peut être nettoyée à l’aide d’un détergent doux.
Procédures à suivre en présence de problèmes liés à l’éclairage (épiscopique / diascopique)
Les DEL intégrées ont une très grande longévité. Si l’éclairage ne devait pas fonctionner correctement,
Avertissement :
Les lingettes qui contiennent des bres synthétiques peuvent endommager le revêtement des lentilles !
Avertissement :
La réparation et le remplacement des DEL et pièces électroniques sont strictement réservés au personnel spécialisé ! En cas de non-respect,
nous déclinons toute responsabilité.
Réparations
S’il devait s’avérer nécessaire de réparer votre microscope, veuillez contacter notre centre S.A.V. →Servicecenter@brw.ch
Entretien périodique
Si vous souhaitez coner l’entretien périodique de votre microscope à Brütsch RüeggerWerkzeuge AG, veuillez contacter nos techniciens
S.A.V. →Service.Messtechnik@brw.ch
MAN_BRW _vers. July. 19_art. BRW 152 321.0100

11
Struttura del microscopio stereoscopico
Di seguito è riportata l‘indicazione dei nomi dei singoli componenti illustrati anche nella gura:
MICROSCOPIO STEREOSCOPICO BVS
Manuale d‘uso
Introduzione
Con l‘acquisto di un microscopio stereoscopico NERIOX si sceglie un prodotto di qualità che è adatto per l‘uso nelle scuole, nei laboratori e nell‘industria.
Il microscopio stereoscopico si compone di due tubi separati che vengono combinati a formare un‘unità in modo che entrambi possano mettere a fuoco l‘oggetto allo stesso
tempo. Ciascun tubo è dotato di un prisma, un obiettivo acromatico e un oculare a campo largo. In questo modo si genera un campo visivo largo e piatto. Entrambi gli occhi
osservano l‘oggetto da un angolo leggermente dierente in modo che sia possibile ottenere un eetto stereoscopico.
L‘utilizzo corretto riduce al minimo la necessità di provvedere a interventi di manutenzione!
Il presente manuale d‘uso fornisce informazioni su struttura, utilizzo e manutenzione del microscopio.
152321.0100
8
1
11
12
14
10
9
8
2
3
4
5
13
6
7
1. Conchiglie oculari
2. Regolazione diottrica
3. Revolver portaobiettivi
4. Interruttore per illuminazione
5. Graette per oggetti
6. Disco portaoggetti
7. Base dello stativo con illuminazione
8. Illuminazione a luce incidente
9. Messa a fuoco
10. Alloggiamento del prisma
11. Oculare a campo largo
12. Vite di arresto regolazione in altezza
13. Interruttore principale (Power)
14. Stativo a colonna

12
Modalità di funzionamento dei singoli componenti
Il microscopio stereoscopico si compone di una base dello stativo, di uno stativo a colonna verticale e di una testata con dispositivo di messa a fuoco. Per spostare il
microscopio, aerrarlo sempre dalla parte dello stativo.
Tubo
I due tubi sono inclinabili di 45° e possono essere ruotati di 360°, se necessario.
Speciche ottiche
Ogni microscopio stereoscopico è dotato di una coppia di oculari a campo largo 10x, due coppie (non intercambiabili) di obiettivi acromatici 2x e 4x in un revolver
portaobiettivi girevole. L‘ingrandimento complessivo del microscopio viene calcolato moltiplicando l‘ingrandimento degli oculari per quello degli obiettivi. Ciascun oculare è
dotato di una piccola vite ssata al tubo.
Tavolino portaoggetti
Il tavolino portaoggetti è dotato di un‘illuminazione a luce trasmessa, un disco portaoggetti trasparente nonché di due graette. In aggiunta, viene fornita in dotazione un
disco portaoggetti in bianco e nero.
Messa a fuoco
Mediante la messa a fuoco è possibile mettere a fuoco nitidamente l‘immagine dell‘oggetto. La distanza di lavoro (distanza fra parte inferiore dell‘obiettivo e parte
superiore dell‘oggetto) è circa di 75 mm.
Revolver portaobiettivi
Nel revolver portaobiettivi girevole sono integrate due coppie di obiettivi acromatici. Ruotando di 180° il revolver portaobiettivi, viene impostato un ingrandimento
dierente. Ruotare il revolver portaobiettivi no a udire un „clic“.
Illuminazione
Questo modello è dotato di un‘illuminazione LED a luce incidente e a luce trasmessa
• LED : Illuminazione a luce incidente
• LED : Illuminazione a luce trasmessa
Entrambe le tipologie di illuminazione possono essere utilizzate contemporaneamente (Interruttore per illuminazione).
Preparazione all‘uso del microscopio stereoscopio
Estrarre il microscopio dalla confezione e posarlo su un tavolo stabile. Inserire la spina di alimentazione in una presa elettrica, azionare l‘interruttore principale (POWER) e
accendere l‘illuminazione con l‘apposito interruttore. Far scorrere le conchiglie sugli oculari. Accomodarsi davanti al microscopio e guardare attraverso gli oculari.
Lavorare con il microscopio stereoscopico
• Posare un oggetto sul disco portaoggetti e regolare l‘altezza ideale rispetto all‘oggetto con la regolazione in altezza dello stativo a colonna. Poi regolare la nitidezza
dell‘immagine tramite il dispositivo di messa a fuoco.
• Regolare la distanza delle pupille muovendo gli alloggiamenti del prisma avanti e indietro no a che entrambi gli occhi riescono a vedere soltanto un‘immagine tonda.
• In caso di normale utilizzo, entrambi i tubi oculari devono avere la stessa lunghezza. Per pareggiare un‘eventuale disparità fra gli occhi, procedere nel modo
seguente: prendere un oggetto con supercie piatta e guardare solo con l‘occhio destro attraverso l‘oculare destro. Regolare la nitidezza dell‘immagine tramite
il dispositivo di messa a fuoco. Ora guardare soltanto con l‘occhio sinistro attraverso l‘oculare sinistro e servirsi della regolazione diottrica sul tubo sinistro per
ottenere un‘immagine nitida.
• I modelli con illuminazione dispongono inoltre di un disco portaoggetti bianco e nero facilmente sostituibile. La parte nera viene utilizzata per osservare gli
oggetti che necessitano di uno sfondo scuro per essere meglio riconoscibili.
Attenzione:
Se si utilizza il disco portaoggetti bianco e nero, è necessario disattivare l‘illuminazione a luce trasmessa!

13
Brütsch/Rüegger Werkzeuge AG, Heinrich Stutz-Strasse 20, Postfach, CH-8902 Urdorf, Tel. +41 44 736 63 63, Fax +41 44 736 63 00, www.neriox.tools, sales@brw.ch
Manutenzione e pulizia
Coprire sempre il microscopio dopo l‘uso con un involucro antipolvere. Lasciare sempre inseriti gli oculari nel tubo del microscopio per impedire l‘accumulo di polvere
all‘interno dell‘apparecchio.
Pulizia dell‘ottica
Se le lenti dell‘oculare sono sporche, è possibile pulirle utilizzando un apposito pezzo di carta per lenti (movimento circolare). Se non si nota alcun miglioramento, inumidire
la carta per lenti con una goccia di xilolo o alcol. Non applicare mai xilolo o alcol direttamente sulla supercie delle lenti!
Se lo sporco è ancora evidente nel campo visivo signica che è presente sulla lente inferiore di cui dispone l‘oculare. È possibile rimuovere gli oculari dal tubo mediante
un cacciavite a croce (dimensione 00). Ora pulire la parte esterna della lente. Qualora la polvere fosse ancora visibile, assicurarsi che la polvere si trovi realmente all‘intero
dell‘oculare ruotandolo. Qualora fosse necessario, ruotare cautamente la lente inferiore dall‘alloggiamento e pulirla.
Pulizia dello stativo
È possibile rimuovere la polvere utilizzando un pennello. Se lo stativo è molto sporco, è possibile pulirne la supercie utilizzando detergenti non aggressivi.
Procedura in caso di problemi di illuminazione (luce incidente /trasmessa)
I LED incorporati hanno una durata molto lunga.Se dovesse emergere un problema di illuminazione, spedire il microscopio al nostro
centro servizio → Servicecenter@brw.ch.
Avvertenza:
I panni con bre in materiale plastico potrebbero danneggiare il rivestimento delle lenti!
Avvertenza:
I LED e i componenti elettronici devono essere riparati o sostituiti esclusivamente da personale specializzato! Si declina ogni responsabilità in caso di tras-
gressione rispetto a quanto menzionato.
Riparazioni
Se dovesse essere necessario eettuare una riparazione del vostro microscopio, rivolgersi al nostro centro servizi →Servicecenter@brw.ch
Manutenzione periodica
Se si desidera usufruire della manutenzione periodica del microscopio da parte di Brütsch RüeggerWerkzeuge AG,
rivolgersi al nostro tecnico incaricato dei servizi → Service.Messtechnik@brw.ch
MAN_BRW _vers. July. 19_art. BRW 152 321.0100

14
Estructura del microscopio estéreo
A continuación encontrará una ilustración y una leyenda con los componentes que constituyen este aparato:
MICROSCOPIO ESTÉREO BVS
Manual de instrucciones
Introducción
Con la compra de este microscopio estéreo NERIOX ha adquirido un producto de alta calidad.
Puede utilizarse en colegios, en laboratorios y también en entornos industriales.
El microscopio estéreo consta de dos tubos separados que se combinan en una unidad para enfocar la muestra de forma simultánea. Cada uno de los tubos contiene un
prisma, un objetivo acromático y un ocular de campo amplio. El resultado es un campo de visión grande y plano. Al observar una muestra, cada uno de los ojos se encuentra
en un ángulo ligeramente diferente, lo que genera un efecto estereoscópico.
En condiciones de uso normal, los requisitos de mantenimiento del aparato son mínimos.
El presente manual de instrucciones contiene información sobre la estructura, el manejo y el mantenimiento del microscopio.
152321.0100
8
1
11
12
14
10
9
8
2
3
4
5
13
6
7
1. Copa de ocular
2. Anillo de ajuste dióptrico
3. Revólver
4. Interruptor de la fuente de luz
5. Pinzas de sujeción de muestras
6. Portaobjetos
7. Base del estativo con fuente de luz
8. Fuente de luz superior
9. Enfoque
10. Carcasa del prisma
11. Ocular de campo amplio
12. Tornillo de jación del ajuste de la altura
13. Interruptor principal (alimentación)
14. Columna del estativo

15
Funcionamiento de los componentes
El microscopio estéreo está formado por un estativo con una base y una columna vertical y un cabezal con enfocador. Para mover el microscopio, agárrelo siempre por el
estativo.
Tubo
Los dos tubos están inclinados a 45° y se pueden girar 360°.
Especicaciones ópticas
El microscopio estéreo está equipado con un par de objetivos de campo amplio 10x y dos pares de objetivos acromáticos 2x y 4x (no reemplazables) en un revólver
giratorio. El aumento total del microscopio se calcula multiplicando el aumento de los oculares por el de los objetivos. Los oculares están jados al tubo con un pequeño
tornillo cada uno.
Base portaobjetos
La base portaobjetos está equipada con una fuente de luz inferior integrada, un portaobjetos transparente y dos pinzas de sujeción de muestras. En el volumen de sumi-
nistro también se incluye un portaobjetos adicional blanco/negro.
Enfoque
Por medio el enfoque se puede ajustar la nitidez de la imagen de la muestra. La distancia de trabajo (distancia ente la parte inferior del objetivo y la parte superior de la
muestra) es de 75 mm.
Revólver
El revólver giratorio contiene dos pares de objetivos acromáticos integrados. Girando el revólver 180° se cambia el aumento. Gire el revólver hasta que se escuche un
chasquido.
Fuente de luz
Este modelo está equipado con una fuente de luz LED superior y otra inferior.
• LED : Fuente de luz superior
• LED : Fuente de luz inferior
Ambas fuentes de luz pueden usarse al mismo tiempo (interruptor de la fuente de luz).
Preparación del microscopio estéreo para el uso
Extraiga el microscopio de la caja y colóquelo en una mesa estable. Enchufe la clavija de alimentación a una toma de corriente, pulse el interruptor principal (alimentación)
y encienda la luz con el interruptor de la fuente de luz. A continuación, coloque las copas en los oculares. Una vez hecho esto, sitúese en una posición cómoda delante del
microscopio y mire por los oculares.
Trabajo con el microscopio estéreo
• Coloque una muestra en el portaobjetos y ajuste la altura correcta hasta la muestra con el ajuste de altura de la columna del estativo.
A continuación, ajuste la nitidez de la imagen con el enfoque.
• Ajuste la separación de los ojos acercando o alejando las carcasas de los prismas hasta que vea una imagen circular con ambos ojos.
• Por norma general, los dos tubos de ocular deberían tener la misma longitud. Si fuera necesario compensar alguna diferencia entre los ojos, proceda
de la siguiente manera: coloque una muestra plana y obsérvela únicamente con el ojo derecho usando el ocular derecho. Ajuste la nitidez de la imagen con el enfoque.
A continuación, observe la muestra con el ojo izquierdo usando el ocular izquierdo y utilice el anillo de ajuste dióptrico del tubo izquierdo para obtener una
imagen nítida.
• De forma adicional, en los modelos con fuente de luz también se incluye un portaobjetos blanco/negro que puede cambiarse fácilmente. La cara negra puede
usarse para observar muestras que se ven mejor sobre un fondo negro.
Atención:
Al utilizar el portaobjetos blanco/negro debe apagarse la fuente de luz inferior.

16
Brütsch/Rüegger Werkzeuge AG, Heinrich Stutz-Strasse 20, Postfach, CH-8902 Urdorf, Tel. +41 44 736 63 63, Fax +41 44 736 63 00, www.neriox.tools, sales@brw.ch
Mantenimiento y limpieza
Cuando termine de usar el microscopio, tápelo siempre con una funda de protección contra el polvo. Los oculares deben dejarse siempre montados en los tubos del micro-
scopio para evitar que pueda entrar polvo al interior del aparato.
Limpieza de la óptica
Si se ensucian las lentes del ocular, puede limpiarlas con una papel para lentes (siempre en movimientos circulares). Si no consigue el resultado deseado, humedezca el
papel para lentes con una gota de xileno o alcohol. ¡No aplique nunca xileno o alcohol directamente sobre las lentes!
Si se ve suciedad claramente en el campo de visión, signica que se encuentra en la lente inferior del ocular. Los oculares se pueden desmontar del tubo utilizando un
destornillador de estrella (tamaño 00). Limpie la cara exterior de la lente. Si se continúa viendo polvo, gire el ocular para vericar si el polvo está realmente ahí. Si es así, gire
con mucho cuidado la lente inferior hacia fuera de la carcasa y límpiela.
Limpieza del estativo
Limpie el polvo con un pincel. Si el estativo está muy sucio, puede utilizar un producto de limpieza no agresivo para limpiar la supercie.
Procedimiento en caso de problemas en la fuente de luz (superior/inferior)
Los LED utilizados poseen una vida útil muy larga. Si surge algún problema relacionado con la fuente de luz, envíe el microscopio a
nuestro servicio de atención al cliente → Servicecenter@brw.ch.
Advertencia:
¡Los paños con bras de plástico pueden dañar el revestimiento de las lentes!
Advertencia:
Los trabajos de reparación y sustitución de los LED y los componentes electrónicos deben ser realizados únicamente por personal especializado.
Si no se cumple esta instrucción, la garantía quedará anulada.
Reparaciones
Si fuera necesario realizar alguna reparación en el microscopio, póngase en contacto con nuestro servicio de atención al cliente: → Servicecenter@brw.ch
Mantenimiento periódico
Si desea encargar el mantenimiento periódico de su microscopio a Brütsch RüeggerWerkzeuge AG, póngase en contacto con nuestro servi-
cio técnico: →Service.Messtechnik@brw.ch
MAN_BRW _vers. July. 19_art. BRW 152 321.0100

17
A sztereomikroszkóp felépítése
A következőkben az ábrán is szereplő egyes komponensek megnevezését találhatja:
BVS SZTEREOMIKROSZKÓP
Használati útmutató
Bevezető
A NERIOX sztereomikroszkóp megvételével Ön egy minőségi terméket tudhat magáénak.
Alkalmas iskolai, laboratóriumi vagy ipari használatra.
A sztereomikroszkóp két külön tubusból áll, amelyek a tárgyra való együttes fókuszálás érdekében egy egységet alkotnak. Minden egyes tubus egy prizmával, egy akroma-
tikus objektívvel, valamint egy nagylátószögű okulárral rendelkezik. Ezáltal nagy, egyenletes látómező érhető el. Mindkét szem kissé eltérő szögben látja a tárgyat, amelynek
hatására egy sztereoszkópikus hatás keletkezik.
Normál használat esetén a karbantartás szükségessége minimálisra korlátozható!
A használati útmutató információkat nyújt a mikroszkóp felépítéséről, kezeléséről és karbantartásáról.
152321.0100
8
1
11
12
14
10
9
8
2
3
4
5
13
6
7
1. Szemkagyló
2. Dioptria állító
3. Objektív revolver
4. Világítás kapcsoló
5. Tárgyleszorító
6. Tárgylemez
7. Állvány láb világítással
8. Tárgyvilágítás
9. Fókuszáló
10. Prizmaház
11. Nagylátószögű okulár
12. Magasságállító szorítócsavar
13. Főkapcsoló (Power)
14. Állványoszlop

18
Az egyes komponensek működése
A sztereomikroszkóp egy állvány lábból, egy függőleges állványoszlopból, valamint egy fókuszáló berendezéssel felszerelt fejből áll. Ha át kell helyezni, úgy mindig az
állványnál fogja meg a mikroszkópot.
Tubus
A két tubus dőlésszöge 45° és szükség esetén 360°-kal elforgathatók.
Optikai jellemzők
A sztereomikroszkóp egy pár 10x nagylátószögű okulárból, valamint két pár (nem cserélhető) 2x és 4x akromatikus objektívvel rendelkezik, amelyek a forgatható objektív
revolverben helyezkednek el. A mikroszkóp össznagyítását az okulárok nagyításának és az objektívek nagyításának szorzata adja. Az okulárokat egy-egy apró csavar
rögzíti a tubusban.
Tárgyasztal
A tárgyasztal integrált átmenő világítással, egy átlátszó tárgylámezzel, valamint két tárgyleszorítóval rendelkezik. A szállítási terjedelem részét képezi továbbá egy fekete-
fehér tárgylemez is.
Fókuszálás
A tárgy képének élessége a fókuszálóval állítható be. A munkatávolság (az objektív alja és az objektív teteje közötti távolság) kb. 75 mm.
Objektív revolver
A forgatható revolver két pár akromatikus objektív található. Az objektív revolver 180°-os forgatásával egy másik nagyítás állítható be. Kattanásig forgassa az objektív
revolvert.
Világítás
Ez a modell LED-es tárgy- és átmenő világítással rendelkezik
• LED: tárgyvilágítás
• LED: átmenő világítás
Mindkét világítás egyidejűleg használható (világítás kapcsoló).
A sztereomikroszkóp előkészítése a használatra
Vegye ki a mikroszkópot a csomagolásból, majd helyezze egy stabil asztalra. Csatlakoztassa a hálózati dugaszt a dugaszolóaljzatra, majd kapcsolja be főkapcsolót (Power)
és kapcsolja be a világítást a világítás kapcsolójával. Ezt követően tolja a szemkagylókat az okulárokra. Helyezkedjen el kényelmesen a mikroszkóp előtt, majd nézzen az
okulárokba.
Munkavégzés a sztereomikroszkóppal
• Helyezzen egy tárgyat a tárgylemezre, majd állítsa be a magasságállítóval az ideális magasságot a tárgyhoz képest. Ezután állítsa be élesre a képet a fókuszálóval.
• A prizmaház mozgatásával állítsa be a pupillatávolságot, amíg mindkét szemével kör alakú képet nem lát.
• Normális esetben mindkét okulártubusnak azonos hosszal kell rendelkeznie. A két szem közötti apró eltérések kiegyenlítése érdekében a következőképpen járjon el:
Helyezzen egy lapos tárgyat a tárgylemezre, majd nézzen a jobb szemével a jobb oldali okulárba. Állítsa be élesre a képet a fókuszálóval.
Ezután nézzen a bal szemével a bal oldali okulárba, majd használja a dioptria beállítást a bal oldali tubuson, amíg a kép éles nem lesz.
• A világítással felszerelt modellek egy fekete-fehér tárgylemezzel is rendelkeznek, amely egyszerűen cserélhető. A fekete oldal olyan tárgyak megtekintéséhez
használható, amelyek jobban megnyilvánulnak sötét hátterek előtt.
Figyelem:
A fekete-fehér tárgylemez használatakor ki kell kapcsolni az átmenő világítást!

19
Brütsch/Rüegger Werkzeuge AG, Heinrich Stutz-Strasse 20, Postfach, CH-8902 Urdorf, Tel. +41 44 736 63 63, Fax +41 44 736 63 00, www.neriox.tools, sales@brw.ch
Karbantartás és tisztítás
A használatot követően mindig takarja le a mikroszkópot a porvédővel. A por bejutásának elkerülése érdekében hagyja az okulárokat felszerelve a mikroszkóp tubuson.
Az optika tisztítása
Ha az okulár lencséi elszennyeződtek, úgy ezek egy darab lencsetisztító papírral letörölhetők (körkörös mozdulatokkal). Amennyiben ez nem nyújt segítséget, úgy nedve-
sítse be a lencsetisztító papírt egy csepp xilollal vagy alkohollal. Soha ne adagolja a xilolt vagy az alkoholt közvetlenül a lencsékre!
Ha a szennyeződés világosan látható a látómezőben, úgy a szennyeződés az okulár legalsó lencséjén található. Az okulárok egy kereszthornyú csavarhúzó (00 méret)
segítségével vehetők ki a tubusból. Tisztítsa meg a lencse külső oldalát. Amennyiben a lencsén még mindig por látható, úgy az okulár elforgatásával győződjön meg róla,
hogy valóban az okulárban található a por. Ha a por valóban az okulárban található, úgy óvatosan csavarja ki az alsó lencsét a házból, majd tisztítsa meg.
Az állvány tisztítása
A por ecsettel távolítható el. Ha az állvány erősen szennyeződött, a felület nem maró hatású tisztítószerrel tisztítható.
Teendőkvilágítással (tárgy- / átmenő világítás) kapcsolatos problémák esetén
A beszerelt LED-ek nagyon hosszú élettartammal rendelkeznek. Amennyiben probléma merülne fel a világítással, úgy küldje be a mikroszkópot a
szervizközpontunkba → Servicecenter@brw.ch.
Figyelmeztetés:
A műanyag szálas anyagból készült törlőkendők megsérthetik a lencsék bevonatát!
Figyelmeztetés:
A LED-ek vagy az elektronikus komponensek javítását, ill. cseréjét kizárólag szakszemélyzet végezheti! Ellenkező esetben a gyártó nem vállal felelősséget a
keletkezett károkért.
Javítások
Amennyiben a mikroszkóp javításra szorulna, úgy kérjük, forduljon a szervizközpontunkhoz →Servicecenter@brw.ch
Időszakos karbantartás
Amennyiben a mikroszkóp időszakos karbantartását a Brütsch RüeggerWerkzeuge AG révén kívánja elvégeztetni, úgy kérjük, forduljon a
szerviztechnikusunkhoz →Service.Messtechnik@brw.ch
MAN_BRW _vers. July. 19_art. BRW 152 321.0100

20
Budowa mikroskopu stereoskopowego
Poniżej podane są nazwy poszczególnych elementów, które są również przedstawione na rysunku:
MIKROSKOP STEREOSKOPOWY BVS
Instrukcja obsługi
Wprowadzenie
Kupując mikroskop stereoskopowy NERIOX zdecydowali się Państwo na produkt wysokiej jakości.
Przeznaczony jest on do użytku w szkołach, laboratoriach i przemyśle.
Mikroskop stereoskopowy tworzą dwa osobne tubusy, które są połączone w jedną całość, aby ostatecznie możliwe było jednoczesne ustawienie ostrości na obserwowa-
ny obiekt. Każdy tubus wyposażony jest odpowiednio w jeden pryzmat, achromatyczny obiektyw oraz szerokopolowy okular. Dzięki temu osiągany jest duże, równe pole
widzenia. Oboje oczu obserwują obiekt pod nieznacznie innym kątem, co daje efekt stereoskopowy.
Podczas zwykłego użytkowania konieczność konserwacji ograniczona jest do minimum!
Niniejsza instrukcja obsługi zawiera informacje dotyczące budowy, obsługi i konserwacji tego mikroskopu.
152321.0100
8
1
11
12
14
10
9
8
2
3
4
5
13
6
7
1. Muszla oczna
2. Regulacja dioptrii
3. Uchwyt rewolwerowy obiektywów
4. Przełącznik oświetlenia
5. Zaczepy obiektu
6. Płytka obiektu
7. Stopa statywu z oświetleniem
8. Oświetlenie górne
9. Ustawianie ostrości
10. Obudowa pryzmatu
11. Okular szerokopolowy
12. Śruba zaciskowa regulacji wysokości
13. Wyłącznik główny (Power)
14. Kolumna statywu
This manual suits for next models
1
Table of contents
Languages:
Other Neriox Microscope manuals
