manuals.online logo
Brands
  1. Home
  2. •
  3. Brands
  4. •
  5. NETGEAR
  6. •
  7. Switch
  8. •
  9. NETGEAR XS712Tv2 User manual

NETGEAR XS712Tv2 User manual

Installation
Smart Managed Pro Switch
XS708T, XS712Tv2, and XS716T
XS716T
XS708T
XS712Tv2
Configure the Switch With a Static IP
Address
If you are using static IP addresses in your network, configure the switch
IP address before connecting the switch to your network. The default IP
address of the switch is 192.168.0.239.
Note: If your network uses a DHCP server, this section does not apply. Go
directly to Connect the Switch to a Network.
1. Configure a computer with a static IP address in the 192.168.0.x
subnet.
2. Plug the switch into a power outlet and connect your computer to the
switch using an Ethernet cable.
3. Open a web browser and enter the IP address of your switch.
The default IP address of the switch is 192.168.0.239.
A login page displays.
4. Enter password for the password.
5. Select System > Management > IP Configuration.
6. Enter the static IP address that you want to assign to the switch.
7. Click the Apply button.
Your settings are saved.
Connect the Switch to a Network
1. Connect each computer or device to an RJ-45 network port on the
switch front panel.
Use Category 5e (Cat 5e) or higher rated Ethernet cable (Cat 6, Cat 6a,
or Cat 7) terminated with an RJ-45 connector to make 10-Gigabit
connections.
Note: We recommend Cat 6a or Cat 7 cables if the cable distance is
greater than 148 feet (45 meters).
Package Contents
• NETGEAR Smart Managed Pro Switch XS708T, XS712Tv2, or XS716T
• Rubber footpads for tabletop installation
• AC power cord (localized to country of sale)
• 19-inch rack-mount kit for rack installation
• Resource CD
2. Connect the switch to your network.
3. Power on the switch.
Configure the Switch
You can configure the switch either by using a computer’s web browser or by
installing the Smart Control Center Utility on your Windows-based computer.
Web Browser Access
1. Connect the switch to your network.
2. For initial configuration, open a web browser on a computer that is on the
same network and subnet as the switch and enter the switch’s IP address.
If you are unsure how to determine the IP address of the switch, you can
use the Smart Control Center Utility.
3. Enter the password.
The default password is password.
4. Click the Login button.
5. Configure the switch for your network.
For information about switch configuration, see the soware administration
guide for your switch.
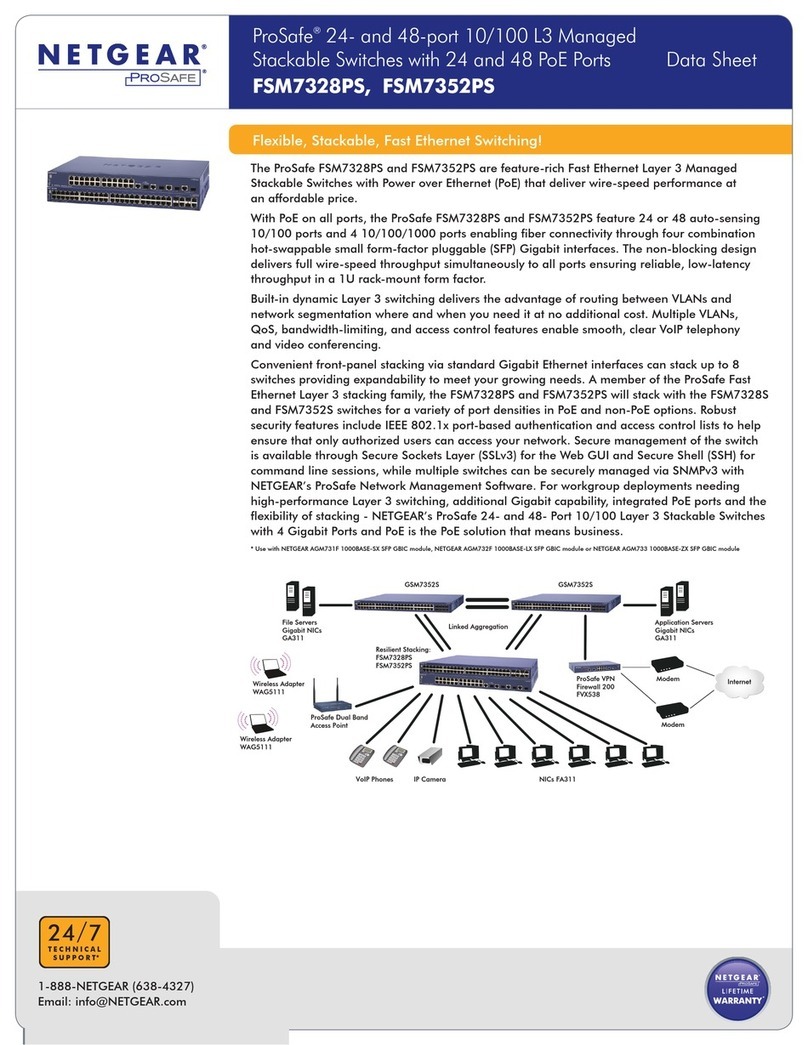
XS716T 10-Gigabit Ethernet
Smart Managed Pro Switch
Server Workstation
ReadyNAS
NETGEAR, Inc. First Floor Building 3 University Technology Centre
Curraheen Road Cork Ireland
Corporate Oce Phone 353 21 2333 200.
NETGEAR, Inc.
350 East Plumeria Drive
San Jose, CA 95134, USA
© NETGEAR, Inc., NETGEAR and the NETGEAR Logo
are trademarks of NETGEAR, Inc. Any non‑NETGEAR
trademarks are used for reference purposes only. June 2017
Smart Control Center Utility Access
The Smart Control Center Utility runs on Windows-based computers. The
utility is on the resource CD that came with the switch. You can also visit
support.netgear.com/product/SCC to download the utility.
Install the Smart Control Center Utility From the CD
Note: The Smart Control Center Utility requires Adobe Air. If Adobe Air
is not detected during Smart Control Center Utility installation, you are
prompted to allow Adobe Air to be installed.
1. Insert the resource CD into a computer that is on the same network and
the same subnet as the switch.
2. Click the Smart Control Center link and follow the prompts to install
the program.
The utility is installed in the program directory of your computer and a
Smart Control Center Utility icon is placed on your desktop.
Note: If the Resource CD Center does not automatically launch, open
Windows Explorer, open the CD, right-click the Autostart file, and then
click Run as Administrator.
3. If prompted, allow Adobe Air to be installed.
Note: For optimal discovery performance, we recommend that you restart
your computer aer installing the Smart Control Center Utility.
Configure the Switch With the Smart Control Center
Utility
1. Connect the computer to the network.
The computer that is running the Smart Control Center Utility must be
on the same network (with the same broadcast domain) as the switch.
2. Double-click the Smart Control Center icon.
The Smart Control Center displays.
3. Click the Discover button.
The Smart Control Center Utility finds Smart Managed Switches on the
network and displays each switch’s MAC address, IP address, and model
number.
If the utility does not discover your switch, verify that the cable
connections are secure and that the computer’s IP address is in the
same subnet as the switch, and click the Discover button.
You might need to temporarily turn o the antivirus program, firewall,
or both on the computer so that the utility can discover the switch.
4. Select the switch that you want to configure.
5. Click the Web Browser Access button.
6. When prompted, enter the password.
The default password is password.
7. Click the Login button.
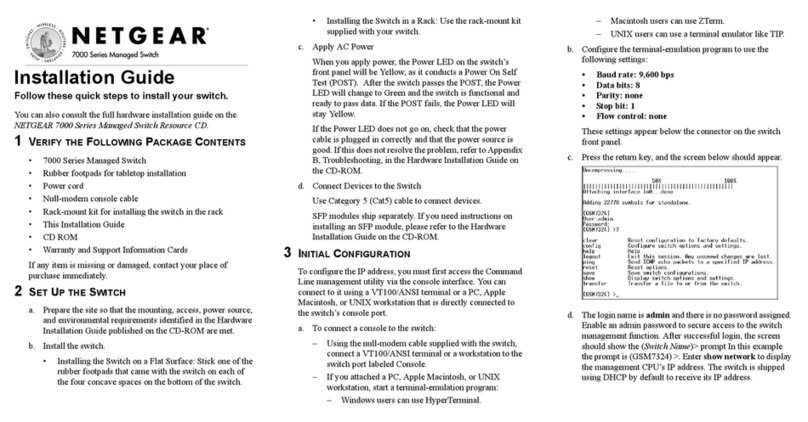
The System Information page displays.
8. Configure the switch for your network.
For information about switch configuration, see the soware
administration guide for your switch.
9. When you are finished with the configuration, return the computer’s
antivirus program and firewall to their usual settings.
Troubleshooting Tips
Here are some tips for correcting simple problems that might occur:
• Be sure to power on your computer and switch in the following sequence:
1. Turn on the switch and wait two minutes.
2. Turn on the computer and connect it to the switch.
• Make sure that the Ethernet cables are plugged in. For each powered-on
computer or device connected to the switch, the corresponding switch
Ethernet port status LED is lit.
• Make sure that the network settings for the computer or device are
correct. You might need to temporarily turn o the antivirus program,
firewall, or both on the computer so that the utility can discover the switch.
• To use the Smart Control Center Utility, you must configure your
computer’s security soware to allow broadcast UDP packets to go through
to the destination IP address of 255.255.255.255. The Smart Control
Center Utility uses UDP source and destination ports 63323 and 63324.
Support
Thank you for selecting NETGEAR products. You can visit
www.netgear.com/support to register your product, get help, access the latest
downloads and user manuals, and join our community. We recommend that you
use only ocial NETGEAR support resources.
For the current EU Declaration of Conformity, visit
http://support.netgear.com/app/answers/detail/a_id/11621/.
For regulatory compliance information, visit
http://www.netgear.com/about/regulatory/.
See the regulatory compliance document before connecting the power supply.

This manual suits for next models

2

Other NETGEAR Switch manuals

NETGEAR GS110TP - ProSafe Gigabit Smart Switch Instruction Manual

NETGEAR

NETGEAR GS110TP - ProSafe Gigabit Smart Switch Instruction Manual

NETGEAR FS205 User manual

NETGEAR

NETGEAR FS205 User manual

NETGEAR GS516T - ProSafe Switch User manual

NETGEAR

NETGEAR GS516T - ProSafe Switch User manual

NETGEAR GS504T - Switch User manual

NETGEAR

NETGEAR GS504T - Switch User manual

NETGEAR GS110EMX User manual

NETGEAR

NETGEAR GS110EMX User manual

NETGEAR GSM7212 - ProSafe Switch Instruction Manual

NETGEAR

NETGEAR GSM7212 - ProSafe Switch Instruction Manual

NETGEAR GS724TPv2 User manual

NETGEAR

NETGEAR GS724TPv2 User manual

NETGEAR FSM726v2 - 10/100 Mbps Managed Switch User guide

NETGEAR

NETGEAR FSM726v2 - 10/100 Mbps Managed Switch User guide

NETGEAR FSM726E-100NAS Instruction Manual

NETGEAR

NETGEAR FSM726E-100NAS Instruction Manual

NETGEAR MS108TUP Manual

NETGEAR

NETGEAR MS108TUP Manual

NETGEAR ProSafe FS750T2 User manual

NETGEAR

NETGEAR ProSafe FS750T2 User manual

NETGEAR MS510TXM Manual

NETGEAR

NETGEAR MS510TXM Manual

NETGEAR FS108P - ProSafe Switch Supplement

NETGEAR

NETGEAR FS108P - ProSafe Switch Supplement

NETGEAR FS608 User manual

NETGEAR

NETGEAR FS608 User manual

NETGEAR M4300-96X Manual

NETGEAR

NETGEAR M4300-96X Manual

NETGEAR DS508 - Hub - Stackable User manual

NETGEAR

NETGEAR DS508 - Hub - Stackable User manual

NETGEAR M4100 Series ProSAFE User guide

NETGEAR

NETGEAR M4100 Series ProSAFE User guide

NETGEAR GS605 - Gigabit Desktop Switch User manual

NETGEAR

NETGEAR GS605 - Gigabit Desktop Switch User manual

NETGEAR FS509T User manual

NETGEAR

NETGEAR FS509T User manual

NETGEAR M4100 Series ProSAFE User manual

NETGEAR

NETGEAR M4100 Series ProSAFE User manual

NETGEAR GS716T - ProSafe Switch User manual

NETGEAR

NETGEAR GS716T - ProSafe Switch User manual

NETGEAR GS316 User manual

NETGEAR

NETGEAR GS316 User manual

NETGEAR GSM7248R - ProSafe Switch Owner's manual

NETGEAR

NETGEAR GSM7248R - ProSafe Switch Owner's manual

NETGEAR GS108T - ProSafe - Gigabit Smart Switch Instruction Manual

NETGEAR

NETGEAR GS108T - ProSafe - Gigabit Smart Switch Instruction Manual

Popular Switch manuals by other brands

SMC Networks SMC8612XL3 F 1.0.1.3 Technical specifications

SMC Networks

SMC Networks SMC8612XL3 F 1.0.1.3 Technical specifications

Siku TS20 manual

Siku

Siku TS20 manual

SOR 102 General instructions

SOR

SOR 102 General instructions

Siemens SIMATIC NET SCALANCE X-100 operating instructions

Siemens

Siemens SIMATIC NET SCALANCE X-100 operating instructions

Siemens 3KD Series operating instructions

Siemens

Siemens 3KD Series operating instructions

Vertiv Avocent SwitchView 300 Series Installer/user guide

Vertiv

Vertiv Avocent SwitchView 300 Series Installer/user guide

GEM 3140 operating instructions

GEM

GEM 3140 operating instructions

ANTAIRA Lanolinx LNX-1002GN user manual

ANTAIRA

ANTAIRA Lanolinx LNX-1002GN user manual

D-Link DKVM-4U Quick installation guide

D-Link

D-Link DKVM-4U Quick installation guide

ION Optix C-Pace Manual for installation

ION Optix

ION Optix C-Pace Manual for installation

AMX AV2SM instruction manual

AMX

AMX AV2SM instruction manual

Wieland wienet UMS 8-C Installation instruction

Wieland

Wieland wienet UMS 8-C Installation instruction

Avenview C-COMP-VGA Specifications

Avenview

Avenview C-COMP-VGA Specifications

H3C H3C S7500E Series Configuration Examples

H3C

H3C H3C S7500E Series Configuration Examples

Citel TVA-A Integration guide

Citel

Citel TVA-A Integration guide

SMC Networks TigerSwitch SMC6709FL2 Technical specifications

SMC Networks

SMC Networks TigerSwitch SMC6709FL2 Technical specifications

steute Ex ES 97 -60 C Series Mounting and wiring instructions

steute

steute Ex ES 97 -60 C Series Mounting and wiring instructions

Texas Instruments TPS20 EVM-293 Series user guide

Texas Instruments

Texas Instruments TPS20 EVM-293 Series user guide

manuals.online logo
manuals.online logoBrands
  • About & Mission
  • Contact us
  • Privacy Policy
  • Terms and Conditions

Copyright 2025 Manuals.Online. All Rights Reserved.