NetScreen Technologies 200 Series User manual

*HWWLQJ 6WDUWHG *XLGH
&211(&7,1*7+('(9,&(
8VLQJWKHLQVWUXFWLRQVEHORZFRQQHFWWKH1HW6FUHHQ6HULHVDQGSUHSDUHWR
FRQILJXUHWKHGHYLFHWRSURWHFW\RXUQHWZRUN8VHWKH ('VRQWKHIURQWSDQHORIWKH
GHYLFHWRKHOS\RXGHWHUPLQHWKHGHYLFHVWDWXV
6WHS
Connect an Ethernet cable from the ethernet3 port of the
NetScreen-200 Series to the external router, cable modem, or
DSL modem.
6WHS
•If the workstation is in a LAN (see diagram), connect a cable
from the ethernet1 port to the internal switch or hub.
•If the workstation is a single workstation, connect an Ethernet
cable from the ethernet1 port directly to the Ethernet port on
the workstation.
6WHS
Connect the power cable between the NetScreen-200 Series device
and a power source. NetScreen recommends using a surge
protector.
a. Ensure that the Power LED glows green. This indicates the device
is receiving power.
b. After the device starts (should take about 30 seconds), ensure
that the Status LED blinks green. This indicates the device is
operating normally.
c. Ensure that the Link LEDs glow green for the connected
interfaces. This indicates the device has network connectivity.
6WHS
Configure the workstation to access the NetScreen-200 Series via a
Web browser:
a. Ensure that your workstation is properly connected to your LAN
(use the diagram above).
b. Record the IP address and netmask of your workstation. You
need to re-enter them later in this process.
c. Change the IP address and netmask of your workstation to
192.168.1.2 and 255.255.255.0, respectively. For help, see
the operating system documentation for your workstation.
d. If needed, restart the workstation to enable the changes to take
effect. The workstation is now part of the same subnetwork as
the NetScreen-50 default IP address, which is 192.168.1.1.
*HWWLQJ6WDUWHG
8VHWKHLQVWUXFWLRQVLQWKLV*HWWLQJ6WDUWHGJXLGHWRKHOS\RXFRQQHFWDQGFRQILJXUH\RXU
1HW6FUHHQ6HULHVGHYLFH)RUPRUHFRQILJXUDWLRQH[DPSOHVDQGGHWDLOVVHHWKH1HW6FUHHQ
6HULHV8VHU·V*XLGHDQGWKH1HW6FUHHQ&RQFHSWV([DPSOHV6FUHHQ265HIHUHQFH*XLGH
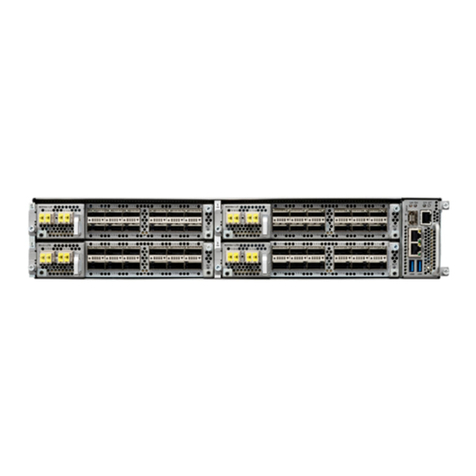
NetScreen-200 Series
4
31
2
Internet NetScreen-204
NetScreen-208
The numbers on the diagram are paired with the
steps below

*HWWLQJ 6WDUWHG *XLGH
&21),*85,1*7+('(9,&(
8VHWKH,QLWLDO&RQILJXUDWLRQ:L]DUGWRFRQILJXUHWKH1HW6FUHHQ6HULHVGHYLFH
%HIRUHVWDUWLQJWKH:L]DUGGHFLGHKRZ\RXZDQWWRGHSOR\\RXUGHYLFH)RU
DGGLWLRQDOLQIRUPDWLRQVHHWKH1HW6FUHHQ6HULHV8VHU·V*XLGH
Trust Zone Interface IP Address. The default IP address and netmask
for the Trust zone interface is 192.168.1.1/24. You can change this
address to match IP addresses that exist on your network.
Assigning IP Addresses to Hosts in the Trust Zone (Enabling DHCP
server). You can choose to have the NetScreen device assign IP
addresses, via DHCP, to hosts in your network. If you have the
NetScreen-200 Series device assign IP addresses, then you can
define the range of addresses to be assigned. You need to ensure
that the range of addresses is in the same subnetwork as the Trust
zone interface IP address.
6WHS
Launch a Web browser. In the URL address field, enter
http://192.168.1.1 or http://ns.setup. The Rapid Deployment
Wizard appears.
6WHS
If your network uses NetScreen-Security Manager 2004, you can
use a Rapid Deployment (RD) configlet to automatically configure the
NetScreen-200 Series. Obtain a configlet from your Security
Manager administrator, select the Yes option, click in the Load
Configlet from: field, browse to the file location, then click Next.
If you want to bypass the configuration wizard and go directly to the
WebUI, select the last option, then click Next.
If you are not using a configlet to configure the NetScreen-200
Series device and you want to use the configuration wizard, select
the first option, then click Next. The Initial Configuration Wizard
welcome screen appears.
Click Next.
6WHS
Enter a new administrator login name and password, then
click Next.
6WHS
Select the zones to which each interface is bound. Click Next.

*HWWLQJ 6WDUWHG *XLGH
6WHS
To change the IP address of the Trust zone interface, enter a new IP
address and netmask. If you change the IP address and netmask of
the Trust zone interface, then your workstation and the Trust zone
interface of the NetScreen-200 Series device might be in different
subnetworks. To manage the NetScreen-200 Series device with the
WebUI, ensure that your workstation and the NetScreen-200 Series
device are in the same subnetwork. Click Next.
Note: To change the IP address of the Untrust or DMZ zone
interfaces, enter a new IP address and netmask. If you are using
DHCP or PPPoE to assign an IP address for these interfaces, then
leave the fields blank. You need to configure the addresses after you
have completed the Initial Configuration Wizard. Please refer to
Step 9 to assign IP addresses.
6WHS
You can choose to have the NetScreen-200 Series device assign IP
addresses to hosts in your network.
•Select Yes if the NetScreen-200 Series device is to act as a
DHCP server and assign dynamic IP addresses to hosts in the
Trust zone interface. Enter a range for the assigned IP
addresses or enter the address(es) of the DNS server(s). If you
specify an IP address range in a different subnetwork than the
Trust subnetwork, then your workstation and the Trust zone
interface of the NetScreen-200 Series device might then be in
different subnetworks. To manage the NetScreen-200 Series
device using the WebUI, ensure that your workstation and the
NetScreen-200 Series device are in the same subnetwork.
•Select No if you do not want the NetScreen-200 Series device
to assign IP addresses to hosts in the Trust zone interface.
Click Next.
6WHS
A confirmation screen like the above appears:
•Click Previous to re-enter configuration information.
•Click Next to enter the configuration.
6WHS
At the final review configuration window, click Finish.
Note: If you left blanks in Step 5, then you need to configure the
Untrust interface. Proceed to Step 9 to configure the Untrust
interface.
6WHS
To configure the NetScreen-200 Series device to receive an IP
address via DHCP or PPPoE:
a. Launch a Web browser and, in the URL address field, enter
http://192.168.1.1 or the new IP address you entered in
Step 5. The login dialog box appears.
b. Both the admin name and password are case-sensitive. In the
dialog box, enter the Admin name and password you specified
in Step 3.
c. Click Login.

*HWWLQJ 6WDUWHG *XLGH
%$6,&6(&85,7<$1'32/,&<$'0,1,675$7,21
<RXPXVWUHJLVWHU\RXUSURGXFWDWZZZQHWVFUHHQFRPFVRWRDFWLYDWHFHUWDLQ
6FUHHQ26VHUYLFHVOLNHWKH'HHS,QVSHFWLRQ6LJQDWXUH6HUYLFH$IWHUUHJLVWHULQJXVH
WKH:HE8,RU& ,WRREWDLQWKHVXEVFULSWLRQIRUWKHVHUYLFH
6WHS
Using Policy Wizards. By default, the NetScreen-200 Series device
permits workstations in your network to start sessions with outside
workstations, while outside workstations cannot start sessions with
your workstations. You can set up access policies that tell the device
what kinds of sessions to restrict or permit.
To set up an access policy to either restrict the kinds of traffic that
can be initiated from inside your network to go out to the Internet,
or to permit certain kinds of traffic that can be initiated from outside
workstations to your network, use the WebUI Policy Wizard. In the
WebUI menu column, click Wizards >Policy. Follow the directions
in the Wizard to configure a policy.
For details on setting up policies, see the NetScreen Concepts &
Examples ScreenOS Reference Guide.
6WHS
Using Protection Options. The firewall attack protection (SCREEN)
menu enables you to tailor detection and threshold levels for a
range of potential attacks.
a. In the WebUI menu column, click Screening > Screen
b. Select the zone for which you want to configure firewall attack
protection.
c. Select the appropriate protection options then click Apply.
Remember these features must be configured on each zone
where they are required.
6WHS
Verifying Access. To verify that workstations in your network can
access resources on the Internet, start a Web browser from any
workstation in the network and enter the URL: www.netscreen.com.
6WHS
To configure the ethernet3 interface:
a. Select Network > Interfaces > Edit for the ethernet3 interface.
b. If your ISP is using PPPoE, select Create new PPPoE
settings. Enter a name for the PPPoE instance, then enter the
admin name and password provided by your ISP. Click OK.
Select Obtain IP using PPPoE, then select the PPPoE instance
you configured. Click OK.
or
c. If your ISP is using DHCP, select Obtain IP using DHCP,
scroll down, then click OK.
Your NetScreen configuration is complete.
Copyright © 2004 NetScreen Technologies Inc.
All rights reserved. NetScreen, NetScreen Technologies, GigaScreen, NetScreen-Security Manager, NetScreen-Remote, NetScreen ScreenOS and the NetScreen logo are trademarks
and registered trademarks of NetScreen Technologies, Inc. in the United States and other countries. All other trademarks and registered trademarks are the property of their respective
companies.
315HY%
This manual suits for next models
2
Other NetScreen Technologies Network Hardware manuals

