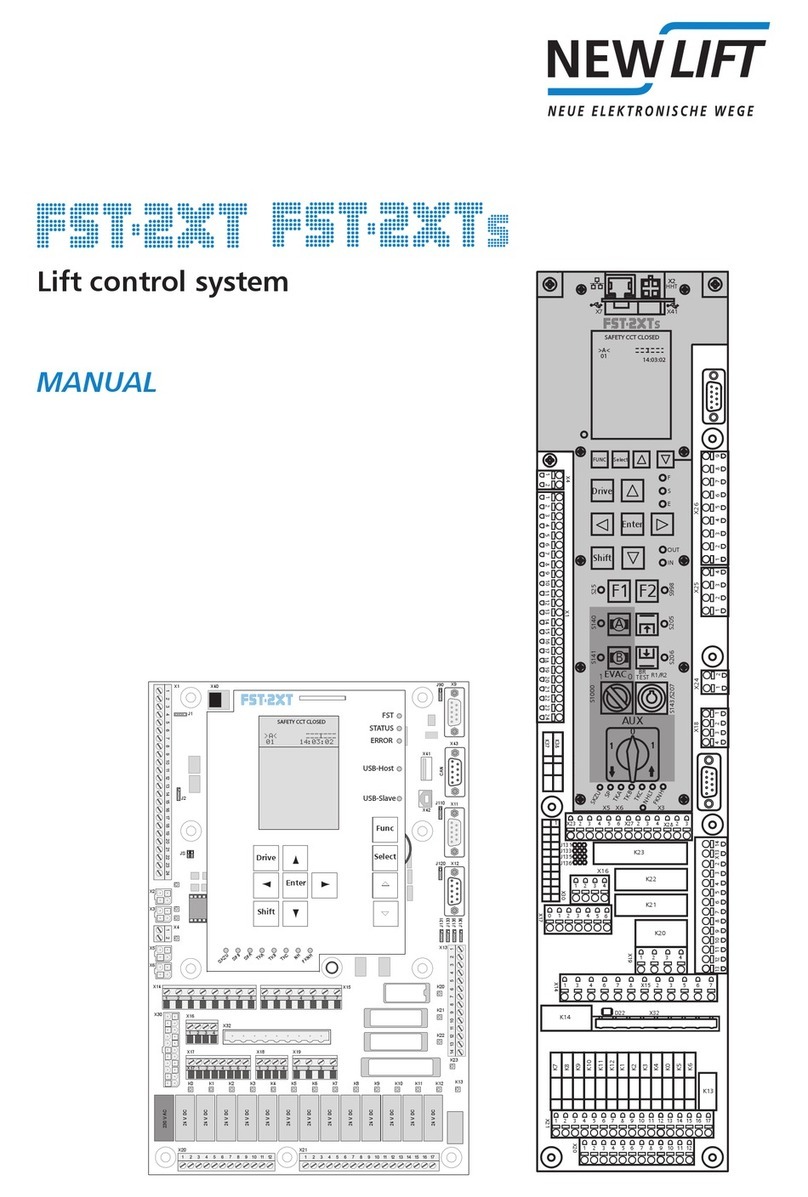
New lift FST-2XT MRL Manual

MANUAL
Update-Backup-Analysis
Updating firmware
Saving, loading configuration
Saving, evaluating Recording
Updating LON Modules
FST-2XT and FST-2XTs Recovery
Updating LON Modules
Troubleshooting
Short instructions

Update-Backup-Analysis FST-2XT FST-2XTs
Manufacturer NEW LIFT Neue elektronische Wege
Steuerungsbau GmbH
Lochhamer Schlag 8
82166 Gräfelng
Tel +49 89 – 898 66 – 0
Fax +49 89 – 898 66 – 300
Mail [email protected]
www.newlift.de
Service line Tel +49 89 – 898 66 – 110
Mail [email protected]
Date of issue 20.01.2012 TF
Last Change 04.12.2020 AME
Release 04.12.2020 AL
Software version min. FST-2XT V2.000-xxx
Doc. No. hb_Update-Backup-Analysis FST-2XT FST-2XTs_2020-09_en
Copyright © NEW LIFT Steuerungsbau GmbH, 2020.
This manual is protected by copyright. All rights, including those of copying,
of reproduction, of translation and of modication, in whole or in part, are
reserved by the publisher.
No part of this description may be reproduced in any form or copied with an
electronic replication system without written permission.
Although great care has been taken in the production of texts and gures, we
cannot be held legally liable for possible mistakes and their consequences.

Update-Backup-Analysis FST-2XT FST-2XTs 3
Contents
1 General 5
1.1 Abbreviations, characters and symbols used 5
1.2 Notation 5
1.3 Further information 6
1.4 How to contact us 6
2 Hardware requirements 7
2.1 Serial interface cable (null modem cable) for FST 7
3.1 SavingrmwareupdateontheUSBstick 8
3.2 CopyingtheFSTrmwareupdatetotheFST-2XT 9
3.3 CopyingtheGSTrmwareupdatetotheGST-XT 10
4 Conguration 11
4.1 Saving/loadingthecongurationinternallyontheFST 11
4.2 SavingthecongurationontheUSBstick,loadingfromtheUSBstick 11
5 Recording 12
5.1 FST Recording 12
5.1.1 SavingFSTrecordingsontheUSBstick 12
5.2 GST-XTRecording 12
5.2.1 EnableGST-XTRecording 13
5.2.2 CheckingGST-XTRecordingStatus 13
5.2.3 SavingGST-XTrecordingsontheUSBstick 14
5.2.4 Relevant menu items 14
5.2.5 Others 14
5.3 Evaluating recordings via EleVision Light 15
5.3.1 Downloading EleVision Light software 15
5.3.2 Visualising recordings with EleVision Light 16
6 LONmodules 19
6.1 UpdatingwithUSBstick 19
6.2 DownloadingLonModuleCentersoftware 19
6.3 UpdatingwithLonModuleCentersoftware 20
7 FST-2XTandFST-2XTsRecovery 22
7.1 FST-2XT-RecoverySoftware 22
7.2 RunFST-Recovery 24
7.3 FAQs 26
7.4 Program sequence. Overview 26
7.5 Program structure 27

4Update-Backup-Analysis FST-2XT FST-2XTs
8 Errorlist 28
8.1 SaveerrorlistontheUSBstick 28
8.2 Visualisingtheerrorlist 28
9.1 Controlsystemfailure 28
9.2 TheFSTapplicationdoesnotstart 29
9.3 Errormessages 30

General
Update-Backup-Analysis FST-2XT FST-2XTs 5
1 General
This manual is a supplement to the FST-2XT manual and the FST-2XT Installation and Commissioning
Manual. It is limited exclusively to the description of the aspects relevant to the function.
The safety guidelines of the FST-2XT manual and the FST Installation and Commissioning manual always
apply.
1.1 Abbreviations, characters and symbols used
Symbol /
abbreviation Meaning
► Operational instructions
Perform the tasks that follow this symbol in the specied order.
Warning notice
This symbol is located in front of safety-relevant information
Information notice
This symbol is located in front of relevant information.
1.2 Notation
Notation Meaning
Bold ›Designations of menus, options, buttons, check boxes, input and display
elds, display areas, navigation areas, software functions
›Keyboard commands
Italics ›Designations of folders, screen windows, screen areas, work areas, tabs,
software dialogs
›Operating level, parameters, paths, operating modes, and input and dis-
play values
›System messages
›Cross references
<italics in pointed
brackets>
›Place holders for le names.
LCD font ›System messages of the controller

General
6Update-Backup-Analysis FST-2XT FST-2XTs
1.3 Further information
The following documents, among others, are available for the FST control system and its components:
›ADM Manual
›EAZ 256 Manual
›EAZ TFT.45.110.210 Manual
›EN81-20 Manual
›FPM Manual
›FST-2XT/s Manual
›FST-2XT MRL Manual
›FST Installation & Commissioning Manual
›GST-XT Manual
›LCS Manual
›RIO Manual
›SAM Manual
›UCM-A3 Manual
These and other up to date manuals can be found in the download area of our website at
https://www.newlift.de/downloads-311.html
1.4 How to contact us
If, after referring to this manual, you still require assistance, our service line is there for you:
Phone +49 89 – 898 66 – 110
E-mail [email protected]
Mon. - Thurs.: 8:00 a.m. – 12:00 p.m. and 1:00 p.m. – 5:00 p.m.
Fr: 8:00 a.m. – 3:00 p.m.

Hardware requirements
Update-Backup-Analysis FST-2XT FST-2XTs 7
2 Hardware requirements
›PC with MS Windows operating system
›Internet access
›Free USB port
›USB stick, max. 32 GB (with FAT32 le system)
2.1 Serial interface cable (null modem cable) for FST
The cable is required for the following programs:
›FST Editor
›Elevision Light
›Lon Modul Center
Technical data
1 2 3 4 5
6 7 8 9
1 2 3 4 5
6 7 8 9
Connections A and B - SUB-D socket to SUB-D socket
Pinning
Pin Conductor color
connection A
Conductor color
connectionB
AssignmentA-B
1 black orange 1-4
2 brown red 2-3
3 red brown 3-2
4 orange black 4-1
5 yellow yellow 5-5
6 - - not assigned
7 green blue 7-8
8 blue green 8-9
9 violet violet 9-9
socket black black S-S

Hardware requirements
8Update-Backup-Analysis FST-2XT FST-2XTs
3 Firmware
3.1 SavingrmwareupdateontheUSBstick
►Connect the USB stick to the PC.
Wait until the operating system has detected the USB stick as a removable disk.
►Create a new folder on the removable disk with the folder name update.
Payattentiontospellingandcapitalisation.Useonlylower-caseletters.
You must request the rmware update le from our service line in advance.
There are two ways to obtain the rmware update:
1. via E-mail
2. via Link NEW LIFT Cloud
►Save the rmware update le that you received in the newly created update folder on the USB stick.
At https://www.newlift.de/downloads-311.html you will nd the following relevant les for download:
›Information on version differences
FST-2XTchanges-customer-EN.pdf
›This document
hb_Update-Backup-Analysis_fst2XT_XTs_2020_09_en.pdf
DoNOTextractthelewiththe.tar extension into the update folder!
►Wait until the le has been completely stored in the update folder on the USB stick.
►Remove the USB stick from the PC.

Hardware requirements
Update-Backup-Analysis FST-2XT FST-2XTs 9
3.2 CopyingtheFSTrmwareupdatetotheFST-2XT
►Save existing conguration:
»Save the conguration le internally
„4.1 Saving / loading the conguration internally on the FST“ on page 11.
If necessary, also:
»Save the conguration le on the USB stick.
„4.2 Saving the conguration on the USB stick, loading from the USB stick“ on page 11
►Use the controller fuse to switch the control system OFF and ON.
►Set the Auxiliary Mode switch of the FST-2XT to ON.
►Plug the USB stick with the rmware update into port X41 of the FST-2XT.
The message USBStick OK appears briey on the screen.
►In the menu of the FST controller, call up MAIN MENU/System/Update FST.
This menu item is only displayed if the USB stick is plugged in.
►Select option Upd. f. USBStick.
►Select YES to start the update.
After a few seconds, the FST-2XT update screen appears.
The update may take up to 4 minutes.
Following a successful update, the message UPDATE COMPLETE appears briey on the screen.
If the update could not be completed successfully:
e.g., if the FST controller restarts immediately after briey displaying the update screen:
►Use the controller fuse to switch the control system OFF and ON.
►Repeat update procedure.
The FST-2XT restarts following a successful update.
►Check the software version by pressing the SHIFT + ENTER buttons.
The following information appears:
--- FST information ---
HW Vers. :XXX-XXX
SW Vers. :V2.000 - XXXX
:tt/mm/jjjj
Boot Ver. :X.X.X.XX
DRV Vers. :XXXX
If the displayed SW version or the DRV version does not match the current software version:
repeat the update process.
►Press the ENTER button to exit the menu item again.

Hardware requirements
10 Update-Backup-Analysis FST-2XT FST-2XTs
3.3 CopyingtheGSTrmwareupdatetotheGST-XT
►Plug the USB stick with the GST rmware update into port X12 of the GST-XT.
The message GST USBStick OK appears briey on the screen of the FST.
►Save existing conguration:
»In the menu of the FST controller, call up MAIN MENU/GST-Menu/Configuration/
GST-Config -> USB.
»Select YES.
The conguration data is stored on the USB stick in automatically created subdirectories. The
message: GST Config XFER OK! appears briey on the screen.
►Copying the GST rmware update to the GST-XT:
»In the menu of the FST controller, call up MAIN MENU/GST-Menu/Configuration/Update
GST f. USB.
»Select YES to start the update.
The message GST WAITING TO RESET
appears briefly on the screen.The entire update process of the GST rmware takes
approximately 50 seconds (25 seconds for the update and 25 seconds for the automatic restart of
the GST-XT).
During the update process, the LEDs of the GST-XT illuminate continuously in sequence.
Following a successful update, the message GST USBStick OK appears briey on the screen.
►Check the software version by pressing the SHIFT + ENTER buttons:
»Scroll the screen until the following information appears.
---GST Information ---
GST SW Vers. :V2.0X0 - XXXX
:tt/mm/jjjj
If the displayed SW version does not match the current software version:
repeat the update process.
►Press the ENTER button to exit the menu item again.

Conguration
Update-Backup-Analysis FST-2XT FST-2XTs 11
4 Conguration
4.1 Saving/loadingthecongurationinternallyontheFST
Saving
►In the menu of the FST controller, call up MAIN MENU/System/Config-->Backup.
►Select YES to save the backup in the system.
Loading
►In the menu of the FST controller, call up MAIN MENU/System/Config<--Backup.
►Select YES to load the backup from the system.
4.2 SavingthecongurationontheUSBstick,loadingfromtheUSBstick
►Set the Auxiliary Mode switch of the FST-2XT to ON.
►Plug the USB stick into port X41 of the FST-2XT.
The message USBStick OK appears briey on the screen.
Saving
►In the menu of the FST controller, call up MAIN MENU/System/Copy to.
This menu item is only displayed if the USB stick is plugged in.
►Select the option Config -> USBStick.
►Select YES.
The conguration data is stored on the USB stick in automatically created subdirectories. The
message Config TRANSFER OK! appears briefly on the screen.
For unique identication, beginning with version V2.000-0102, the le is given a unique le name that
is made up of the NEW LIFT factory number, installation ID and the lift factory number (provided this
information has been recorded in the system).
Loading
►In the menu of the FST controller, call up MAIN MENU/System/Kopieren von.
This menu item is only displayed if the USB stick is plugged in.
►Select the option USBStick -> Config.
►Select YES.
Attention!Anexistingcongurationisoverwritten.
The FST loads the conguration data from the USB stick.
The control system automatically performs a restart.
Following a successful update, the message UPDATE COMPLETE appears briey on the screen.
►Unplug the USB stick from port X41 of the FST-2XT.
The message USBStick REMOVED appears briey on the screen.

Recording
12 Update-Backup-Analysis FST-2XT FST-2XTs
5 Recording
The system performs an automatic on-board long-term recording. System activities as well as various
statistics are stored daily on the SD card over a period of up to 31 days.
5.1 FST Recording
5.1.1 SavingFSTrecordingsontheUSBstick
►Plug the USB stick into port X41 of the FST-2XT.
The message USBStick OK appears briey on the screen.
►In the menu of the FST controller, call up MAIN MENU/System/COPY TO.
This menu item is only displayed if the USB stick is plugged in.
►Select the option Record -> USBStick.
The system records data daily. If no recordings are present for the day of the query, the message Rec.
not available - Exit Menu OK? appears.
►Selec NO to remain in the menu.
►Set the date setting to the relevant date.
►Select YES to save the recording for the selected date to the USB stick.
►Unplug the USB stick from port X41 of the FST-2XT.
The message USBStick REMOVED appears briey on the screen.
5.2 GST-XTRecording
The integrated standard SD card interface allows recording for trafc analysis. The system performs an
automatic on-board long-term recording. System activities as well as various statistics are stored daily
on the SD card over a period of up to 31 days, provided that the SD card is inserted into the card slot
X13 on the GST-XT.
SD card not included in the delivery. A 2-gigabyte standard SD card can be used.

Recording
Update-Backup-Analysis FST-2XT FST-2XTs 13
5.2.1 EnableGST-XTRecording
►Insert the SD card into slot X13 on the GST-XT.
GST-XT
X14 X13 X12
X7
X8
X9
X10X11
Connection
Slot for Recording and Update
►To enable automatic recording:
Switch the power supply of the GST-XT OFF and ON again.
5.2.2 CheckingGST-XTRecordingStatus
This menu item can be used to check whether the recording of the GST-XT is currently being
performed.
►In the menu of the FST controller, call up MAIN MENU/GST-MENUE/Status Window.
The status of the recording can be read out in the rst line of the display.
REC-ON =
GST-XT Recording is running
REC-OFF =
Recording stopped

Recording
14 Update-Backup-Analysis FST-2XT FST-2XTs
5.2.3 SavingGST-XTrecordingsontheUSBstick
►Plug the USB stick into port X12 of the GST-XT.
The message GST USBStick OK appears briey on the screen.
►In the menu of the FST controller, call up MAIN MENU/GST-MENUE/Configuration/
GST-Recorder.
This menu item is only displayed if the USB stick is plugged in.
►Select option Record -> USBStick.
The message Transfer Recording OK appiears briey on the screen.
The current day is copied to the USB stick. A selection of the remaining days must be available through the
SD card on a PC.
►Select YES to save the recording to the USB stick.
►Unplug the USB stick from port X12 of the GST-XT.
The message USBStick REMOVED appears briey on the screen.
5.2.4 Relevant menu items
Menu item Description Setting range
GST-Re-
corder-
Recorder
RESTART
Start GST recording. Certain internal events are recorded
with date and time. This recording is stored on a standard
SD-Card (option). The recording will not start if a SD-Card is
not inserted.
YES
NO
GST-Re-
corder-
Recorder STOP
Stop the GST recording. YES
NO
GST-Re-
corder-
Recorder
CONTINUE
Continue the stopped GST recording. YES
NO
GST-Re-
corder-
Copy Record to
USB
This menu item copies the GST-XT’s recording from a specied
day onto the USB stick in the \recording folder.
YES
NO
GST-Config ->
USB-Stick
This menu item stores a copy of the current GST-XT congura-
tion onto the USB stick in the \cong folder.
YES
NO
5.2.5 Others
The following information is displayed in the second line of the display: AD = 0% / 0
AD = 0% / 0 AD = 0% / 0
current detected trafc level
as percent
current detected trafc level
0 = Low
1 = Mid
2 = Heavy

Recording
Update-Backup-Analysis FST-2XT FST-2XTs 15
5.3 Evaluating recordings via EleVision Light
5.3.1 Downloading EleVision Light software
►Open the website https://www.newlift.de/downloads-311.html
►Select sub-item PC software
►Depending on Windows requirements, download software for
»Windows XP - LMS EleVision Light or
»Windows 7 - LMS EleVision Light Win 7.
►Extract the software and execute the installation le ElevisionLightVx_xx.exe.
The program automatically adds a start icon to the screen.

Recording
16 Update-Backup-Analysis FST-2XT FST-2XTs
5.3.2 Visualising recordings with EleVision Light
►Start the software.
►The program automatically loads a demo project the rst time it is started.
On every subsequent program start, the program loads the last created project.
Demo project

Recording
Update-Backup-Analysis FST-2XT FST-2XTs 17
►In the menu bar, select option Project / New Project.
The New Project window opens.
►Assign a new project name.
►Select project type Recording.
►Press the FST-Congle/Recordingbutton.
►Navigate to the stored recording le and double click to open it.
►Conrm the next two dialogs with OK.
While the recording le is loading, the recording converter automatically creates the les in the *.bin
and *.txt formats.
►If necessary, change the folder structure at this point and exit the window with OK.

Recording
18 Update-Backup-Analysis FST-2XT FST-2XTs
►Conrm the query Do you want to play back the recording now? with Yes.
The program automatically starts the recording playback mode.
At the same time, the Detail Grid Recording window opens.
►Start playback of the recording with Play.
The program simulates the recorded events. At the same time, you can follow the individual event
steps in the Detail Grid Recording window, select individual events and call up information.
►To exit Elevision-Light, click on Quit in the menu bar.
The program automatically closes all windows. The project as well as all corresponding text and
binary les are retained.

LON modules
Update-Backup-Analysis FST-2XT FST-2XTs 19
6 LON modules
6.1 UpdatingwithUSBstick
►Set the Auxiliary Mode switch of the FST-2XT to ON.
►Plug the USB stick loaded with update software into port X41 of the FST-2XT.
The message USBStick OK appears briey on the screen.
►In the menu of the FST controller, call up MAIN MENU/System/Update LON-Module.
►Select option Update f. USBStick.
This menu item is only displayed if the USB stick is plugged in.
►Select YES.
The system automatically performs an update.
The message Updated Moduls = x appears on the screen, whereby x corresponds to the
number of updated modules.
If the USB does not contain any valid data, the message:
...Update not successful... no valid le found appears on the screen.
In this case, contact the New LIFT service line or perform the update via the Lon Module Center
software.
6.2 Downloading Lon Module Center software
►Open the website https://www.newlift.de/downloads-311.html
►Select sub-item PC software

LON modules
20 Update-Backup-Analysis FST-2XT FST-2XTs
►Download the LON Module Center software s_lon_v1_x_x_x.zip.
►Extract the software and execute the installation le LonModulCenter_1_x_x_x.exe.
The program automatically adds a start icon to the screen.
6.3 UpdatingwithLonModuleCentersoftware
►Connect PC and FST controller (port X9) with null modem cable via the serial interface.
►Start the software.
►Bridge the service pins of the used module with a metal object (e.g., screwdriver).
The software detects the module type and automatically opens an editor window with information
on the module, in the example here module ADM-50.
Other manuals for FST-2XT MRL
3
This manual suits for next models
1
Table of contents
Other New lift Control System manuals
Popular Control System manuals by other brands

Hologic
Hologic Aquiflex Instructions for Use and Operator's manual
DigitaLinx
DigitaLinx DL-ARK Deployment guide
Danfysik
Danfysik SYSTEM 8700 user manual
Woodward
Woodward easYgen-2200 Package P2 Application note
BST
BST ekrPro Com60 Quick reference guide
Intewa
Intewa RAINMASTER Eco-FS Installation and user manual
