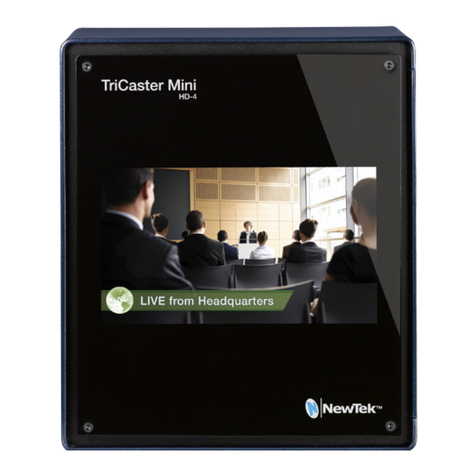
NewTek TRICASTER ADVANCED EDITION 3 MINI HD-4SDI User manual

Quick Start Guide
TriCaster®

At a Glance
TriCaster Mini
®
HD-4sdi
1
2
3
4
5
6
7
8
9
10
11
12
13
15
16
17
18
19
20
21
22
23
24
Update TriCaster (Optional)
A. Connect Ethernet cable to the ETHERNET port and plug into an active network connection, as
instructed in step 5
B. Register TriCaster as instructed in steps 11-18, if needed
C. At the Startup Screen, select the Shutdown icon and choose Administrator Mode from the menu
D. In Administrator Mode, select Update TriCaster from the System Utilities menu to download and
install software update, if available
14
Connect the TriCaster power supply cable to
the DC IN port on the rear panel and plug into
an electrical outlet or external power source
Connect the keyboard and mouse using USB
ports
Connect the cable for User Interface monitor to
the DVI port on the right
Optional: Connect the cable for Multiview
monitor to the HDMI port on the right
Plug an Ethernet cable into the TriCaster
Ethernet port and connect to an active local
network
Connect an appropriate SDI accessory cable
to camera and plug in using VIDEO IN port 1;
repeat using ports 2-4 for additional cameras
Connect the cable for SDI output to VIDEO
OUT port 1; repeat using port 2 for additional
SDI output, as needed
Plug in audio input devices (microphone,
audio mixer, or other sound source) using the
appropriate 1/4” AUDIO IN jacks
Optional: Plug in audio output devices
(headphones, speakers, or sound system)
using the appropriate 1/4” AUDIO OUT jacks
Press the power button and accept the End
User License Agreement (press the keyboard
button for ILLUMINATION to light keys if
desired)
Locate the sticker with the 15-digit Serial
Number (s/n) for your TriCaster and write it
down on the included registration card for
future reference
Enter your Serial Number as directed in the
Register TriCaster dialog box and write down
the Product ID provided for future reference on
the included registration card
Click the button as directed in the Register
TriCaster dialog box to proceed to the
NewTek Registration site
Create (or log into) your User Account in
the NewTek Registration System using a
valid e-mail address
Select TriCaster Mini from the drop-down
menu and click the Register Now button
Enter your Serial Number (if needed),
Product ID and additional information as
required, then click the Register button
When you receive the email with your
Registration Code, write it on the TriCaster
sticker and your registration card for future
reference
Enter your Registration Code in the
Register TriCaster dialog box as
directed, then click Continue to complete
registration
At the Home Screen, select the New icon
Enter a Session Name to title your
production
Choose a High Denition (1080 or 720) or
Standard Denition (480i) Resolution
Click the Start Session button to proceed
to the Session screen
At the Session Screen, click the Start
Live Production button to enter the Live
Desktop
Once you are in the Live Desktop, TriCaster
automatically detects each connected
camera (each camera must be on and
connected properly)

Quick Start Guide
TriCaster Mini
®
HD-4sdi
Connect the keyboard and mouse using USB ports
Connect an appropriate SDI accessory cable to camera and plug in
using VIDEO IN port 1; repeat using ports 2-4 for additional cameras
Optional: Connect the cable for Multiview monitor to the HDMI port on the right
Optional: Plug in audio input devices (microphone, audio mixer, or other
sound source) using the appropriate 1/4” AUDIO IN jacks
Plug an Ethernet cable into the TriCaster Ethernet port and connect to an
active local network
Connect the cable for SDI output to VIDEO OUT port 1; repeat using port 2
for additional SDI output, as needed
Connect the TriCaster power supply cable to the DC IN port on the rear panel
and plug into an electrical outlet or external power source
Connect the cable for User Interface monitor to the DVI port on the right
Press the power button and accept the End User License Agreement (press
the keyboard button for ILLUMINATION to light keys if desired)
Optional: Plug in audio output devices (headphones, speakers, or sound
system) using the appropriate 1/4” AUDIO OUT jacks
Setup 2
4
6
8
1
3
5
7
109

Quick Start Guide
TriCaster Mini
®
HD-4sdi
Registration - Required
When you receive the email with your Registration Code, write it on the
TriCaster sticker and your registration card for future reference
Locate the sticker with the 15-digit Serial Number (s/n) for your TriCaster
and write it down on the included registration card for future reference
Enter your Serial Number as directed in the Register TriCaster dialog
box and write down the Product ID provided for future reference on the
included registration card
Click the button as directed in the Register TriCaster dialog box to
proceed to the NewTek Registration site
Create (or log into) your User Account in the NewTek Registration System
using a valid e-mail address
Enter your Serial Number (if needed), Product ID and additional
information as required, then click the Register button
Select TriCaster Mini from the drop-down menu and click the Register
Now button
Enter your Registration Code in the Register TriCaster dialog box as
directed, then click Continue to complete registration
Registration is required to begin using your TriCaster. If you have connected your TriCaster to the Web, the NewTek
Registration site will load automatically upon submitting your Serial Number. You may also register from any Web browser
at register.newtek.com (Serial Number and Product ID required).
Be sure to record your User Account login and password, Serial Number, Product ID, and Registration Code, and store in a safe
place for future reference when accessing software updates and downloads, contacting NewTek Customer Support, or performing
a system restore.
12
16
18
11
17
13
15
14

Quick Start Guide
TriCaster Mini
®
HD-4sdi
Choose a High Denition (1080 or 720) or Standard Denition (480i) Resolution
At the Home Screen, select the New icon
At the Session Screen, click the Start Live Production button to enter the
Live Desktop
Click the Start Session button to proceed to the Session screen
Enter a Session Name to title your production
Once you are in the Live Desktop, TriCaster automatically detects each
connected camera (each camera must be on and connected properly)
Getting Started
Case display not available on all TriCaster Mini models. NewTek periodically issues free software updates and downloads for
TriCaster that provide enhanced performance and new features. Once your system is registered, you may immediately access
these downloads by visiting your personal registration page at register.newtek.com
21 22
23 24
19 20

© 2016 NewTek, Inc. All rights reserved.
TriCaster, 3Play, TalkShow and LightWave 3D are registered trademarks of NewTek, Inc.
NDI, MediaDS, LightWave, ProTek, and Broadcast Minds are trademarks and/or service marks of NewTek, Inc.
Table of contents
Other NewTek Switch manuals
Popular Switch manuals by other brands

Girard Systems
Girard Systems 98GC229 installation guide
Jung
Jung FAS180 Series operating instructions
Helmholz
Helmholz 700-841-16S01 instruction manual
Keysight Technologies
Keysight Technologies 34945A Configuration guide

CycleOps
CycleOps Hub Updater Update instructions
Guntermann & Drunck
Guntermann & Drunck TradeSwitch8-USB Installation and operation manual
