Newwave ThermoChef Natura User manual
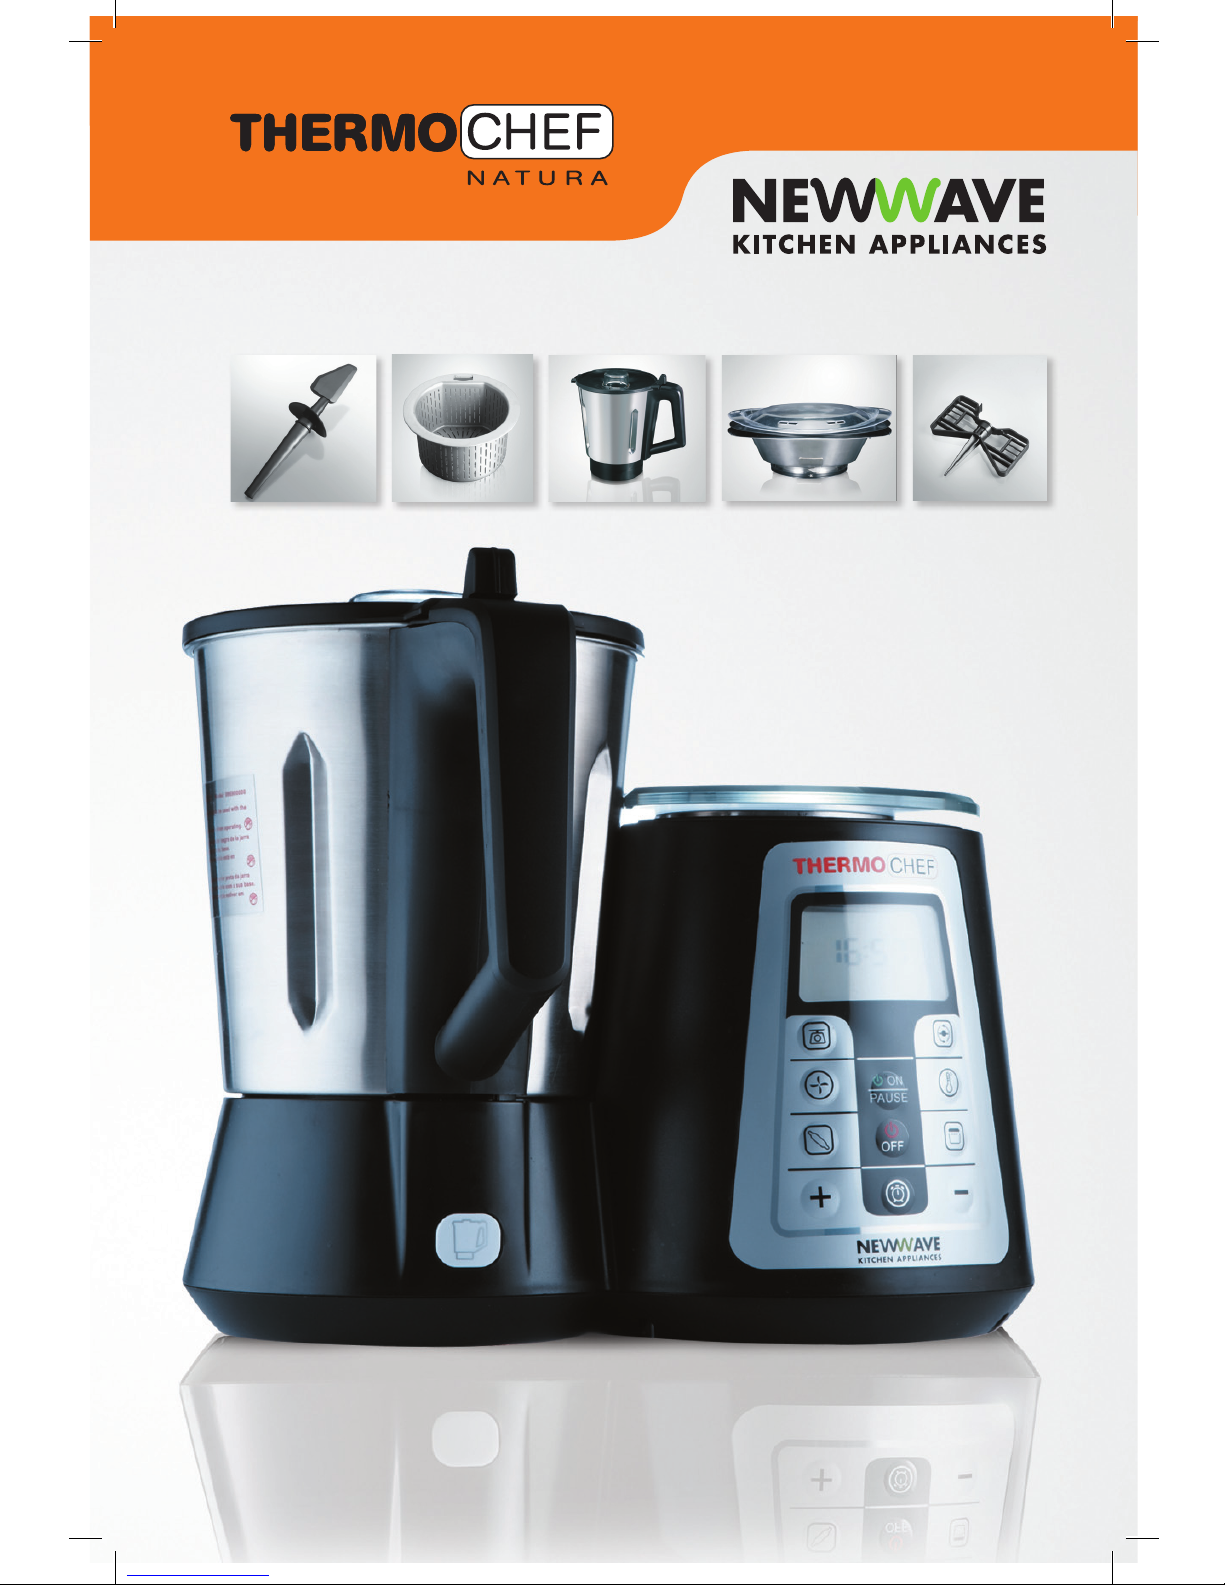
Instruction Manual

Safety notes 3
Risk of Electric Shock 3
Risk of Blade injury 3
Risk of Projection of High-temp Food 4
Avoid scalding by out-owing vapor or condensed water bubble 4
Risk of scalding by hot spare parts 4
Risk of injury by splashed food 4
Risk of using foreign ingredients or unwarrantable parts 4
Possible shift of Thermo Chef Natura 4
Damage of hot vapor 4
Risk of Other hot resources 4
The Overow of Food 4
Damage of Bad Ventilation 4
Technical data 5
Brief introduction/ Customer service 6
Your Thermo Chef Natura 7
Accessories 9
Blender Bowl 9
Measuring Cup 9
Basket lter 9
Scraper Bar 10
Buttery Bar 11
Steamer 11
Instructions before use 12
Before you start 12
How to insert the blender bowl correctly 13
How to remove the blade base 13
CATALOGUE

Safety notes 3
Risk of Electric Shock 3
Risk of Blade injury 3
Risk of Projection of High-temp Food 4
Avoid scalding by out-owing vapor or condensed water bubble 4
Risk of scalding by hot spare parts 4
Risk of injury by splashed food 4
Risk of using foreign ingredients or unwarrantable parts 4
Possible shift of Thermo Chef Natura 4
Damage of hot vapor 4
Risk of Other hot resources 4
The Overow of Food 4
Damage of Bad Ventilation 4
Technical data 5
Brief introduction/ Customer service 6
Your Thermo Chef Natura 7
Accessories 9
Blender Bowl 9
Measuring Cup 9
Basket lter 9
Scraper Bar 10
Buttery Bar 11
Steamer 11
Instructions before use 12
Before you start 12
How to insert the blender bowl correctly 13
How to remove the blade base 13
Instruction for use 14
Technical parameter 14
Start to use 14
Explanation of characters in the display 15
Button instruction 15
Operational instruction for functions 16
Things to remember 21
Sleep mode 21
Electronic motor protection 21
First use and overload 21
Cleaning 22
How to clean the blender bowl and the bowl lid 22
How to clean blade base 22
How to clean steamer 22
How to clean the main body 23
More information about cleaning 23
Notes for your own recipes 24
Trouble shooting 25
Handy suggestions 26
Measurement guide 27
Warranty 28
New Wave appliance range 29
After sales service 30
CATALOGUE

Thermo Chef Natura can be used in home (or similar
places such as hotels or restaurants). Thermo
Chef Natura is conforming with the most advanced
SAA safety standard. For safety, please read the
instruction of use carefully before use, especially the
following aspects:
Please keep the instruction manual for future
reference.
• This appliance is not intended for use by persons
(including children) with reduced physical, sensory
or mental capabilities, or lack of experience
and knowledge, unless they have been given
supervision or instruction concerning use of the
appliance by a person responsible for their safety.
• Children should be supervised to ensure that they
do not play with the appliance.
• If the supply cord is damaged, it must be replaced
by the manufacturer, its service agent or similarly
qualied persons in order to avoid a hazard.
• Appliances are not intended to be operated by
means of an external timer or separate remote
control system.
• This appliance must not be immersed.
• The blender is only to be used with the docking
unit
CAUTION: Ensure that the blender is
switched off before removing it from the
docking unit.
• Switch off the appliance before changing
accessories or approaching parts which move
when in use.
• If the bowl is overlled, boiling water may be
ejected.
• Do not Immerse during cleaning.
CAUTION: In order to avoid a hazard due
to inadvertent resetting of the thermal cut-out,
this appliance must not be supplied through
an external switching device, such asa timer,
or connected to a circuit that is regularly
switched on and off by the utility.
Risk of Electric Shock
• Please unplug the application when cleaning
• Please do not immerse the main body in the
water or wash it with a great amount of water.
To be cleaned with wet cloth and avoid water or
other foreign matter getting into the main body.
• Regularly inspect the main body, steamer or
other components for damage. The damaged
parts will decrease the safety of use. When
a faulty part is found, please stop use and
contact New Wave Kitchen Appliances
customer service department.
• Thermo Chef Natura can only be repaired
by the persons appointed by our company.
Any inappropriate or unauthorized repair will
cause safety risk. The warranty will be void if
components from other sources are used.
Risk of Blade injury
• Do not touch the edge of the blades. Please
be careful and hold the top part when you
reassembly or dismantle the blade.
• Risk of Projection of High-temp Food
• The food should not exceed the maximum
capacity of 2.0L.
• Pay attention to the capacity mark on the
blender bowl.
• Do not open the lid until the food in the bowl
stops rotating, especially during speed 4 or
even higher speed.
• Please do not force the lid to open.
• When the food in the bowl is of a high-
temperature or boiling, do not use speed 4 or
greater.
• Pay attention to high-temperature food when
opening bowl lid. Please put measuring cup at
the mouth of bowl lid correctly when processing
food such as sauce or soup at medium speed
(3-6) and high speed (7-10).
• Do not touch the blender bowl when
processing hot food of more than 60°C.
• Adopt low speed (1-2) when using steamer in
order to avoid the liquid projected out at high
speed.
• Please put the food processor on a clean,
stable, at and cool table especially when
using steamer.
• Make sure that steamer and blender bowl are
connected well when using steamer.
SAFETY NOTES
!
3

4
Avoid scalding by outowed vapor or
condensed water bubble
• Be aware vapour will outow through the top
cover or sides.
• In operation, remember to not touch any part
of the steamer except the handles.
• Do not use the steamer without the cover in
place.
• When opening the steamer cover, be careful
not to be scalded by vapour.
• When using steaming and boiling setting,
pay attention that vapour will outow through
blender bowl mouth.
• When using the steamer, please keep children
away from the appliance.
• Keep checking that the air hole on the cover is
unblocked.
Risk of scalding by hot spare parts
• Ensure the appliance is put out of children’s
reach and warn children that the unit will
become hot and do not touch it.
Risk of injury by splashed food
• When using Thermo Chef Natura to grind or
chop frozen food at medium speed (3-6), high
speed (7-10) or turbo, press the blender bowl
rmly.
Risk of using foreign ingredients or
unwarrantable parts
• Thermo Chef Natura spare parts provided by
New Wave
• Kitchen Appliances can be used for this
appliance.
• Do not use components not provided by New
Wave Kitchen Appliances.
• The measuring cup is the only part which can
be used to cover the round hole in the top
cover. Please do not use cloth or similar things
to cover the hole.
• Only the scraper bar with the safe round plate
can be used for this unit. Please do not use
other articles such
as a soup spoon or spatula for blending, or else
they will bump with the blender blade components
which will cause danger.
Asset damage
• Possible shift of Thermo Chef Natura
• Place the unit on a stable, at table which will not
become hot and ensure it is a safe distance from
the edge to avoid falling down. When it is used to
knead the dough or cut food, the unit may move
due to vibration.
Avoid damage
• Damage of hot vapor: when using the steamer,
pay attention that there is appropriate distance
between the appliance and cupboard or book shelf
to avoid vapour damage.
• Risk of other hot resources: Please keep the
appliance away from other electrical appliances
and Induction cooker. Please do not put the set or
the supply cord which is already connected with
electricity on any hot resources such as electric hot
plate, stove or oven.
• The leakage of food: Make sure that the rubber
lock ring is placed well when setting up blade
base. Failure of installation of rubber lock ring
will cause food leakage which may damage the
appliance.
• Damage of bad ventilation: Ensure that the vent
on both sides of the main body are not blocked by
food, this will cause the appliance to malfunction.
CAUTION: This unit should be used with
a residual current device (safety switch) to
lessen the risk of scalding or other injury from
hot water that may be ejected if the heating
element ruptures.
Disregard this marking if your home is tted
with a residual current device (safety switch).
CAUTION: Do not operate the unit on an
inclined plane. Do not operate the unit unless
it’s well lled. Do not move while the unit is
switched on.
SAFETY NOTES
!
Motor
Heating device
Electronic Scale
Housing
Steamer
Motor power : 550W
Rotation range: 110 to 8700 rounds per minute
Power consumption: 1000w, over heat protection
device.
Range of weighting: 0g to 3000g. resolution rate: 4g
Rated power
dimension and weight
not include steaming pot
Steaming pot
Material: stainless steel, maxi capacity: 2L, with heating
system and temperature sensor
maxi blending power 550W
maxi heating power 1000W
length of supply cord: 1.2m
Height: 30cm
Width: 28.5cm
Weight: 6.3kg
Height: 11.8cm
Width: 38.5cm
Depth: 27.5cm
Weight: 0.8kg
Customer Service
If you experience problems or difculty, please contact New Wave Kitchen Appliances.
Tel: 03 9553 7211
Fax: 03 9553 7233
E-mail: [email protected]
TECHNICAL DATA
5
220-240Vac, 50/60Hz
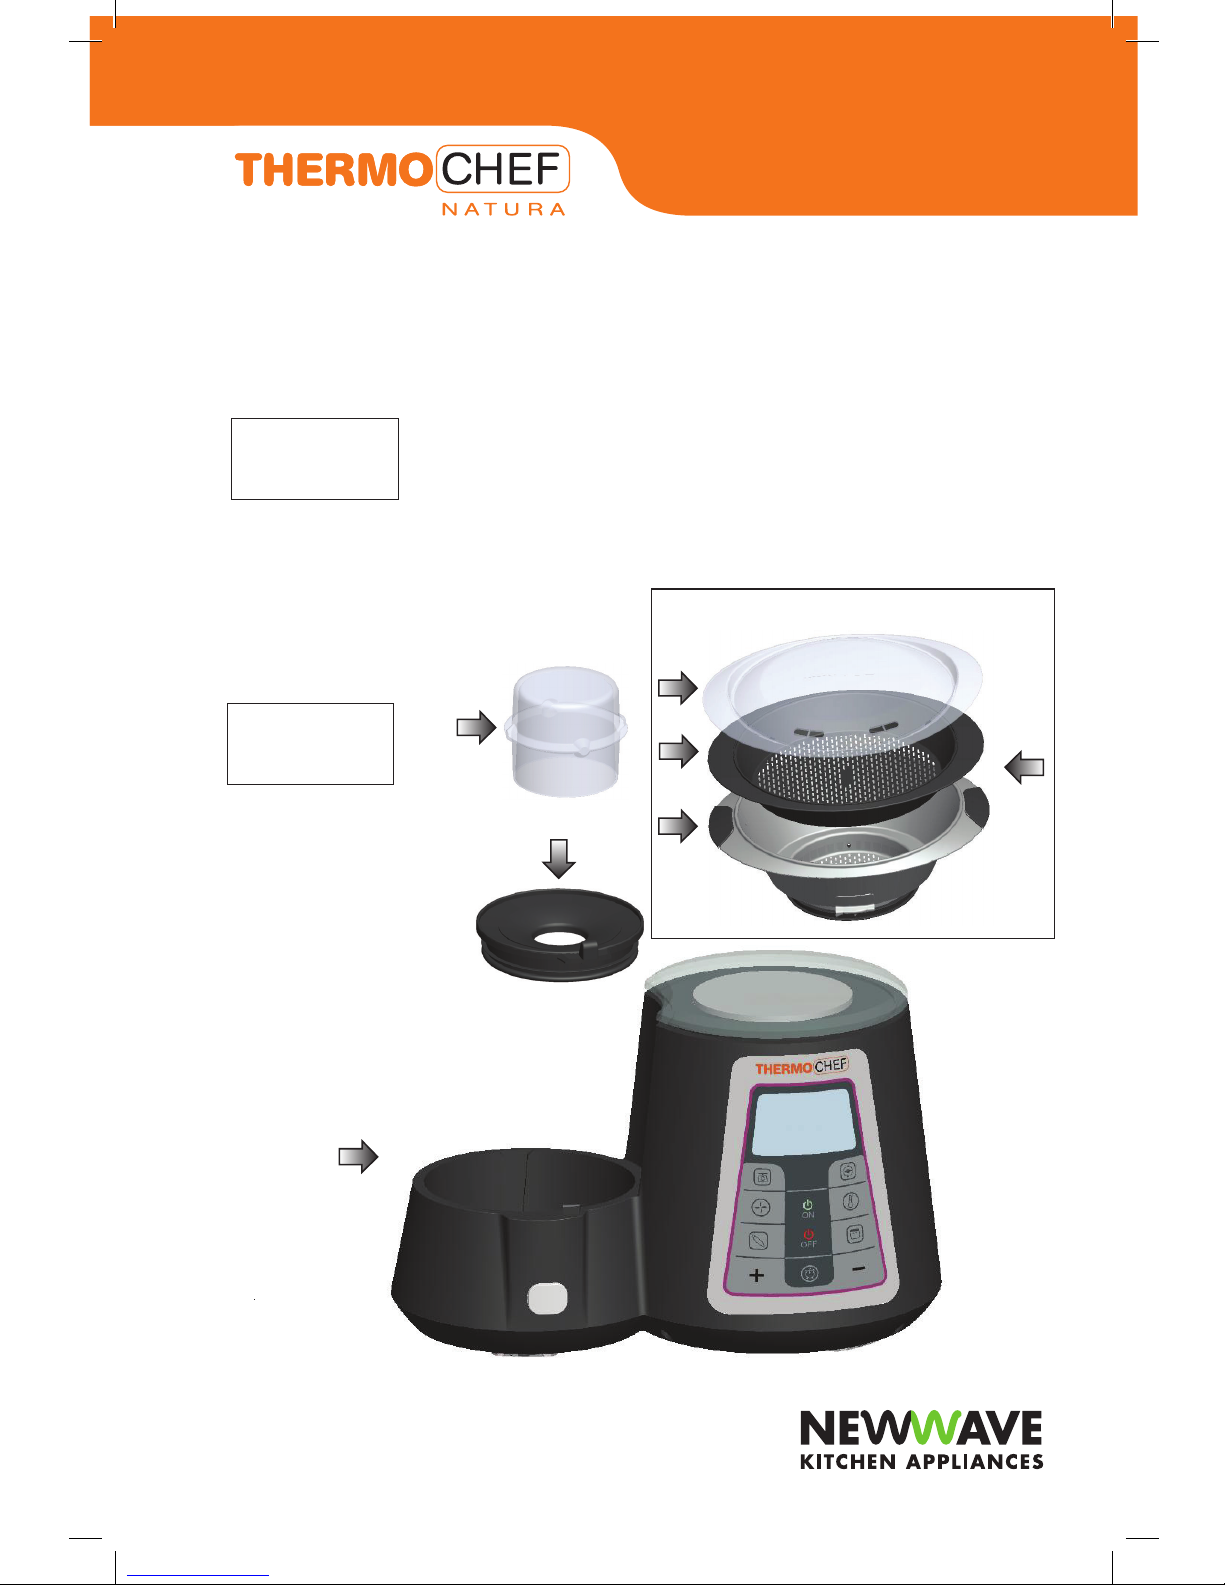
When opening the packing box, take out all the accessories and get to know them according to the
components list.
The spare parts are as follows:
1. Main body
2. Steamer cover
3. Steaming mesh
4. Steamer
5. Steaming pot
6. Measuring cup
7. Cup lid
8. Buttery bar
9. Blade base components
10. Blender bowl
11. Filter basket
12. Scraper
13. Scraper bracket
14. Scraper handle
15. Scraper bar
1
6
7
2
3
4
5
YOUR THERMO CHEF
6

9
10
12
13
14
15
11
YOUR THERMO CHEF
7
Before you start to use Thermo Chef Natura, we would
like to introduce the accessories to you in detail:
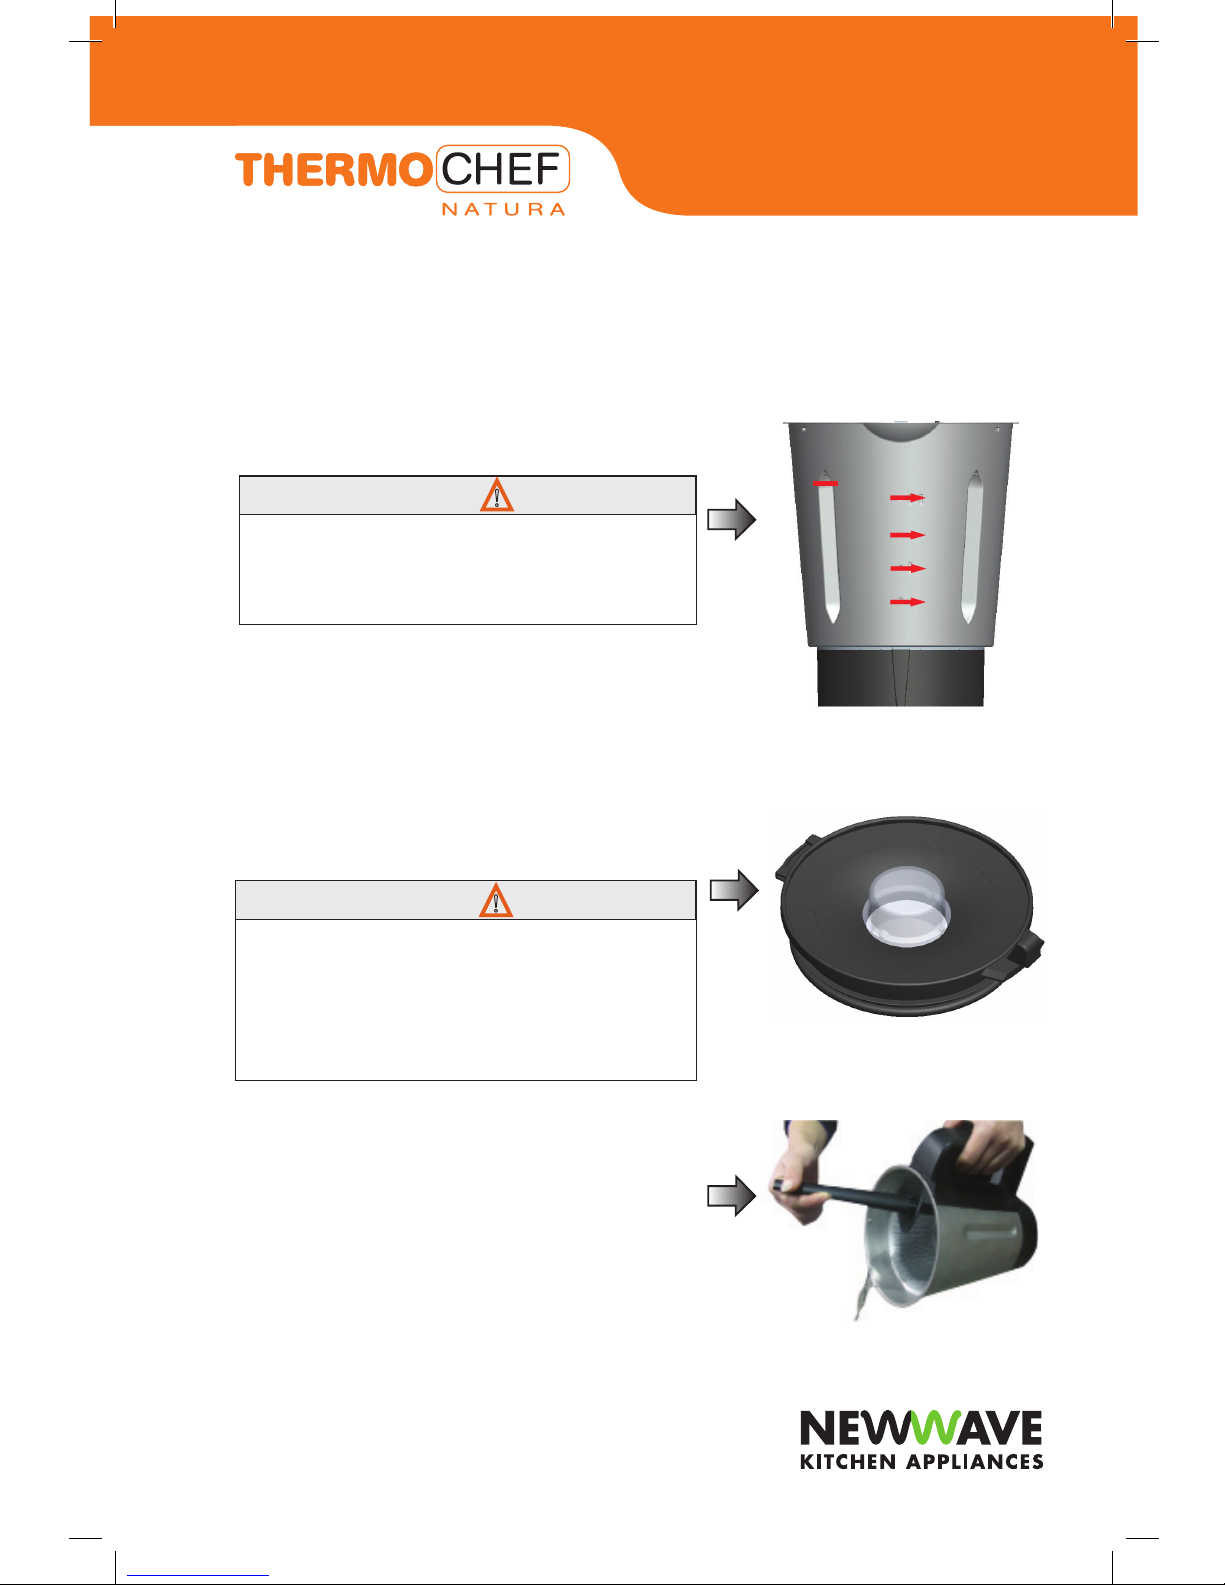
Blender bowl:
There are bowl capacity graduations on one side of the
bowl (see picture 1). Each graduation represents 0.5L.
The maximum capacity of the bowl is 2.0L.
Measuring cup:
The measuring cup can be used in many ways: it
can be used as a cover (see picture 2) to prevent the
steam from escaping or the food to be mixed or cooked
splashing out. At the same time, it can also be used to
measure the ingredient. A full measuring cup is 100ml.
If you want to add ingredients through the mouth, lift
the measuring cup and put ingredients into the bowl
Basket lter:
The basket lter of Thermo Chef Natura is made of
high qualied stainless steel. Just like the measuring
cup, the basket lter is also a multifunctional
component:
• Filter fruit and vegetable juice. After grinding or
making fruit sauce with Thermo Chef Natura, put
the basket lter into the blender bowl to help pour
out the juice. Please use the scraper bar to hold the
basket lter when pouring the juice. Now the basket
lter is used as a sieve.
!
Food projection (Scalding Danger
The quantity of food put into the bowl should not
exceed 2.0L, or else the food may overflow or splash
out causing danger..
!
Food projection Scalding Danger
The measuring cup is the only part which can be used
to cover the round hole in the top cover.
Please do not use cloth or similar things to cover the
hole, or else the food may splash out and cause
danger to people.
ACCESSORIES
2
3
1
0.5L
1.0L
1.2L
2.0L
Max
capacity
8
NOTICE
NOTICE

• Soft food such as meat or sh balls should be put
in the basket lter to stew. Easy to dismantle the
basket lter: put the scraper shaft into the notch
and press the scraper to the direction of the edge
to nish the assembly. Then turn the scraper to the
center of the basket lter and it will be easily taken
out.
• If you wish to decrease the water in the food, such
as tomatoes, then take the measuring cup away and
cover with the basket lter instead. The water can be
easily removed.
Scraper bar:
Scraper bar is another function designed for the
Thermo Chef Natura.
• The scraper is the only utensil which can be used
to mix or blend in the bowl. The scraper can be put
into the bowl through the hole in the cup cover (
see picture 6) and the round safe plate can prevent
it from touching the blades. So the scraper can be
used during the process of cooking, ltering and
blending.
• The scraper bar can also be used to scrape the food
in the bowl, and the shape of it just ts into the gap
between blade and the bowl wall.
• The scraper bar is designed not to touch the top of
the blade.
• Use the basket lter when ltering fruit juice or
vegetable juice.
• It is easy to take out the basket lter with the help of
the scraper shaft.
!
Incidents may arise if anything except the scraper shaft is used for blending.
Please use the scraper shaft attached to blend food.
Do cover and lock the lid before putting in the scraper shaft.
Please do not use soup spoon or other spoons for blending which will touch the rotating blades and cause injury.
4
Pressing
direction
5
6
ACCESSORIES
9
NOTICE
ACCESSORIES
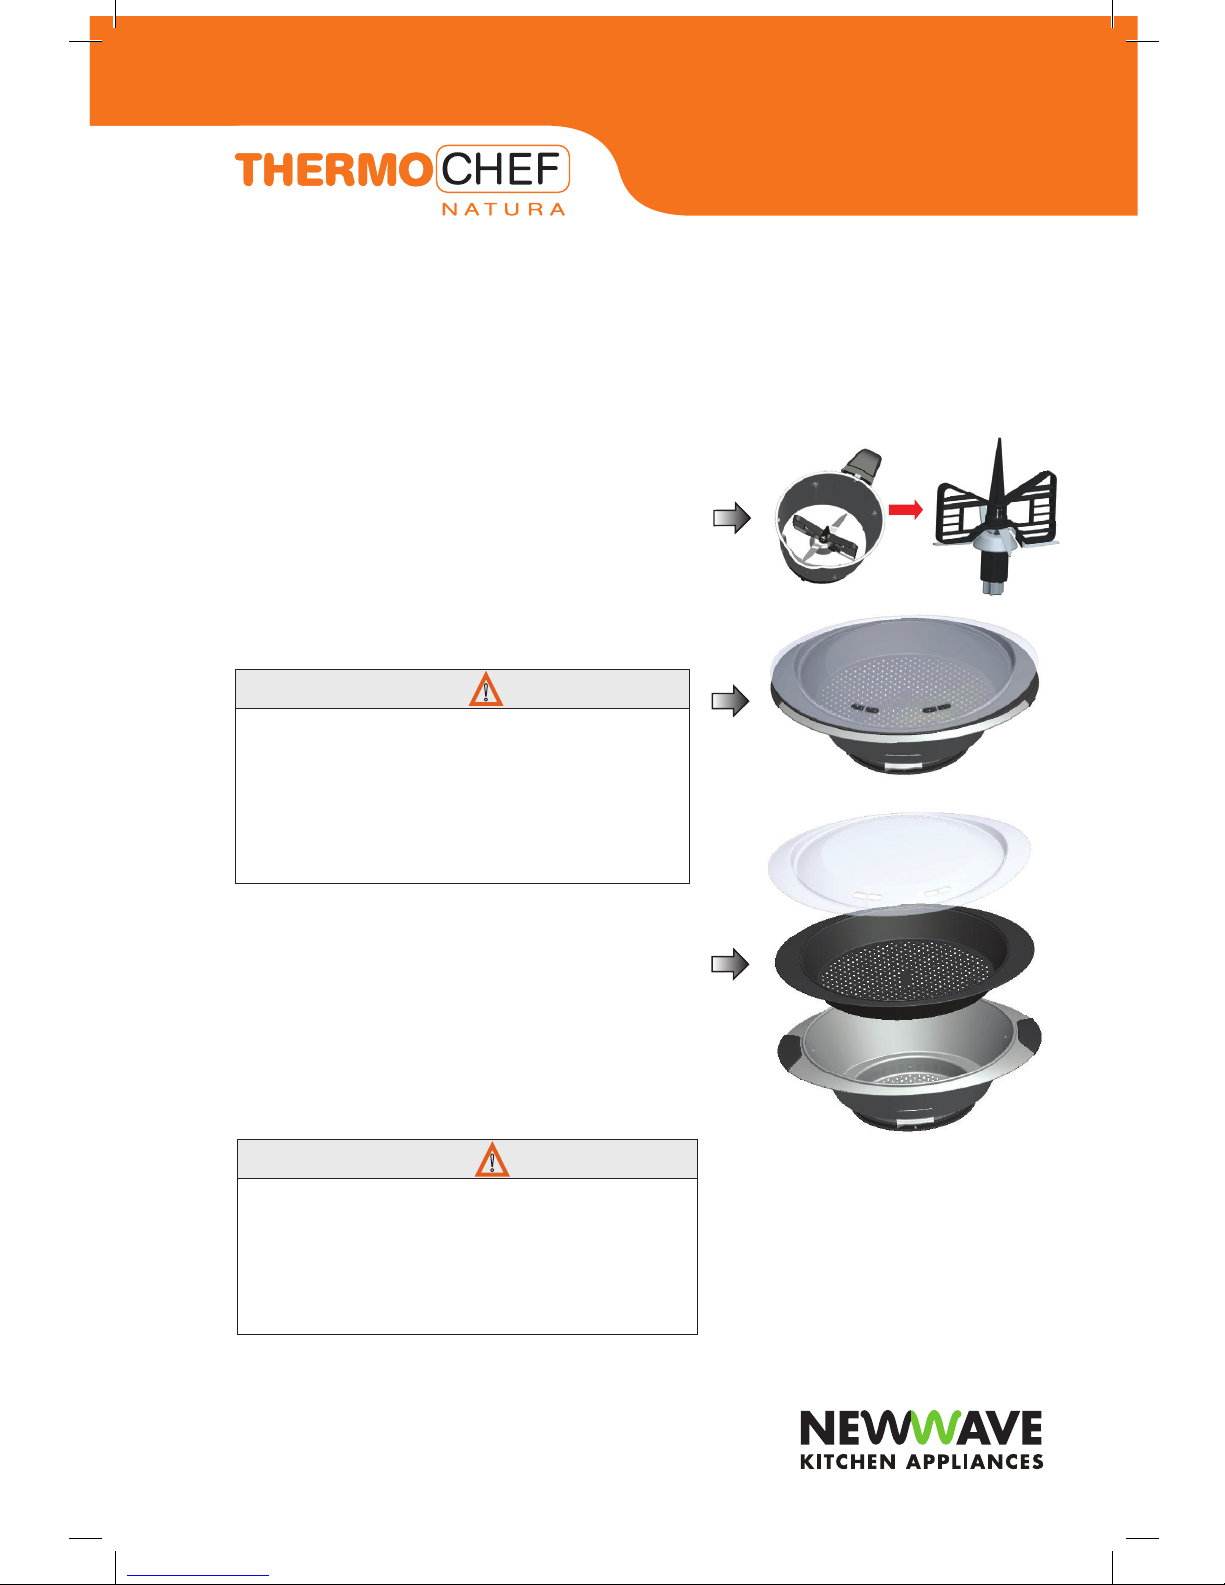
Buttery bar:
• Installed on the blade, the buttery bar can help to
mix fresh milk or egg white. It is also the best utensil
to make milk pudding or milk mixture.
• When boiling milk or making pudding or fruit puree,
the buttery bar can prevent the food from binding
together and keep the food mixing.
• Have the two sides of the buttery bar at the same
direction as the blades, then centralize the centre
hole of the buttery bar with the screw hole of the
blender blade and press it with enough force for
good connection. Turn the buttery bar counter
clockwise to make it locked on the blade.
Steamer:
[Accessories List] there are three parts of the steaming
pot:
• steamer cover (top)
• steaming mesh (middle)
• steamer (bottom)
All the parts are made of high qualied materials.
!
Do not start the appliance until the butterfly is fixed
in place.
Do not use speed 4 when using butterfly bar.
Do not use scraper bar when using butterfly bar.
Do not add ingredients into the bowl when the
appliance is working with the butterfly bar, or else
the butterfly may be damaged or blocked.
Please make sure that the steamer lid is covered
when putting the steaming pot on. (see picture 8)
The steaming pot of Thermo Chef Natura cannot be
used in a microwave oven or other electric appliances.
Only “Cooking” function can be chosen when this
accessory is to be used.
!
7
8
9
10
NOTICE
NOTICE
ACCESSORIES
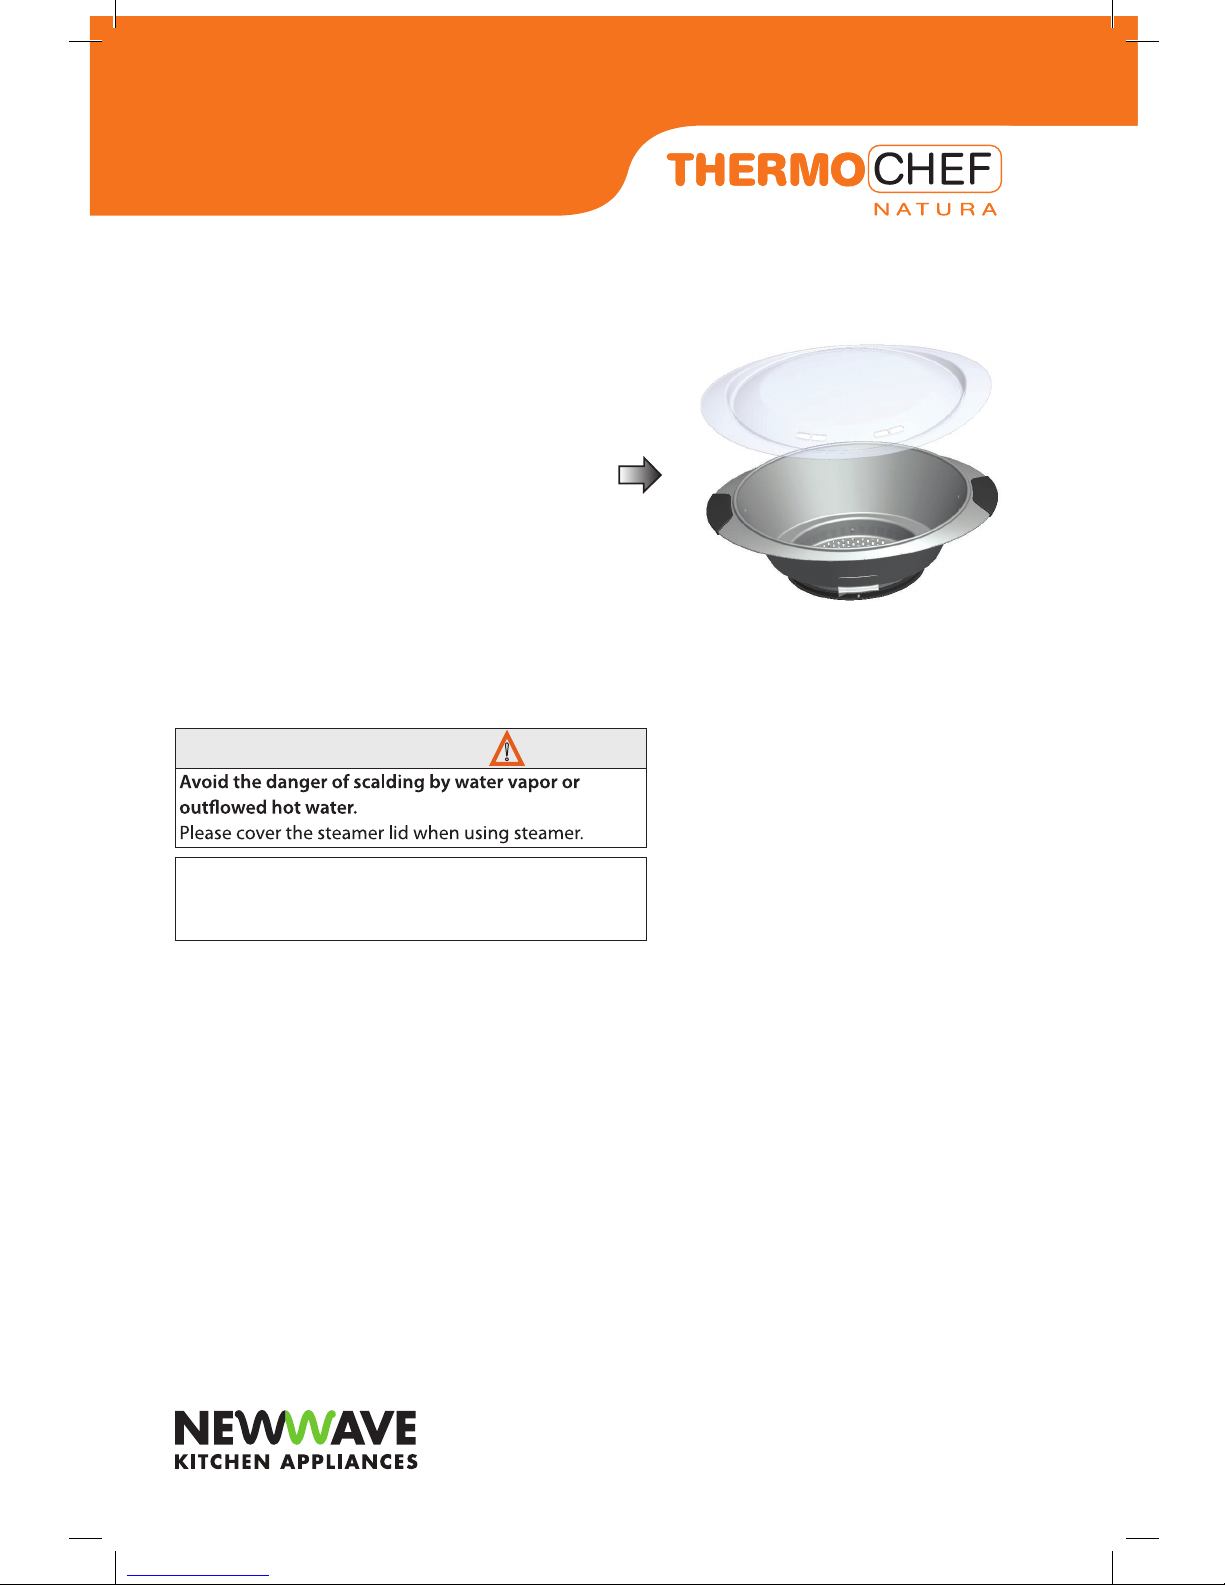
Combination of the steamer:
There are two combinations:
There is no need to use the cup lid if steamer is used.
Install the steamer onto the blender cup according to
the way of assembling cup lid.
Combination 1
Steamer + steaming mesh + steamer lid (Picture 9).
This is the best combination way for cooking various
food. For example: Vegetables and meat or sh and
buns.
Combination 2
Steamer + steamer lid (picture 10).
This is the best combination way to cook large
amounts of the same food. For example: vegetables,
potatoes or large pieces of meat or sausage.
!
Important notice
10
If the lid isn’t covered well, the vapour may come out
which will cause the failure of the cooking process.
11
NOTICE
INSTRUCTIONS
BEFORE USE
Before you start
At the early stage of using this unit, there will be a light
peculiar smell produced by the motor which is normal.
After a period of time, this smell will disappear.
• Please put the unit on a clean, stable and at table.
• It is best to put the unit on a xed place for your
convenience.
• Please thoroughly clean the unit according to the
cleaning instructions in the manual before using it.
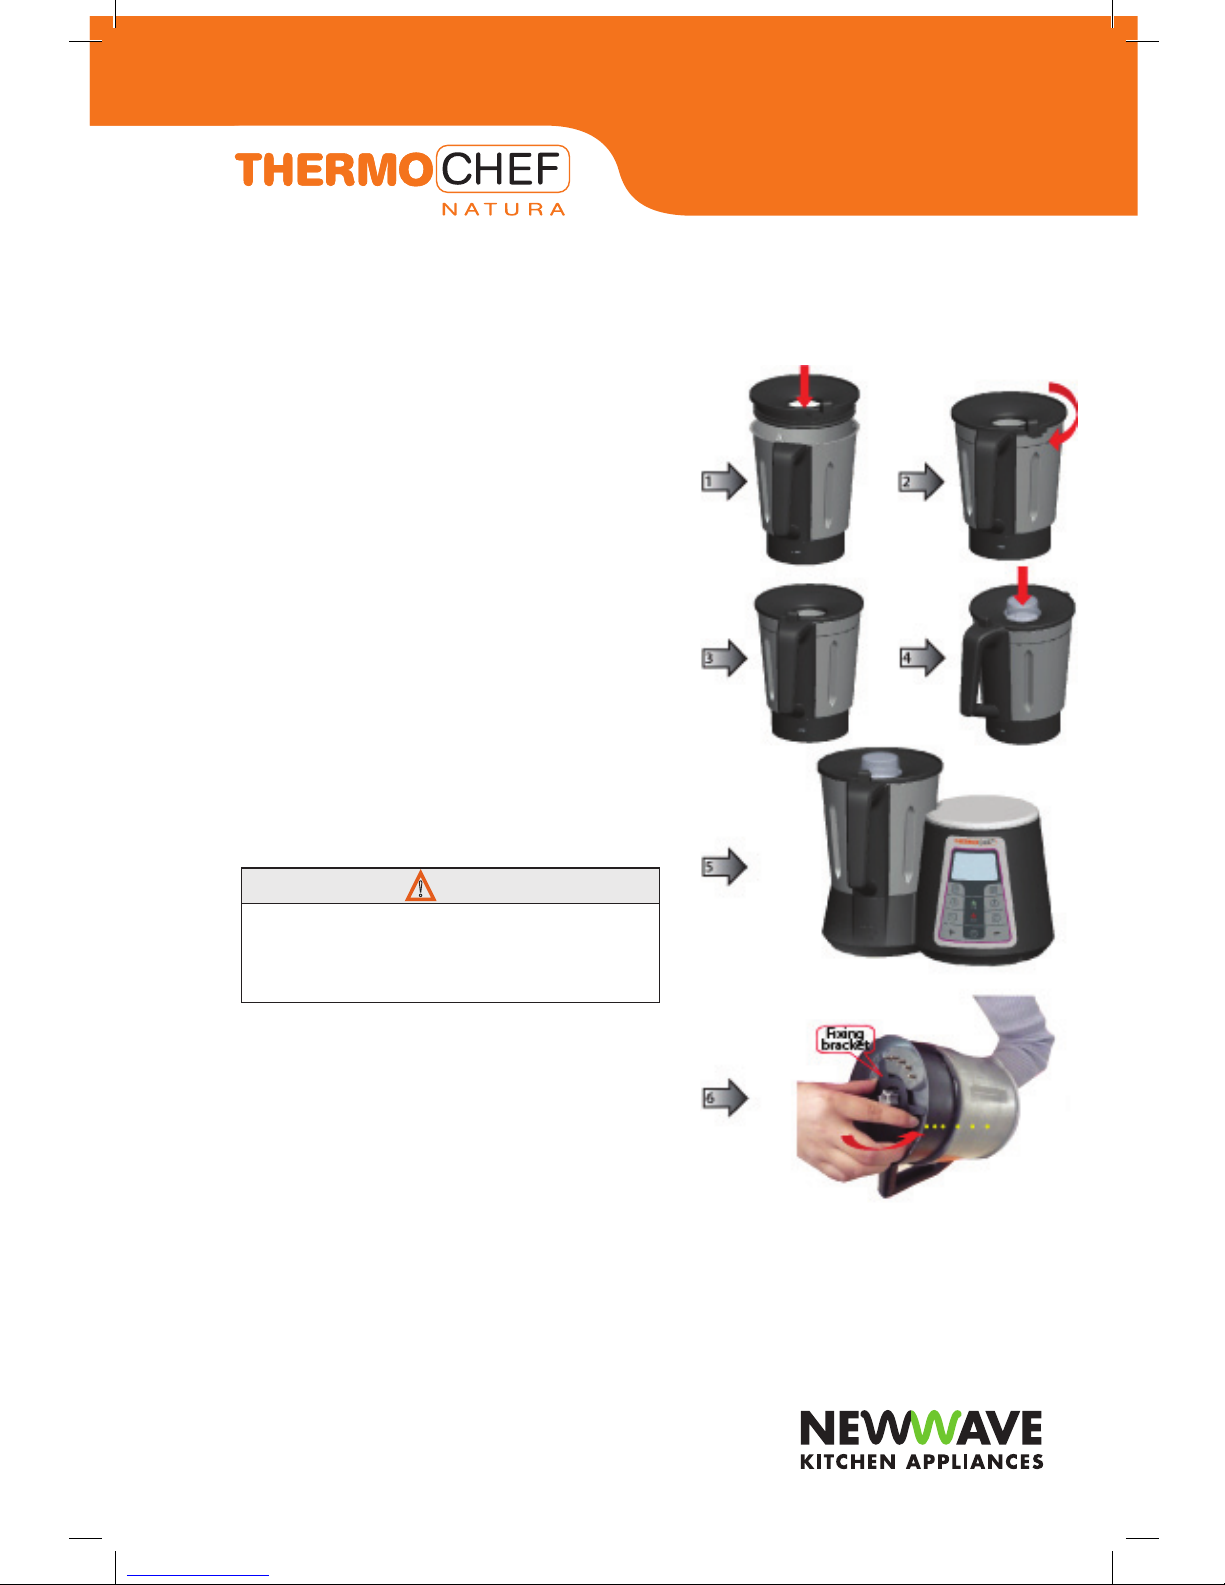
How to insert the blender bowl correctly?
Before using, please put the main body and blender
bowl on a at table. Add appropriate quantities of food
and ingredients into the bowl and place the cup cover
on the bowl (picture 1).Turn the cup cover clockwise to
the place as shown in picture 3. With the handle facing
the front (the direction of buttons), put the bowl onto
the main body until you hear a sound to show they
have been connected well as shown in picture 5, or
else the unit cannot be started.
How to remove the blade base?
Dismantle the blade base: hold the half top of the blade
base from inside with the left hand (it is better to wrap
up the blade with cloth or towel to avoid injury), turn the
xing bracket counter clockwise 30°(see picture 6) with
the other hand. Take out the blade base out as shown
in picture 7.
Risk of scalding by splashed food
Do not open the bowl cover. First take apart the blender
bowl from the main body in the reverse procedures and
then open the bowl cover.
!
12
NOTICE

INSTRUCTIONS
BEFORE USE
Reassemble blade base:
The assembly procedure of blade base is just opposite
to “dismantling blade base”.
Be careful not to be hurt
The blade is very sharp. Please wrap the blade with
Washcloth when dismantling or assembling the blade
base.
!
!
7
13
NOTICE
NOTICE

INSTRUCTION FOR USE
Before using the Thermo Chef, please put the
appliance safely on the table. Do not put it too close to
the edge, and keep it away from the built-in wardrobe
or hanging bracket.
Technical parameter
1. Voltage input 220-240V AC 50/60Hz
2. Rated power: Motor power 550W Heating plate
1000W
3. Work voltage of control panel 5V: 12VDC
4. Technical parameter of main electric machine:
5. Work voltage 220-240V AC 50/60Hz Max rotate
speed 8700 RPM Min
6. Display way LCD display + white backlight
7. Heating way Heating by heating tube at the bowl
8. bottom, Power 1000W
9. Electronic scale max weight 3Kg; resolution
rate:4g
10. Environment temperature 0-x50℃
Start to use
Put the machine on the table horizontally, or else the
machine will not work stably or the electronic scale
cannot weigh accurately. Take out the supply cord and
connect one terminal to the main body and the other
terminal to the outlet. Now let’s learn how to operate
the appliance together.
Press the switch at the back of the main body to start
the unit.
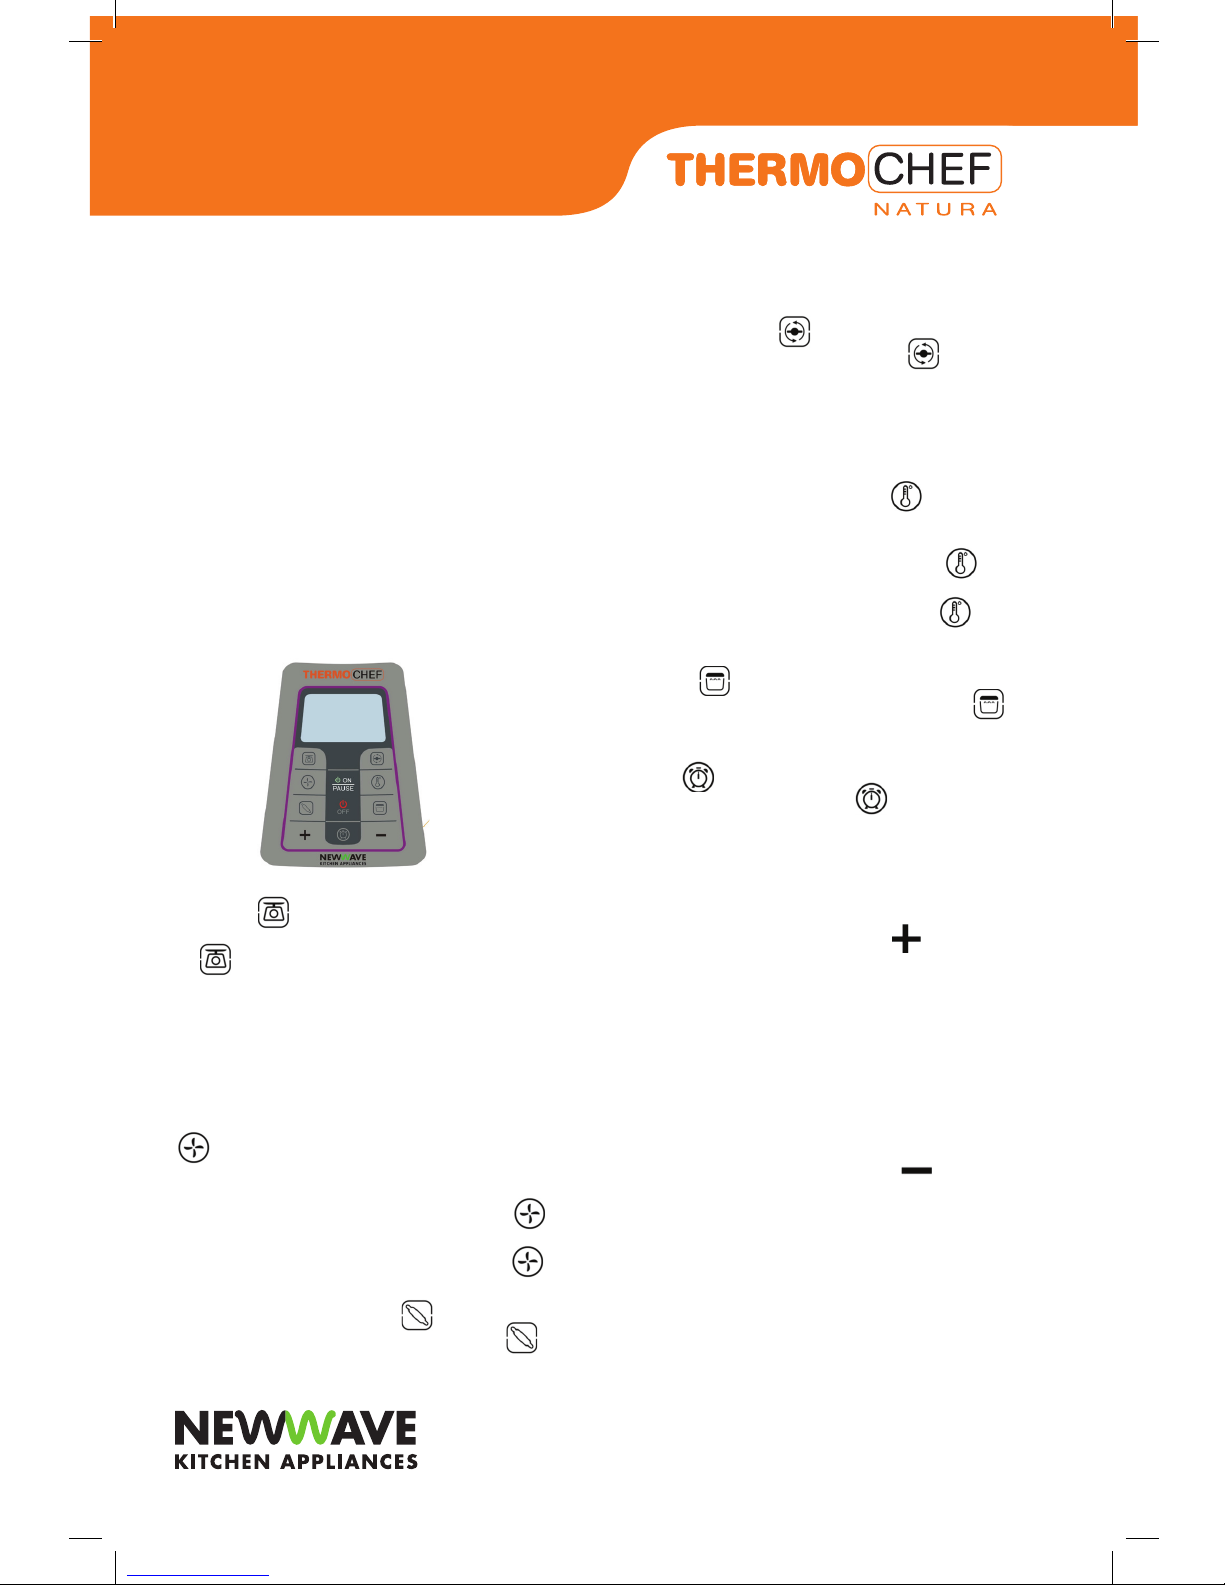
Explanation of characters in the display
Display “ ”
meaning: heating function
Flicker: adjustable temperature mode
Display “ ”
meaning: blending
Flicker: rotation speed gear can be set.
Not icker: rotation speed gear is locked.
Display “ ”
meaning: picture of electronic scale
Display “ ”
meaning: picture of cooking
Flicker: cooking setting mode
Display “ ”
meaning: picture of knead dough
Flicker: knead dough setting mode
Display “ ”
meaning: Turbo boost function
Display “ ”
meaning: timing
Flicker: timing setting mode
Display “ ”
meaning: cover is locked.
Display “ ”
meaning: cover is unclocked.
Display “ ”
meaning: temperature
Flicker: heating
Not icker: keep warming
Display “ ”
meaning: time: or weight: display
Flicker: time setting mode
Not icker: Temperature is unchangeable.
Display “ ”
meaning: pause function
The unit will switch to pause mode and stop.
14
INSTRUCTION FOR USE
In scale mode, it shows the weight on the scale plate
with “g” as the unit. But if the user set the time, in
working mode, the left time will be countdown in the
screen in the form of “XX: XX”.
If the time is not set up, then the working time cost will
be accumulated in the screen in the form of “XX:XX”.
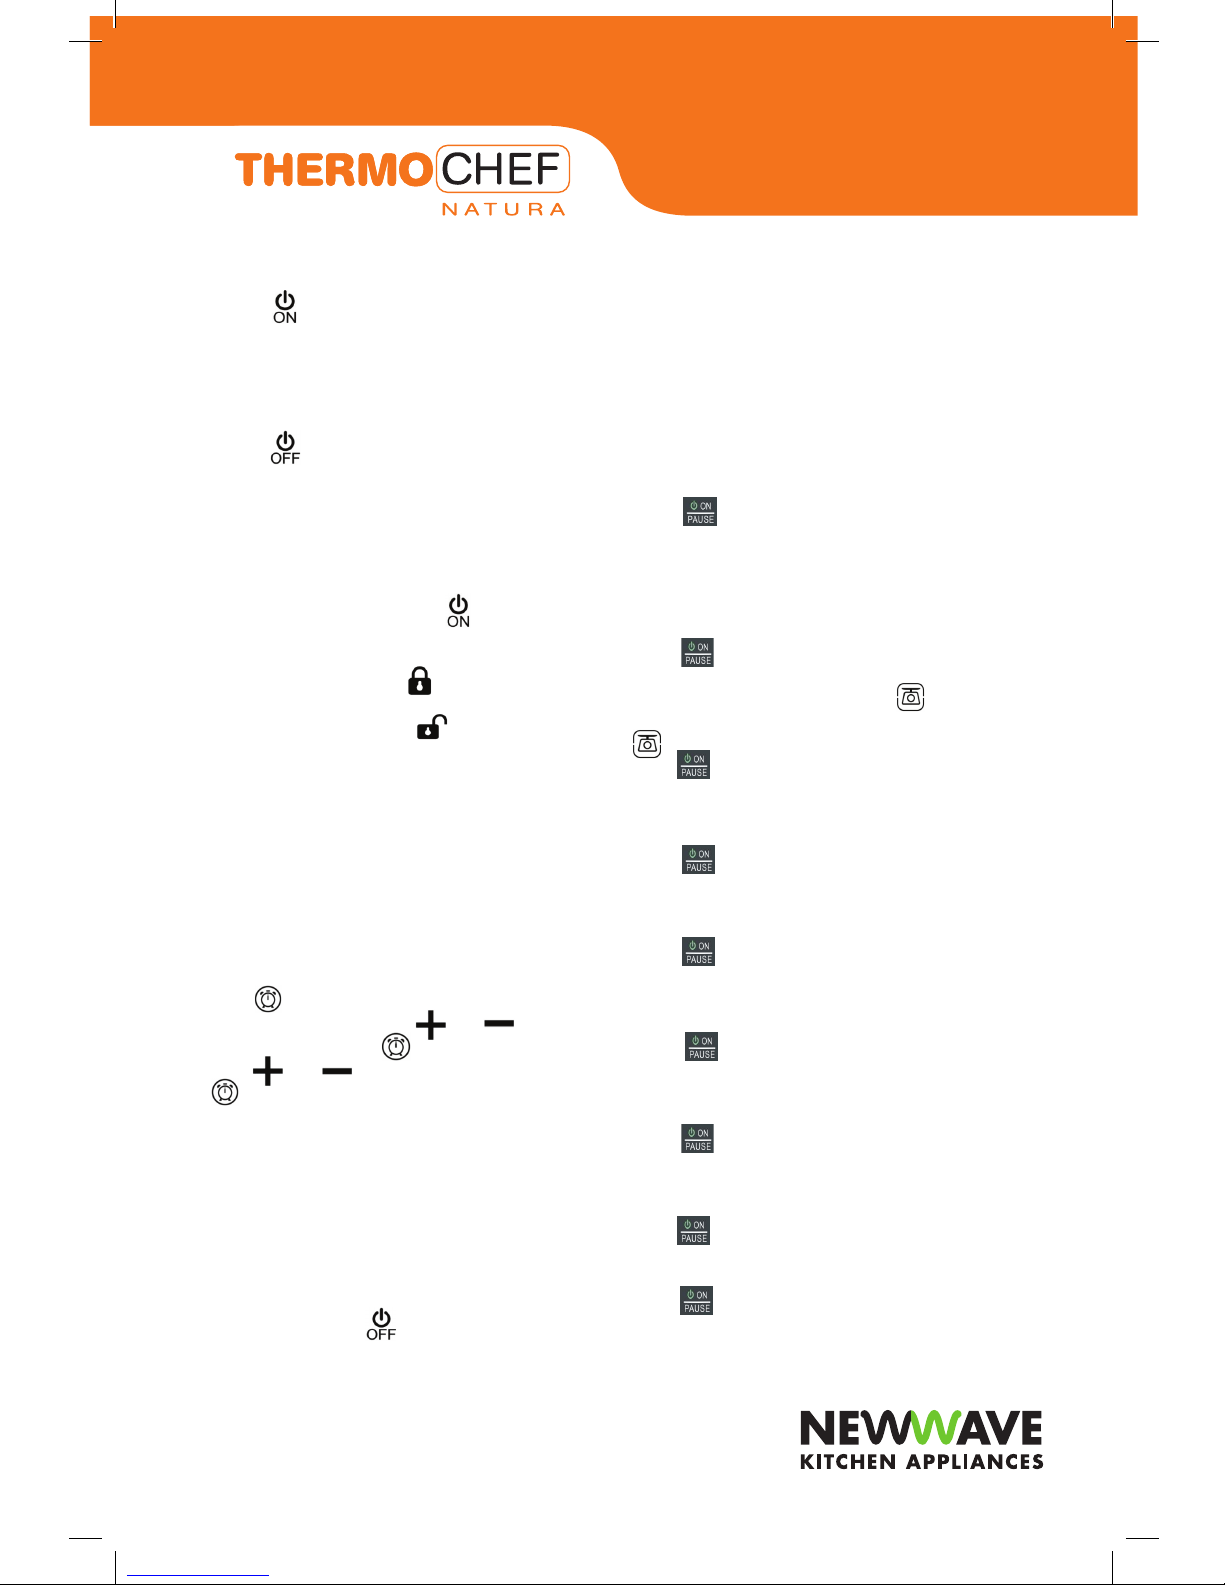
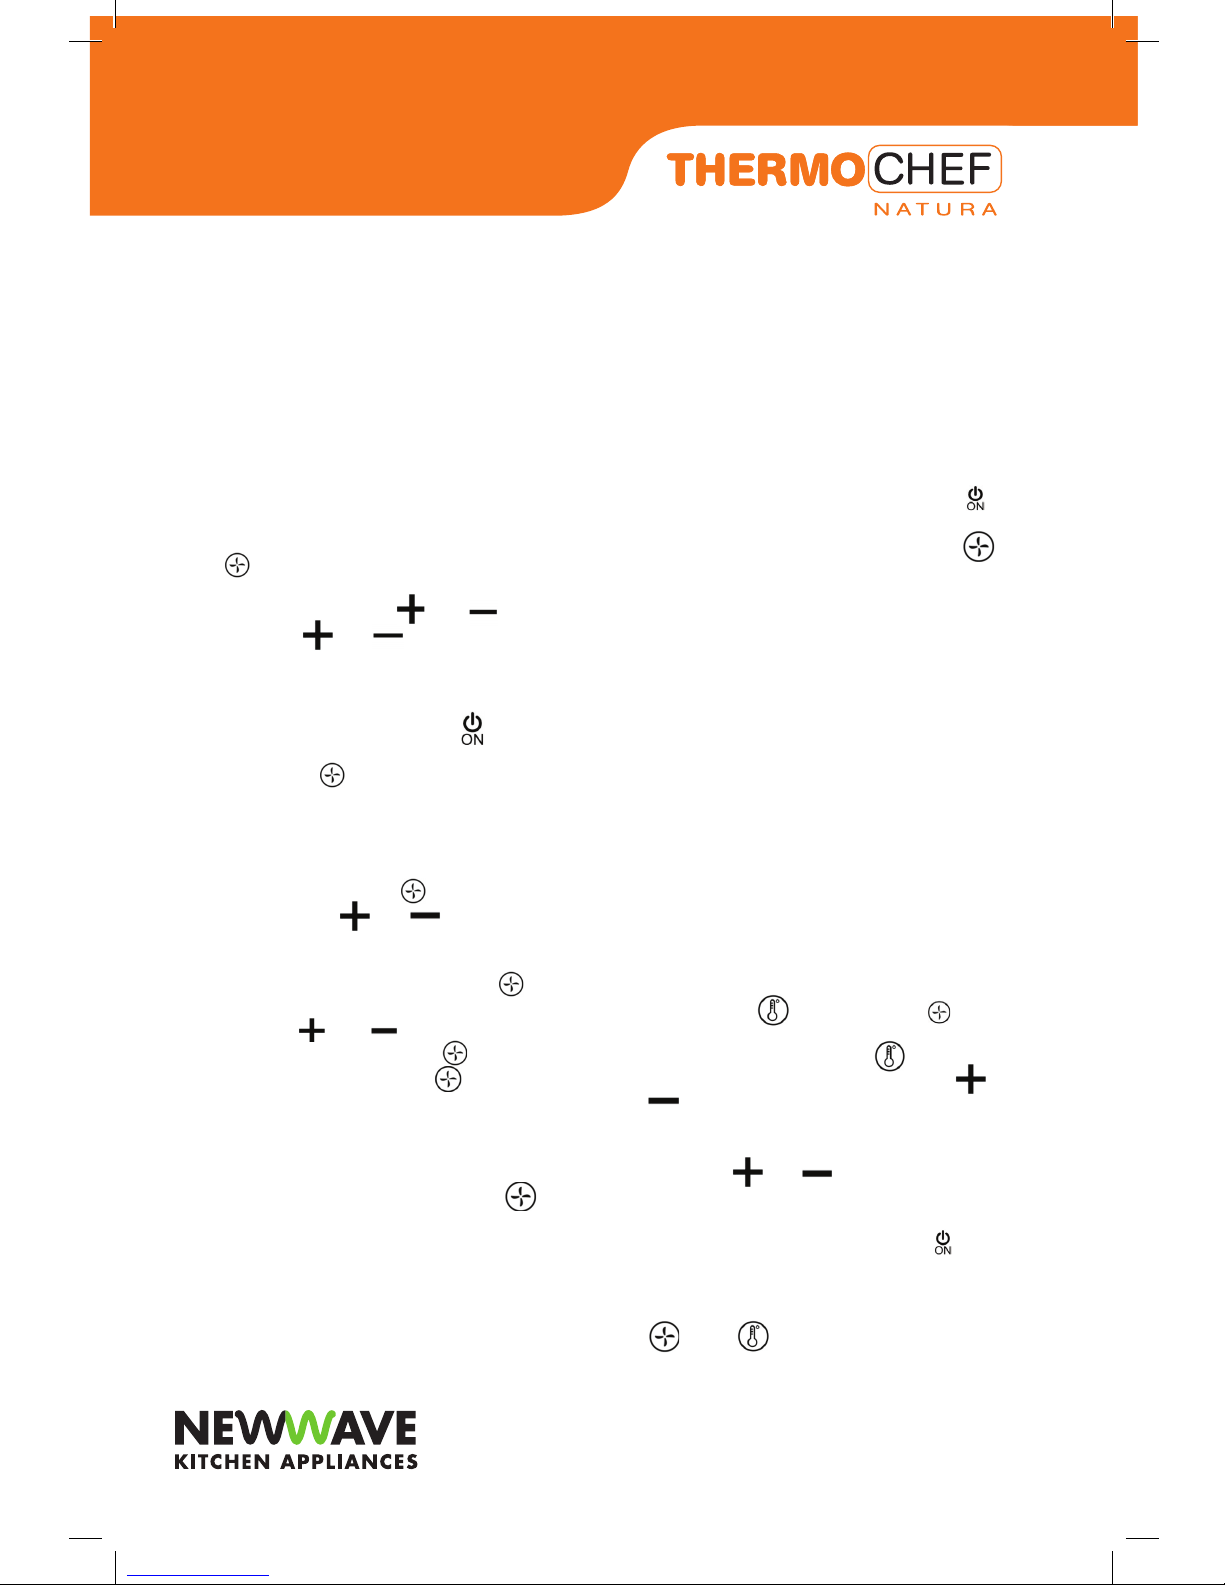
Button instruction
“Beep” sound shows the button has activated.
The control panel includes the following buttons
including:
“electronic scale”, “speed adjustment”, “knead dough”,
“Turbo boost”, “temperature adjustment”, “cooking”,
“Timer”, “+”, “-”, “start”, “stop”. The functions of these
buttons will be explained in the following part.
1. button of electronic scale/zero clearing of
measuring“ ”
• In standby condition, if you press this button,
“ ”will be shown in LCD screen. Now the
appliance is in electronic scale mode.
• In electronic scale mode, if you press this button
again, then the weight displayed in LCD will be
cleared to zero.
• Electronic scale function is not allowed to be used
during the working process.
2. Button for blending/ locking speed/ unlocking speed
“ ”
• In standby condition, if you press this button, then
the appliance come into blending mode.
• In blending mode, Press this button when “ ” is
ickering in LCD, then the speed is locked.
• In blending mode, Press this button when “ ”
stops ickering in LCD, then the speed is unlocked.
3. Button for kneading dough “ ”
• In standby condition, if press this button, “ ” will
icker in LCD screen, now the appliance gets into
• kneading dough function.
4. Turbo boost button“ ”
• Press in and maintain the pressure, “ ” will
icker in LCD screen, now the appliance is in Turbo
boost mode and rotates and blends at maxi speed.
• When you stop pressing it, the appliance will stop
blending.
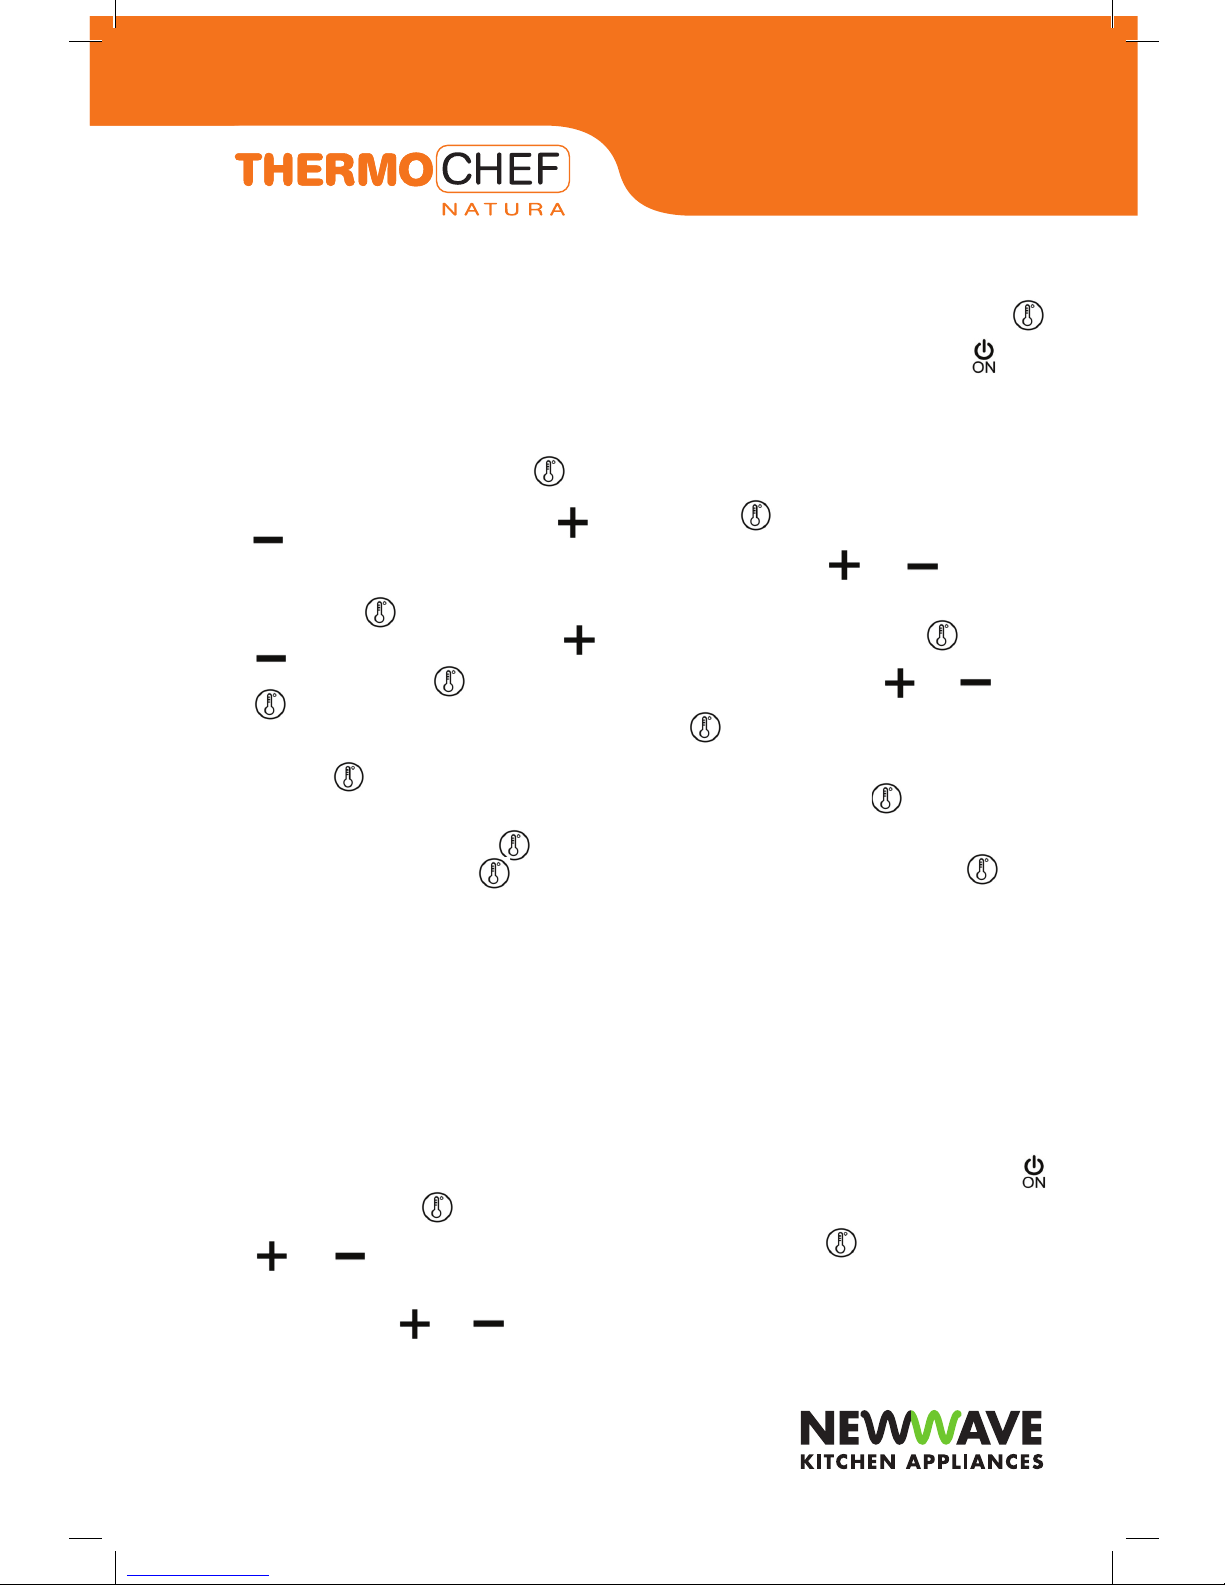
5. Button for heating/ locking temperature regulation/
unlocking temperature regulation “ ”
• Press this button in stand-by mode, the appliance
gets into heating setting mode.
• In heating mode, press this button when “ ” is
ickering, then temperature regulation is locked.
• In heating mode, press this button when “ ”
is not ickering, then temperature regulation is
unlocked.
6. Cooking “ ”
• In standby condition, if you press this button, “ ”
it will icker in LCD screen, now the appliance gets
into cooking mode.
7. Timer “ ”
• This button in standby mode, “ ” will icker
in LCD screen, now the appliance gets into timer
mode.
• This button in timer mode, hour setting will be
changed to minute setting.
• Conrm the setting time.
8. Increase speed/temperature/ time “ ”
• In blending mode, the rotation speed will increase
one level each time you press the button.
• In heating mode, the heating temperature will
increase one level each time when you press the
button.
• In timer mode, time will increase by pressing the
button.
• If maintain the pressure, the time will increase
quickly.
9. Decrease speed/temperature/ time “ ”
• In blending mode, the rotation speed will decrease
one level each time when you press the button.
• In heating mode, the heating temperature will
decrease one level each time when you press the
button.
• In timer mode, time will decrease by pressing
the button. If maintain the pressure, the time will
decrease quickly.
15
INSTRUCTION FOR USE
10. start “ ”
• In electricity saving mode, if you press this button for
2 seconds, then the appliance is in local time setting
mode.
• If you press this button in the setting mode, then the
appliance will start.
11. stop “ ”
• If you press this button in setting mode, the system
will cancel the setting and return to stand-by mode.
• In working mode, the appliance shuts off if this
button is pressed.
Operational instruction for functions
Before pressing the start button “ ” to begin the
operations (not including electronic scale and local
time setting), make sure that the bowl body and bowl
lid are connected well, i.e. “ ” will be displayed
on the LCD screen. The appliance cannot be turned
on with warning sound and “ ” on the LCD. As
each function is nished, “End” will be displayed with
warning sound.
1. Timer
Note: Timer cannot work without any function is
selected in advance and time cannot be set during
the process of working. It can be used only with four
functions: heating, blending, kneading dough, and
steaming.In stand-by mode or setting mode, press
timer “ ” which will then ickering on LCD screen
with minute blinking. Press “ ”or “ ” to set
minute and then press “ ”, the second will icker.
Press “ ”or “ ” to set seconds and then press
“ ” to conrm the time you have set. Timer stops
icker.The maxi time for setting is 60 minutes and the
display form is “XX:XX” (minute: second).
2. Turn off the appliance
Manual turning off
a) During working process, the appliance will stop
working immediately and return stand-by mode when
pressing stop button “ ”.
Automatically shut off
a) If the user has set the time, “End” will appear on the
LCD screen with warning sound to remind the end of
the operation after the time counts down to the end.
b) If there is no time set, the appliance will shut off
without any operation in 15 minutes for fear that the
user will forget to turn off it and with “End” appearing
on the display and warning sound to show the end of
the operation.
3. Pause Button
Operational instructions for PAUSE BUTTON
When unit is in progress:
Press button. The unit will switch to pause
mode and stop. Information already programmed
into unit will not be lost. Pause will ash on screen.
The maximum pause time is 15 minutes.
Using electronic scales while in pause mode –
To use electronic scales while unit is in progress –
Press button . The unit will switch over to pause
mode and stop. Information already programmed
into unit will not be lost. Press the button – the
LCD will display the programmed settings and the
icon will ash.
Press button again and the electronic scale
function will stop and previous functions programmed
into unit will continue.
In BLEND mode:
Press button. The unit will switch to pause
mode. This allows you to re set speed, time and
scale function.
In TEMPERATURE mode:
Press button. The unit will switch to pause
mode. This allows you to re set temperature, time
and scale function.
In BLEND and TEMPERATURE mode:
Press button. The unit will switch to pause
mode. Allowing the blend, temperature, time and
scales functions to be re set.
In COOKING mode:
Press button. The unit will switch to pause
mode. This allows you to re set time, rotate speed
(1-5 gradual speed increase) and scale function.
In KNEAD mode:
Press button. The unit will switch to pause mode.
This allows you to re set time (max 2 minutes) and
scale function.
Press button and previous functions
programmed into unit will continue.
16
INSTRUCTION FOR USE
Blending + timer + adjusting speed
Note: step 1 and step 2 are in no particular order.
• Step 1: choose blending function and set up rotation
• speed. Refer to: chapter of “blending + adjusting
speed”
• Step 2: time setting Note: this step can be chosen or
skipped. Refer to: chapter of “Timer”
• Step 3: start the appliance Note: this step can be
chosen or skipped. In setting mode, when “ ” is
pressed, the appliance will begin to work at the set
speed for the set time, and functional icon “ ”
remains on to show the blending mode.
• Step 4: rotation speed can be reset in blending
mode.Note: this step can be chosen or skipped.
Refer to: the third step in chapter of “blending +
adjusting speed”
• Turn off the appliance
Refer to: chapter of “turn off the appliance”
Blending + adjusting speed + heating + adjusting
temperature + timing
(Note: the following step 1 to 3 are in no particular
order)
• Step 1: choose blending and set rotation speed.
Refer to: step 1 in chapter of “blending + adjust
speed”
• Step 2: timer setting Note: this step can be chosen
or skipped. Refer to: chapter of “timing ”
• Step 3: choose heating and set up temperatureNote:
this step can be chosen or skipped. After pressing
heating button “ ”, blending icon “ ” remains
light instead of icker which means the speed is
nonadjustable. If heating icon “ ” ickers, the
heating temperature can be adjusted by “ ” or
“ ”. (There are totally seven temperature levels,
including 37°, 50°, 60°, 70°, 80°, 90°and 100°.)
The temperature will increase or decrease by one
level when “ ” or “ ” is pressed each time.
The chosen heating temperature level will icker in
display with default temperature of 37°.
• Step 4: start the appliance. When the “ ”
button is pressed, the appliance starts to work in
accordance with the rotation speed, temperature
and time which have been set up. Functional icons
“ ” and “ ” will appear together on the
LCD display to show the condition of blending and
heating.
17
4. Blending
Processing beef: each time 200g can be processed
and the max continuous operation can continue for
15 minutes. When processing beef, ice or any other
stubborn food, do not let the product continuously
operate, only use on-off way, operate 30 seconds then
rest 30 seconds.
Blending + adjusting speed
• Step 1: choose blending and set up rotation speed.In
stand-by mode, after pressing blending button,
“ ” functional sign will icker on the LCD. At
this time rotation speed level (10 levels in total)
can be set by pressing “ ” or “ ”. Each time
you press “ ” or “ ”, the rotation speed will
increase or decrease one level. The chosen rotation
speed will blink on the display. ( the default rotation
speed is level one).
• Step 2: start the appliance After “ ” is pressed
down, the appliance starts to work according to the
settings with “ ” is on to show the appliance is in
blending mode.
• Step 3: adjustment of rotation speed in blending
mode. Note: this step can be chosen or skipped.
In blending mode, you can press blending button
to make functional sign “ ” icker on the LCD
and then press “ ” or “ ” to reset the rotation
speed.
Note:
a) Adjustable rotation speed: ickering “ ” on
the LCD means that rotation speed can be adjusted
by pressing “ ” or “ ”. If you want to conrm
your setting, you can just press “ ” again. Now the
speed cannot be adjusted and “ ” remains light.
b) Nonadjustable rotation speed: if the functional icon
doesn’t icker on the display, that means the speed
adjustment function is locked and the speed cannot
be adjusted. To unlock it, you can press “ ” which
will then icker on the display. Now the speed is
adjustable.
• Step 4: turn off the appliance Refer to the chapter of
“turn off the appliance”.
INSTRUCTION FOR USE
• Step 5: rotation speed is allowed to be reset in
blending mode.Note: this step can be chosen or
skipped.Refer to: step 3 in chapter of “blending +
adjusting speed”
• Step 6: heating temperature is allowed to be reset
in blending mode. Note: this step can be chosen
or skipped. Heating temperature can be reset in
blending mode. Press heating button“ ” the icon
of which will then icker on the display. Now you
can set the temperature level freely with “ ” or
“ ”.
Note:
a) Condition of heating temperature adjustable: the
Flickering icon “ ” on LCD screen means the
temperature is allowed to be adjusted by “ ” or
“ ”. The temperature level can be conrmed by
pressing heating button “ ” again with icon
“ ” on the display remaining light. Now the
heating temperature cannot be adjusted.
• b) Condition of heating temperature nonadjustable:
if the icon “ ” on the LCD screen doesn’t icker,
then the temperature adjustment button is locked
and cannot be activated. To unlock the button, you
should press the heating button “ ”, then the
temperature can be reset with “ ” ickering on
the LCD display.
c) When the bowl body’s temperature exceeds 60℃
with rotation speed over level 5, the appliance will
automatically change the speed to level 5 in order to
avoid scalding by the splashed food.
• Step 7: turn off the appliance. Refer to: the chapter
of “turn off the appliance”
5. Heating:
Heating + adjusting temperature
• Step 1: choose heating and set up temperature
After the heating button is pressed in stand-by
mode, functional icon “ ” will icker on the LCD
display and the temperature can be set up by
“ ” or “ ”. (There are seven temperature
levels, including 37° , 50° , 60° , 70° , 80° , 90° and
100℃.) The temperature will increase or decrease
by one level when “ ” or “ ” is pressed each
time. The chosen heating temperature level will
icker in display with default temperature of 37°.
• Step 2: start the appliance. After the button“ ”
is pressed, the appliance starts to work at
the set temperature. Functional icon “ ”
remains light on LCD screen to show the heating
condition of the appliance.
• Step 3: the heating temperature can be reset
in heating mode. Note: this step can be chosen
or skipped. The heating temperature can be
changed in heating mode. Press the heating
button “ ” and it will icker on the LCD
display. At this time the temperature can be
adjusted freely by “ ” or “ ”.
• Note:
a) The condition of adjustable heating
temperature: the fact that icon “ ” ickers on
the LCD screen means that the temperature is
allowed to be changed by “ ” or “ ”.
To lock the temperature setting, you can press
“ ” which will remains light on LCD screen to
show the temperature adjustment is not allowed.
b) the condition of nonadjustable heating
temperature: if the icon “ ” doesn’t icker on
the screen, then the temperature setting is not
allowed. To unlock the temperature setting button,
you should press the heating button “ ” and
it will icker on the LCD screen which means the
temperature is adjustable.
• Step 4: turn off the appliance Refer to: the chapter
of “turn off the appliance”
Heating + timing + adjusting temperature
( Note: step 1 and 2 are in no particular order)
• Step 1: choose heating function and set up
temperature: Refer to: step 1 in the chapter of
“Heating + adjusting temperature”
• Step 2: timing. Note: this step can be chosen or
skipped.Refer to: the chapter of “timing”
• Step 3: start the appliance. After the button “ ”
is pressed, the appliance starts to work according
to the temperature and the time set in advance.
The function icon “ ” remains light on the
LCD screen to show the heating condition. The
ickering icon “°” means that the temperature of
the food hasn’t reached the set temperature and
vice versa. The displayed temperature is just for
information.
18
INSTRUCTION FOR USE
• Step 4: the temperature can be reset in heating
mode. Note: this step can be chosen or skipped.
Refer to: step 3 in the chapter of “heating +
adjusting temperatre”
• Step 5: turn off the appliance
Heating + adjusting temperature + blending +
adjusting
• rotation speed + timing. ( Note: step 1 to 3 are in no
particular order)
• Step 1: choose heating function and set up the
temperature. Refer to: step 1 in the chapter of
“ heating + adjusting temperature”
• Step 2: timing. Note: this step can be chosen or
skipped. Refer to: the chapter of “timing”
• Step 3: choose blending function and set up
rotation speed. Note: this step can be chosen
or skipped. After the blending button is pressed
down, functional icon “ ” becomes light
instead of ickering which means the temperature
setting button is locked. With blending icon “ ”
ickering on LCD screen, you can adjust the
rotation speed freely by “ ”or “ ”. (There
are 10 rotation speed levels in total, from 1 to 10).
The rotation speed will increase or decrease by
one level each time you press “ ”or “ ”.
The selected rotation speed will icker on the
display and the default speed is level 1.
• Step 4: start the appliance. After the button “ ”
is pressed down, the appliance starts to work
according to the set rotation speed, temperature
and time. Function icons “ ” and “ ” will
appear together on the LCD screen to show the
heating and blending mode of the appliance.
• Step 5: the heating temperature can be reset in
heating mode. Note: this step can be chosen or
skipped. Refer to: step 1 in the chapter of “ heating
+ adjusting temperature”
• Step 6: rotation speed can be reset in heating
mode.Note: this step can be chosen or skipped.
Rotation speed can be reset in heating mode.
Press the blending button “ ” to have function
icon “ ” icker on the LCD screen and then set
up the rotation speed freely by pressing “ ” or
“ ”.
• Note:
a) Condition of adjustable rotation speed: the
ickering icon “ ” on the LCD screen means the
rotation speed is allowed to be adjusted by pressing
“ ” or “ ”. To lock the rotation speed setting
function, just press the blending button “ ”again
and its icon will remains light on LCD screen to show
that the rotation speed cannot be adjusted.
b) Condition of nonadjustable rotation speed: if the
icon “ ” doesn’t icker on LCD, that means
the rotation speed setting function is locked and
inactivated. To activate it, just press the blending
button again. Then “ ” will icker on LCD to
show that the speed can be adjusted.
c) If the temperature of bowl body exceeds 60℃
with its rotation speed over level 5, the appliance will
change the rotation speed to level 5 for fear that the
liquid in the bowl will splashed out and cause scald
to the people if the speed is over level 5.
• Step 7: turn off the appliance. Refer to: the chapter
of “turn off the appliance”
6. Kneading dough:
Making dough: following the instruction, use separate
function to make dough. Each time make 200 g four
with 120 g water, to operate 2 minutes, rest 1 minute
for next cycle. It can only continuously operate for 5
cycles. After it should be cool down for 1 hour before
use it again. (Note: step 1 and 2 are in no particular
order)
• Step 1: choose Kneading dough function. After the
kneading dough button “ ” is pressed down in
stand-by mode, the functional icon “ ” will icker
on LCD screen to show the setting of kneading
dough.
• Step 2: timing. Note: this step can be chosen or
skipped. Refer to: the chapter of “timing”
• Step 3: start the appliance. After pressing down the
button “ ”, the appliance/ starts to work according
to the settings. Functional icon “ ” remains
light on LCD screen to show the appliance is in the
condition of kneading dough.
• Step 4: turn off the appliance
Refer to: the chapter of “ turn off the appliance”
. . . .
19
Table of contents
Other Newwave Kitchen Appliance manuals


