Next 666612 User manual

1
Need Help?
With: Assembly instructions
Missing or damaged parts
CALL: 0333 777 8999
IMPORTANT ─ RETAIN FOR FUTURE REFERENCE
Produced in China for Next Retail Ltd.
Assembly instructions
Notice:
This kit is a bay window solution which converts a Next 25/28mm extendable
straight curtain pole into a curtain pole suitable for a bay window.
Please see www.next.co.uk for a full range of 25-28mm extendable straight
poles.
Bay Window Kit
666612 & 662382
Bay Window Kit - 2015 INS-9.1

2
Produced in China for Next Retail Ltd.
Assembly instructions
Before You Start
Warnings
We suggest you retain these instructions for future reference.
This product should only be used on solid mounting at the point of fixing. This
is necessary to take the weight of the curtain pole with curtain.
Please periodically check all fittings and re-tighten as necessary.
Unwrap all packaging materials and place the components on top of the
carton box or on a clean floor to protect it from damage.
Do's
We suggest you spend a short time reading through this leaflet before you start.
When you are ready to start, make sure that you have the right tools and plenty of
space.
Unwrap all packaging materials and place the components on a clean surface to
protect it from damage.
Carefully check that you have all the parts before beginning assembly.
Due to the size of the product we recommend that it is assembled in the room
intended for use.
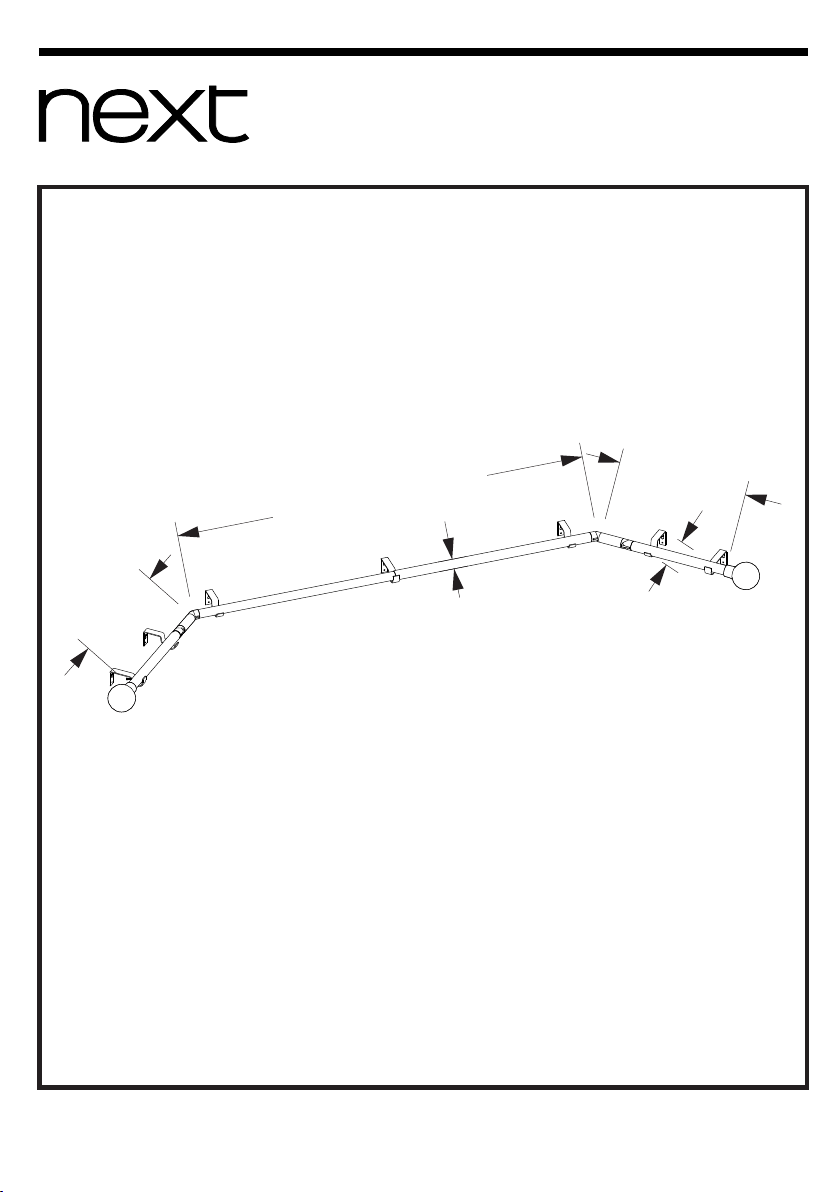
Ensure the product is fully assembled as illustrated and all fixings are fully
tightened before use.
Wipe occasionally with a soft cloth slightly dampened with water. Then buff with a
dry clean soft cloth.
Don'ts
We recommend cleaning with a soft dry cloth. Do not use abrasive materials
as these will rub away the protective coating.
Number of people required to assemble
One person who is competent with installation, however we do recommend
that with two persons it should be easier to assemble this item.
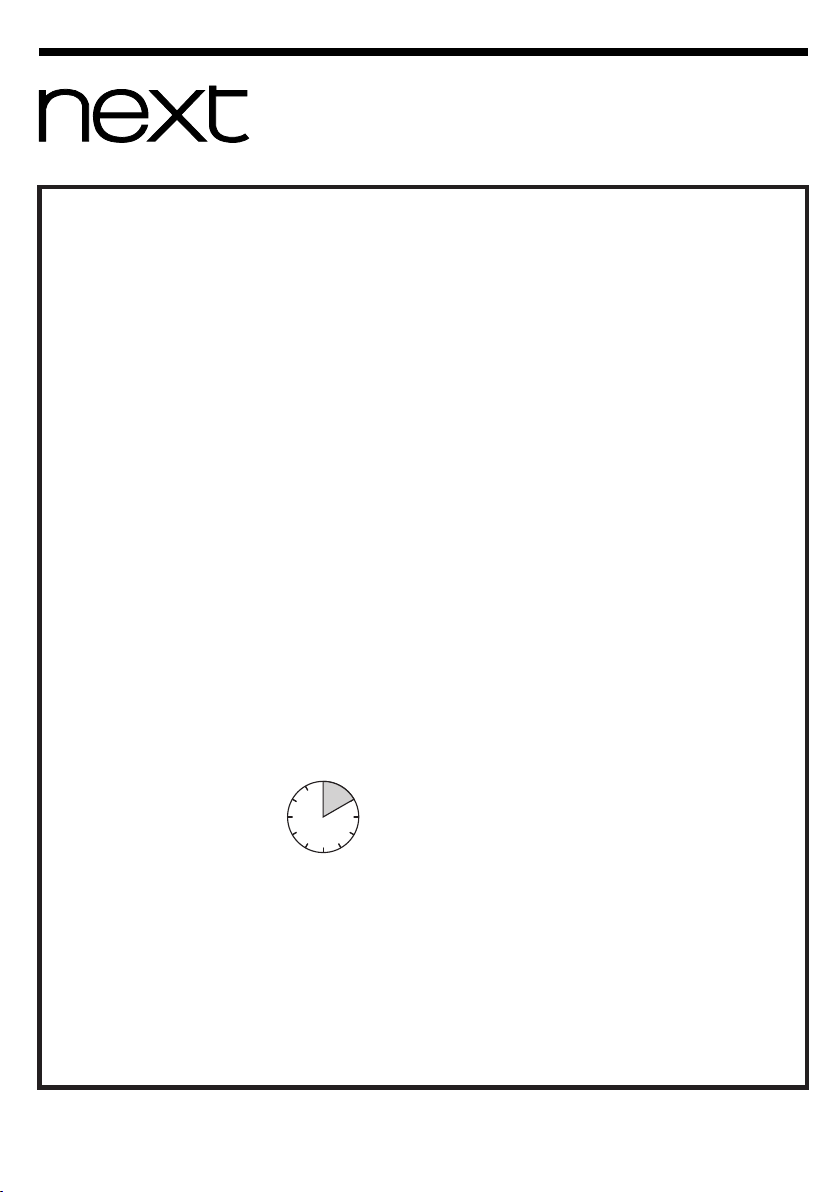
Time to assemble
About 2 hours.
Tools required
Electric drill with 6mm masonry drill bit ; Cross head screwdriver
Spirit level and tape measure; Hack saw and small file
Missing parts
If you are missing any fixtures and fittings for your product, please contact
our customer service team on 0333 777 8999 and they will be happy to
arrange for a replacement to be sent to you free of charge.
You can write to us at Home Customer Services
Next Retail Ltd,
Desford Road,Leicester,LE19 4AT
To View our full curtain pole range please visit www.next.co.uk
Bay Window Kit
666612 & 662382
Bay Window Kit - 2015 INS-9.1

3
Produced in China for Next Retail Ltd.
Assembly instructions
Components supplied. Please use this guide if you require replacement parts.
1 2 3
567 8 9
GETTING TO KNOW YOUR PRODUCT
4
No
Description Spec Qty
1 Diam 28 pole Diam 28 x 900mm 1
2 Diam 25 pole Diam 25 x 900mm 1
3 Corner piece “A” Fit 28mm pole 1
4 Corner piece “B” Fit 25mm pole 1
5 Corner Bracket Without fixed screw 4
6 Open end Ring With cut-away section 20
7 Plastic plug 8
8 Fixing screws L 38mm 8
9 Instructions A4 x 2 1
Bay Window Kit
666612 & 662382
Bay Window Kit - 2015 INS-9.1

4
Produced in China for Next Retail Ltd.
Assembly instructions
INTRODUCE 25/28MM EXTENDABLE
STRAIGHT CURTAIN POLE
(Sold Separately)
5 6 7 8 9 10
1 2 43
125-216cm Size 200-300cm Size 280-400cm Size
No. Description Spec Qty Spec Qty Spec Qty
1 Outer pole 1150mm 1 1600mm 1 2100mm 1
2 Pole joint seal 1 1 1
3 Inner pole 1170mm 1 1620mm 1 2120mm 1
4 Finials 2 2 2
5 Bracket 3 3 3
6 Ring 20 30 40
7 Plastic plug 6 6 6
8 Fixing screws L 38mm 6 L 38mm 6 L 38mm 6
9 Allen key M4 1 M4 1 M4 1
10 Instructions A4 x 2 1 A4 x 2 1 A4 x 2 1
Bay Window Kit
666612 & 662382
Bay Window Kit - 2015 INS-9.1

5
20cm
20cm
20cm
Assembly instructions
Step 1. Temporarily fit the brackets
1.Find the four corner brackets from bay window kit. These are the brackets which
supplied with kit, Shown (A) in below figure.
2.Place one of the corner brackets (A) against the wall at the required height and
20cm from the corner of the recess. Make a mark on the wall at the top of the
keyhole slot in the bracket. With the help of a spirit level, mark the wall for the
remaining three corner brackets. Each bracket should be 20cm from the corner of
the recess. At this stage, only mark the hole positions for the keyhole slots.
(See Figure 1).
*IMPORTANT – Curtain rings will not run over brackets supplied with curtain
poles. Please ensure that these are positioned correctly as shown below and
where curtain will not need to be drawn.
3.Find the 3 brackets from the straight curtain pole kit. These are the brackets which
supplied with curtain pole. Shown ‘B’ in below figure.
4.In the same way, mark the desired hole positions for the keyhole slots of the 2
brackets at both end of window. It should be at least 8cm from the wall edge.
5.The remaining bracket should be positioned at the meeting point of the curtain on
the front face of the window, usually the centre. This will also be the point at which
the two parts of the extendable pole meet.
6.Drill 6mm holes in the wall at the seven bracket positions and insert plastic plugs.
7.Without the brackets being in position, screw in the screws in the plastic plugs.
Occasionally try hanging a bracket from them until the brackets are starting to be
held firmly.
8.Hang all the brackets on their screws.
Assembly Instructions
1
20cm
At least 8cm
Wall edge
Wall edge
A
A
A
A
BB
B
At least 8cm
Produced in China for Next Retail Ltd.
Bay Window Kit
666612 & 662382
Bay Window Kit - 2015 INS-9.1

6
Assembly instructions
Step 2. Try out the poles on the brackets and Permanentlyfix brackets
1.Assemble the corner pieces (part no.s 3+4) together with the curtain poles from the
desired extendable curtain pole following the diagram below.(See Figure 2.)
2.Rest the pole assembly on the brackets and check that the brackets are all in the
correct place.
3.Now make any small adjustments to the height of the brackets by sliding them up or
down their keyhole slots. Mark the position on the wall for the lower screws.
4.Remove the brackets and drill holes at the positions marked by above step.
5.Insertplasticplugsandre-positionthebrackets.Tightenthekeyholeslotscrewsas
muchaspossiblewhilstbeingabletoslidethebracketsintoplace.
6.Insertscrewsinthelowerbracketholesandtightenfully.
Step 3. Cut the poles to length
Note that the join of the extendable pole should be located aligned with the centre
bracket (B). This will prevent the curtain rings catching on the pole joint.
1.With the poles resting on the brackets measure from the join on the main poles to the
centre of the middle bracket (B). Note measurement.
2. Remove poles from brackets and separate the two main pole sections.
3. Measure and mark the distance noted above in step 1 onto outer 28mm pole (only)
4. Remove plastic pole joint seal.
5.Cut the pole using a hacksaw and remove any burrs with a file.
6.Re-insert plastic pole joint seal.
7.Trim poles supplied with bay window kit to desired length with a hacksaw.
8. Remove protective film and re-assemble curtain poles and re-check positioning on
2
Produced in China for Next Retail Ltd.
Dia 25mm pole
Dia 25mm pole of
extendable curtain pole
Dia 28mm pole
Dia 28mm pole of
extendable curtain pole
Corner
piece ‘A’
Corner
piece ‘B’
B
Bay Window Kit
666612 & 662382
Bay Window Kit - 2015 INS-9.1

7
Produced in China for Next Retail Ltd.
Assembly instructions
Step 4. Fit the rings
1. Slide sufficient rings onto the pole. We recommend one ring for every 10cm of
pole.(See Figure 3.)
The rings supplied with the bay window kit have a cut-away section that allows
them to pass over the corner brackets (A). These should be used for any part of the
curtain that needs to travel around the bay corner.
2.We advise using complete curtain rings supplied with the extendable pole for parts
of the curtain that do not need to pass around the corner.
3.Keep two complete rings aside for the pole ends.
4.Rest the pole assembly on the brackets
5.Slide a ring onto each end of the pole to hold the end of the curtain in place.
Step 5. Finishing off
1. Secure the pole to the three brackets that have fixing screws by tightening the
screws against the pole.(See Figure 4.)
2. Secure the finials to each end of the pole using the Allen key provided to tighten the
grub screws. (See Figure 5.)
3. The pole is now ready to accept curtains by slipping the curtain hooks through the
eyelets on the rings. We recommend one ring for every 10cm of pole.
4. Hang the curtain on the curtain rings.
4
5
3
Bay Window Kit
666612 & 662382
Bay Window Kit - 2015 INS-9.1

8
Produced in China for Next Retail Ltd.
Actual product size
See below diagram
Unit: mm
Depend on the extendable
straight curtain pole size
Max 1020
Max 1020
Dia 28
107
Bay Window Kit
666612 & 662382
Bay Window Kit - 2015 INS-9.1
This manual suits for next models
1
Table of contents
Popular Window Blind manuals by other brands

WeatherMaster
WeatherMaster Eclipse Shutters installation manual

BLINDS2GO
BLINDS2GO Roman installation guide

sun collection
sun collection FALTSTORE UP & DOWN Assembly instructions

YewdaleDefiant
YewdaleDefiant R20 Fitting instructions

MHZ
MHZ SPIN Care Instructions

DecorQuip
DecorQuip Dream Range 191713 quick start guide