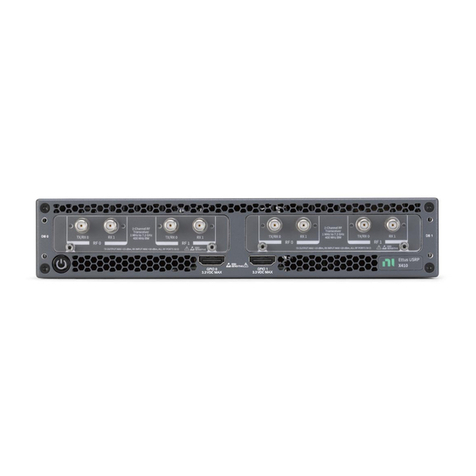
NI 5421 Manual

CALIBRATION PROCEDURE
NI 5421/5441
100 MS/s Arbitrary Waveform Generator
This document contains the verification and adjustment procedures for the NI 5421/5441
arbitrary waveform generator. This calibration procedure is intended for metrology labs.
Refer to ni.com/calibration for more information about calibration solutions.
Contents
Contents .................................................................................................................................... 1
Software.................................................................................................................................... 2
Documentation.......................................................................................................................... 3
Self-Calibration Procedures...................................................................................................... 3
MAX................................................................................................................................. 4
FGEN Soft Front Panel..................................................................................................... 4
NI-FGEN .......................................................................................................................... 4
Calibration Options................................................................................................................... 5
Calibration Requirements ......................................................................................................... 5
Test Equipment................................................................................................................. 5
Test Conditions.................................................................................................................7
System Setup ............................................................................................................................ 7
Calibration Procedures ............................................................................................................. 7
Verifying NI 5421/5441 Specifications............................................................................ 7
Verifying the Oscillator Frequency Accuracy.......................................................... 9
Verifying the DC Gain and Offset Accuracy ........................................................... 11
Verifying the AC Voltage Amplitude Absolute Accuracy....................................... 21
Verifying Frequency Response (Flatness)................................................................ 25
Adjusting the NI 5421/5441 ............................................................................................. 32
Adjusting the Analog Output.................................................................................... 33
Adjusting the Oscillator Frequency .......................................................................... 47
Adjusting the Calibration ADC ................................................................................ 50
Closing the External Adjustment Session ................................................................ 54
Calibration Utilities .................................................................................................................. 55
MAX................................................................................................................................. 55
FGEN SFP ........................................................................................................................55
NI-FGEN .......................................................................................................................... 55
Worldwide Support and Services ............................................................................................. 56

2 |ni.com |NI 5421/5441 Calibration Procedure
Software
Calibrating the NI 5421 requires you to install NI-FGEN version 2.0 or later on the calibration
system. Calibrating the NI 5441 requires you to install NI-FGEN version 2.3 or later on the
calibration system. You can download NI-FGEN from the National Instruments website at
ni.com/downloads. NI-FGEN supports programming the Self-Calibration Procedures and
the Calibration Procedures in the LabVIEW, LabWindows™/CVI™, and C application
development environments (ADEs). When you install NI-FGEN, you only need to install
support for the ADE that you intend to use.
For LabWindows/CVI, the NI-FGEN function panel (niFgen.fp) provides help about the
functions available. LabVIEW support is in the niFgen.llb file, and all calibration VIs appear
in the Functions palette.
Calibration functions are C function calls or LabVIEW VIs in NI-FGEN. The C function calls
are valid for any compiler capable of calling a 32-bit DLL. Many of the functions use constants
defined in the niFgen.h file. To use these constants in C, you must include niFgen.h in your
code when you write the calibration procedure. Refer to the following table for file locations.
The calibration process is described in the Self-Calibration Procedures and the Calibration
Procedures sections, including step-by-step instructions on calling the appropriate calibration
functions.
Table 1. Calibration File Locations
File Name and Location Description
IVI\Bin\niFgen_32.dll The NI-FGEN library, which provides
the functionality for calibrating the NI 5421/5441.
IVI\Lib\msc\niFgen.lib
IVI\Lib\bc\niFgen.lib
Allows you to create applications that call
functions in the niFgen_32.dll:
• For Microsoft Visual C/C++, link to
msc\niFgen.lib.
• For LabWindows/CVI, link to the library
appropriate to your current compatibility mode
(msc for Microsoft Visual C/C++).
IVI\Include\niFgen.h A header file for the accessible functions in the
niFgen_32.dll. You must include this file in
any C code that you write to call these functions.
<LabVIEW>\instr.lib\
niFgen\niFgen.llb (LabVIEW)
Contains VIs that correspond to the functions in the
niFgen_32.dll.
IVI\Drivers\niFgen\
niFgen.fp (CVI)
Contains the function panels for the functions in the
niFgen_32.dll.

NI 5421/5441 Calibration Procedure |© National Instruments |3
Documentation
Consult the following documents for information about the NI 5421/5441, NI-FGEN, and your
application software. All documents are available at ni.com/manuals and are installed with
the software.
Self-Calibration Procedures
The NI 5421/5441 can perform self-calibration, which adjusts the gain and offset of the main
and direct analog paths. Self-calibration uses only an onboard analog-to-digital converter (ADC)
to measure the output voltage. You can implement self-calibration on the NI 5421/5441 by
following procedures similar to the Verifying the DC Gain and Offset Accuracy and the
Adjusting the Analog Output procedures described in this document. However, output
impedance, oscillator frequency, and the calibration ADC are not adjusted during
self-calibration.
You can initiate self-calibration interactively from Measurement & Automation Explorer
(MAX) or from the FGEN Soft Front Panel (SFP). Alternatively, you can initiate self-calibration
programmatically using NI-FGEN.
NI Signal Generators Getting Started Guide
Contains instructions for installing and configuring NI signal generators.
NI PXI/PCI-5421 Specifications
Provides the published specification values and calibration interval for the
NI 5421. Refer to the most recent NI PXI/PCI-5421 Specifications online at
ni.com/manuals.
NI PXI-5441 Specifications
Provides the published specification values and calibration interval for the
NI 5441. Refer to the most recent NI PXI-5441 Specifications online at ni.com/
manuals.
NI Signal Generators Help
Contains detailed information about the NI 5421/5441 and the NI-FGEN
LabVIEW VI and C function programming references. Access this help file
by selecting Start»All Programs»National Instruments»NI-FGEN»
Documentation»NI Signal Generators Help.

4 |ni.com |NI 5421/5441 Calibration Procedure
MAX
To initiate self-calibration from MAX, complete the following steps:
1. Launch MAX.
2. Select My System»Devices and Interfaces»PXI System from the tree control.
3. Select the device that you want to calibrate.
4. Initiate self-calibration in one of the following ways:
•ClickSelf-Calibrate in the upper right corner.
• Right-click the device name and select Self-Calibrate from the drop-down menu.
FGEN Soft Front Panel
To initiate self-calibration from the FGEN Soft Front Panel (SFP), complete the following steps:
1. Select the device that you want to calibrate using the Device Configuration dialog box
(Edit»Device Configuration).
2. Open the Calibration dialog box (Utility»Calibration).
3. Click Perform self-calibration.
NI-FGEN
To self-calibrate the NI 5421/5441 programmatically using NI-FGEN, complete the following
steps:
1. Call niFgen_init (niFgen Initialize VI) to open an NI-FGEN session using the following
parameters:
•resourceName: The name of the device that you want to calibrate. You can find this
name under Devices and Interfaces in MAX.
•IDQuery: VI_TRUE
•resetDevice: VI_TRUE
•vi: A pointer to a ViSession. The variable passed by reference through this parameter
receives the value that identifies the session created by this function. This value acts
as the session handle and is passed as the first parameter to all subsequent NI-FGEN
functions.
2. Call niFgen_SelfCal (niFgen Self Cal VI) using the following parameter:
•vi: The session handle returned from niFgen_init
3. Call niFgen_close (niFgen Close VI) to close the NI-FGEN session using the following
parameter:
•vi: The session handle returned from niFgen_init

NI 5421/5441 Calibration Procedure |© National Instruments |5
Calibration Options
External calibration involves both verification and adjustment. Verification is the process of
testing the device to ensure that the output accuracy is within certain specifications. You can use
verification to ensure that the adjustment process was successful or to determine if the
adjustment process needs to be performed.
Adjustment is the process of measuring and compensating for device performance to improve
the output accuracy. Performing an adjustment updates the calibration date, resetting the
calibration interval. The device is guaranteed to meet or exceed its published specifications for
the duration of the calibration interval.
This document provides two sets of test limits for most verification stages, the calibration test
limits and the published specifications. The calibration test limits are more restrictive than the
published specifications. If all the output errors determined during verification fall within the
calibration test limits, the device is guaranteed to meet or exceed its published specifications for
a full calibration interval (two years). For this reason, you must verify against the calibration test
limits when performing verification after adjustment.
If all the output errors determined during verification fall within the published specifications, but
not within the calibration test limits, the device meets its published specifications. However, the
device may not remain within these specifications for another two years. The device will meet
published specifications for the rest of the current calibration interval. In this case, you can
perform an adjustment if you want to improve the output accuracy or reset the calibration
interval. If some output errors determined during verification do not fall within the published
specifications, you must perform an adjustment to restore the device operation to its published
specifications.
Calibration Requirements
This section describes the test equipment and test conditions required for calibration.
Test Equipment
External calibration requires different equipment for each applicable specification. Refer to
Table 2 for a list of equipment.

6 |ni.com |NI 5421/5441 Calibration Procedure
Table 2. Equipment Required for Calibrating the NI 5421/5441
Instrument Recommended Instrument Applicable Specification Minimum Specifications
Digital multimeter (DMM) NI PXI-4070
Agilent/HP 34401A
Keithley 2000
AC accuracy, DC gain and
offset, and frequency accuracy
DCV accuracy: ≤0.05%
DC input impedance: ≥1 GΩ
ACV accuracy: ≤0.16%
AC input impedance: ≥1 MΩ
Bandwidth: ≥100 kHz
Male banana-to-female BNC adapter — —
Male BNC-to-female SMB cable —50 Ω, RG-223
Frequency counter Agilent/HP 53131A or
HP 53132A with timebase option
001, 010, or 012
Frequency accuracy Ability to measure 10 MHz or higher
sine waves
Frequency accuracy to ±500 ppb
Male BNC-to-female SMB cable —50 Ω, RG-223
Power meter/sensor R&S NRP-Z91 Frequency response (flatness) VSWR: (50 kHz to 120 MHz) ≤1.11
Relative power accuracy: ≤0.022 dB
Type N female-to-SMB plug adapter Pasternak PE9316 VSWR: 1.3

NI 5421/5441 Calibration Procedure |© National Instruments |7
Test Conditions
Follow these guidelines to optimize the connections and the environment during calibration:
• Keep connections to the NI 5421/5441 short. Long cables and wires act as antennas,
picking up extra noise that can affect measurements.
• Keep relative humidity below 80%.
• Maintain a temperature between 18 °C and 28 °C.
• Observe the 15 minute warm-up time.
• Allow the DMM to warm up for its recommended warm up interval.
System Setup
Before you begin the calibration procedure, connect the Reference Clock output from your
counter to the CLK IN connector on your DUT (device under test).
Calibration Procedures
The complete calibration procedure consists of self-calibrating, verifying the performance of the
NI 5421/5441, adjusting the calibration constants, and re-verifying performance after the
adjustments. In some cases, the complete calibration procedure may not be required. Refer to the
Calibration Options section for more information.
The external calibration procedure automatically stores the calibration date to allow traceability.
Verifying NI 5421/5441 Specifications
Note Always self-calibrate the NI 5421/5441 before beginning a verification
procedure.
This section provides instructions for verifying the NI 5421/5441 specifications. This section
also includes instructions for updating the calibration cycle.
You can verify the following specifications for the NI 5421/5441:
• Oscillator frequency accuracy
• DC gain and offset accuracy
• AC accuracy
• Flatness
Note If any of these tests fail immediately after you perform an external
adjustment, verify that you have met the required test conditions before you return
the NI 5421/5441 to NI for repair.

8 |ni.com |NI 5421/5441 Calibration Procedure
Refer to Table 2 for information about which instrument to use for verifying each specification.
Refer to Figure 1 for the names and locations of the NI PXI-5421/5441 and the NI PCI-5421
front panel connectors. The NI PXI-5421/5441 is pictured on the left. The NI PCI-5421 is
pictured on the right.
Figure 1. NI PXI-5421/5441 and NI PCI-5421 Front Panel Connectors
PFI 0
PFI 1
ACCESS ACTIVE
CLK
IN
CH 0
DIGITAL DATA & CONTROL
CH
0
PFl
0
DIGITAL DATA & CONTROL
NI PCI-5421
CLK
IN
PFl
1

NI 5421/5441 Calibration Procedure |© National Instruments |9
Verifying the Oscillator Frequency Accuracy
This test verifies the frequency accuracy of the oscillator on the NI 5421/5441. Verification
involves generating a 10 MHz sine wave with the NI 5421/5441 and measuring the sine wave
frequency with one of the instruments from Table 2.
To verify the frequency accuracy of the oscillator on the NI 5421/5441, complete the following
steps:
1. Connect the NI 5421/5441 CH 0 front panel connector to the instrument measuring the
frequency accuracy with a male BNC-to-female SMB cable.
2. Call niFgen_init (niFgen Initialize VI) using the following parameters:
•resourceName: The name of the device that you want to verify. You can find this
name under Devices and Interfaces in MAX.
•IDQuery: VI_TRUE
•resetDevice: VI_TRUE
•vi: A pointer to a ViSession. The variable passed by reference through this parameter
receives the value that identifies the session created by this function. This value acts
as the session handle and is passed as the first parameter to all subsequent NI-FGEN
functions.
3. Call niFgen_ConfigureSampleRate (niFgen Set Sample Rate VI) using the following
parameters:
•vi: The session handle returned from niFgen_init
•Sample Rate: 100 MS/s (100000000)
4. Call niFgen_SetAttributeViReal64 to set the gain (NI-FGEN Gain property) using
the following parameters:
•vi: The session handle returned from niFgen_init
•channelName: "0"
•attributeID: NIFGEN_ATTR_ARB_GAIN
•value: 1
Note You can adjust the gain value based on which measuring device you use.
5. Call niFgen_SetAttributeViReal64 to set the offset (NI-FGEN Offset property)
using the following parameters:
•vi: The session handle returned from niFgen_init
•channelName: "0"
•attributeID: NIFGEN_ATTR_ARB_OFFSET
•value: 0
Note You can adjust the offset value based on which measuring device you use.

10 |ni.com |NI 5421/5441 Calibration Procedure
6. Call niFgen_SetAttributeViBoolean to set the analog filter state (NI-FGEN
Analog Filter Enabled property) using the following parameters:
•vi: The session handle returned from niFgen_init
•channelName: "0"
•attributeID: NIFGEN_ATTR_ANALOG_FILTER_ENABLED
•value: VI_TRUE
7. Call niFgen_SetAttributeViBoolean to set the digital filter state (NI-FGEN Digital
Filter Enabled property) using the following parameters:
•vi: The session handle returned from niFgen_init
•channelName: "0"
•attributeID: NIFGEN_ATTR_DIGITAL_FILTER_ENABLED
•value: VI_TRUE
8. Call niFgen_SetAttributeViReal64 to set the digital filter interpolation factor
(NI-FGEN Digital Filter Interpolation Factor property) using the following parameters:
•vi: The session handle returned from niFgen_init
•channelName: "0"
•attributeID: NIFGEN_ATTR_DIGITAL_FILTER_INTERPOLATION_FACTOR
•value: 4
9. Generate an array of waveform samples. Each waveform should have 10 samples per cycle
with a total of 500 samples and 50 sine wave cycles. Because you set the sample rate to 100
MS/s and use 10 samples per cycle, the resulting waveform is a 10 MHz sine wave.
Note The sample values of this waveform must fall between -1.0 and 1.0.
10. (LabVIEW Only) You must call the Sine Pattern VI to create the array of waveform
samples for step 9. Specify 500 samples, an amplitude of 1, and 50 cycles. Wire the
Sinusoidal Pattern output of the Sine Pattern VI to the Waveform Data Array input of
the niFgen Create Waveform (DBL) VI in step 11.
11. Call niFgen_CreateWaveformF64 (niFgen Create Waveform (DBL) VI) using the
following parameters:
•vi: The session handle returned from niFgen_init
•wfmSize: The size in samples (500) of the waveform you created in step 9 or step 10.
•wfmData: The array of waveform samples you created in step 9 or step 10.
•wfmHandle: The variable passed by reference through this parameter receives the
value (waveform handle) that identifies the waveform created by this function.
12. Call niFgen_InitiateGeneration (niFgen Initiate Generation VI) to initiate the
waveform generation using the following parameter:
•vi: The session handle returned from niFgen_init

NI 5421/5441 Calibration Procedure |© National Instruments |11
13. Measure the frequency output of the NI 5421/5441.
A frequency error of 45 Hz for a 10 MHz signal corresponds to an error of 4.5 ppm. This
limit accounts for the initial accuracy and the frequency deviation caused by temperature
and aging. Refer to Table 3 for frequency ranges.
14. Call niFgen_AbortGeneration (niFgen Abort Generation VI) to abort the waveform
generation using the following parameter:
•vi: The session handle returned from niFgen_init
15. Call niFgen_close (niFgen Close VI) to close the instrument driver session, to destroy
the instrument driver session and all of its properties, and to release any memory resources
NI-FGEN uses. Use the following parameter:
•vi: The session handle returned from niFgen_init
Verifying the DC Gain and Offset Accuracy
This test verifies the DC gain and offset accuracy of the NI 5421/5441 into a high-impedance
load by generating a number of DC voltages and offsets, measuring the voltage with a DMM,
and comparing the NI 5421/5441 to the error limits.
The DC gain and offset accuracy verification procedure has three subprocedures that verify the
following specifications:
• Main analog path gain
• Main analog path offset
• Direct analog path gain
Verifying the Main Analog Path Gain
Complete the following steps to verify the NI 5421/5441 main analog path gain.
1. Connect the NI 5421/5441 CH 0 front panel connector to the DMM.
2. Call niFgen_init (niFgen Initialize VI) using the following parameters:
•resourceName: The name of the device that you want to verify. You can find this
name under Devices and Interfaces in MAX.
•IDQuery: VI_TRUE
•resetDevice: VI_TRUE
•vi: A pointer to a ViSession. The variable passed by reference through this parameter
receives the value that identifies the session created by this function. This value acts
as the session handle and is passed as the first parameter to all subsequent NI-FGEN
functions.
Table 3. Calibration Limits for Frequency Accuracy
Frequency Limit As-Found Limits As-Left Limits
Low 9,999,750 Hz 9,999,955 Hz
High 10,000,250 Hz 10,000,045 Hz

12 |ni.com |NI 5421/5441 Calibration Procedure
3. Call niFgen_SetAttributeViBoolean to set the analog filter state (NI-FGEN
Analog Filter Enabled property) using the following parameters:
•vi: The session handle returned from niFgen_init
•channelName: "0"
•attributeID: NIFGEN_ATTR_ANALOG_FILTER_ENABLED
•value: VI_FALSE
4. Call niFgen_SetAttributeViReal64 to set the load impedance (NI-FGEN Load
Impedance property) using the following parameters:
•vi: The session handle returned from niFgen_init
•channelName: "0"
•attributeID: NIFGEN_ATTR_LOAD_IMPEDANCE
•value:10000000000
5. Call niFgen_SetAttributeViInt32 to set the analog path (NI-FGEN Analog Path
property) using the following parameters:
•vi: The session handle returned from niFgen_init
•channelName: "0"
•attributeID: NIFGEN_ATTR_ANALOG_PATH
•value: NIFGEN_VAL_MAIN_ANALOG_PATH
6. Call niFgen_SetAttributeViReal64 to set the output impedance (NI-FGEN Output
Impedance property) using the following parameters:
•vi: The session handle returned from niFgen_init
•channelName: "0"
•attributeID: NIFGEN_ATTR_OUTPUT_IMPEDANCE
•value: 50
7. Call niFgen_SetAttributeViBoolean to enable the analog output (NI-FGEN Output
Enabled property) using the following parameters:
•vi: The session handle returned from niFgen_init
•channelName: "0"
•attributeID: NIFGEN_ATTR_OUTPUT_ENABLED
•value: VI_TRUE
8. Create an array of waveform samples for the positive full-scale DC waveform. This array
should contain 500 samples with each sample having the value 1.0 (representation:
double).
9. (LabVIEW Only) You must call the Initialize Array function to create the array of samples
for step 8. Wire 1.0 to the element input and specify a dimension size of 500. Wire the
initialized array output of the Initialize Array function to the Waveform Data Array
input of the niFgen Create Waveform (DBL) VI in step 10.

NI 5421/5441 Calibration Procedure |© National Instruments |13
10. Call niFgen_CreateWaveformF64 (niFgen Create Waveform (DBL) VI) using the
following parameters:
•vi: The session handle returned from niFgen_init
•wfmSize: The size in samples (500) of the waveform you created in step 8 or step 9
•wfmData: The array of waveform samples that you created in step 8 or step 9
•wfmHandle: The variable passed by reference through this parameter receives the
value (waveform handle) that identifies the waveform created by this function
(positive full-scale handle).
11. Create an array of waveform samples for the negative full-scale DC waveform. This array
should contain 500 samples with each sample having the value -1.0 (representation:
double).
12. (LabVIEW Only) You must call the Initialize Array function to create the array of samples
for step 11. Wire -1.0 to the element input and specify a dimension size of 500. Wire the
initialized array output of the Initialize Array function to the Waveform Data Array
input of the niFgen Create Waveform (DBL) VI in step 13.
13. Call niFgen_CreateWaveformF64 (niFgen Create Waveform (DBL) VI) using the
following parameters:
•vi: The session handle returned from niFgen_init
•wfmSize: The size in samples (500) of the waveform that you created in step 11 or
step 12
•wfmData: The array of waveform samples that you created in step 11 or step 12
•wfmHandle: The variable passed by reference through this parameter receives the
value (waveform handle) that identifies the waveform created by this function
(negative full-scale handle).
14. Call niFgen_SetAttributeViReal64 to set the offset (NI-FGEN Offset property)
using the following parameters:
•vi: The session handle returned from niFgen_init
•channelName: "0"
•attributeID: NIFGEN_ATTR_ARB_OFFSET
•value: 0
Repeat steps 15 through 25 for each of the 24 iterations listed in Table 4, changing the Gain
value for each iteration
Table 4. Values for Verifying the Gain of the Main Analog Path
Iteration Gain
Ideal Positive
Full-Scale
(Volts)
IdealNegative
Full-Scale
(Volts)
As-Found
Limits (Volts)
As-Left
Limits(Volts)
112.000000 12.000000 -12.000000 ±0.048500 ±0.019700
210.000000 10.000000 -10.000000 ±0.040500 ±0.016500
37.000000 7.000000 -7.000000 ±0.028500 ±0.011700

14 |ni.com |NI 5421/5441 Calibration Procedure
45.000000 5.000000 -5.000000 ±0.020500 ±0.008500
53.500000 3.500000 -3.500000 ±0.014500 ±0.006100
62.500000 2.500000 -2.500000 ±0.010500 ±0.004500
72.000000 2.000000 -2.000000 ±0.008500 ±0.003700
81.650000 1.650000 -1.650000 ±0.007100 ±0.003140
91.250000 1.250000 -1.250000 ±0.005500 ±0.002500
10 0.850000 0.850000 -0.850000 ±0.003900 ±0.001860
11 0.600000 0.600000 -0.600000 ±0.002900 ±0.001460
12 0.415000 0.415000 -0.415000 ±0.002160 ±0.001164
13 0.300000 0.300000 -0.300000 ±0.001700 ±0.000980
14 0.205000 0.205000 -0.205000 ±0.001320 ±0.000828
15 0.150000 0.150000 -0.150000 ±0.001100 ±0.000740
16 0.105000 0.105000 -0.105000 ±0.000920 ±0.000668
17 0.075000 0.075000 -0.075000 ±0.000800 ±0.000620
18 0.055000 0.055000 -0.055000 ±0.000720 ±0.000588
19 0.037500 0.037500 -0.037500 ±0.000650 ±0.000560
20 0.026000 0.026000 -0.026000 ±0.000604 ±0.000542
21 0.018500 0.018500 -0.018500 ±0.000574 ±0.000530
22 0.013000 0.013000 - 0.013000 ±0.000552 ±0.000521
23 0.009000 0.009000 - 0.009000 ±0.000536 ±0.000514
24 0.006500 0.006500 -0.006500 ±0.000526 ±0.000510
Note: Error Positive Full-Scale Value = (Measured Positive Full-Scale Value) - (Ideal Positive
Full-Scale Value)
Error Negative Full-Scale Value = (Measured Negative Full-Scale Value) - (Ideal Negative Full-Scale
Value)
Table 4. Values for Verifying the Gain of the Main Analog Path (Continued)
Iteration Gain
Ideal Positive
Full-Scale
(Volts)
IdealNegative
Full-Scale
(Volts)
As-Found
Limits (Volts)
As-Left
Limits(Volts)

NI 5421/5441 Calibration Procedure |© National Instruments |15
15. Call niFgen_SetAttributeViReal64 to set the gain (NI-FGEN Gain property) using
the following parameters:
•vi: The session handle returned from niFgen_init
•channelName: "0"
•attributeID: NIFGEN_ATTR_ARB_GAIN
•value: The Gain value listed in Table 4 for the current iteration
16. Call niFgen_SetAttributeViInt32 to choose the positive full-scale DC waveform
(NI-FGEN Arbitrary Waveform Handle property) using the following parameters:
•vi: The session handle returned from niFgen_init
•channelName: "0"
•attributeID: NIFGEN_ATTR_ARB_WAVEFORM_HANDLE
•value: The wfmHandle from step 10 (positive full-scale handle)
17. Call niFgen_InitiateGeneration (niFgen Initiate Generation VI) to initiate the
waveform generation using the following parameter:
•vi: The session handle returned from niFgen_init
18. Measure the DC voltage from the NI 5421/5441. This value is the Measured Positive
Full-Scale Value.
19. Determine the error for positive full scale using the following formula:
Error Positive Full-Scale =
(Measured Positive Full-Scale Value) - (Ideal Positive Full-Scale Value)
Compare this error to the calibration limits listed in Table 4.
20. Call niFgen_AbortGeneration (niFgen Abort Generation VI) to abort the waveform
generation using the following parameter:
•vi: The session handle returned from niFgen_init
21. Call niFgen_SetAttributeViInt32 to choose the negative full-scale DC waveform
(NI-FGEN Arbitrary Waveform Handle property) using the following parameters:
•vi: The session handle returned from niFgen_init
•channelName: "0"
•attributeID: NIFGEN_ATTR_ARB_WAVEFORM_HANDLE
•value: The wfmHandle from step 13 (negative full-scale handle)
22. Call niFgen_InitiateGeneration (niFgen Initiate Generation VI) to initiate the
waveform generation using the following parameter:
•vi: The session handle returned from niFgen_init
23. Measure the DC voltage from the NI 5421/5441. This value is the Measured Negative
Full-Scale Value.

16 |ni.com |NI 5421/5441 Calibration Procedure
24. Determine the error for negative full scale using the following formula:
Error Negative Full-Scale =
(Measured Negative Full-Scale Value) - (Ideal Negative Full-Scale Value)
Compare this error to the calibration limits listed in Table 4.
25. Call niFgen_AbortGeneration (niFgen Abort Generation VI) to abort the waveform
generation using the following parameter:
•vi: The session handle returned from niFgen_init
26. If any of the errors are greater than the As-Found Limits, perform an external adjustment.
Verifying the Main Analog Path Offset
To verify the offset of the NI 5421/5441 main analog path, complete the following steps:
1. Create an array of waveform samples for the mid-scale DC waveform (0 VDC). This array
should contain 500 samples with each sample having the value 0.0 (representation:
double).
2. (LabVIEW Only) You must call the Initialize Array function to create the array of samples
for step 1. Wire 0.0 to the element input and specify a dimension size of 500. Wire the
initialized array output of the Initialize Array function to the Waveform Data Array
input of the niFgen Create Waveform (DBL) VI in step 3.
3. Call niFgen_CreateWaveformF64 (niFgen Create Waveform (DBL) VI) using the
following parameters:
•vi: The session handle returned from niFgen_init
•wfmSize: The size in samples (500) of the waveform that you created in step 1 or
step 2
•wfmData: The array of waveform samples that you created in step 1 or step 2
•wfmHandle: The variable passed by reference through this parameter receives the
value (waveform handle) that identifies the waveform created by this function
(mid-scale handle).
4. Call niFgen_SetAttributeViInt32 to choose the mid-scale handle DC waveform
(NI-FGEN Arbitrary Waveform Handle property) using the following parameters:
•vi: The session handle returned from niFgen_init
•channelName: "0"
•attributeID: NIFGEN_ATTR_ARB_WAVEFORM_HANDLE
•value: The wfmHandle from step 3 (mid-scale handle)
Repeat steps 5 through 16 for each of the 24 iterations listed in Table 5, changing the Ideal
Positive Offset, Ideal Negative Offset, and Gain values for each iteration.

NI 5421/5441 Calibration Procedure |© National Instruments |17
Table 5. Values for Verifying the Offset of the Main Analog Path
Iteration Gain
Ideal
Positive
Offset
(Volts)
Ideal
Negative
Offset
(Volts)
As-Found
Limits (Volts)
As-Left
Limits (Volts)
112.000000 6.000000 -6.000000 ±0.051500 ±0.021500
210.000000 5.000000 -5.000000 ±0.043000 ±0.018000
37.000000 3.500000 -3.500000 ±0.030250 ±0.012750
45.000000 2.500000 -2.500000 ±0.021750 ±0.009250
53.500000 1.750000 -1.750000 ±0.015375 ±0.006625
62.500000 1.250000 -1.250000 ±0.011125 ±0.004875
72.000000 1.000000 -1.000000 ±0.009000 ±0.004000
81.650000 0.825000 -0.825000 ±0.007513 ±0.003388
91.250000 0.625000 -0.625000 ±0.005813 ±0.002688
10 0.850000 0.425000 -0.425000 ±0.004113 ±0.001988
11 0.600000 0.300000 -0.300000 ±0.003050 ±0.001550
12 0.415000 0.207500 -0.207500 ±0.002264 ±0.001226
13 0.300000 0.150000 -0.150000 ±0.001775 ±0.001025
14 0.205000 0.102500 -0.102500 ±0.001371 ±0.000859
15 0.150000 0.075000 -0.075000 ±0.001138 ±0.000763
16 0.105000 0.052500 -0.052500 ±0.000946 ±0.000684
17 0.075000 0.037500 -0.037500 ±0.000819 ±0.000631
18 0.055000 0.027500 -0.027500 ±0.000734 ±0.000596
19 0.037500 0.018750 -0.018750 ±0.000659 ±0.000566
20 0.026000 0.013000 -0.013000 ±0.000611 ±0.000546
21 0.018500 0.009250 - 0.009250 ±0.000579 ±0.000532
22 0.013000 0.006500 - 0.006500 ±0.000555 ±0.000523
23 0.009000 0.004500 - 0.004500 ±0.000538 ±0.000516
24 0.006500 0.003250 - 0.003250 ±0.000528 ±0.000511
Note: Error Positive Offset Value = (Measured Positive Offset Value) - (Ideal Positive Offset Value)
Error Negative Offset Value = (Measured Negative Offset Value) - (Ideal Negative Offset Value)

18 |ni.com |NI 5421/5441 Calibration Procedure
5. Call niFgen_SetAttributeViReal64 to set the offset (NI-FGEN Offset property)
using the following parameters:
•vi: The session handle returned from niFgen_init
•channelName: "0"
•attributeID: NIFGEN_ATTR_ARB_OFFSET
•value: The Ideal Positive Offset value listed in Table 5 for the current iteration
6. Call niFgen_SetAttributeViReal64 to set the gain (NI-FGEN Gain property) using
the following parameters:
•vi: The session handle returned from niFgen_init
•channelName: "0"
•attributeID: NIFGEN_ATTR_ARB_GAIN
•value: The Gain value listed in Table 5 for the current iteration
7. Call niFgen_InitiateGeneration (niFgen Initiate Generation VI) to initiate the
waveform generation using the following parameter:
•vi: The session handle returned from niFgen_init
8. Measure the positive DC voltage from the NI 5421/5441. This value is the Measured
Positive Offset Value.
9. Determine the error for positive offset using the following formula:
Error Positive Offset =
(Measured Positive Offset Value) - (Ideal Positive Offset Value)
Compare this error to the calibration limits listed in Table 5.
10. Call niFgen_AbortGeneration (niFgen Abort Generation VI) to abort the waveform
generation using the following parameter:
•vi: The session handle returned from niFgen_init
11. Call niFgen_SetAttributeViReal64 to set the offset (NI-FGEN Offset property)
using the following parameters:
•vi: The session handle returned from niFgen_init
•channelName: "0"
•attributeID: NIFGEN_ATTR_ARB_OFFSET
•value: The Ideal Negative Offset value listed in Table 5 for the current iteration
12. Call niFgen_InitiateGeneration (niFgen Initiate Generation VI) to initiate the
waveform generation using the following parameter:
•vi: The session handle returned from niFgen_init
13. Measure the negative DC voltage from the NI 5421/5441. This value is the Measured
Negative Offset Value.
14. Determine the error for negative offset using the following formula:
Error Negative Offset =
(Measured Negative Offset Value) - (Ideal Negative Offset Value)

NI 5421/5441 Calibration Procedure |© National Instruments |19
Compare this error to the calibration limits listed in Table 5.
15. Call niFgen_AbortGeneration (niFgen Abort Generation VI) to abort the waveform
generation using the following parameter:
•vi: The session handle returned from niFgen_init
16. If any of the errors are greater than the calibration limits, perform an external adjustment.
Verifying the Direct Analog Path Gain
Complete the following steps to verify the NI 5421/5441 direct analog path gain.
Note The offset is not adjustable for the direct analog path.
1. Call niFgen_SetAttributeViReal64 to set the offset (NI-FGEN Offset property)
using the following parameters:
•vi: The session handle returned from niFgen_init
•channelName: "0"
•attributeID: NIFGEN_ATTR_ARB_OFFSET
•value: 0
2. Call niFgen_SetAttributeViInt32 to set the analog path (NI-FGEN Analog Path
property) using the following parameters:
•vi: The session handle returned from niFgen_init
•channelName: "0"
•attributeID: NIFGEN_ATTR_ANALOG_PATH
•value: NIFGEN_VAL_DIRECT_ANALOG_PATH
Repeat steps 3 through 12 for each of the seven iterations listed in Table 6, changing the Gain
value for each iteration.
Table 6. Values for Verifying the Gain of the Direct Analog Path
Iteration Gain
Ideal
Positive
Full-Scale
(Volts)
Ideal
Negative
Full-Scale
(Volts)
Offset
Limit
(Volts)
As-Found
Limits
(Volts)
As-Left
Limits
(Volts)
11.000000 1.000000 -1.000000 ±0.025000 ±0.004000 ±0.001600
20.950000 0.950000 -0.950000 ±0.025000 ±0.003800 ±0.001520
30.900000 0.900000 -0.900000 ±0.025000 ±0.003600 ±0.001440
40.850000 0.850000 -0.850000 ±0.025000 ±0.003400 ±0.001360
50.800000 0.800000 -0.800000 ±0.025000 ±0.003200 ±0.001280

20 |ni.com |NI 5421/5441 Calibration Procedure
3. Call niFgen_SetAttributeViReal64 to set the gain (NI-FGEN Gain property) using
the following parameters:
•vi: The session handle returned from niFgen_init
•channelName: "0"
•attributeID: NIFGEN_ATTR_ARB_GAIN
•value: The Gain value listed in Table 6 for the current iteration
4. Call niFgen_SetAttributeViInt32 to choose the positive full-scale DC waveform
(NI-FGEN Arbitrary Waveform Handle property) using the following parameters:
•vi: The session handle returned from niFgen_init
•channelName: "0"
•attributeID: NIFGEN_ATTR_ARB_WAVEFORM_HANDLE
•value: The wfmHandle from step 10 of the Verifying the Main Analog Path Gain
section (positive full-scale handle)
5. Call niFgen_InitiateGeneration (niFgen Initiate Generation VI) to initiate the
waveform generation using the following parameter:
•vi: The session handle returned from niFgen_init
6. Measure the positive DC voltage from the NI 5421/5441. This value is the Measured
Positive Full-Scale Value.
7. Call niFgen_AbortGeneration (niFgen Abort Generation VI) to abort the waveform
generation using the following parameter:
•vi: The session handle returned from niFgen_init
8. Call niFgen_SetAttributeViInt32 to choose the negative full-scale DC waveform
(NI-FGEN Arbitrary Waveform Handle property) using the following parameters:
•vi: The session handle returned from niFgen_init
•channelName: "0"
•attributeID: NIFGEN_ATTR_ARB_WAVEFORM_HANDLE
60.750000 0.750000 -0.750000 ±0.025000 ±0.003000 ±0.001200
70.710000 0.710000 -0.710000 ±0.025000 ±0.002840 ±0.001136
Note: Offset = ((Measured Positive Full-Scale Value) + (Measured Negative Full-Scale Value))/2
Error Positive Full-Scale Value = (Measured Positive Full-Scale Value) - Offset - (Ideal Positive
Full-Scale Value)
Error Negative Full-Scale Value = (Measured Negative Full-Scale Value) - Offset - (Ideal Negative
Full-Scale Value)
Table 6. Values for Verifying the Gain of the Direct Analog Path (Continued)
Iteration Gain
Ideal
Positive
Full-Scale
(Volts)
Ideal
Negative
Full-Scale
(Volts)
Offset
Limit
(Volts)
As-Found
Limits
(Volts)
As-Left
Limits
(Volts)
This manual suits for next models
1
Table of contents
Other NI Laboratory Equipment manuals
Popular Laboratory Equipment manuals by other brands

BRIGHT
BRIGHT M3500 MICROTOME Operating, Maintenance and Spare Parts Manual

Agilent Technologies
Agilent Technologies M9302A Startup guide

DLab
DLab MS7-H550-S user manual

KLA Tencor
KLA Tencor Alpha-StepIQ operating guide

Hettich
Hettich ROTOFIX 32 A operating instructions

Agilent Technologies
Agilent Technologies 1200 series user manual