DESCRIZIONE DEL PRODOTTO E DE-
STINAZIONE D’USO
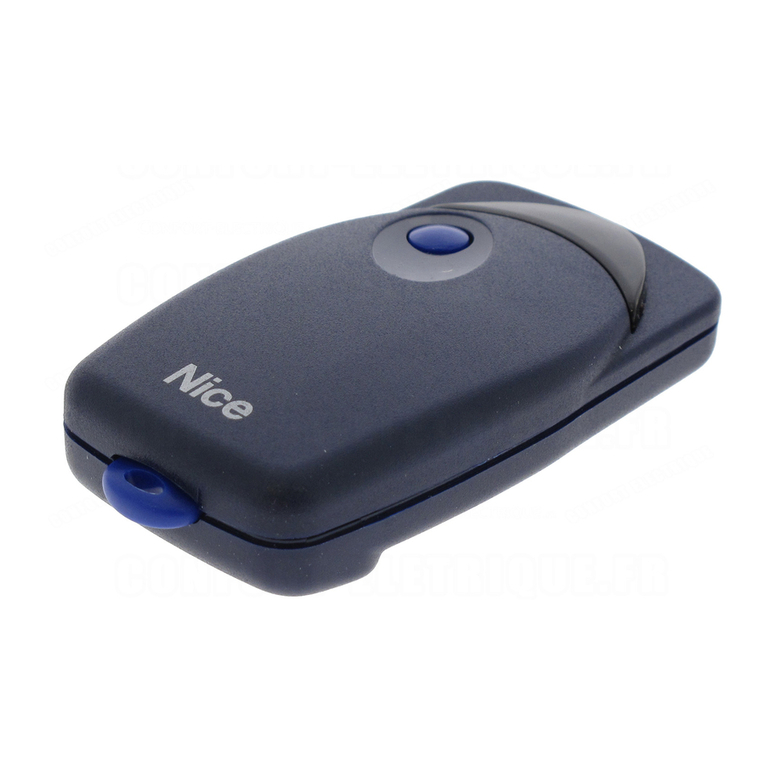
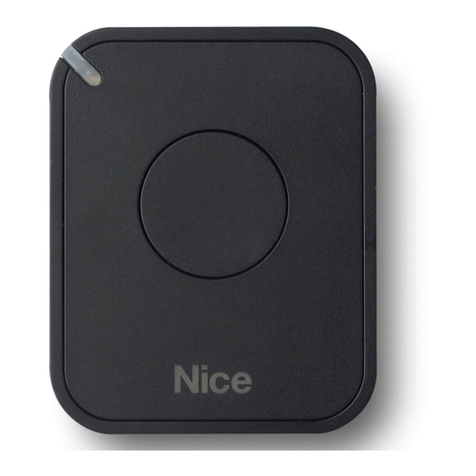
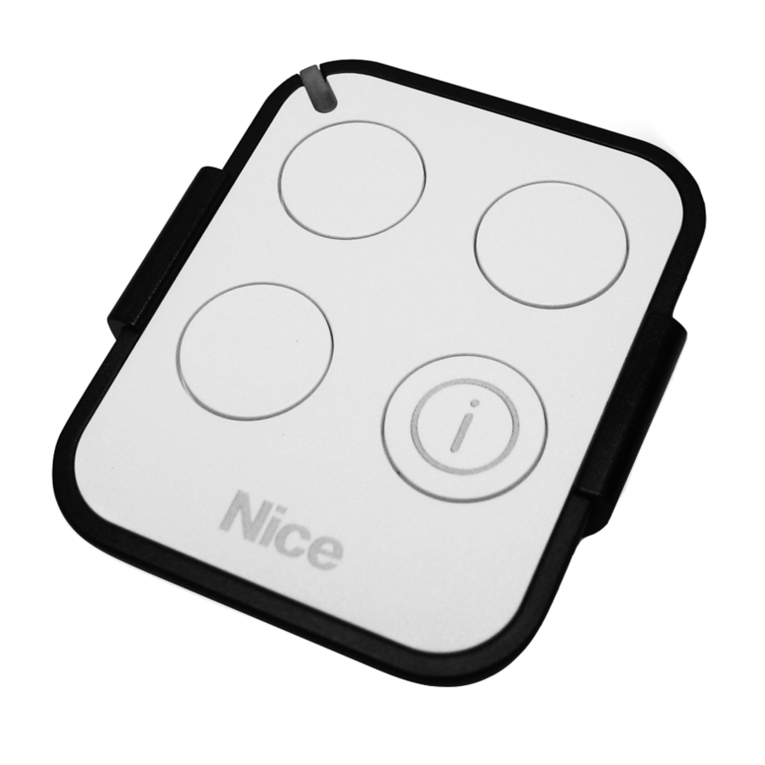
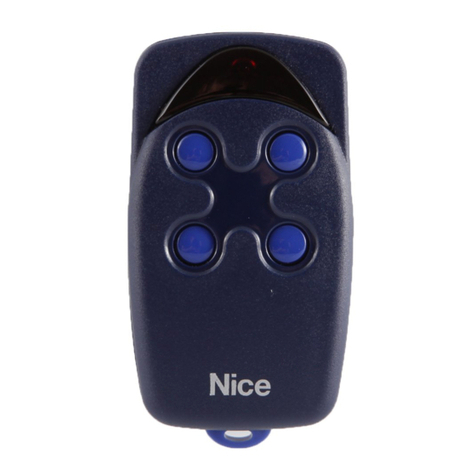
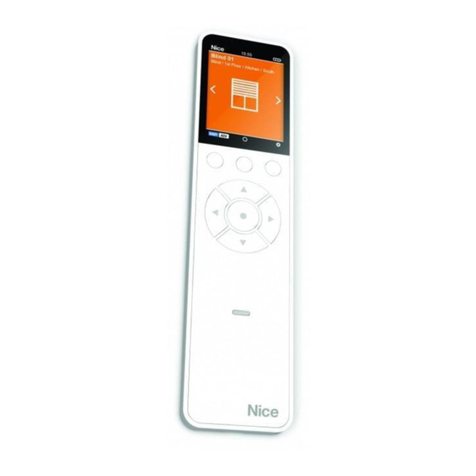
Il presente trasmettitore fa parte della serie
“NiceOne” di Nice. I trasmettitori di questa
serie sono destinati al comando di automazio-
ni del tipo apriporta, apricancelli e similari:
qualsiasi altro uso è improprio e vietato!
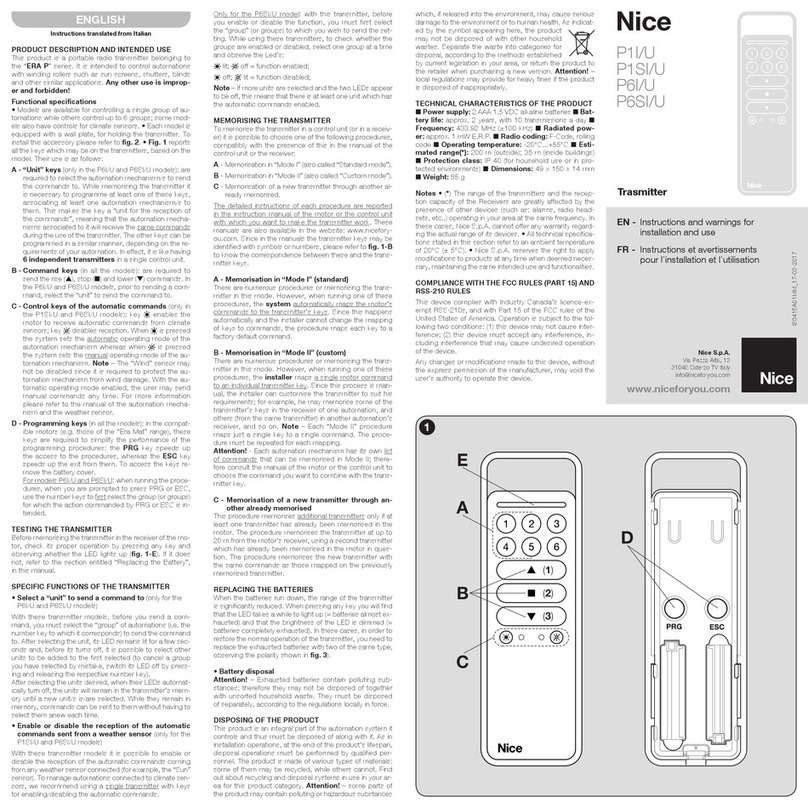
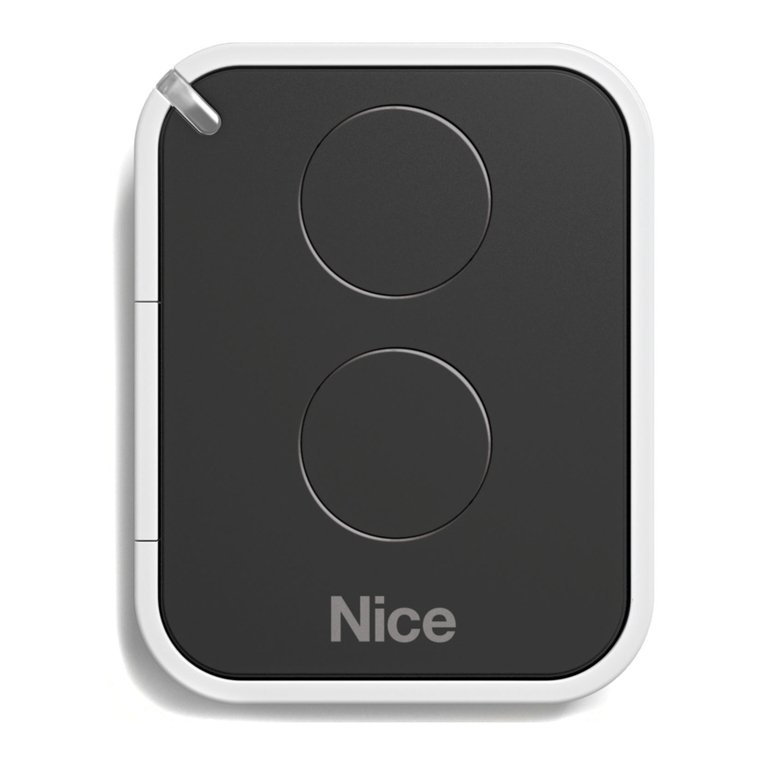
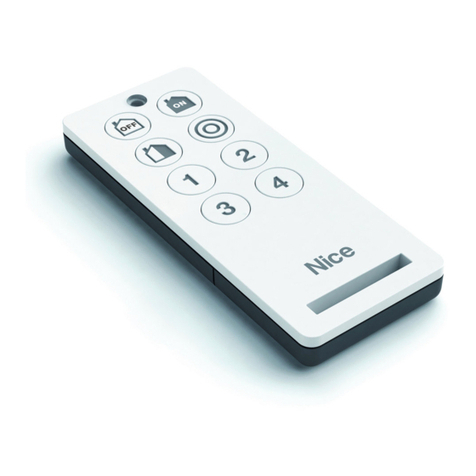
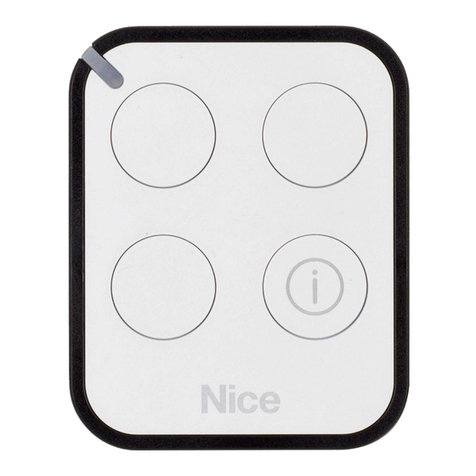
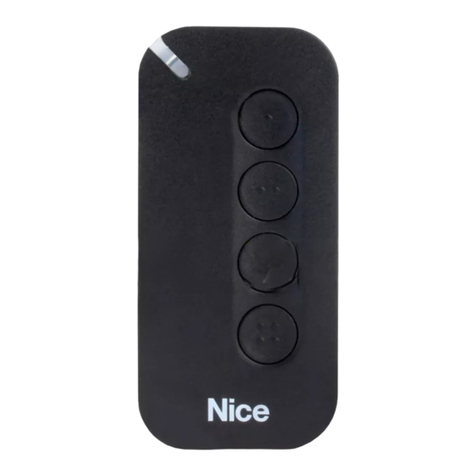
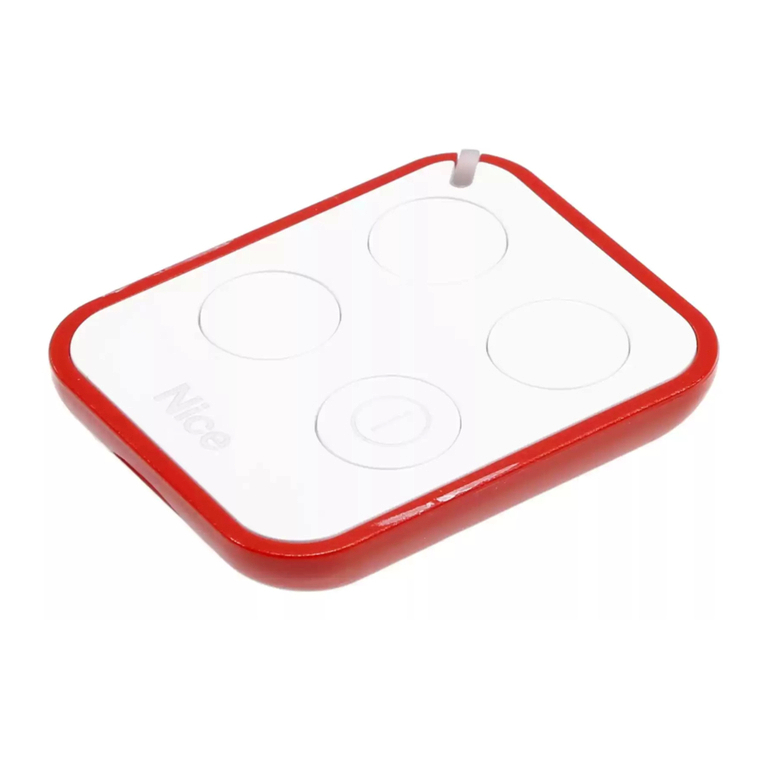
Sono disponibili modelli a 1, 2, 4 e 9 tasti (fig.
A), più i seguenti accessori opzionali: cordino
per portachiavi (fig. D); forcina per ancoraggio
a taschino (fig. E); supporto per fissaggio a
muro (fig. F).
Il sistema “NiceOpera”
I trasmettitori della serie NiceOne fanno parte
del sistema “NiceOpera”. Questo sistema è
stato progettato da Nice per ottimizzare e faci-
litare le fasi di programmazione, di uso e di
manutenzione dei dispositivi impiegati solita-
mente negli impianti di automatizzazione. Il
sistema è formato da vari dispositivi capaci di
scambiarsi fra loro dati e informazioni via ra-
dio, impiegando un nuovo sistema di codifica
chiamato “O-Code”, o attraverso il collega-
mento fisico.
I principali dispositivi che formano il sistema
NiceOpera sono:
– trasmettitori NiceOne;
– ricevitori NiceOne;
– unità di programmazione O-Box;
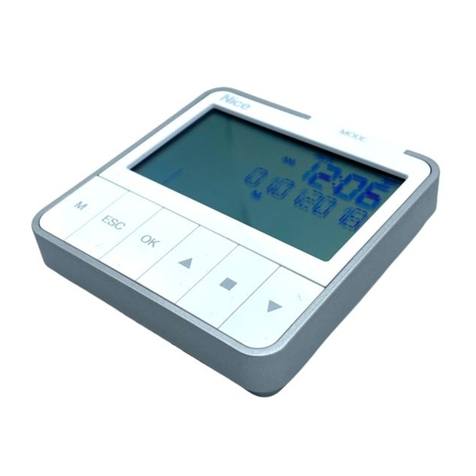
– programmatore portatile O-View;
– motoriduttori con “Bus T4”.
IMPORTANTE – Per approfondire tutte le
funzionalità del sistema NiceOpera e l’in-
terdipendenza operativa che lega i vari
dispositivi del sistema, consultare il ma-
nuale generale “NiceOpera System Bo-
ok”, disponibile anche nel sito internet
www.niceforyou.com
LE FUNZIONALITÀ DEL PRODOTTO
• Il trasmettitore adotta una tecnologia di tra-
smissione chiamata “O-Code”, con codice va-
riabile (rolling-code), che migliora sensibilmen-
te la velocità di trasmissione del comando.
• Il trasmettitore contiene al suo interno una
“Memoria”, un “Ricevitore di prossimità” e un
“Codice di abilitazione” che, nel loro insieme,
permettono di effettuare via radio operazioni e
programmazioni tipiche del sistema NiceOpera.
VERIFICA DEL TRASMETTITORE
Prima di memorizzare il trasmettitore nel Rice-
vitore dell’automazione, verificare il suo corret-
to funzionamento premendo un tasto qualsia-
si e osservando contemporaneamente l’ac-
censione del Led (fig. A). Se questo non si
accende, leggere il paragrafo “Sostituzione
della batteria” in questo manuale.
MEMORIZZAZIONE DEL TRASMETTI-
TORE
Per sfruttare tutte le funzioni del trasmettitore,
occorre abbinarlo ai Ricevitori con codifica
“O-Code” (per identificare questi modelli con-
sultare il catalogo prodotti di Nice).
Nota – il trasmettitore è compatibile anche
con tutti i Ricevitori che adottano la codifica
“FloR” (per identificare questi modelli consul-
tare il catalogo prodotti di Nice); però, in que-
sto caso, non sarà possibile utilizzare le
funzionalità tipiche del Sistema NiceOpera.
Per memorizzare il trasmettitore in un Ricevi-
tore NiceOne, è possibile scegliere fra le se-
guenti procedure operative:
a–Memorizzazione in “Modo I”
b–Memorizzazione in “Modo II”
c–Memorizzazione in “Modo II esteso”
d–Memorizzazione tramite il “Numero di
Certificato”
e–Memorizzazione tramite il “Codice di
Abilitazione” ricevuta da un trasmetti-
tore già memorizzato
Le procedure operative di queste modalità di
memorizzazione sono riportate nel manuale
istruzioni del Ricevitore o della Centrale con il
quale si desidera far funzionare il trasmettitore.
I manuali citati sono disponibili anche nel sito
internet: www.niceforyou.com . In questi
manuali i tasti dei trasmettitori sono identificati
tramite dei numeri. Quindi, per conoscere la
corrispondenza fra questi numeri e i tasti dei
trasmettitori NiceOne, vedere la fig. A.
a– Memorizzazione in “Modo I”
Questa procedura permette di memorizzare
nel ricevitore, in una sola volta, tutti i tasti del
trasmettitore. I tasti vengono abbinati automa-
ticamente a ciascun comando gestito dalla
Centrale, secondo un ordine prestabilito in
fabbrica.
Solo per il trasmettitore mod.
“ON9” - “ON9FM”
Se la memorizzazione di questo trasmettitore
viene fatta con la procedura operativa “Modo
I”, durante l’esecuzione occorre considerare la
tastiera del trasmettitore come suddivisa in 3
settori autonomi (s1, s2, s3 in fig. A), ogniuno
con un proprio codice di identità. Quindi, ogni
settore richiederà una propria procedura di
memorizzazione (come se fossero 3 trasmetti-
tori separati).
b– Memorizzazione in “Modo II”
Questa procedura permette di memorizzare
nel ricevitore un singolo tasto del trasmettito-
re. In questo caso, è l’utente che sceglie tra i
comandi gestiti dalla Centrale (massimo 4),
quale di questi desidera abbinare al tasto che
sta memorizzando. Nota – la procedura deve
essere ripetuta per ogni singolo tasto che si
desidera memorizzare.
c– Memorizzazione in “Modo II esteso”
Questa procedura è specifica per i dispositivi
che fanno parte del sistema NiceOpera, con
codifica “O-Code”. È uguale alla precedente
“Modo II”, ma offre in più la possibilità di sce-
gliere il comando desiderato (da abbinare al
tasto che si sta memorizzando) in una lista
estesa di comandi – fino a 15 comandi diversi,
– gestiti dalla Centrale.
La fattibilità della procedura dipende quindi
dalla capacità della Centrale di gestire i 15
comandi, come le Centrali compatibili con
NiceOpera.
d– Memorizzazione tramite il “Numero
di CERTIFICATO”
[con l’unità di programmazione O-Box]
Questa procedura è specifica per i dispositivi
che fanno parte del sistema NiceOpera, con
codifica “O-Code”. In questo sistema ogni
Ricevitore possiede un numero particolare
che lo identifica e lo certifica, chiamato appun-
to “CERTIFICATO”. L’uso di questo “certifica-
to” ha il vantaggio di semplificare la procedura
di memorizzazione del trasmettitore nel Rice-
vitore, in quanto non obbliga più l’installatore
ad operare nel raggio di ricezione del Ricevito-
re. La prassi permette infatti, con l’aiuto del-
l’unità di programmazione “O-Box”, di predi-
sporre il trasmettitore alla memorizzazione
anche lontano dal luogo dell’installazione (ad
esempio, nell’ufficio dell’installatore - fig. H).
e– Memorizzazione tramite il “Codice
di ABILITAZIONE” [tra due trasmettitori]
Questa procedura è specifica per i dispositivi
che fanno parte del sistema NiceOpera, con
codifica “O-Code”. I trasmettitori NiceOne
possiedono un codice segreto, chiamato
“CODICE DI ABILITAZIONE”. Questa “abili-
tazione”, opportunamente trasferita da un
vecchio trasmettittore (già memorizzato) in
un nuovo trasmettitore NiceOne (fig. G) per-
mette a quest’ultimo di essere riconosciuto e
quindi memorizzato automaticamente da un
Ricevitore.
La procedura per trasferire il “codice di abilta-
zione” di un VECCHIO in un NUOVO trasmet-
titore, è la seguente:
01. Tenere vicini fra loro (attaccati!!) due tra-
smettitori, uno “NUOVO” (da memorizza-
re) e uno “VECCHIO” (già memorizzato).
02. Sul NUOVO trasmettitore, tenere premu-
to un tasto qualsiasi(nota 1) fino a quan-
do si accende il Led del VECCHIO tra-
smettitore. Quindi, rilasciare il tasto (il Led
del VECCHIO trasmettitore inizia a lam-
peggiare).
03. Sul VECCHIO trasmettitore, tenere pre-
muto un tasto qualsiasi(nota 1) fino a
quando si accende il Led del NUOVO tra-
smettitore. Quindi, rilasciare il tasto (il Led
si spegne, segnalando il termine della
procedura e l’avvenuto trasferimento del
“codice di abilitazione” nel NUOVO tra-
smettitore).
nota 1 – Se si usa il modello “ON9” - “ON9 FM”,
considerare la tastiera suddivisa in 3 settori (cioè
3 trasmettitori - fig. A). Quindi, premere un tasto
qualsiasi all’interno del settore da memorizzare.
Quando il NUOVO trasmettitore verrà usato le
prime 20 volte, trasmetterà al Ricevitore questo
“codice di abilitazione” insieme al comando. Il
Ricevitore, dopo aver riconosciuto l’“abilitazio-
ne”, memorizzerà automaticamente il codice di
identità del trasmettitore che l’ha trasmessa.
SEGNALAZIONE DI ERRORI ATTRAVER-
SO IL LED
4 lampeggi = trasferimento del “Codice di
abilitazione” disabilitato.
6 lampeggi = trasferimento del “Codice di
abilitazione” disabilitato fra trasmettitori diversi.
10 lampeggi = errore di comunicazione fra i
dispositivi.
15 lampeggi = memorizzazione non avvenuta
per superamento del tempo limite.
SOSTITUZIONE DELLA BATTERIA
Quando la batteria è scarica, il trasmettitore
riduce sensibilmente la portata. In particolare,
premendo un tasto si nota che il Led si accen-
de in ritardo (= batteria quasi scarica) o che
l’intensità della luce del Led si affievolisce (=
batteria totalmente scarica).
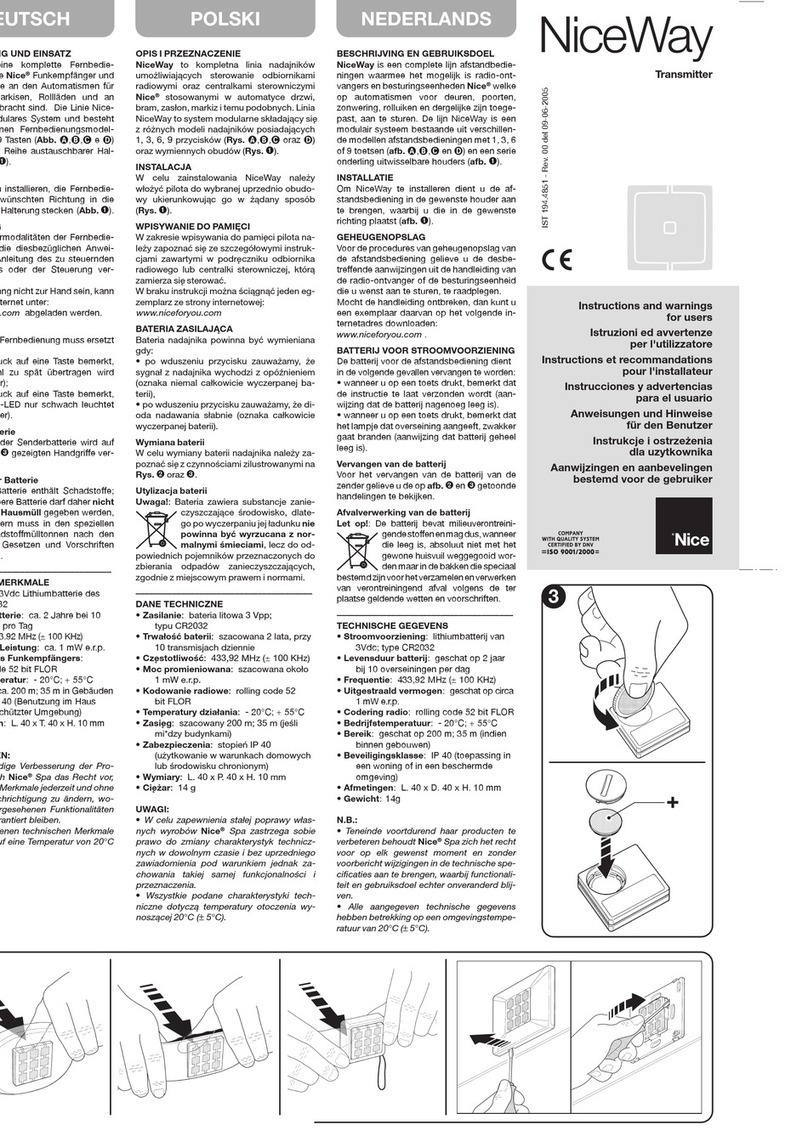
In questi casi, per ripristinare il regolare funzio-
namento del trasmettitore, sostituire la batte-
ria scarica con una dello stesso tipo, rispet-
tando la polarità indicata in fig. C.
Smaltimento della batteria
Attenzione! – La batteria scarica contiene
sostanze inquinanti e quindi, non deve essere
buttata nei rifiuti comuni. Occorre smaltirla uti-
lizzando i metodi di raccolta ‘separata’, previ-
sti dalle normative vigenti nel vostro territorio.
SMALTIMENTO DEL PRODOTTO
Questo prodotto è parte integrante dell'au-
tomazione che comanda e dunque deve
essere smaltito insieme con essa.
Come per le operazioni d'installazione, anche
al termine della vita di questo prodotto, le ope-
razioni di smantellamento devono essere ese-
guite da personale qualificato.
Questo prodotto è costituito da vari tipi di
materiali: alcuni possono essere riciclati, altri
devono essere smaltiti. Informatevi sui sistemi
di riciclaggio o smaltimento previsti dai regola-
menti vigenti sul vostro territorio, per questa
categoria di prodotto.
Attenzione! – alcune parti del prodotto pos-
sono contenere sostanze inquinanti o perico-
lose che, se disperse nell’ambiente, potrebbe-
ro provocare effetti dannosi sull'ambiente
stesso e sulla salute umana.
Come indicato dal simbolo a lato, è vietato
gettare questo prodotto nei rifiuti
domestici. Eseguire quindi la
“raccolta separata” per lo smalti-
mento, secondo i metodi previsti
dai regolamenti vigenti sul vostro
territorio, oppure riconsegnare il
prodotto al venditore nel momento dell'acqui-
sto di un nuovo prodotto equivalente.
Attenzione! – i regolamenti vigenti a livello loca-
le possono prevedere pesanti sanzioni in caso
di smaltimento abusivo di questo prodotto.
CARATTERISTICHE TECNICHE DEL
PRODOTTO
Alimentazione: batteria al litio da 3 Vdc
tipo CR2032. Durata batteria: stimata 2
anni, con 10 trasmissioni al giorno. Fre-
quenza: 433.92 MHz (± 100 kHz) / 868.46
MHz (± 35 kHz) Potenza irradiata: stima-
ta circa 1 mW E.R.P. Codifica radio: rol-
ling code, 72 bit, O-Code (compatibile Flo-
R). Temperatura di funzionamento: -20°
C; + 55°C. Portata: stimata 200 m (al-
l’esterno); 35 m (se all’interno di edifici) (*).
Grado di protezione: IP 40 (utilizzo in casa
o in ambienti protetti). Dimensioni: L. 44 x
P. 55 x H. 10 mm. Peso: 11g.
Note: • Le frequenze 433.92 MHz e 868.46 MHz
non sono compatibili tra loro • (*) La portata dei
trasmettitori e la capacità di ricezione dei Ricevitori
è fortemente influenzata da altri dispositivi (ad
esempio: allarmi, radiocuffie, ecc..) che operano
nella vostra zona alla stessa frequenza. In questi
casi, Nice non può offrire nessuna garanzia circa la
reale portata dei propri dispositivi. • Tutte le caratte-
ristiche tecniche riportate, sono riferite ad una tem-
peratura ambientale di 20°C (± 5°C). • Nice S.p.a.
si riserva il diritto di apportare modifiche al prodotto
in qualsiasi momento lo riterrà necessario, mante-
nendone comunque le stesse funzionalità e desti-
nazione d’uso.
DICHIARAZIONE CE DI CONFORMITÀ
Nota – La presente Dichiarazione di Conformità
raccoglie il contenuto delle singole dichiarazioni di
conformità dei singoli prodotti citati; è aggiornata
alla data di edizione del presente manuale ed è sta-
ta riadattata per motivi editoriali. Copia della dichia-
razione originale per ogni prodotto può essere ri-
chiesta a Nice S.p.a. (TV) I.
Nice S.p.a. - via Pezza Alta, 13, Z.I. Rustignè,
31046 Oderzo (TV) Italia, dichiara che tutti i
prodotti della linea Nice One (ON1; ON1FM;
ON2; ON2FM; ON4; ON4FM; ON9; ON9FM)
sono conformi ai requisiti essenziali richiesti
dalla Direttiva R&TTE 1999/5/CE, per l’uso cui
gli apparecchi sono destinati. I prodotti sono
in Classe 1.
Lauro Buoro
(Amministratore delegato)
PRODUKTBESCHREIBUNG UND
EINSATZ
Der vorliegende Sender ist Teil der Serie
“NiceOne” der Firma Nice spa. Die Sender
dieser Serie dienen hauptsächlich zur Steue-
rung von Automationen wie Tür- und Toröffner
und ähnliches: jeder andere Einsatz ist
unsachgemäß und daher untersagt!
Zur Verfügung stehen Modelle mit 1, 2, 4 und 9
Tasten (Abb. A) sowie das folgende Sonderzu-
behör: Schlüsselseileinige Zubehörteile (Abb.
D), Klammer für die Taschenbefestigung (Abb.
E), Halterung für die Wandmontage (Abb. F).
Das System “NiceOpera”
Die Sender der Serie NiceOne sind Teil des
Systems “NiceOpera”. Dieses System wurde
von der Firma Nice spa realisiert, um die Pro-
grammierungsphasen, die Bedienung und die
Wartung der üblicherweise in Automatisie-
rungsanlagen verwendeten Vorrichtungen zu
vereinfachen und zu optimieren. Das System
besteht aus verschiedenen Vorrichtungen, die
unter Verwendung eines neuen Codierungs-
systems, “O-Code” genannt, Daten und Infos
per Funk oder mittels physikalischer Verbin-
dung untereinander austauschen.
Die wichtigsten Vorrichtungen, aus denen das
System NiceOpera besteht, sind:
– Sender NiceOne;
– Empfänger NiceOne;
– Programmierungseinheiten O-Box;
– Tragbarer Programmierer O-View
– Getriebemotoren mit “Bus T4”.
WICHTIG – Um alle Funktionen vom Sy-
stem NICE OPERA und die Interdepen-
denz der verschiedenen Vorrichtungen
von diesem System ausführlich zu kennen,
bitte die allgemeine Anleitung “NiceOpera
System Book” nachschlagen, die auch auf
der Web Seite www.niceforyou.com ver-
fügbar ist.
DIE FUNKTIONALITÄTEN DES
PRODUKTES
• Der Sender wendet eine Übertragungstech-
nologie, “O-Code” genannt, an. Ihr variabler
Code (Rolling-Code) verbessert die Übertra-
gungsgeschwindigkeit der Befehle bedeutend.
• Der Sender enthält einen “SpeicheR”, einen
“Proximity-Empfänger”, einen “Speicher” und
einen “Befähigungscode”. Diese Elemente ins-
gesamt ermöglichen es, die dem System Nice-
Opera typischen Vorgänge und Programmie-
rungen per Funk auszuführen.
ÜBERPRÜFUNG DES SENDERS
Bevor man den Sender im Empfänger der
Automation speichert, muss geprüft werden,
ob er korrekt funktioniert. Hierzu auf eine
beliebige Taste drücken und beobachten, ob
sich gleichzeitig die Led einschaltet (Abb. A).
Andernfalls im Par. “Ersatz der Batterie” in die-
ser Anleitung nachlesen.
SPEICHERUNG DES SENDERS
Um alle Funktionen des Senders zu nutzen,
muss er mit den Empfängern mit “O-Code”
kombiniert werden (für diese Modelle, siehe
den Produktkatalog der Firma Nice spa).
Anmerkung – Der Sender ist auch mit allen
existierenden Empfängern mit der Codierung
“FloR” kompatibel (für diese Modelle, siehe
den Produktkatalog der Firma Nice spa);
aber in diesem Fall können die typischen
Funktionen des Systems NiceOpera nicht
benutzt werden.
Zum Speichern des Senders in einem Emp-
fänger NiceOne hat man die Wahl unter den
folgenden Verfahren:
a– Speicherung im “Modus I”
b – Speicherung im “Modus II”
c – Speicherung im “Modus II erweitert”
d – Speicherung über “Bescheinigung-
scode”
e – Speicherung über einen “Befähigung-
scode”, der von einem bereits gespei-
cherten Sender empfangen wird.
Diese Speicherverfahren sind in den Anleitun-
gen des Empfängers oder der Steuerung ange-
geben, mit denen der Sender funktionieren soll.
Die genannten Anleitungen stehen auch im
Internet unter www.niceforyou.com zur Ver-
fügung. In diesen Anleitungen sind die Tasten
der Sender an Zahlen zu erkennen. Für die
Übereinstimmung dieser Zahlen mit den
Tasten der Sender NiceOne siehe die Abb. A.
a– Speicherung im “Modus I”
Mit diesem Verfahren können auf einmal alle
Sendertasten im Empfänger gespeichert wer-
den. Die Tasten werden automatisch jedem,
durch die Steuerung erteiltem Befehl nach einer
werkseitig bestimmten Reihenfolge zugeordnet.
Nur für die Sender Mod. “ON9” - “ON9FM”
Wenn dieser Sender im “Modus I” gespeichert
wird, muss die Tastatur des Senders bei der
Durchführung als in 3 unabhängige Segmente
unterteilt betrachtet werden (s1, s2, s3 in
Abb. A). Jedes dieser Segmente hat seinen
Personalcode. Daher wird für jedes Segment
ein Speicherverfahren notwendig sein (wie
wenn man 3 unabhängige Sender hätte).
b– Speicherung im “Modus II”
Mit diesem Verfahren kann im Empfänger eine
einzelne Sendertaste gespeichert werden. In
diesem Fall wählt der Benutzer unter den von
der Steuerung erteilten Befehlen (max. 4), wel-
chen Befehl er der Taste zuordnen will, die er
gerade speichert. Anmerkung – das Verfah-
ren muss für jede Taste, die man speichern
will, wiederholt werden.
c– Speicherung im “Modus II erweitert”
Dieses Verfahren dient speziell für die Vorrich-
tungen, die Teil des Systems NiceOpera mit
“O-Code” sind. Es ist wie das vorherige Spei-
cherverfahren im “Modus II”, zusätzlich kann
der gewünschte Befehl (der der zu speichern-
den Taste zugeordnet werden soll) aus einer
erweiterten Befehlsliste (bis zu 15 verschiede-
ne, durch die Steuerung erteilte Befehle) aus-
gewählt werden.
Die Durchführbarkeit dieses Verfahrens hängt
daher davon ab, ob die Steuerung imstande
ist, die 15 Befehle zu erteilen, wie die mit dem
System NiceOpera kompatiblen Steuerungen.
d –Speicherung über “BESCHEINI-
GUNGSCODE”
[mit der Programmierungseinheit O-Box]
Dieses Verfahren dient speziell für die Vorrich-
tungen mit “O-Code”, die Teil des Systems Nice
Opera sind. In diesem System besitzt jeder
Empfänger eine besondere Zahl, die ihn identifi-
ziert und bescheinigt und daher “BESCHEINI-
GUNGSCODE” genannt wird. Der Vorteil die-
ses „Bescheinigungscodes“ ist, dass er das
Speicherverfahren des Senders im Empfänger
vereinfacht, da der Installateur nicht in Empfän-
gerreichweite arbeiten muss. Mit Hilfe der Pro-
grammierungseinheit “O-Box” kann der Sender
auch fern vom Installationsort (zum Beispiel im
Büro des Installateurs – Abb. H) auf die Spei-
cherung vorbereitet werden.
e –Speicherung über “BEFÄHIGUNG-
SCODE” [zwischen zwei Sendern]
Dieses Speicherverfahren dient speziell für
die Vorrichtungen mit “O-Code”, die Teil des
Systems NiceOpera sind. Die Sender NiceO-
ne besitzen einen Geheimcode, “BEFÄHI-
GUNGSCODE” genannt. Mit dieser “Befähi-
gung”, von einem alten (bereits gespeicher-
ten) Sender in einen neuen Sender NiceOne
übertragen (Abb. G), kann dieser von einem
Empfänger erkannt und daher automatisch
gespeichert werden.
Das Verfahren zur Übertragung des „Befähi-
gungscodes“ eines ALTEN Senders in einen
NEUEN ist wie folgend:
01. Zwei Sender, einen “NEUEN“ (muss
gespeichert werden) und einen “ALTEN“
(bereits gespeichert) direkt nebeneinan-
der halten.
02. Am NEUEN Sender eine beliebige Taste
gedrückt halten(Anmerkung 1), bis die
Led des ALTEN Senders leuchtet. Dann
die Taste loslassen (die Led des ALTEN
Senders wird zu blinken beginnen).
03. Am ALTEN Sender eine beliebige Taste
gedrückt halten(Anmerkung 1), bis die
Led des NEUEN Senders leuchtet. Dann
die Taste loslassen (die Led schaltet sich
aus, was bedeutet, dass das Verfahren
beendet und die Übertragung des „Befä-
higungscodes“ in den NEUEN Sender
erfolgt ist).
Anmerkung 1 – Wenn man das Modell “ON9” -
“ON9FM” benutzt, muss die Tastatur als in 3 Se-
gmente unterteilt betrachtet werden (daher 3
Sender – Abb. A). Daher auf eine beliebige Taste
in dem zu speicherndem Segment drücken.
Wenn der NEUE Sender die ersten 20 Mal
benutzt wird, wird er diesen “Befähigungsco-
de“ zusammen mit dem Befehl dem Empfän-
ger übertragen. Nachdem der Empfänger die
“Befähigung“ erkannt hat, wird er den Perso-
nalcode des Senders, der sie übertragen hat,
automatisch speichern.
FEHLERMELDUNGEN DURCH DIE LED
4 Mal Blinken = Übertragung des “Befähi-
gungscodes” deaktiviert.
6 Mal Blinken = Übertragung des “Befähi-
gungscodes” deaktiviert zwischen verschie-
denen Sendern.
10 Mal Blinken = Kommunikationsfehler zwi-
schen den Vorrichtungen.
15 Mal Blinken = Speicherung nicht erfolgt
aufgrund der Überschreitung der Höchstzeit-
grenze.
ERSATZ DER BATTERIE
Wenn die Batterie leer ist, reduziert der Sen-
der seine Reichweite. Insbesondere kann be-
merkt werden, dass sich die Led später ein-
schaltet, wenn man auf eine Taste drückt ( =
Batterie fast leer) oder dass die Led schwä-
cher leuchtet ( = Batterie ganz leer).
Damit der Sender wieder ordnungsgemäß
funktioniert, muss die leere Batterie mit einer
desselben Typs ersetzt werden. Die in Abb. C
gezeigte Polung beachten.
Entsorgung der Batterie
Achtung! – Die leere Batterie enthält Schadstof-
fe und darf daher nicht in den Hausmüll gege-
ben werden. Sie muss nach den örtlich gültigen
Vorschriften differenziert entsorgt werden.
ENTSORGUNG DES PRODUKTES
Das vorliegende Produkt ist Teil der Auto-
matisierung, die sie steuert, und muss da-
her zusammen mit derselben entsorgt wer-
den.
Wie die Installationsarbeiten muss auch die
Abrüstung am Ende der Lebensdauer dieses
Produktes von Fachpersonal ausgeführt wer-
den.
Dieses Produkt besteht aus verschiedenen
Stoffen, von denen einige recycled werden
können, andere müssen hingegen entsorgt
werden. Informieren Sie sich über die Recy-
cling- oder Entsorgungssysteme für dieses
Produkt, die von den auf Ihrem Gebiet gülti-
gen Verordnungen vorgesehen sind.
Achtung! – bestimmte Teile des Produktes
können Schadstoffe oder gefährliche Substan-
zen enthalten, die, falls in die Umwelt gegeben,
schädliche Wirkungen auf die Umwelt und die
menschliche Gesundheit haben könnten.
Wie durch das Symbol seitlich angegeben, ist
es verboten, dieses Produkt zum Haushaltmüll
zu geben. Daher differenziert nach den Metho-
den entsorgen, die von den auf
Ihrem Gebiet gültigen Verordnun-
gen vorgesehen sind, oder das
Produkt dem Verkäufer beim Kauf
eines neuen, gleichwertigen Pro-
duktes zurückgeben.
Achtung! – die örtlichen Verordnungen kön-
nen schwere Strafen im Fall einer widerrechtli-
chen Entsorgung dieses Produktes vorsehen.
TECHNISCHE MERKMALE DES
PRODUKTS
Versorgung: 3 Vdc Lithiumbatterie des
Typs CR2032 Dauer der Batterie: ca. 2
Jahre bei 10 Sendungen pro Tag Fre-
quenz: 433.92 MHz (± 100 kHz) / 868.46
MHz (± 35 kHz) Abgestrahlte Leistung:
ca. 1 mW E.R.P. Funkcodierung: Rolling
Code, 72 bit, O-Code (kompatibel mit Flo-R)
Betriebstemperatur: - 20°C; + 55°C
Reichweite: ca. 200 m (außen); 35 m (in
Gebäuden) (*) Schutzart: IP 40 (Innenan-
wendung oder Anwendung in geschützter
Umgebung) Abmessungen: L. 44 x T. 55
x H. 10 mm Gewicht: 11g
Anmerkung: • Die Frequenzen 433.92 MHz und
868.46 MHz sind untereinander nicht kompati-
bel • (*) Die Reichweite der Sender und das Emp-
fangsvermögen der Empfänger wird durch andere
Vorrichtungen stark beeinflusst (wie z. B.: Alarme,
Kopfhörer, usw.), die in ihrer Zone auf derselben Fre-
quenz funktionieren. In diesen Fällen kann die Firma
Nice die effektive Reichweite der Vorrichtungen nicht
garantieren. • Alle angegebenen technischen Merk-
male beziehen sich auf eine Temperatur von 20°C (±
5°C). • Nice S.p.a. behält sich das Recht vor, jeder-
zeit als nötig betrachtete Änderungen am Produkt
vorzunehmen, wobei Funktionalitäten und Einsatz-
zweck beibehalten werden.
CE-KONFORMITÄTSERKLÄRUNG
Anmerkung – Die vorliegende Konformitätserklä-
rung fasst den Inhalt der einzelnen Konformitätser-
klärungen der aufgeführten einzelnen Produkte zu-
sammen; sie wurde zum Ausgabedatum dieses
Handbuchs überarbeitet und wurde aus Verlag-
sgründen erneut angepasst. Eine Kopie der Ori-
ginalerklärung jedes Produkts kann bei Nice S.p.a.
(TV) – I - angefordert werden.
NICE s.p.a. - Via Pezza Alta 13, 31046 Z.I.
Rustignè, 31046 Oderzo (TV) Italien erklärt,
dass alle Produkte der Serie Nice One (ON1;
ON1FM; ON2; ON2FM; ON4; ON4FM; ON9;
ON9FM) mit den wichtigsten Anforderungen der
Richtlinie R&TTE 1999/5/CE konform sind, was
den Einsatz betrifft, für den die Geräte bestimmt
sind. Die Produkte gehören zu Klasse 1.
Lauro Buoro
(Der Geschäftsführer)
OPIS I PRZEZNACZENIE PRODUKTU
Nadajnik stanowi część serii “NiceOne” produ-
kowanej przez firmę Nice. Nadajniki tej serii są
wykorzystywane przede wszystkim przy stero-
waniu automatyką przeznaczoną do otwierania
bram wjazdowych i garażowych oraz do po-
dobnych zastosowań. Jakiekolwiek inne uży-
cie jest niewłaściwe i zabronione!
Dostępne są modele z 1, 2, 4 i 9 przyciskami
(rys. A) oraz następujące akcesoria opcjonal-
ne: zawieszka do etui na klucze (rys.D); spin-
ka do przymocowania do kieszeni (rys.E);
uchwyt do mocowania na ścianie (rys.F).
System “NiceOpera”
Nadajniki z serii NiceOne stanowią część sys-
temu “NiceOpera”. Jest to system zaprojek-
towany przez firmę Nice w celu optymalizacji i
ułatwienia programowania, użytkowania i kon-
serwacji urządzeń stanowiących część insta-
lacji automatyki. System składa się z wielu
urządzeń, które mogą przesyłać pomiędzy
sobą drogą radiową dane i informacje wyko-
rzystując do tego nowy systemu kodowania
“O-Code” lub tradycyjny kabel.
Podstawowe urządzenia składające się na
system NiceOpera to:
- nadajniki NiceOne;
- odbiorniki NiceOne;
- jednostka programująca O-Box;
- programator przenośny O-View;
- siłowniki z systemem “Bus T4”.
WAŻNE – W celu szczegółowego zapozna-
nia się z możliwościami oferowanymi przez
system NiceOpera oraz współzależnością
funkcjonalną poszczególnych urządzeń,
przeczytaj instrukcję “NiceOpera System
Book”, dostępną między innymi na stronie
internetowej www.niceforyou.com
FUNKCJE PRODUKTU
• Nadajnik działa w oparciu o technologię na-
dawania “O-Code”, ze zmiennym kodem
(rolling-code), która zdecydowanie zwiększa
szybkość przesyłania poleceń.
• Nadajnik wyposażony jest w “Pamięć”,
“Odbiornik zbliżeniowy” i “Kod dostępu”, które
wspólnie umożliwiają przekazywanie drogą
radiową poleceń i wykonywanie funkcji cha-
rakterystycznych dla systemu NiceOpera.
KONTROLA NADAJNIKA
Przed rozpoczęciem wczytywania nadajnika
do Odbiornika automatyki sprawdź czy dzia-
ła on poprawnie. W tym celu wciśnij jakikol-
wiek przycisk i zwróć uwagę czy zapala się
dioda (rys.A). Jeśli dioda nie zapala się,
przejdź do punktu “Wymiana baterii” w niniej-
szej instrukcji.
WCZYTYWANIE NADAJNIKA
W celu wykorzystania wszystkich funkcji na-
dajnika należy zestawiać go z Odbiornikami,
które działają w oparciu o system kodowania
“O-Code” (odpowiednie modele zostały ozna-
czone w katalogu produktów Nice ).
Pamiętaj – nadajnik jest kompatybilny również
ze wszystkimi innymi Odbiornikami działający-
mi w oparciu o system kodowania “FloR”
(odpowiednie modele zostały oznaczone w
katalogu produktów Nice), jednak wówczas
nie można wykorzystać funkcji oferowa-
nych przez System NiceOpera.
W celu wczytania nadajnika do Odbiornika
NiceOne, możesz skorzystać z następujących
procedur operacyjnych:
a- Wczytywanie w “Trybie I”
b- Wczytywanie w “Trybie II”
c- Wczytywanie w “Trybie II rozszerzo-
nym”
d- Wczytywanie przy użyciu “Numeru Cer-
tyfikatu”
e- Wczytywanie przy użyciu “Kodu dostę-
pu” pobranego od nadajnika wczytane-
go wcześniej.
Procedury operacyjne poszczególnych try-
bów wczytywania znajdziesz w instrukcji
Odbiornika lub Centrali, z którą ma współ-
pracować dany nadajnik.
Wspomniane instrukcje są dostępne między
innymi na stronie internetowej: www.nicefo-
ryou.com. W tych instrukcjach przyciski na-
dajnika są oznaczane przy użyciu numerów.
Odpowiednia identyfikacja numerów i przyci-
sków nadajników NiceOne została przedsta-
wiona na rys. A.
a– Wczytywanie w “Trybie I”
Procedura ta pozwala na wczytanie do
odbiornika jednorazowo wszystkich przyci-
sków nadajnika. Przyciski są automatycznie
przypisywane poszczególnym poleceniom
wydawanym przez Centralę, według fabrycz-
nie ustawionej kolejności.
Dotyczy tylko nadajnika mod.
“ON9” - “ON9FM”
Jeśli do wczytania tego nadajnika stosujesz
procedurę operacyjną “Tryb I”, pamiętaj by
traktować klawiaturę nadajnika jakby była
podzielona na 3 sektory (s1, s2, s3 na rys. A),
z których każdy dysponuje indywidualnym
kodem identyfikacyjnym. Oznacza to, że każ-
dy sektor wymaga przeprowadzenia osobnej
procedury wczytywania (tak jakbyś miał do
czynienia z 3 osobnymi nadajnikami).
b– Wczytywanie w “Trybie II”
Procedura ta umożliwia pojedyncze wczyty-
wanie przycisków nadajnika do Odbiornika. W
tym trybie to użytkownik wybiera, które z pole-
ceń dostępnych na Centrali chce przypisać
do aktualnie wczytywanego przycisku (mak-
symalnie 4 polecenia). Pamiętaj – musisz
powtórzyć procedurę dla każdego przycisku,
który chcesz wczytać.
c– Wczytywanie w “Trybie II rozszerzo-
nym”
Procedura ta została opracowana specjalnie
dla urządzeń systemu NiceOpera z kodowa-
niem typu “O-Code”. Jest identyczna z pro-
cedurą “Tryb II”, ale dodatkowo daje możli-
wość wybrania polecenia, które przypisujemy
do wczytywanego przycisku z szerszej listy
poleceń dostępnych na Centrali (do 15 róż-
nych poleceń). Możliwość wykonania tej pro-
cedury zależy więc od tego czy dana Centrala
może obsługiwać do 15 poleceń, tak jak dzie-
je się to w przypadku Central kompatybilnych
z systemem NiceOpera.
d–Wczytywanie przy użyciu “Numeru
CERTYFIKATU”
[z jednostk programowania O-Box]
Jest to procedura wczytywania opracowana
specjalnie dla urządzeń systemu NiceOpera, z
kodowaniem typu “O-Code”. W systemie tym
do każdego Odbiornika przypisany jest numer
identyfikacyjny zwany “CERTYFIKATEM”. Taki
certyfikat ułatwia procedurę wczytywania
nadajnika do Odbiornika, ponieważ nie zmu-
sza już instalatora do pracy w zasięgu odbioru
Odbiornika. Zastosowanie jednostki progra-
mującej “O-Box” pozwala na przeprowadze-
nie procedury wczytywania także z dala od
miejsca montażu (na przykład w biurze insta-
latora – rys. H).
e–Wczytywanie przy użyciu “Kodu DO-
STĘPU” [pomi dzy dwoma nadajnikami]
Jest to procedura opracowana specjalnie dla
urządzeń systemu NiceOpera z kodowaniem
typu “O-Code”. Nadajniki NiceOne posiadają
indywidualny kod, zwany “KODEM DO-
STĘPU”. “Dostęp” ten przekazany w odpo-
wiedni sposób ze starego nadajnika (wczyta-
nego wcześniej) do nowego nadajnika Nice-
One (rys. G) umożliwia rozpoznanie nowego
nadajnika przez Odbiornik, a co za tym idzie
pozwala na automatyczne wczytanie go do
Odbiornika.
Poniżej przedstawiono procedurę przekazania
“Kodu dostępu” ze STAREGO do NOWEGO
nadajnika:
01. Zbliż do siebie (muszą być złączone!!)
oba nadajniki - “NOWY” (do wczytania) i
“STARY” (wczytany wcześniej).
02. Wciśnij jakikolwiek(uwaga 1) przycisk na
NOWYM nadajniku i przytrzymaj do chwili,
gdy zapali się dioda na STARYM nadajni-
ku. Następnie zwolnij przycisk (dioda STA-
REGO nadajnika zacznie migać).
03. Następnie wciśnij jakikolwiek(uwaga 1)
przycisk na STARYM nadajniku i przytrzy-
maj do chwili, gdy zapali się dioda na
NOWYM nadajniku. Następnie zwolnij
przycisk (dioda zgaśnie sygnalizując tym
samym zakończenie procedury oraz prze-
kazanie „kodu dostępu” do NOWEGO
nadajnika).
uwaga 1 – Je eli u ywany jest model “ON9” -
“ON9FM”, nale y uwzgl dni, e klawiatura jest
podzielona na 3 sektory (czyli 3 nadajniki - rys.
A). Nale y wi c wcisn którykolwiek klawisz,
znajduj cy si w sektorze zapami tywania.
Pobrany w ten sposób “Kod dostępu” zostanie
przekazany do Odbiornika podczas pierwszych
20 poleceń wydanych za pośrednictwem NO-
WEGO nadajnika. Po rozpoznaniu „kodu do-
stępu” Odbiornik wczyta automatycznie kod
identyfikacyjny nadajnika, który go przekazał.
SYGNALIZACJA BŁĘDÓW ZA POMOCĄ
DIOD
4 błyski = transmisja “Kodu uaktywnienia” jest
nieaktywna.
6 błysków = transmisja “Kodu uaktywnienia”
pomiędzy różnymi nadajnikami jest nieaktywna.
10 błysków = błąd w komunikacji pomiędzy
urządzeniami.
15 błysków = wczytywanie nie wykonane w
wyniku przekroczenia ograniczenia czasowego.
WYMIANA BATERII
Kiedy bateria rozładowuje się, nadajnik zna-
cząco zmniejsza zasięg działania. Wówczas
po wciśnięciu przycisku dioda zapala się z
opóźnieniem (= bateria jest prawie całkowicie
rozładowana) lub zmniejsza się intensywność
jej światełka (= bateria jest całkowicie rozłado-
wana).
W takiej sytuacji, by przywrócić prawidłowe
działanie nadajnika, należy wymienić rozła-
dowaną baterię na baterię tego samego
typu, pamiętając o zachowaniu biegunowo-
ści wskazanej na rys. C.
Utylizacja baterii
Uwaga! – Rozładowana bateria zawiera sub-
stancje szkodliwe i w związku z tym nie moż-
na wyrzucać jej do odpadów domowych.
Należy poddać ją utylizacji stosując metody
segregacji odpadów, zgodnie z przepisami
obowiązującymi w danym kraju.
UTYLIZACJA PRODUKTU
Produkt ten jest nierozłączną częścią auto-
matyki, którą steruje i w związku z tym
musi być poddany utylizacji wraz z auto-
matyką.
Podobnie jak w przypadku montażu, również
czynności związane z demontażem muszą być
wykonane przez wykwalifikowany personel.
Produkt ten składa się z różnego rodzaju
materiałów, niektóre z nich mogą być powtór-
nie użyte, inne muszą zostać poddane utyliza-
cji. Zasięgnij informacji odnośnie systemów
recyklingu i utylizacji, przewidzianych zgodnie
z lokalnymi przepisami obowiązującymi dla tej
kategorii produktu.
Uwaga! – niektóre elementy produktu mogą
zawierać substancje szkodliwe lub niebez-
pieczne, które po wyrzuceniu, mogłyby zanie-
czyścić środowisko lub zagrozić zdrowiu ludz-
kiemu.
Zabrania się wyrzucania tego pro-
duktu do odpadów domowych o
czym przypomina symbol umiesz-
czony z boku. Należy przeprowa-
dzić “segregację odpadów” na
potrzeby utylizacji, według metod
przewidzianych lokalnymi przepisami lub zwró-
cić produkt sprzedawcy podczas zakupu
nowego, równorzędnego produktu.
Uwaga! – lokalne przepisy mogą przewidy-
wać poważne sankcje w przypadku nielegal-
nej utylizacji produktu.
DANE TECHNICZNE PRODUKTU
Zasilanie: bateria litowa 3Vdc typu CR
2032 Czas życia baterii: szacunkowo 2
lata, przy 10 przekazach dziennie Często-
tliwość: 433.92 MHz (± 100 kHz) / 868.46
MHz (± 35 kHz) Moc wyjściowa: szacun-
kowo około 1 mW E.R.P. Kod radiowy: rol-
ling code, 72 bit, O-Code (kompatybilny z Flo-
R) Temperatura pracy: - 20°C; + 55°C
Zasięg: szacunkowo 200 m; 35 m (w bu-
dynku) (*)Stopień ochrony: IP 40 (stoso-
wanie w domu lub w zabezpieczonych po-
mieszczeniach) Wymiary: L. 44 x P. 55 x H.
10 mm Masa: 11g
Pamiętaj: • Częstotliwości 433.92 MHz i 868.46
MHz nie są kompatybilne ze sobą • (*) Na zasięg
nadajników i pracę Odbiorników silnie wpływają inne
urządzenia (np.: alarmy, słuchawki radiowe, itp.),
działające w pobliżu na tej samej częstotliwości. W
takich wypadkach firma Nice nie może zagwaranto-
wać rzeczywistego zasięgu pracy produkowanych
przez siebie urządzeń • Wszystkie wskazane powy-
żej dane techniczne odnoszą się do temperatury
powietrza 20°C (± 5°C).• Firma Nice S.p.a. zastrze-
ga sobie możliwość wprowadzania zmian w pro-
dukcie w każdym momencie gdy uzna to za stoso-
wane, przy jednoczesnym zachowaniu funkcji i
przeznaczenia produktu.
DEKLARACJA ZGODNOŚCI CE
Uwaga – W niniejszej Deklaracji Zgodności zgro-
madzone są pojedyncze deklaracje zgodności po-
jedynczych zacytowanych wyżej urządzeń; została
ona zaktualizowana do daty wydania niniejszej in-
strukcji obsługi i została dostosowana dla celów
wydawniczych. Kopia oryginalnej deklaracji dla
każdego urządzenia może być zamawiana w firmie
Nice S.p.a. (TV) I.
Firma Nice S.p.a. – via Pezza Alta, 13, Z.I.
Rustignè, 31046 Oderzo (TV) Włochy oświad-
cza, że wszystkie produkty z linii NiceOne
(ON1; ON1FM; ON2; ON2FM; ON4; ON4FM;
ON9; ON9FM) są zgodne z podstawowymi
wymogami Dyrektywy 1999/5/WE w zakresie
użytkowania, do którego urządzenia te zosta-
ły przeznaczone. Produkty Klasy I.
Lauro Buoro
(Prezes Zarządu)
BESCHRIJVING VAN HET PRODUCT EN
GEBRUIKSDOEL
Deze zender maakt deel uit van de serie “Nice-
One” van Nice. De zenders van deze serie zijn
hoofdzakelijk bestemd voor het aansturen van
automatiseringen als deuropeners, poortope-
ners en dergelijke: elk ander gebruik is onei-
genlijk gebruik en dus verboden!
Er zijn modellen met 1, 2, 4 of 9 toetsen (afb. A),
plus de volgende optionals: koordje voor sleutel-
hanger (afb. D ); bevestigingsspeld voor zakje
(afb. E); steun voor bevestiging aan de wand
(afb. F).
Het systeem “NiceOpera”
De zenders van de serie NiceOne maken deel uit
van het systeem “NiceOpera”. Dit systeem is
door Nice ontworpen om de inrichtingen die
gewoonlijk in automatiseringsinstallaties worden
gebruikt, beter en gemakkelijker te kunnen pro-
grammeren, gebruiken en onderhouden. Het sys-
teem bestaat uit verschillende software- en hard-
ware-inrichtingen die onderling gegevens en infor-
matie via radio kunnen uitwisselen, waarbij zij een
nieuw coderingssysteem gebruiken dat de naam
“O-Code” heeft, of via een vaste verbinding.
De belangrijkste inrichtingen die het systeem
NiceOpera vormen, zijn:
– zenders NiceOne;
– ontvangers NiceOne;
– programmeereenheid;
– portable programmeereenheid O-View;
– reductiemotors met het communicatiesys-
teem “T4-Bus”.
BELANGRIJK – Om alle functies van het sys-
teem NiceOpera verder te leren kennen alsook
de onderlinge afhankelijkheid van de verschil-
lende inrichtingen van het systeem, gelieve u
de algemene handleiding “NiceOpera System
Book” te raadplegen, die ook op de internetsi-
te www.niceforyou.com beschikbaar is.
DE WERKING VAN HET PRODUCT
• De zender past een zendtechnologie toe -
genaamd “O-Code” - met een variabele code
(rollingcode), die de overdrachtsnelheid van een
instructie aanzienlijk verbetert.
• De zender herbergt een “geheugen”, een “pro-
ximity-ontvanger”, een “geheugen” en een “auto-
risatiecode”, die het als geheel mogelijk maken
radiografisch de voor het systeem NiceOpera
typische handelingen en programmeringen te
verrichten.
CONTROLE VAN DE ZENDER
Voordat u de zender in het geheugen van de
ontvanger van de automatisering gaat opslaan,
dient u te controleren of ze goed werkt; u drukt
hiervoor op een willekeurige toets en kijkt daarbij
of de led (afb. A) gaat branden. Als de led niet
gaat branden, lees dan in deze handleiding de
paragraaf “Vervangen van de batterij”.
GEHEUGENOPSLAG VAN DE ZENDER
Om alle nieuwe functies van de zender te kun-
nen benutten, dient u ze samen met de ontvan-
gers met codering “O-Code” te gebruiken (om
te weten welke modellen dat zijn gelieve u de
productcatalogus van Nice te raadplegen).
N.B.–de zender is ook verenigbaar met alle
bestaande ontvangers die de codering “FloR”
toepassen (om te weten welke modellen dat zijn
gelieve u de productcatalogus van Nice te raad-
plegen); in dit geval zal het echter niet moge-
lijk zijn de typische functies van het Systeem
NiceOpera te gebruiken.
Om de zender in het geheugen van een ontvan-
ger NiceOne op te slaan, kunt u op grond van
uw eisen uit de volgende procedures kiezen:
a – Geheugenopslag in “Modus I”
b – Geheugenopslag in “Modus II”
c – Geheugenopslag in “Modus II
uitgebreid”
d – Geheugenopslag via het “Certificaat-
nummer”
e – Geheugenopslag via een “Autorisatie-
code” die ontvangen is van een reeds in
het geheugen opgeslagen zender
Deze procedures voor geheugenopslag zijn
opgenomen in de handleidingen voor de ont-
vanger of besturingseenheid waarmee u de zen-
der wilt laten werken.
Deze handleidingen vindt u ook op de internetsi-
te: www.niceforyou.com. In deze handleidin-
gen worden de toetsen van de zenders met
nummers aangegeven. Raadpleeg dan ook afb.
Avoor het verband tussen deze nummers en
de toetsen van de zenders NiceOne.
a– Geheugenopslag in “Modus I”
Met deze procedure is het mogelijk in één keer
alle toetsen van de zender in het geheugen van
de ontvanger op te slaan. De toetsen worden
automatisch aan elke door de besturingseen-
heid beheerde instructie volgens een in de
fabriek ingestelde volgorde geassocieerd.
Alleen voor de zender mod. “ON9” - “ON9FM”
Als deze zender met de methode “Modus I” in
het geheugen wordt opgeslagen, dient het toet-
senpaneel van de zender als onderverdeeld in 3
afzonderlijke sectoren (s1, s2, s3 op afb. A) te
worden beschouwd, waarvan elk een eigen
identiteitscode heeft. Daarom is dan ook voor
elk daarvan een eigen procedure voor geheu-
genopslag vereist (alsof het 3 verschillende zen-
ders zouden zijn).
b– Geheugenopslag in “Modus II”
Met behulp van deze procedure is het mogelijk
één enkele toets van de zender in het geheugen
van de ontvanger op te slaan. In dit geval is het
de gebruiker die uit de door de besturingseen-
heid beheerde instructies (ten hoogste 4) kiest,
welke hij daarvan wilt associëren aan de toets die
hij nu in het geheugen opslaat. N.B.– de proce-
dure moet voor elke afzonderlijke toets die in het
geheugen moet worden opgeslagen, opnieuw
worden uitgevoerd.
c– Geheugenopslag in “Modus II uitge-
breid”
Deze procedure is kenmerkend voor de inrich-
tingen die behoren tot het systeem NiceOpera,
met codering “O-Code”. Ze is gelijk aan de
“Modus II” hierboven, maar biedt daarenboven
de mogelijkheid uit een uitgebreide lijst door de
besturingseenheid beheerde instructies – tot 15
verschillende instructies- de gewenste instructie
te kiezen (te associëren aan de toets die nu in
het geheugen wordt opgeslagen) .
De uitvoerbaarheid van de procedure is dan ook
afhankelijk van de mogelijkheid van de besturings-
eenheid 15 instructies te behandelen, zoals de
besturingseenheid compatibel met NiceOpera.
d –Geheugenopslag met behulp van het
“CERTIFICAATNUMMER”
[met de programmeereenheid O-Box]
Deze procedure voor geheugenopslag is ken-
merkend voor de inrichtingen die behoren tot
het systeem NiceOpera, met codering “O-
Code”. Bij dit systeem heeft elke ontvanger een
speciaal nummer dat hem kenmerkt en garan-
deert en dat dan ook “CERTIFICAAT” wordt
genoemd. Het gebruik van dit “certificaat” heeft
als voordeel dat de procedure voor geheugen-
opslag van de zender in de ontvanger eenvoudi-
ger wordt, daar de installateur niet meer ged-
wongen is binnen het ontvangbereik van de ont-
vanger te werken. Dankzij de nieuwe werkwijze
is het immers mogelijk met behulp van de pro-
grammeereenheid “O-Box”de procedure voor
geheugenopslag van de zender ook ver van de
plaats van installatie uit te voeren (bijvoorbeeld in
het kantoor van de installateur – afb. H).
e –Geheugenopslag met behulp van de
“AUTORISATIECODE” [tussen twee zenders]
Deze procedure voor geheugenopslag is ken-
merkend voor de inrichtingen die behoren tot het
systeem NiceOpera, met codering “O-Code”.
De zenders NiceOne bezitten een geheime code,
die de naam “AUTORISATIESCODE” heeft.
Wanneer deze “autorisatie” wordt overgebracht
van een oude (reeds in het geheugen opgesla-
gen) zender in een nieuwe zender NiceOne (afb.
G) biedt deze laatste de mogelijkheid automa-
tisch door een ontvanger te worden herkend.
De procedure om de “autorisatiecode” van een
OUDE zender in een NIEUWE zender over te
brengen, verloopt als volgt:
01. Houd twee zenders, een “NIEUWE” (in het
geheugen op te slaan) en een “OUDE”
(reeds in het geheugen opgeslagen), dicht
bij elkaar (aangesloten!!!).
02. Houd op de NIEUWE zender een willekeuri-
ge(opmerking 1) toets ingedrukt tot wanneer
de led van de OUDE zender gaat branden.
Laat daarna de toets los en (de led van de
OUDE zender begint te knipperen).
03. Houd vervolgens op de OUDE zender een
willekeurige(opmerking 1) toets ingedrukt tot
wanneer de led van de NIEUWE zender
gaat branden. Laat daarna de toets los (de
led gaat uit ten teken dat de procedure ten
einde is en de “Autorisatiecode” in het geheu-
gen van de NIEUWE zender is overgebracht).
opmerking 1 – als u het model “ON9” - “ON9
FM” gebruikt, dient u het toetsenpaneel als ver-
deeld in 3 sectoren (dat wil zeggen 3 zenders -
afb. A) te beschouwen. Druk daarna op een wil-
lekeurige toets binnen de te bewaren sector.
Wanneer de NIEUWE zender de eerste 20 maal
zal worden gebruikt, zal ze deze “Autorisatieco-
de” samen met de instructie naar de ontvanger
verzenden. De ontvanger zal na herkenning van
de “autorisatiecode”, de identiteitscode van de
zender, die hem heeft verzonden, automatisch in
het geheugen opslaan.
FOUTMELDINGEN VIA DE LED
4 maal knipperen = overdracht van de uitge-
schakelde “Autorisatiecode”.
6 maal knipperen = overdracht van de uitge-
schakelde “Autorisatiecode” tussen verschillen-
de zenders.
10 maal knipperen = communicatiefout tussen
de inrichtingen.
15 maal knipperen = geheugenopslag heeft
niet plaatsgevonden wegens overschrijding van
de tijdslimiet.
VERVANGEN VAN DE BATTERIJ
Wanneer de batterij leeg is, reduceert de zender
aanzienlijk het bereik en de lichtsterkte van de led.
Met name, wanneer er op een toets zal worden
gedrukt, zal de led later gaat branden (= batterij
bijna leeg) of dat de intensiteit van het licht van de
led afneemt (= batterij helemaal leeg).
In deze gevallen dient om de overdracht weer
normaal te laten functioneren, de lege batterij te
wordenvervangen met een andere van het zelf-
de type, waarbij de op afb. C aangegeven pola-
riteit dient te worden aangehouden.
Afvalverwerking van de batterij
Let op! – De lege batterij bevat vervuilende stof-
fen en mag dus niet met het gewone huisvuil
worden weggegooid. Ze dienen verwerkt te
worden door ze ‘gescheiden’ in te zamelen,
zoals dat voorzien is in de regelgeving, die in uw
gebied van kracht is.
AFVALVERWERKING VAN HET PRODUCT
Dit product vormt een geheel met de auto-
matisering die het aanstuurt en moet dus
samen daarmee als afval worden verwerkt.
Wanneer de levensduur van dit product ten ein-
de is, dienen, zoals dit ook bij de installatiewerk-
zaamheden het geval is, de ontmantelingswerk-
zaamheden door gekwalificeerde technici te
worden uitgevoerd.
Dit product bestaat uit verschillende soorten
materialen; sommige daarvan kunnen opnieuw
gebruikt worden, terwijl andere als afval verwerkt
dienen te worden. Win inlichtingen in over de
methoden van hergebruik of afvalverwerking in
en houd u aan de voor dit soort producten in uw
gebied van kracht zijnde voorschriften.
Let op! – sommige onderdelen van het product
kunnen vervuilende of gevaarlijke stoffen bevat-
ten: indien die in het milieu zouden verdwijnen,
zouden ze schadelijke gevolgen voor het milieu
en de menselijke gezondheid kunnen opleveren.
Zoals dat door het symbool hiernaast is aangege-
ven, is het verboden dit product
met het gewone huisafval weg te
gooien. Scheid uw afval voor ver-
werking op een manier zoals die in
de regelgeving in uw gebied is voor-
zien of lever het product bij uw leve-
rancier in, wanneer u een nieuw gelijksoortig pro-
duct koopt.
Let op! –de plaatselijke regelgeving kan in zwa-
re straffen voorzien in geval van illegale dumping
van dit product.
TECHNISCHE GEGEVENS VAN HET
PRODUCT
Stroomtoevoer: lithiumbatterij van 3Vdc type
CR2032 Levensduur batterij: geschat op 2
jaar, bij 10 overseiningen per dag Frequentie:
433.92 MHz (± 100 kHz) / 868.46 MHz (± 35
kHz) Uitgestraald vermogen: geschat op cir-
ca 1 mW E.R.P. Codering radio: rollingcode,
72 bits, O-Code (compatibel met Flo-R) Wer-
kingstemperatuur: - 20°C; + 55°C Bereik:
geschat op 200 m (buitenshuis); 35 m (indien bin-
nenshuis) (*) Beschermingsklasse: IP 40
(gebruik binnenshuis of in een beschermde omge-
ving) Afmetingen: L. 44 x D. 55 x H. 10 mm
Gewicht: 11g
N.B.: • De frequenties 433.92 MHz en 868.46
MHz zijn onderling niet compatibel • (*) Het
bereik van de zenders en het ontvangbereik van de
ontvangers wordt sterk beïnvloed door andere inrich-
tingen (bijvoorbeeld: alarmen, radiokoptelefoons,
etc..) die in uw gebied op dezelfde frequentie uitzen-
den. In deze gevallen kan Nice geen enkele garantie
bieden omtrent het werkelijke bereik van haar inrich-
tingen • Alle technische gegevens hebben betrekking
op een omgevingstemperatuur van 20°C (± 5°C). •
Nice S.p.a. behoudt zich het recht voor op elk
gewenst moment wijzigingen in het product aan te
brengen, waarbij functionaliteit en gebruiksdoel ech-
ter gehandhaafd blijven.
EG-VERKLARING VAN OVEREENSTEM-
MING
Opmerking: deze verklaring van overeenstemming
verzamelt de inhoud van de aparte verklaringen van
overeenstemming van de aparte producten die
genoemd worden; de verklaring is bijgewerkt op de
datum van uitgave van deze handleiding en werd
om uitgeversredenen heraangepast. Een kopie van
de originele verklaring voor elk van de producten
kan worden aangevraagd bij Nice S.p.A. (TV) I .
Nice S.p.a. - via Pezza Alta, 13, Z.I. Rustignè,
31046 Oderzo (TV) Italië, verklaart dat alle pro-
ducten van de lijn Nice One (ON1; ON1FM;
ON2; ON2FM; ON4; ON4FM; ON9; ON9FM)
in overeenstemming zijn met de essentiële ver-
eisten van de Richtlijn R&TTE 1999/5/EG, voor
het gebruik waarvan de apparaten zijn bedoeld.
De producten behoren tot klasse 1.
Lauro Buoro
(Gedelegeerd Bestuurder)
ITALIANO DEUTSCH POLSKI NEDERLANDS
