manuals.online logo
Brands
  1. Home
  2. •
  3. Brands
  4. •
  5. Nice
  6. •
  7. Transmitter
  8. •
  9. Nice Era P View User manual

Nice Era P View User manual

EN - CE DECLARATION OF CONFORMITY
Declaration in compliance with Directive 1999/5/EC
Note - The content of this declaration corresponds to that specied
in the ofcial document deposited at the Nice S.p.A. headquarters
and, in particular, to the latest revised edition available prior to the
publishing of this manual. The text herein has been re-edited for edi-
torial purposes. A copy of the original declaration can be requested
from Nice S.p.A. (TV) I.
Declaration number: 533/ERA P VIEW - Revision: 0 -
Language: EN
The undersigned, Mauro Sordini, CEO, declares under his
sole responsibility that the following product: • Manufac-
turer's name: Nice s.p.a. • Address: Via Pezza Alta 13,
31046 Rustignè di Oderzo (TV) Italy • Type of product:
Multifunctional transmitter with graphic interface• Model /
Type: ERA P VIEW • Accessories:-
Complies with the essential requirements pursuant to
Article 3 of the following European directive, relevant to
the use for which the products are intended: DIRECTIVE
1999/5/EC OF THE EUROPEAN PARLIAMENT AND OF
THE COUNCIL of 9 March 1999 on radio equipment and
telecommunications terminal equipment and the mutual
recognition of their conformity, in accordance with the fol-
lowing harmonised standards: - Health and safety (Art. 3(1)
(a)): EN 62479:2010; - Electrical safety (art. 3(1)(a)): EN
60950-1:2006+A11:2009+A12:2011+A1:2010+A2:2013 -
Electromagnetic compatibility (art. 3(1)(b)): EN 301 489-1
V1.9.2:2011, EN 301 489-3 V1.6.1:2013 - Radio spectrum
(art. 3(2)): EN 300 220-2 V2.4.1:2012
In accordance with Directive 1999/5/EC (appendix V), the
product is class 1 and marked:
Oderzo, 09 June 2015
Mr. Mauro Sordini (Chief Executive Ofcer)
Instructions and warnings for
installation and use
IS0380A00MM_29-06-2015
Nice
Era P View
0682
Nice SpA
Oderzo TV Italy
[email protected] www.niceforyou.com
EN
Scenes :
sets which enable you to control multiple devices at once,
even of different types (each
with its own command), for ease of use and for creating scenographic effects. A ‘scene’ can be
associated with the ‘timing’ function (automatic execution of commands at a given time of different
days of the week) or the ‘astro’ function - see par. 4.1.2; the scene can also be an ‘event’ - par.
4.3.
Table 1 - Available command sets
01 Shutter 02 Shutter with partial positions
key commands key key commands key
standard radio standard optional radio
▲Up T1 ▲Up Partial 1 T1
Stop T2 Stop Partial 2 T2
▼Down T3 ▼Down Partial 3 T3
03 Sun awning
key standard commands radio key key commands
optional radio key
▲Up T1 ▲Sun ON Sun ON
Stop T2 Partial 1 T1
▼Down T3 ▼Sun OFF Sun OFF
04 Gate 05 Locks
key commands key key commands key
standard radio standard radio
▲Open T3 ▲- -
Partial open T2 Open T1
▼Close T4 ▼- -
06 Lights + Electrical equipment 07 Adjustable lights
key commands key key commands key
standard radio standard radio
▲On T1 ▲Increment T1
--On/Off T2
▼Off T2 ▼Decrement T3
08 Irrigation 09 Alarm
key commands key key commands key
standard radio standard radio
▲- - ▲Armed On (alarms)
Turn on T1 Partial position
armed
PARTIAL
(alarms)
▼- - ▼Disarmed OFF (alarms)
4.1.2 - Conguration functions: ‘Options’ menu ( )
Congure various operating parameters; this manual describes the most specic ones, since the
rest are intuitive.
- Start: congure the internal sensors that activate the Era P View:
Factory settings (default)
OK key only OFF OFF = any key will turn Era P View on.
ON = only the OK key can turn the unit on.
Proximity
sensor OFF Activates the proximity sensor (not recommended for installations in area
with a lot of people moving close to the unit)
Movement
sensor OFF Activates the proximity sensor (not recommended during transport)
On support OFF OFF = events are always executed
ON = events are executed only if the transmitter is on its wall support
On on event OFF
OFF = events are executed in the background
ON = events turn the unit on shortly before the event itself is to be exe-
cuted; this gives the user the option to suspend the event or change its
time setting
- Password: allows you to block access to the installer menu with the 'installer' password (this
stops ADV users modifying critical parameters) or, allows a 'user' password to be set to stop Easy
users quitting the simplied menu.
By default all menus, functions and settings are freely available to all users.
- Astro function (Date & Time menu): automatically calculates the time of sunrise/sunset and
allows you to associate an event to these times rather than to a xed time of day.
The sunrise and sunset times are calculated and updated automatically; the calculation requires
the latitude and the difference between the clock time and true winter time. These parameters
are easy to nd on-line (use the date of 25 December if requested) or as follows: determine the
position of the geographic South of the location (North for the southern hemisphere) and check
the clock time when the sun is directly South (or at its zenith). For example, if this happens at clock
time 12:45, set the parameter to +00:45; if it happens at 11:30, enter -00:30.
N.B. - the calculations made by Era P View are approximate and do not account for astronomical
phenomena; however, the error is negligible (less than 15 minutes).
4.2 - Easy menu
This menu allows you to: • control devices (groups and scenes: after conguration in the ADV
menu) • select the type of reading ( ) • set the order of devices in the list ( ) • use the tand
ukeys to select devices.
To congure a device, associate the image with its identifying data, add/remove indi-
vidual devices (groups/scenes), you must rst use the ADV menu.
4.3 - Events
Only usable for ‘Scenes’ with the ‘timing’ function (Scenes > Create > Timing) - i.e. automatic exe-
cution of events at set times of one or more days of the week; see also ‘Astro function’, par. 4.1.2.
All congured events are grouped in the ‘Scenes’ page ( ).
Suspend/modify scheduled events.
4.4 - ‘PROG’ / ‘ESC’ keys
These keys are located in the battery compartment (g. 3-e); they can be used with compatible
motors (e.g. the Era Mat family) to simplify programming: the PROG key speeds up access to the
procedures, while the ESC provides a quick exit from the procedures. When programming, before
using these keys you must rst select the individual device you wish to program.
5 - REPLACING THE TRANSMITTER BATTERY
When the batteries are exhausted ( ) they must be replaced with new ones of the same type
(alkaline) with the indicated polarity (g. 3-f); you can also use 1.2V NiMh AAA rechargeable
batteries (chapter 7). Replacing the batteries: g. 3-e/f/g).
6 - SCRAPPING THE PRODUCT
This product constitutes an integral part of the automation system, therefore it must
be disposed of together with the former. As in installation, also at the end of product lifetime,
the disassembly and scrapping operations must be performed by qualied personnel. This prod-
uct is made up of different types of material, some of which can be recycled while others must
be disposed of. Seek information on the recycling and disposal systems envisaged by the local
regulations in your area for this product category. – Some parts of the product may contain
polluting or hazardous substances which, if disposed of into the environment, constitute
serious environmental and health risks.
As indicated by the symbol, the product may not be disposed of as domestic waste. Sort
the materials for disposal, according to the methods envisaged by current legislation in
your area, or return the product to the retailer when purchasing an equivalent product.
- Local legislation may include the application of serious nes in the event of
improper disposal of this product.
Disposing of the batteries: – Even if discharged, the batteries can contain pollutant sub-
stances and therefore must never be disposed of in common waste collection points. Dispose of
according to separate waste collection methods as envisaged by current local standards.
7 - TECHNICAL SPECIFICATIONS
• Power supply: 2 1.5 V AAA alkaline batteries; estimated life 1 year with 20 cycles/day. Alter-
natively, 2 1.2V NiMh AAA rechargeable batteries (charge via USB socket). • Frequency: 433.92
MHz (±50 kHz) • Irradiated power: estimated 1 mW E.R.P • Estimated range: 200 m out-
doors; 35 m inside buildings (*) • Radio coding: standard Flo-R and Flor+Info); 72 bit rolling code;
encoding: HS for “Nice Home Security” alarm system commands • USB socket: power supply
and charging rechargeable batteries • Included accessories: magnetic wall mount support •
Protection rating: IP40 • Operating temperature: -20 - 55°C • Dimensions: 200 x 50 x 15
mm • Weight: 140 g.
Note: • (*)All radio controls are subject to interference which may alter performance levels. There-
fore in the event of interference, Nice cannot guarantee the effective range of their devices. • All
technical specications stated herein refer to an ambient temperature of 20° C (± 5° C). • Nice
S.p.A. reserves the right to apply modications to products at any time when deemed necessary,
maintaining the same intended use and functionality.
OK
ENGLISH Instructions translated from Italian
1 - GENERAL WARNINGS
- Important safety instructions. It is important for you to comply with these instruc-
tions for your own and other people's safety. Keep these instructions. • Children must not
play with the appliance. • Packaging materials must be disposed off in accordance with local regu-
lations. • Handle the product with care, taking care to avoid crushing, denting or dropping it, or
allowing contact with liquids of any kind. Keep the product away from sources of heat and naked
ames. Failure to observe the above can damage the product, and increase the risk of danger or
malfunction.
2 - PRODUCT DESCRIPTION AND INTENDED USE
Era P View is a multifunctional radio transmitter from Nice's Era-P product family; it is designed for
controlling outdoors awnings, sun screens, shutters, gates and entrance doors, lights and electri-
cal equipment in general. Furthermore, it can arm/disarm Nice's Home System alarm system.
– All uses other than the intended use described and use in environmental conditions
other than those described in this manual should be considered improper and forbidden!
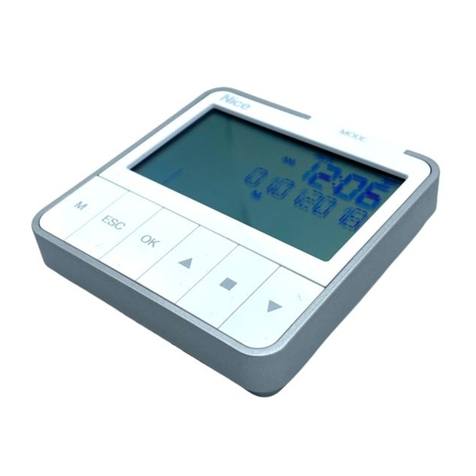
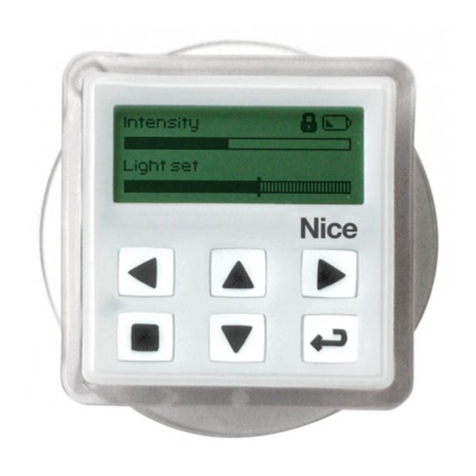
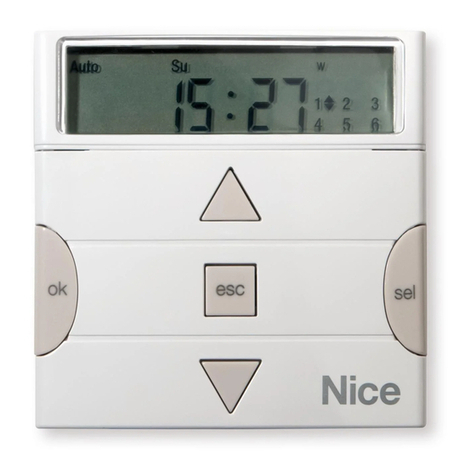
Era P View is a one-way radio transmitter, equipped with a 2.2" LCD graphic display. Features:
- simple, intuitive graphic interface (g. 1).
- three keys (g. 1) for controlling immediate functions and browsing menus.
- ve-key joystick (g. 2).
- clock/calendar for setting scheduled commands.
It can be used for:
- individually controlling up to 99 devices grouped into 20 zones, 20 groups and 20 scenes.
- personalising the name and type of the various devices it controls.
- personalising the name and function assigned to a given control, so that the commands are
clearly associated with the devices they control.
- activating automatic summer/winter time (for areas in which such a standard applies)
- automatically calculating the time of sunrise/sunset (astro function).
Menus:
•Easy user: controls a small number of devices, groups of scenes in a simple, intuitive manner;
quitting this menu can be password protected.
•Advanced user: controls all devices, groups and scenes; access to user settings (names of
devices, create/edit zones, groups, scenes, etc. - see par. 4.1)
•Installer: access to all programming and conguration functions; can be password protected.
3 - FUNCTIONAL SPECIFICATIONS
Era P View runs off two batteries which must be inserted as shown in g. 3-e/f/g, or off a USB
power supply; in the latter case, you can use rechargeable batteries and enable the charging the
option.
To switch the unit on, press any key, remove it from its wall support or hold your hand next to it (its
internal sensors detect your presence).
Standby: if you do not use the unit for a few seconds, it will automatically go into standby to avoid
draining its batteries.
First power on: the unit will prompt you to specify the user language, date and time (required by
its functions).
It then displays the Homepage:
Homepage (g.1)
Acurrent time (not displayed if the time and date have not been set)
B battery charge
Cselects ‘Easy’ or ‘Adv’ user mode: press the function key below it
Dopens the scheduled events page: press the function key below it
E opens the programming options page: press the function key below it
Function keys (g. 2)
▲- moves the cursor (selection) up
- in the Homepage, this key selects ‘Scenes’
▼- moves the cursor (selection) down
- in the Homepage, this key selects ‘Devices’
t- moves the cursor (selection) left
- in the Homepage, this key selects ‘Zones’
u- moves the cursor (selection) right
- in the Homepage, this key selects ‘Groups’
OK conrm
• The three function keys (C/D/E - g. 1) have different meanings (or may not even display)
depending on the current page:
Homepage
Easy user ADV user
==
switch from ‘Easy’ to ‘ADV’ switch from ‘ADV’ to ‘Easy’
=
open the ‘Events’ page (par. 4.3)
==
displays the Easy user menu opens the ‘Options’ menu (installer only)
==
back to Homepage opens the ‘Modify’ menu
=back to previous page
4 - PROGRAMMING ON THE RECEIVER (advanced user)
Era P View must be memorised in the device it is to control; since it can control many devices, you
can assign a set of information to each of them to make it easier to identify them in normal use.
4.1 - Menu ADV
This menu provides all the options described in Chapter 3.
4.1.1 - Conguring a device for control:
01. Homepage ADV
02. =¨‘Options’ menu: select ‘Install devices’
03. OK ¨‘Setting’ menu: select a free channel
04. =¨‘Setting’ menu > Channel ... :
complete every item in the menu*and select ‘Save’
05. =¨‘Setting’ menu:
select the channel you have just programmed to send a command
06. OK ¨‘Registration’ menu:
use the ‘▲- OK - ▼‘ keys to send a command
*items:
Type type of device being controlled
Name common name to assign to the device (optional)
Zone area in which the device is located (optional)
Exposure
orientation of device relative to compass points (optional)
Set of commands type of command to associate with the device (table 1)
On completion of he conguration, memorise the 'code', which is different for each
device: this must be done separately for each device; refer to the device's user manual
(also on www.niceforyou.com).
Once you have congured the individual devices, you can create sets of devices:
Zones :
makes it easy to identify a device; must be dened during the device's congura-
tion.
Gr
oups : sets which allow you to control multiple devices at once; a group can only contain
devices which have the same ‘set of commands’ (Table 1).
1
2
3
15:55
Tent Outside
Outside tents / Zone / East
OK
C ED
AB
Ø 3,5x35mm
PROG
ESC
Ø 3,5x35mm
PROG
ESC
Ø 3,5x35mm
PROG
ESC
Ø 3,5x35mm
PROG
ESC
Ø 3,5x35mm
PROG
ESC
Ø 3,5x35mm
PROG
ESC
Ø 3,5x35mm
PROG
ESC
a
c
e
f g
b
d

Other manuals for Era P View

1

Other Nice Transmitter manuals

Nice WMS01S Product manual

Nice

Nice WMS01S Product manual

Nice SELD User manual

Nice

Nice SELD User manual

Nice Flo Product manual

Nice

Nice Flo Product manual

Nice MYGO4 Technical specifications

Nice

Nice MYGO4 Technical specifications

Nice DTX6 Technical specifications

Nice

Nice DTX6 Technical specifications

Nice Era P View User manual

Nice

Nice Era P View User manual

Nice ERA ONE User manual

Nice

Nice ERA ONE User manual

Nice HSTX8 User manual

Nice

Nice HSTX8 User manual

Nice Era INTI2 User manual

Nice

Nice Era INTI2 User manual

Nice FLO Series User manual

Nice

Nice FLO Series User manual

Nice NiceWay Product manual

Nice

Nice NiceWay Product manual

Nice ERA TIME Technical specifications

Nice

Nice ERA TIME Technical specifications

Nice P1S BD User manual

Nice

Nice P1S BD User manual

Nice MYGO2BD Technical specifications

Nice

Nice MYGO2BD Technical specifications

Nice DTX600 Technical specifications

Nice

Nice DTX600 Technical specifications

Nice Silentron Silenya Adv 7041 PCK 3 Technical specifications

Nice

Nice Silentron Silenya Adv 7041 PCK 3 Technical specifications

Nice FLOX1R Service manual

Nice

Nice FLOX1R Service manual

Nice Era-P INN User manual

Nice

Nice Era-P INN User manual

Nice Era Flor FLO1RE User manual

Nice

Nice Era Flor FLO1RE User manual

Nice HSTX4 User manual

Nice

Nice HSTX4 User manual

Nice Era ONE ON1E User manual

Nice

Nice Era ONE ON1E User manual

Nice KRONO 1WW Operating instructions

Nice

Nice KRONO 1WW Operating instructions

Nice P1I/U Technical specifications

Nice

Nice P1I/U Technical specifications

Nice ON3EBD User manual

Nice

Nice ON3EBD User manual

Popular Transmitter manuals by other brands

NEUTRIK Xirium quick start guide

NEUTRIK

NEUTRIK Xirium quick start guide

Emerson Rosemount 702 quick start guide

Emerson

Emerson Rosemount 702 quick start guide

Bellman & Symfon BE1411-CO Getting started

Bellman & Symfon

Bellman & Symfon BE1411-CO Getting started

Nautel XR6 Operation and maintenance manual

Nautel

Nautel XR6 Operation and maintenance manual

JTS UF-20TB/5 instruction manual

JTS

JTS UF-20TB/5 instruction manual

Endress+Hauser Liquisys M CLM223F operating instructions

Endress+Hauser

Endress+Hauser Liquisys M CLM223F operating instructions

Eldat RTS03 Series operating instructions

Eldat

Eldat RTS03 Series operating instructions

Lectrosonics DBu-LEMO instruction manual

Lectrosonics

Lectrosonics DBu-LEMO instruction manual

Broadcast Electronics 4MX 100 manual

Broadcast Electronics

Broadcast Electronics 4MX 100 manual

PNI VALENTINE V880 user manual

PNI

PNI VALENTINE V880 user manual

Acromag 655T-06003-C user manual

Acromag

Acromag 655T-06003-C user manual

M-system W2VF instruction manual

M-system

M-system W2VF instruction manual

Velleman VM121 manual

Velleman

Velleman VM121 manual

Hollyland Mars 4K quick guide

Hollyland

Hollyland Mars 4K quick guide

LRS Freedom TX-7471 Setup guide

LRS

LRS Freedom TX-7471 Setup guide

Evikon PluraSens E2670-NO2 user manual

Evikon

Evikon PluraSens E2670-NO2 user manual

Thermo Scientific Alpha pH 800 manual

Thermo Scientific

Thermo Scientific Alpha pH 800 manual

RKI Instruments M2 Operator's manual

RKI Instruments

RKI Instruments M2 Operator's manual

manuals.online logo
manuals.online logoBrands
  • About & Mission
  • Contact us
  • Privacy Policy
  • Terms and Conditions

Copyright 2025 Manuals.Online. All Rights Reserved.