Nice ERA TIME Technical specifications

EN - Instructions and warnings for installation and use
IT - Istruzioni ed avvertenze per l’installazione e l’uso
FR - Instructions et avertissements pour l’installation et l’utilisation
ES - Instrucciones y advertencias de instalación y uso
DE - Installierungs-und Gebrauchsanleitungen und Hinweise
PL-Instrukcjeiostrzeżeniadotycząceinstalacjiiużytkowaniaurządzeń
NL - Aanwijzingen en aanbevelingen voor installatie en gebruik
Digital Transmitter
0682
Nice
ERA TIME

1– English
EN
1 - PRODUCT DESCRIPTION AND INTENDED USE
The ERA TIME is a radio transmitter for awning and shutter control systems. Along
with normal manual operation, it also has an automatic control feature which can be
controlled by the user to suit his requirements. Any use other than that described
is to be considered improper and prohibited!
VERY IMPORTANT - READ CAREFULLY!
•The transmitter is equipped with 6 independent transmission channels. Mem-
orising a transmitter in an automated system also includes the association of the
automated system to one or more of these channels. In general, one or more auto-
mated systems can be associated to the same channel. So, this operational prac-
tice creates various automated system groups (maximum of 6 groups), each
represented by a channel.
•The groups are formed when the unit is memorized in the automation: you are
prompted to select the group to which the automation is to be mapped during the
procedure.
•This group-based approach means that the transmitter must be used in a par-
ticular way, as follows:
a) - before sending a command, you must first select one or more groups
to which to send it;
b) - a command sent to a given group actuates all automations included in
the group and makes them all complete the same manoeuvre at the same
time.
•The transmitter can control a group at a time, or several groups together, com-
bined into a multiple group.
•The transmitter can be operated in manual, automatic or program mode.
– In manual mode, the user manually selects the groups and sends them com-
mands.
– In automatic mode, the transmitter controls the groups in response to an event
programmed by the user.
– Programming mode enables the user to program, modify, copy and cancel
events; he can also set the date and time as well as other parameters used by the
transmitter in automatic mode.
•What is an “event”? An event is the automatic transmission, by the transmitter,
of an actuation command (open/close shutter, awning, etc.), at a given time of day,
one or more days a week, as decided and programmed by the user. For example,
an event could be opening the shutters at 8:37 on Saturday and Sunday; another
could be raising the awnings at 18:50 every day of the week.
•Normally, when a programmed event occurs in automatic mode, the transmitter
sends a simple open or close command to the groups in question. However, it is
possible to associate special functions with these commands, to effect the pro-
grammed events in a particular way. The following functions are available:
– Sensor ON/OFF:this function can only be programmed and used if there are
climate sensors connected to the automated systems you wish to command. The
function has three options: “ON” allows you to activate reception (by the automat-
ed systems) of the commands from the climate sensors; “OFF” allows you to de-
activate reception (by the automated systems) of the commands from the climate
sensors; “flashing ON and OFF” allows you to ignore the presence of climate
sensors within the automation system. The desired option can be programmed
using Procedure 6 within each event (in such cases, each event automatically
performs the programmed option – see the example in the following figure), or con-
versely, each option can be set manually by the user at any time (see paragraph G,
in section 9).
8.30 10.45 12.15 14.30 17.15 19.30
“ON” “---” “OFF”“ON” “---” “OFF”
Important – The “Sensor OFF” option only deactivates commands coming from
ENGLISH

English – 2
EN
Rain and Sun sensors; those coming from the Wind sensor continue to remain
active since they provide protection for the awning or shutter.
– On vacation: randomly moves the time of an event by a few minutes (00 to
75 minutes) off its programmed time; this simulates the presence of an occupant
when the house is unoccupied.
– Planetary time:advances/delays the programmed time of the event, day by day
throughout the year, in relation to the local time at which the sun rises and sets:
for instance. in summer the function advances events in the morning and delays
events in the afternoon.
– Partial manoeuvre:stops the programmed manoeuvre once a settable period
of time (01 to 99 seconds) has expired from the start of the manoeuvre in question.
In short, this function allows you to partially open/close an awning or shutter con-
trolled by the event.
•To enable automatic mode, set “Auto” (not flashing) on the display and deactivate
it by setting “Man” (not flashing).
IMPORTANT – The user can send manual commands at any time, even when au-
tomatic mode is enabled; there is no need to deactivate it first.
2 - PRODUCT INSTALLATION
2.1 - Turn on the transmitter – Set the clock and other basic
settings after activating the battery
• The transmitter is delivered with two batteries already fitted; these batteries are
disconnected to prevent them running down. To turn the transmitter on, pull out the
plastic tab sticking out of the battery compartment. • Once the batteries have been
activated the transmitter will prompt you to enter the basic settings, with Proce-
dure 1. If you wish to make the settings at a later time, quit the procedure by press-
ing n/esc 1 time: the system will display its main screen (see chapter 4) and apply
its factory settings (time: “00:00”; day: “Su” = Sunday). • IMPORTANT: removing
the batteries also cancels the basic settings (date, time, city code), if these had been
set. Any events that have been programmed, however, are not cancelled. Every
time you power up the transmitter (for example, after first powering it up, or when
you install new batteries) you must make the basic settings again with Procedure
1(the system will prompt you to do so when it is turned on). If, however, you wish
to make the basic settings at a later time, without having shut off the transmitter,
you must use Procedure 5 (“planetary time”) and Procedure 10 (date and time).

3– English
EN
PROCEDURE 1 - Making the BASIC SETTINGS after powering up the transmitter
Step 1 Step 2 Step 3
example:
ok
example:
ok
example: Friday
Su Mo Tu We Th Fr Sa
ok
set the HOUR conrm set the MINUTES conrm set DAY (name)(1) conrm
Step 4 Step 5 Step 6
example:
ok
example:
ok
example:
ok
set the YEAR(2) conrm set the MONTH (number)(3) conrm set DAY (number) conrm
Step 7 (5) - end NOTES:
(1) - Su = Sunday; Mo = Monday; Tu = Tuesday; We = Wednesday; Th = Thursday;
Fr = Friday; Sa = Saturday.
(2) - Range: 2014 to 2059.
(3) - January = 01; February = 02; March = 03; (.....); December = 12.
(4) - Refer to Table D to select the location closest to you. Then enter the code for the
location in question in Step 7.
(5) - When you complete Step 7, the main screen displays (see Chapter 4).
example:
ok
set the LOCATION(4) conrm
2.2 - Memorizing the transmitter in the automations’ receivers
To use the transmitter, it must first be memorized in the memory of the automation/s you wish to control with it.
•To memorize the transmitter, run Procedure 2, if no transmitters have yet been memorized in the automation in question, or Procedure 3, if one or more transmitters have
already been memorized.
•When running the procedure, you must select a group (i.e. the transmission channel) to which the automation in question is assigned; we recommend reading Chap-
ter 1 carefully before starting.
•Repeat the procedure for each automation you will be controlling with the transmitter.
Caution • Since the transmitter will be memorized by all receivers in the transmitters range, before starting the procedure shut off power to any motors and receivers you do
not wish to memorize the transmitter. • All memorization sequences are timed, i.e.they must be completed within the indicated time limits.

English – 4
EN
PROCEDURE 2 - Memorizing the ERA TIME as “First Transmitter”
Run the following procedure only if no transmitters have yet been memorized; otherwise use Procedure 3.
Step 1 Step 2 Step 3 Step 4 ...
on
stop/esc
main
screen
Auto
sel
Auto
Man
Prog
ok
Man
(perma-
nently ON)
sel
example:
1 2 3
4 5 6
power up the motor several times... (display) 1 time (display) conrm (display) select the GROUP(1)
... Step 4 Step 5 - end NOTE:
(1) - This step requires you to select the group (i.e.
transmission channel) to which the automated
system is to be assigned.
ok
example:
1 2 3
456
stop/esc
3
stop/esc
conrm (permanently ON) hold down ... 3 movements ... release
PROCEDURE 3 - Memorizing the ERA TIME as “Second (third, fourth...) Transmitter”
Run the following procedure only if one or more transmitters are already memorized in the automation. If no transmitter has yet been memorized, you MUST
use Procedure 2.
Step 1 - 2 - 3 - 4 Step 5 Step 6
On a new
ERA TIME, not yet
memorized
Execute step
1 - 2- 3- 4
of Procedure 2
stop/esc
10
sec.
stop/esc
On an old
transmitter, already
memorized
stop/esc
hold down ... wait ... release 3 times
Step 7 - end NOTE:
(1) - If the motor moves 6 times, the memory is full (max. 30 transmit-
ters) and the new transmitter could not be memorized.
On a new
ERA TIME, not yet
memorized
stop/esc
3
stop/esc
hold down ... 3 movements(1) ... release

5– English
EN
3 - DISPLAY MESSAGES AND THEIR MEANING
The following figure shows all messages and symbols displayed on the transmitter’s
display, in relation to the operation in question.
•Area 1: symbols showing the operating modes and types of programming.
•Area 2: symbols indicating the weekly clock, values of basic settings, and error
messages.
•Area 3: symbols indicating the transmission channels (or “groups”) and “special
functions” applied to events.
Area 1 Area 3Area 2
TABLE A - List of symbols in Area 1
Auto
• Flashing: indicates that the display is showing the main screen
(Chapter 4). We advise always starting from this screen when using
the transmitter.
• Fixed: indicates that the transmitter is in automatic mode (Chap-
ter 9 - B).
Man Fixed: indicates that automatic mode is off (Chapter 9 - D).
Prog Indicate that an event is being programmed (Chapter 7).
Prog
NEW Indicate that a new event is being programmed (Procedure 6).
Prog
MOD Indicate that an event is being modified (Procedure 7).
Prog
DEL Indicate that an event is being deleted (Procedure 8).
2.3 - Installing the transmitter’s mount
•The transmitter’s mount must be secured to a vertical wall.
•The transmitter must be installed in a protected area. Do not install it outdoors or
where it can be damaged by bad weather.
•The transmitter’s mount must be located 1.5 m off the ground, so that it can be
viewed slightly from above.
•Before anchoring mount definitively, place the transmitter in the proposed position
of the mount and use it to operate all the automations, to check that they all re-
spond correctly. Caution! - The range of transmitters and the reception of receiv-
ers is strongly affected by other devices (e.g. alarms, RF headphones, etc.) oper-
ating on the same frequency in your area. In these cases, the manufacturer cannot
provide any guarantee regarding the actual range of its devices. To reduce this risk,
do not install the transmitter close to or in contact with metal structures, as they
can significantly reduce its range. Discharged batteries can also reduce the unit’s
range by 20 - 30%.
•Once you are sure the transmitter is working properly, anchor the mount definitive-
ly with screws and anchor plugs, as shown in the figure.

English – 6
EN
Prog
COPY Indicate that an event is being copied (Procedure 9).
Prog Indicate that the internal date and time are being set (Procedure
10).
Prog Indicate that the “on vacation” special function is being pro-
grammed (Procedure 4).
Prog Indicate that the “planetary hour” special function is being pro-
grammed (Procedure 5).
Indicates that the battery is discharged and must be replaced as
soon as possible.
Indicates that a radio command is being transmitted.
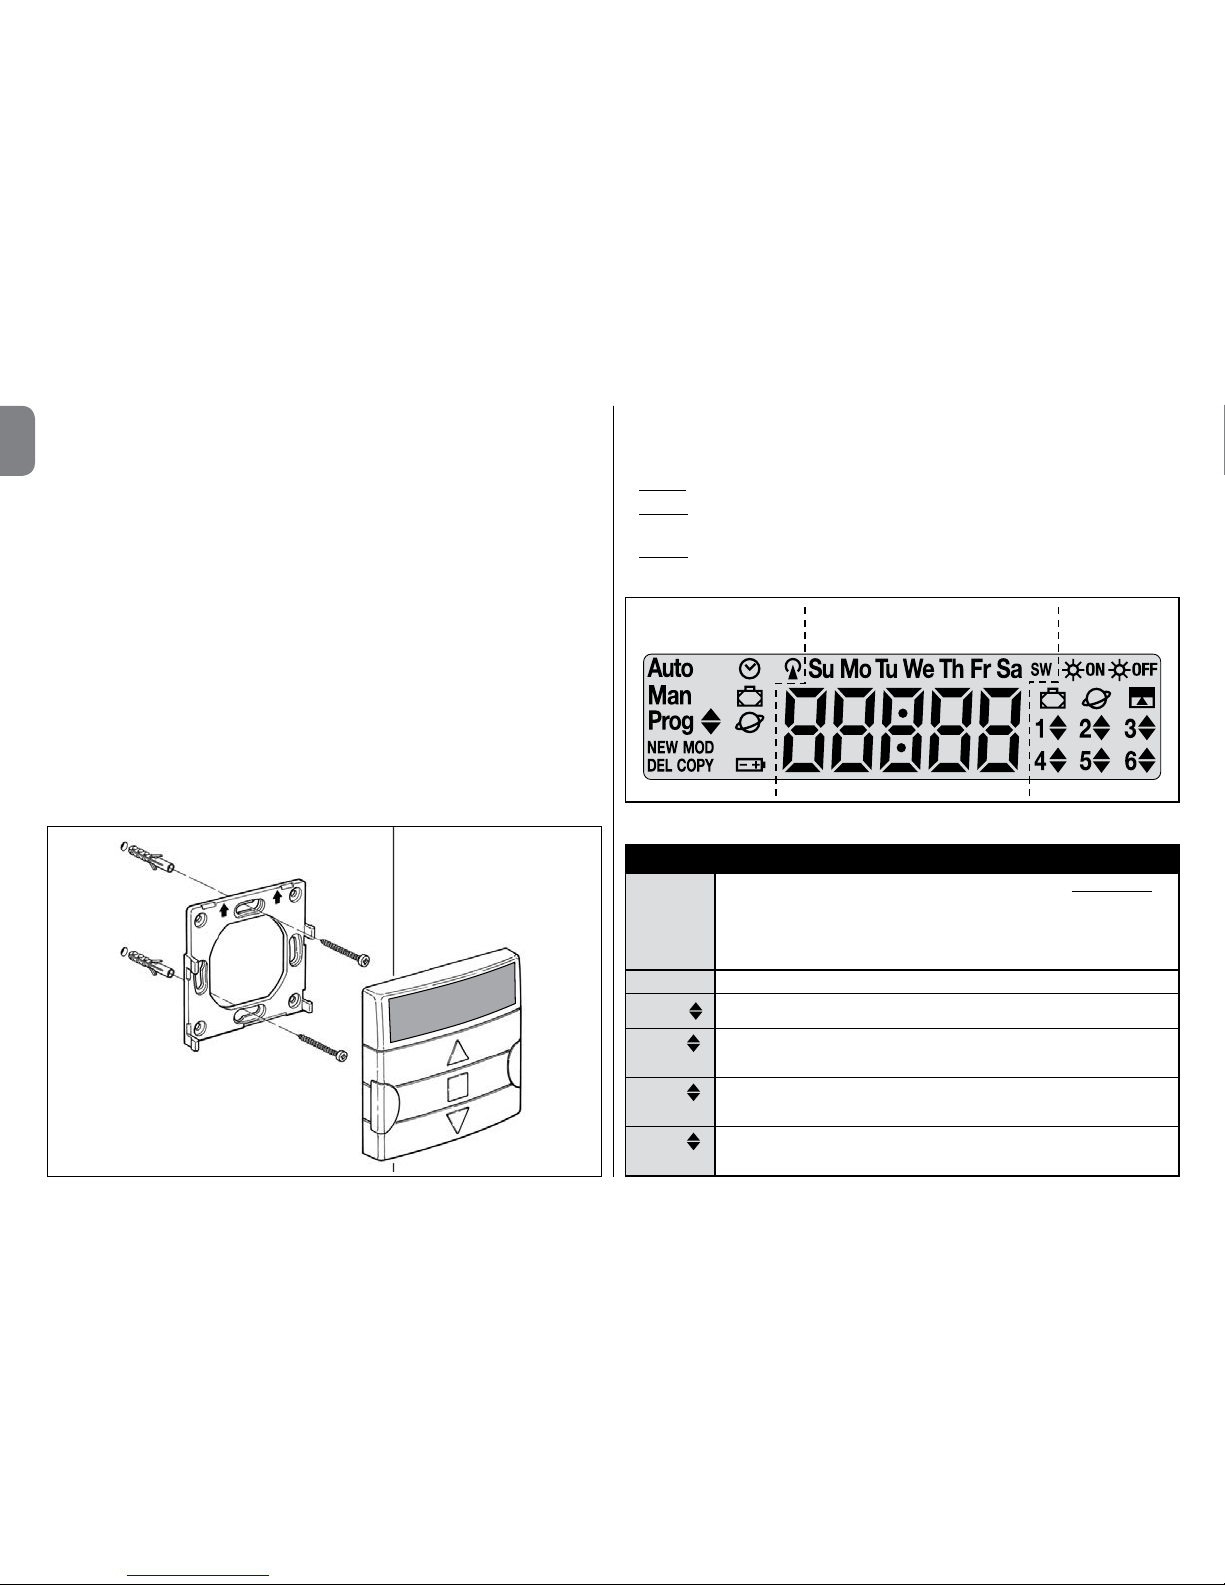
TABLE B - List of symbols in Area 2
• When the basic settings are being made (Procedure 1, 10), this
area displays the values selected for each parameter.
• In automatic or manual mode, it shows the time.
Su Mo Tu We
Th Fr Sa
Indicates the day of the week (Su = Sunday; Mo = Monday; Tu =
Tuesday; We = Wednesday; Th = Thursday; Fr = Friday; Sa = Sat-
urday).
SIndicates that the clock has changed to summer time. (this is set
automatically by the system).
WIndicates that the clock is displaying solar time (in the winter). (this
is set automatically by the system).
TABLE C - List of symbols in Area 3
When an event is being programmed (Procedure 6), this symbol indi-
cates that the special “Sensor ON/OFF” function has been applied
for the event being programmed. Therefore, the automated system
will be managed by the automatic commands coming from the cli-
mate sensors, starting from the moment that the event occurs. This
status will end when another event is performed in which the “OFF”
option is programmed, or when the user intervenes manually.
When an event is being programmed (Procedure 6), this symbol in-
dicates that the special “Sensor ON/OFF” function has been de-
activated for the event being programmed. Therefore, the auto-
mated system will not be managed by the automatic commands
coming from the climate sensors, starting from the moment that the
event occurs. This status will end when another event is performed
in which the “ON” option is programmed, or when the user inter-
venes manually.
When an event is being programmed, indicates that the “on va-
cation” special function has been applied to the event being pro-
grammed (Procedure 6).
When an event is being programmed, indicates that the “planetary
time” special function has been applied to the event being pro-
grammed (Procedure 6).
When an event is being programmed, indicates that the “partial
manoeuvre” special function has been applied to the event being
programmed (Procedure 6).
When a First Transmitter is being memorized (Procedure 2) or a man-
ual command is being sent (Procedure 9 - E), the symbol next to the
number indicates that the group in question has been selected.
When an event is being programmed (Procedure 6), indicates the
direction (Up or Down) assigned to the manoeuvre.
4 - MAIN SCREEN
The main screen is the starting point for all use of the transmitter. It can be called up
at any time by repeatedly pressing n/esc until Auto starts flashing. The main screen
is always the screen in which Auto is flashing.
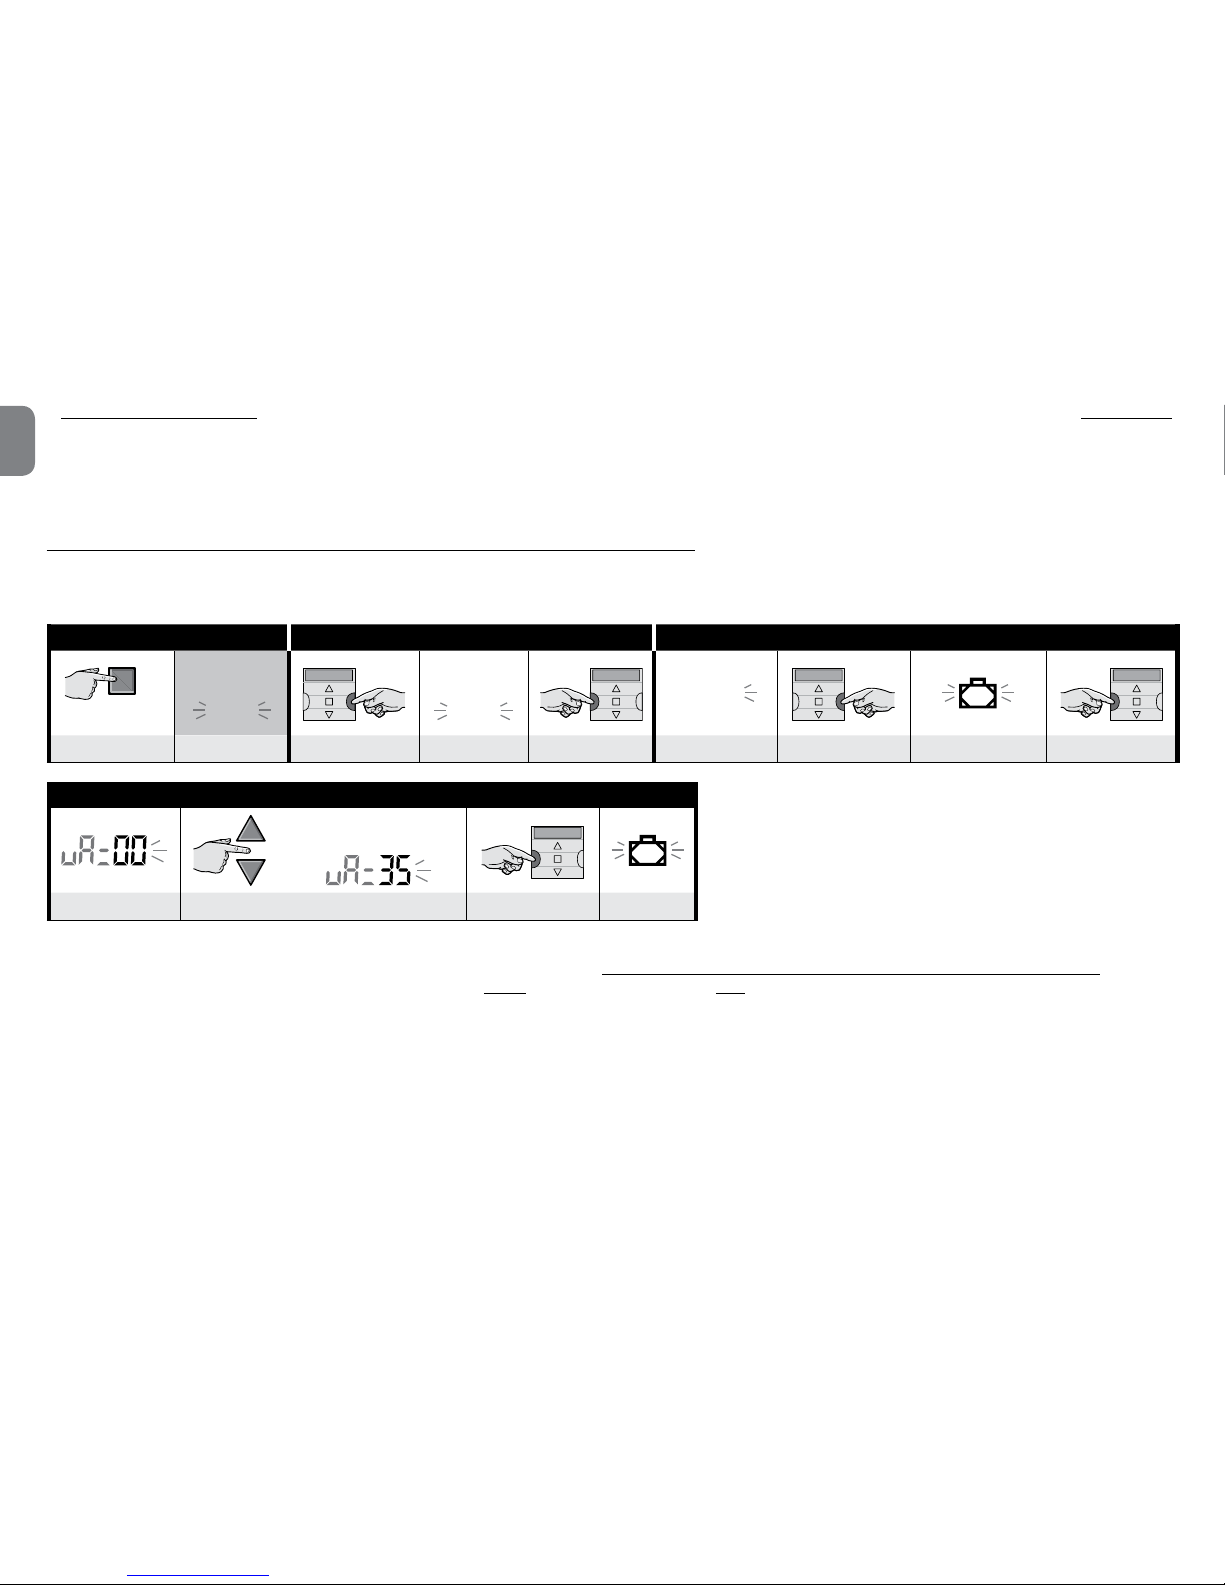
5 - OVERVIEW OF PROGRAMMING
Programming is one of the three main operating modes of the transmitter. To enter
programming mode,
01. call up the main screen by repeatedly pressing n/esc until Auto starts flashing;
02. press sel twice to select Prog; confirm by pressing ok.
You can program the unit:
•set the special function parameters: “on vacation”, (Procedure 4), or “planetary
time” (Procedure 5) (N.B.: If you have run Procedure 1 after powering up the
transmitter, the planetary time need not be set with Procedure 5);
•program events with Procedure 6, and Procedures 7, 8and 9;

7– English
EN
•set the internal clock and date with Procedure 10 (N.B.: If you have run Procedure 1 after powering up the transmitter, only use Procedure 10 to change the basic settings).
6 - SETTING THE SPECIAL FUNCTION PARAMETERS
Caution! – When programming events, if you want to enable the “on vacation” and “planetary time” special functions, the parameters for these functions must already
have been set. To make these settings proceed as follows.
PROCEDURE 4 - Configuring the “ON VACATION” special function
Randomly moves the time of an event by a few minutes off its programmed time; this simulates the presence of an occupant when the house is unoccupied. If the “on vaca-
tion” special function has been applied to one or more events, you must also set the maximum offset relative to the programmed actuation time of the events in question. If
the function has not be applied to any programmed event, changing this value has no effect. To set the value, proceed as follows.
Step 1 Step 2 Step 3
stop/esc
main
screen
Auto
sel
Auto
Man
Prog
ok
Prog
sel
ok
several times... (display) 2 times (display) conrm (display) 2 times ON VACATION conrm
Step 4(2) - end
e.g.: 35 min.
(35+35=range 70min.)
ok
(display) set(1) conrm (display)
NOTES:
(1) - The value can be set from 00(*) to 75 minutes, in 5 minute steps. For example, if you set a value of 15 minutes and the event is programmed to start at 8.00, the system
will actuate the event at any time between 7.45 (15 minutes before 8:00) and 8.15 (15 minutes after 8:00). The system will therefore start the event at any time in this
30 minute range.
(*) - Setting a value of 00 disables the function.
(2) - After Step 4, to return to the main screen, repeatedly press n/esc until Auto starts flashing.

English – 8
EN
PROCEDURE 5 - Configuring the “PLANETARY TIME” special function
This function advances/delays the programmed time of the event, day by day throughout the year, in relation to the local time at which the sun rises and sets: for instance. in
summer the function advances events in the morning and delays events in the afternoon. This setting is normally prompted for automatically by the system, after the trans-
mitter has been powered up ( batteries inserted), and is done with Procedure 1. However, if you prefer to make the setting at a later time, use Procedure 5 below to set
the planetary time without removing/refitting the batteries.
Step 1 Step 2 Step 3
stop/esc
main
screen
Auto
sel
Auto
Man
Prog
ok
Prog
sel
ok
several times... (display) 2 times (display) conrm (display) 3 times PLANETARY TIME conrm
Step 4(2) - end NOTES:
(1) - Refer to Table D to select the location closest to you. Then en-
ter the code for the location in question in Step 4.
(2) - After Step 4, to return to the main screen, repeatedly press n/
esc until Auto starts flashing.
e.g.: Rome
ok
(display) set the LOCATION(1) conrm (display)
7 - PROGRAMMING EVENTS
When programming an event, you must set all its parameters, as follows:
1) - The time (hour/minute) at which the system is to send the command. 2) - The day (or days) on which the system is to send the command. 3) - The group (or multiple
group) of automations to which the system is to send the command. 4) - The type of command to be sent: “Up” or “Down”. 5) - Whether the special “Sensor ON/OFF”
function is to be sent. 6) - Whether the “on vacation” special function is to be sent. 7) - Whether the “planetary time” special function is to be sent. 8) - Whether the “partial
manoeuvre” special command is to be sent. If this latter function is activated, the system will also prompt you to set the time (in seconds) between sending the command
(“Up” or “Down”) and the time at which the system halts the manoeuvre so as to partially open/close the awning/shutter.
•Before you program a new event, we recommend you note down the values of each parameter in Table E at the end of this manual. This table is good for
planning and recalling events and how they have been configured.
•The transmitter can memorize up to 100 events.
PROCEDURE 6 - Programming a NEW EVENT (continue ––>)

9– English
EN
Step 1 Step 2 Step 3 Step 4
stop/esc
main
screen
Auto
sel
Auto
Man
Prog
ok
Prog
ok
Prog
NEWU
ok
several times ... (display) 2 times (display) conrm Prog. EVENTS conrm NEW EVENT conrm
Step 5 Step 6 Step 7 ...
example:
ok
example:
ok
Su Mo Tu We Th Fr Sa
HOUR set the HOUR conrm MINUTES set the MINUTES conrm DAY (name)
... Step 7 Step 8 ...
example: Monday
Su Mo Tu We Th Fr Sa
sel
ok
1 23
456
sel
example:
1
2
3
4
5
6
example:
1
2
3
4
5
6
select the DAY (name)(1) select conrm GROUP set the GROUP(2) set the MANOEUVRE
... Step 8 Step 9 Step 10 ...
ok
sel
1 time = 2 times = 3 times =
ok
slow ashing
conrm SENSOR several times(3) .... ....... to select “ON” / “OFF” / “ignore”conrm ON VACATION
... Step 10 Step 11 ...
sel
• fastashing = function selected(4)
ok
slow ashing
• slowashing = function deselected
several times ..... ............ to select / deselect the function conrm PLANETARY TIME (continue ––>)

English – 10
EN
... Step 11 Step 12 ...
sel
• fastashing = function selected(5)
ok
slow ashing
• slowashing = function deselected
several times ...... ....... to select / deselect the function conrm PARTIAL MANOEUVRE
... Step 12 Step 13(6) ...
sel
• fastashing = function selected
ok
example:
• slowashing = function deselected
several times ...... ....... to select / deselect the function conrm TIME Part. Man.(7) select the TIME Part. Man.(8)
... Step 13 Step 14 Step 15 Step 16 - end
ok
ok
Prog
NEWU
stop/esc
main
screen
Auto
conrm(9) (display = set values) conrm(10) (display) several times ... (display)
NOTES:
(1) - The following days are available: Su = Sunday; Mo = Monday; Tu = Tuesday; We = Wednesday; Th = Thursday; Fr = Friday; Sa = Saturday. To add other DAYS to the
first one, repeat Step 7 for each day you wish to add.
(2) - To add other GROUPS to the first one, repeat Step 8 for each group you wish to add.
(3) - If no climate sensor is connected to the group (or groups) of automated systems involved in the programming of this event or if you want to ignore the existing climate
sensors, select the option with the flashing ON and OFF symbols (= ignore sensors).
(4) - Caution! – if you wish to activate the special “on vacation” function you need to set its parameters first, using Procedure 4.
(5) - Caution! – if you wish to activate the special “planetary time” function you need to set its parameters first, using Procedure 5.
(6) - The system only displays Step 13 if you have enabled the special “partial manoeuvre” function in Step 12.
(7) - Time of the Partial Manoeuvre.
(8) - Set the (required) time between sending the manoeuvre and the time when the automated system blocks the movement of the shutter or awning so as to obtain their
partial opening/closing.
(9) - If, when you press “ok”, the system flashes “Err1”, this means that the memory is full (100 events already memorized) and the new event cannot be memorized.
(10) - When you press “OK”, the system memorizes the new event and “NEW” starts flashing again on the display (Step 15) to show that the transmitter is ready for you to
programme a new event. To program a new event, repeat Procedure 6 from Step 4 onwards, otherwise, to quit programming mode and return to the main screen,
execute Step 16.

11 – English
EN
PROCEDURE 7 - Modifying (“MOD”) an existing event
All programmed events can be modified at any time. To modify an event, first find and select it from the events stored in the transmitter’s memory.
Step 1 Step 2 Step 3 Step 4 ...
stop/esc
main
screen
Auto
sel
Auto
Man
Prog
ok
Prog
ok
Prog
NEWU
sel
several times ... (display) 2 times (display) conrm (display) conrm (display) 1 time
... Step 4 Step 5 continues ...
Prog
MODU
ok
select the
event you wish
to modify(1)
ok
Note(2)
MODIFY event conrm (display) 1 time forwards (▲); backwards (▼)conrm
NOTES:
(1) - The system displays (in chronological order) the days of the week that contain events plus details of the events themselves. By repeatedly pressing the ▲
button (*)the system displays the first programmed day of the week (this flashes while the others remain ON); then it displays the programmed events for that day. On
finishing, it shows the next day, from among the valid ones, followed by the programmed events for that day, and so on, until it displays the last programmed day.
(*) – To scroll through the days and programmed events, in the opposite direction, use the ▼button.
(2) - Continue from Step 5 of Procedure 6. Modify (or reconfirm) the event’s settings one by one. When you have finished, the system will memorize all the changes.

English – 12
EN
PROCEDURE 8 - Deleting (“DEL”) an existing event
Any programmed event can be deleted at any time. To delete an event, first find and select it from the events stored in the transmitter’s memory.
Step 1 Step 2 Step 3 Step 4 ...
stop/esc
main
screen
Auto
sel
Auto
Man
Prog
ok
Prog
ok
Prog
NEWU
sel
several times ... (display) 2 times (display) conrm (display) conrm (display) 2 times
... Step 4 Step 5 - end
Prog
DELU
ok
Option A: to delete
all the events simul-
taneously
ok
1 time
Option B: to delete
one event at a time
select the
event to be
deleted(1)
ok
ok
DELETE event conrm (display) forwards (▲); backwards (▼)conrm (display) delete(2) (3)
NOTES:
(1) - The system displays (in chronological order) the days of the week that contain events plus details of the events themselves. By repeatedly pressing the
▲button (*)the system displays the first programmed day of the week (this flashes while the others remain ON); then it displays the programmed events for that day.
On finishing, it shows the next day, from among the valid ones, followed by the programmed events for that day, and so on, until it displays the last programmed day.
Note – After displaying the last day and the last event the system displays the message “ALL”. In this case, if you want to delete all the events simultaneously, perform
option “A” of Step 5.
(*) – To scroll through the days and programmed events, in the opposite direction, use the ▼button.
(2) - If you do not want to confirm the deletion of the event press the n/esc key instead of the “ok” key; then perform option “B” of Step 5 again to select another event to
be deleted.
(3) - After pressing the “ok” key, the system deletes the selected event and prepares for the deletion of another event (flashing “DEL” symbol). So if you want to delete
another event without exiting the procedure, perform Steps 4 and 5 again. If, on the other hand, you wish quit the procedure and return to the main screen, press n/
esc repeatedly until “Auto” starts flashing.

13 – English
EN
PROCEDURE 9 - Copying (“COPY”) an existing event
To quickly program a new event similar to an existing one, you can copy the existing one and then modify only the settings which are different. To copy an event, first find and
select it from the events stored in the transmitter’s memory.
Step 1 Step 2 Step 3 Step 4 ...
stop/esc
main
screen
Auto
sel
Auto
Man
Prog
ok
Prog
ok
Prog
NEWU
sel
several times ... (display) 2 times (display) conrm (display) conrm (display) 3 times
... Step 4 Step 5 continues ...
Prog
COPYT
ok
select the
event you wish
to copy(1)
ok
Note(2)
COPY event conrm (display) 1 time forwards (▲); backwards (▼)conrm
NOTES:
(1) - The system displays (in chronological order) the days of the week that contain events plus details of the events themselves. By repeatedly pressing the ▲
button (*)the system displays the first programmed day of the week (this flashes while the others remain ON); then it displays the programmed events for that day. On
finishing, it shows the next day, from among the valid ones, followed by the programmed events for that day, and so on, until it displays the last programmed day.
(*) – To scroll through the days and programmed events, in the opposite direction, use the ▼button.
(2) - The system will now prompt you in the same as it did when programming a new event. Modify or confirm all the settings one by one, taking Procedure 4 (from Step
5 onwards) as your reference. After you have modified or reconfirmed the last parameter, the event will be memorized as a new event, leaving the original unchanged.
• In Step 16 of Procedure 4, after you have pressed “ok”, “COPY” will flash to indicate that the transmitter is ready for you to copy another event. You can now copy
another event by repeating Procedure 7 (from Step 6 onwards) followed by Procedure 4 (from Step 5). • At the end, to return to the main screen, press n/esc repeat-
edly until “Auto” starts flashing.
7.1 - To increase the security of command reception by the automation
Proceed as follows: create an event with Procedure 6, then use Procedure 9 to copy it without modifying any settings. Alternatively, during Procedure 9, you can in-
crease the event’s execution time by 1 minute.

English – 14
EN
8 - MAKING THE BASIC SETTINGS (without powering off the transmitter)
The basic settings are normally prompted for automatically by the system, after the transmitter has been powered up (batteries inserted), and is done with Procedure 1. You
can also make these settings (or correct them once they have been memorized) even without the need to power off the device. To do so, use Procedure 10. Note – This
procedure only affects the clock and date settings. To set the “planetary time” special function, use Procedure 5.
PROCEDURE 10 - Setting the internal clock and date
Step 1 Step 2 Step 3
stop/esc
main
screen
Auto
sel
Auto
Man
Prog
ok
Prog
sel
ok
several times ... (display) 2 times (display) conrm (display) 1 time TIME - DATE conrm
Step 4 Step 5 Step 6
example:
ok
example:
ok
example: Friday
Su Mo Tu We Th Fr Sa
ok
set the HOUR conrm set the MINUTES conrm set DAY (name)(1) conrm
Step 7 Step 8 Step 9(4) - end
example:
ok
example:
ok
example:
ok
set the YEAR(2) conrm set the MONTH (number)(3) conrm set the DAY (number) conrm
NOTES:
(1) - Su = Sunday; Mo = Monday; Tu = Tuesday; We = Wednesday; Th = Thursday; Fr = Friday; Sa = Saturday.
(2) - Range: 2014 to 2059.
(3) - January = 01; February = 02; March = 03; (.....); December = 12.
(4) - When you complete Step 9, the main screen displays (see Chapter 4).

15 – English
EN
9 - USING THE TRANSMITTER
This chapter describes how to use the transmitter once it has been installed and programmed.
ATo call up the main screen
You can return to the main screen at any time by repeatedly pressing n/esc until “Auto” starts flashing.
Step 1 - end
stop/esc
The display shows: the flashing “Auto” indica-
tor, the current time, the current day of the week
and the solar time (or summer time).
several times ... (display)
BTo enable automatic mode (“Auto”)
01. Call up the main screen by repeatedly pressing n/esc until Auto starts flashing. Confirm your selection with “ok” (= “Auto” stops flashing).
Step 1 - end
stop/esc
main
screen
Auto
ok
Auto
(permanently ON)
The display shows: the “Auto” indicator per-
manently ON, the current time, the current day
of the week, the solar time (or summer time) and
group 1 flanked by the cursor.
several times ... (display) conrm (display) automatic operation ACTIVATED
Important – If no events have been programmed when automatic mode (“Auto”) is enabled, the transmitter remains inert. In this status it only works if the user sends com-
mands manually.
CTo lock (and unlock) the keys when the automatic mode is operating (“Auto”)
When the transmitter is set to automatic mode (“Auto”) you can prevent inadvertent manual commands or use of the transmitter by unauthorised persons by locking/unlock-
ing the transmitter keys as follows.

English – 16
EN
– To LOCK the ▲, n, ▼and “ok” keys:
01. Call up the term “Auto” on the display (= automatic mode activated).
02. Press the “sel” key 7 times, until the
symbol disappears.
Step 1 Step 2 - end
stop/esc
main
screen
Auto
ok
Auto
(permanently ON)
1
2 3
4 5 6
sel
1 2 3
4 5 6
123
456
several times ... (display) conrm (display) 7 times (display) keys locked
– To UNLOCK the ▲, n, ▼and “ok” keys:
01. Press “sel” 1 time: the system selects group 1 and
flashes next to it.
keys previously locked Step 1 - end
123
456
sel
1
2 3
4 5 6
(display) 1 time keys unlocked
DTo disable automatic mode (“Man”)
01. Call up the main screen by repeatedly pressing n/esc until Auto starts flashing.
02. Press “sel” 1 time to select “Man”. Confirm your selection with “ok” (= “Man” stops flashing).
Step 1 Step 2 - end
stop/esc
main
screen
Auto
sel
Auto
Man
Prog
ok
Man
(permanently ON)
several times ... (display) 1 time (display) conrm (display) automatic operation DEACTIVATED(1)
(1) - The display shows: the “Man” indicator permanently ON, the current time, the current day of the week, the solar time
(or summer time) and group 1 flanked by the cursor.

17 – English
EN
Important – The transmitter will now only operate in manual mode, i.e. under direct user control.
ETo send a manual command to one or more groups
The user can send manual commands only if the transmitter is set to automatic mode (“Auto”) or when it is set to manual mode (“Man”). It cannot be used to send manual
commands when set to programming mode (“Prog”).
E.1 Sending a manual command when the transmitter is set to automatic mode (“Auto”)
In this mode the user can send a command to a single (selected) group or to all groups (simultaneously), in the following way.
– To control a SINGLE group:
01. Call up the term “Auto” on the display (= automatic mode activated).
02. Press “sel” repeatedly until
starts flashing next to the group you want to control (starting from group 1).
03. Now send the command to the selected group with key ▲, nor ▼.
Step 1 Step 2 Step 3 - end
stop/esc
main
screen
Auto
ok
Auto
(perma-
nently ON)
1
2 3
4 5 6
sel
... to select a
desired Group 1 2 3
4 5 6
example:
several times ... (display) conrm (display) several times ... sending the command
Caution! – If the “Sun ON” (or “Sun OFF”) symbol is on the display, when the command is sent to the automation system, it will also send this setting (read the description of
the special “Sensor ON/OFF” function in Section 1 of the manual). Alternatively, first cancel the “Sun ON” (or “Sun OFF”) setting using Procedure G in Section 9.
– To send a command to ALL groups, simultaneously:
01. Call up the term “Auto” on the display (= automatic mode activated).
02. Press “sel” repeatedly until
is flashing next to all groups (keep pressing until you go beyond group 6).
03. Now send the command to all the groups with key ▲, nor ▼.
Step 1 Step 2 Step 3 - end
stop/esc
main
screen
Auto
ok
Auto
(perma-
nently ON)
1
2 3
4 5 6
sel
... to select all
Groups
1
2 3
4 5 6
several times ... (display) conrm (display) 6 times ... sending the command

English – 18
EN
Caution! – If the “Sun ON” (or “Sun OFF”) symbol is on the display, when the command is sent to the automation system, it will also send this setting (read the description of
the special “Sensor ON/OFF” function in Section 1 of the manual). Alternatively, first cancel the “Sun ON” (or “Sun OFF”) setting using Procedure G in Section 9.
E.2 Sending a manual command when the automatic mode on the transmitter is deactivated (“Man”)
In this mode, the user can send a command to any group or set of groups, as follows.
01. Call up the term “Man” on the display (= automatic mode deactivated).
02. Press “sel” repeatedly sending the
(flashing) cursor through the various groups (note – after group 6, if you wish to return to group 1, press “sel” another 3 times); then
stop the cursor next to the group you wish to select. • Confirm the selection with “ok”: (the cursor
will stop flashing).
03. If you wish to form a “multiple group”, repeat step 02 for each group you wish to add to the “multiple group”.
04. Now send the command to the selected multiple group with key ▲, nor ▼.
Step 1 Step 2 Step 3 ...
stop/esc
main
screen
Auto
sel
Auto
Man
Prog
ok
Man
(permanently ON)
sel
... to select a
desired Group 1 2 3
4 5 6
example:
several times ... (display) 1 time (display) conrm (display) several times ...
... Step 3 Step 4 (optional) Passo 5 - end
ok
1 2 3
4 5 6
example:
If you wish to form a “multiple group”,
repeat step 03 for each group you wish
to add to the “multiple group”.
conrm (permanently ON) sending the command
Caution! – If the “Sun ON” (or “Sun OFF”) symbol is on the display, when the command is sent to the automation system, it will also send this setting (read the description of
the special “Sensor ON/OFF” function in Section 1 of the manual). Alternatively, first cancel the “Sun ON” (or “Sun OFF”) setting using Procedure G in Section 9.
FTo send another manual command to a previously selected group
The transmitter stores the last group (or multiple group) in memory selected by the user in memory (See procedure E.2). You can therefore send other manual commands
to the group in question with the ▲, nor ▼keys without having to select it first.
Caution! – If the “Sun ON” (or “Sun OFF”) symbol is on the display, when the command is sent to the automation system, it will also send this setting (read the description of
the special “Sensor ON/OFF” function in Section 1 of the manual). Alternatively, first cancel the “Sun ON” (or “Sun OFF”) setting using Procedure G in Section 9.

19 – English
EN
GTo activate or deactivate the special “Sensor ON/OFF” function within one or more groups
Caution! • If there are no climate sensors in your installation, please ignore this procedure. • Before carrying out the procedure we advise you to read the descrip-
tion of the special “Sensor ON/OFF” function in Section 1 of the manual. • The user may only set the function manually when the automatic mode is deactivated (i.e. when
you see “Man” on the display).
01. Call up the term “Man” on the display (= automatic mode deactivated).
02. Press “sel” repeatedly sending the
(flashing) cursor through the various groups (note – after group 6, if you wish to return to group 1, press “sel” another 3 times); then
stop the cursor next to the group you wish to select. • Confirm the selection with “ok”: (the cursor
will stop flashing).
03. If you wish to form a “multiple group”, repeat step 02 for each group you wish to add to the “multiple group”.
04. After selecting the group, press “sel” repeatedly until the required option is displayed for the special “Sensor ON/OFF” function:
- “Sun ON” = to activate the management of the automation system via automatic commands coming from the climate sensors;
- “Sun OFF” = to deactivate the management of the automation system via automatic commands coming from the climate sensors;
- “sun ON and sun OFF” = to completely ignore the existence of climate sensors.
If you go past the required option by mistake, continue pressing “sel” until the option you want appears again. At the end, the chosen icon flashes. • Confirm the option
by first pressing “ok” and then the key n. The chosen icon stops flashing.
Step 1 Step 2 Step 3 ...
stop/esc
main
screen
Auto
sel
Auto
Man
Prog
ok
Man
(permanently ON)
sel
... to select a de-
sired Group 1 2 3
4 5 6
example:
several times ... (display) 1 time (display) conrm (display) several times ...
... Step 3 Step 4 (optional) Step 5 ...
ok
1 2 3
4 5 6
example: If you wish to form a “multiple
group”, repeat step 03 for each
group you wish to add to the
“multiple group”.
sel
(example)
1 time = 2 times = 3 times =
conrm (permanently ON) several times .... ....... to select “ON” / “OFF” / “ignore”
(continue ––>)
Table of contents
Languages:
Other Nice Transmitter manuals

Nice
Nice KRONO 1WW Operating instructions

Nice
Nice ON3EBD User manual

Nice
Nice NiceWay Product manual

Nice
Nice WMS01S Product manual

Nice
Nice HSTX8 User manual

Nice
Nice Era ONE ON1E User manual

Nice
Nice HSTX4 User manual

Nice
Nice Era P View User manual

Nice
Nice Era Flor FLO1RE User manual

Nice
Nice FLOX1R Service manual

Nice
Nice ON3ELR User manual

Nice
Nice P1I/U Technical specifications

Nice
Nice MYGO2BD Technical specifications

Nice
Nice P1S BD User manual

Nice
Nice Era P View User manual

Nice
Nice MYGO4 Technical specifications

Nice
Nice Silentron Silenya Adv 7041 PCK 3 Technical specifications

Nice
Nice ERA ONE User manual

Nice
Nice Era INTI2 User manual

Nice
Nice Flo Product manual