Nidac 2 Series User manual

PAC2
Dual Door Access Controller
“Series 2”
IMPORTANT DIFFERENCES FROM SERIES 1
1. All programming can only be done through devices
attached to DTA1.
2. A PACDL data logger revision 4.0 or higher attached to
the DLOG terminal is able to program all features (i.e.
times, relay type, etc.) and codes (including the
management code) on the PAC2 series 2.
3. When using a PACDL revision 4.0 or higher with a PAC2
Series 2 it is not necessary to have a management code
programmed.
i
TABLE OF CONTENTS PAGE
Introduction..................................................................1
Features........................................................................1
Specifications...............................................................2
Terminal Descriptions..................................................3
Programmable Features Description..........................5
Automatic Relock Function........................................5
Door Open Too Long.................................................5
Door Forced Open ....................................................5
One Minute Lockout..................................................6
Use Two Codes.........................................................6
Installation....................................................................7
Basic Keypad Wiring.................................................7
D.C. Lock..................................................................8
A.C. Lock..................................................................8
Egress Switch...........................................................8
Door Switch ..............................................................8
Programming................................................................9
Keypad Responses.................................................10
Reset All Memories Codes......................................10
Basic Set Up Sequence...........................................11
Automatic Relock. Memory 80................................12
EGRESS Switch Type. Memory 81.........................12
ELC Relay Type. Memory 82..................................12
ELC Operating Time. Memory 83 ...........................13
ii
Door Input Enable. Memory 84...............................13
Door Open Too Long Timer. Memory 85 ................13
Door Forced Open Detection. Memory 86...............14
One Minute Lockout. Memory 87............................14
Use Two Codes. Memory 88..................................14
Two Codes Timing. Memory 89..............................15
The Management Code. Memory 9........................16
User Codes. Memories 000 to 399.........................17
To Program In A New User Code .......................18
To Change The Code Type................................18
To Delete A User Code ......................................19
Design Philosophy -Problems and Solutions..........20
Warranty.....................................................................20
Security & Protection.................................................21
Other Models And Accessories.................................21
Programming Summary.............................................22

1
INTRODUCTION
The Presco™ Digital Door Access Decoder utilises the
latest microprocessor technology to operate most electric
door locking devices on the market. The decoder together
with an encoder (Presco™ keypad (PRE or PSE) or a
Presco™ Interface Module (PIM) with aClock & Data
(magnetic card format) or Wiegand output reader) offers
access control to restricted areas.
FEATURES
•Split system for maximum security (Encoder & Decoder).
•Door Forced Open detection.
•Door Open Too Long (DOTL) function.
•EGRESS function.
•Automatic door relock function.
•Easy on site programming using Presco™ keypad.
•400 client programmable users.
•Up to 10 encoders can be connected to one decoder.
•Two Heavy Duty 5 Amp. relay contacts for lock control.
•Can operate Fail Safe or Fail Secure electronic locking
mechanisms.
•Two 1 Amp Normally Open DOTL Alarm relay outputs.
•10 year non volatile EEPROM memory.
•Operating Temperature Range: 0ºC to 70ºC.
•36 month (3 year) manufacturer’s warranty.
•Designed and manufactured in Australia.
2
SPECIFICATIONS
Voltage:
Min operating Voltage111 Volts D.C.
14 Volts A.C.
Max operating Voltage2
30 Volts D.C.
28 Volts A.C.
Current: D.C.340 mA. quiescent.
200 mA. MAX.
A.C.450 mA. quiescent.
240 mA. MAX.
ELC contacts:
(Electric Latch Control)
30 Volt, 5 Amp A.C./D.C. SPST.
Programmable as N.O. or N.C.
DOTL contacts:
(Door Open Too Long) 30 Volt, 1 Amp A.C./D.C. SPST.
Operating Temperature: 0°C to 70°C.
Size: 104mm x 72mm x 27mm.
Weight: 150gms.
1Operating the unit at a Voltage lower than that specified
may cause intermittent operation possibly resulting in
damage to the unit.
2Exceeding the maximum specified input voltage may
cause damage to the unit
3Maximum D.C. current is drawn at 14 Volts input.
4Maximum A.C. current is drawn at 16 Volts input.
3
TERMINAL DESCRIPTIONS
A general description for each terminal type is given below.
An xhas been used in place of a 1or 2where a terminal
performs the same function for door 1 and door 2.
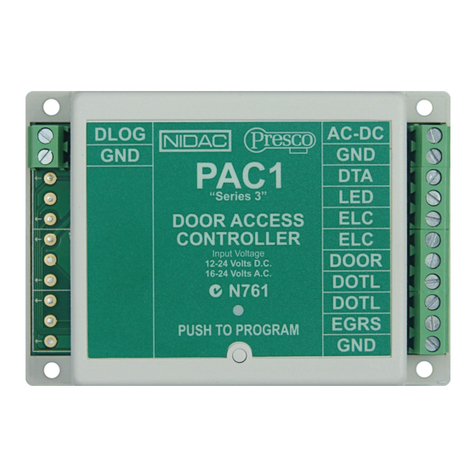
GND Negative input (or ground) from the power supply.
AC-DC A.C. 16 -24 Volt or D.C. 12 -24 Volt positive input
from the power supply.
DTAx Data line to encoder (white wire on keypads).
LEDx Output to drive a LED to indicate door unlocked.
ELCx (Electric Latch Control) 5 Amp relay output. The
ELC relay is used to control the door
locking/release mechanism. The relay can be
programmed as either Normally Open for fail
secure applications (power applied to open door)
or Normally Closed for fail safe applications
(power applied to lock door).
DOORx This input requires a normally closed switch
connected to ground, typically a reed switch
attached to the door. The DOOR input is used by
the PAC2 to monitor when the door is physically
open (not unlocked). In order to use this input it
must first be enabled (via memory 84, refer to
page 13) and a normally closed (when the door is
closed) door switch (or monitored lock contacts)
must be connected between DOOR and GND.
The DOOR input is used to detect when the door
has been opened for use by the door forced open,
Door Open Too Long and automatic relock
functions.
4
DOTLx (Door Open Too Long) 1 Amp Normally Open
relay output, operates when a DOTL or Door
Forced Open alarm condition occurs.
EGRSx The EGRESS input can take either a normally
open or normally closed switch between EGRESS
and GND. When this input is activated the ELC
relay will come on and remain on for the time that
the EGRESS input is on. Once the EGRESS
input is released the timing set for ELC will begin.
The other selected features of the PAC2 (DOTL,
Door Forced Open & Automatic Relock) will also
become active at this time. Therefore the
EGRESS input can be used to hold the door open
indefinitely with the use of a toggle switch, or with
the use of a momentary type switch it can be used
to release the door for a set time in exactly the
same way that a momentary user code does.
DLOG Data input/output for optional PACDL data logger.

5
PROGRAMMABLE FEATURES DESCRIPTION
Each of the programmable features described below can be
set independently for door 1 and door 2
Automatic Relock Function
When the DOOR input is used then the Automatic Relock
function can be used. This feature turns the ELC relay off 1
second after the door is opened (not unlocked) when a
momentary code or the EGRESS input has been used (no
matter how long the time for the ELC relay operation has
been set for in memory 83). The purpose of this feature is
to stop people following someone through the door by
ensuring that the door locks once it closes.
Door Open Too Long
The DOTL timer is used to warn if the door has been held
open for too long after a valid access (either via a code or
EGRESS). When the door has been opened a count down
timer is started (the time set in memory 85, refer to page
13). If the door has not closed again by the time this
counter expires then the DOTL output will activate (contacts
will close) and will remain active until the door is closed.
Note that if a value of 0 has been set for the DOTL time
then the door is allowed to remain open indefinitely.
Door Forced Open
A door forced open condition is defined by the situation
where the door has been opened but a code or EGRESS
has not been used to gain access. When this condition
occurs the DOTL output will activate (contacts will close)
and will remain active for 30 seconds or until the door is
closed again (whichever is the longer time). Note that the
Door Forced Open feature must be disabled (set in memory
86, refer to page 14) if a free (unmonitored) inside door
handle is used instead of an EGRESS button. When this
6
feature is disabled the Door Open Too Long timer will be
started when the PAC2 detects the door has been opened.
One Minute Lockout
To increase security the PAC2 can be set to lock out all
codes for a period of 1 minute after 5 incorrect codes have
been tried (set in memory 87, refer to page 14). Note that
this feature should not be enabled if access must be
guaranteed in an emergency situation.
Use Two Codes
The PAC2 can be set up to operate in one of the four
modes described below.
One User Code Only
Any one of the programmed user codes will operate the
ELC relay.
Any Two User Codes
Any two of the programmed user codes can be used
together to operate the ELC relay.
Code 000 or 001 and any other user code
The user code stored in memory 000 or 001 used
together with any other valid user code will operate the
ELC relay.
Sequentially Numbered User Codes
Two user codes in sequential memory locations must be
used together to operate the ELC relay. The pair of
locations start with an even numbered memory, eg. 000
and 001, 056 and 057, 138 and 139, etc. not 001 and 002.
IMPORTANT NOTE: When the PAC2 is set up to use any
of the two code combinations above the ELC relay will only
operate in Timed Mode even if the codes are programmed
as Toggle codes.
7
INSTALLATION
Read all instructions carefully before installing,
programming and using the system. It is vital that all power
be disconnected during wiring.
To maximise security ensure that the decoder and encoder
components are separated and that the decoder is
inaccessible to persons outside the restricted area. The
decoder should be installed indoors and in a dry secure
place. The maximum distance of separation between the
decoder and encoder is 1 kilometre.
The wiring diagrams for installation are on the following
pages.
BASIC KEYPAD WIRING
8
D.C. LOCK A.C. LOCK
*Use 1N4004 diode only when using a door strike
not a Magnetic Lock or Drop Bolt.
EGRESS SWITCH DOOR SWITCH

9
PROGRAMMING
A Presco™ keypad connected to DTA1 or a PACDL
revision 4.0 or higher connected to DLOG is required to
program the PAC2. To enable programming with a keypad
the PAC2 must first be put into program mode. This is
accomplished by pressing the program button located in the
bottom centre of the PAC2 below the “PUSH TO
PROGRAM” text. When the program mode is entered the
LED above the program button in the PAC2 will light up.
Pressing the program button again will take the PAC2 out of
program mode.
The PAC2 will remain in program mode for a period of 5
minutes after the button has been pressed. Each time the
keypad is used to enter information this time is extended to
5 minutes from that time.
The PAC2 can be forced to exit program mode from the
keypad by simply entering #99E.
When the PAC2 is in program mode the green LED on an
attached PRE keypad will flash at a rate of once per second
(provided the PRE has been wired to DTA1 as shown in the
BASIC KEYPAD WIRING diagram on page 7).
IMPORTANT NOTES:
1. The dshown in the programming sequences must be
replaced by a 1for door 1 or 2for door 2.
2. When programming a new Management or User code the
two steps must be done from devices connected to DTA1.
i.e. you cannot open a user location using a keypad
connected to DTA1 and then enter the new user code on a
keypad (or other Presco™ device) attached to DTA2.
10
KEYPAD RESPONSES
•warble = successful programming operation finished.
•3 x 2 beeps = code memory location opened.
•long beep = unsuccessful operation.
•1 short beep = valid Momentary or Toggle user code
entered to operate ELC relay (unlock door).
•2 short beeps = valid Toggle user code entered to
deactivate ELC relay (lock door).
•5 short beeps = valid Management code entered.
The expected response from the keypad is shown in the
square brackets [] after each programming sequence.
NOTE all keys in a sequence (up to and including the e)
must be pressed within 10 seconds of each other. If
incorrect keys are pressed wait 10 seconds and then enter
the sequence again.
CLEAR ALL USER CODES.
All the user codes memories (000 to 399) can be cleared by
the use of the following sequence.
press #, 8, 7, 6, 5 & E. [warble]
RESET ALL MEMORIES CODE.
The PAC2 can be reset to factory defaults by the use of the
following sequence.
WARNING: Using this code will delete all user codes, the
management code and reset memories 80 to 89 back to
their default settings.
To reset the PAC2 to factory defaults…
press #, 8, 7, 6, 5, 4, 3, 2, 1, & E. [warble]
11
BASIC SETUP SEQUENCE
1/ Select ELC RELAY TYPE (Currently N/O). [Memory
82, page 12]
2/ Select EGRESS switch type (Currently N/O). [Memory
81, page 12]
3/ Set ELC OPERATE TIME (Currently 10 seconds).
[Memory 83, page 13]
4/ Enable/Disable DOOR INPUT (Currently disabled).
[Memory 84, page 13]
5/ Set Door Open Too Long time (Currently 60 seconds).
[Memory 85, page 13]
6/ Enable/Disable DOOR FORCED OPEN DETECTION
(Currently enabled). [Memory 86, page 14]
7/ Enable/Disable AUTOMATIC RELOCK (Currently
enabled). [Memory 80, page 12]
8/ Enable/Disable 1 MINUTE LOCKOUT (Currently
disabled). [Memory 87, page 14]
9/ Enable/Disable USE TWO MOMENTARY CODES
(Currently disabled). [Memory 88, page 14]
10/ Set TWO CODES TIMING, if enabled in step 9 above
(Currently 60 seconds). [Memory 89, page 15]
11/ Program MANAGEMENT CODE. [Memory 9, page 16]
12/ Program USER CODES. [Memories 000 to 399,
page 17]
12
Automatic Relock. Memory 80
(Factory Default: Automatic Relock is enabled)
Disabling the Automatic Relock function prevents the ELC
relay output from deactivating 1 second after the door is
opened. This function is only valid when the DOOR input is
being used.
To disable the Automatic Relock function…
press *, 8, 0, d, 0, & E. [warble]
To enable the Automatic Relock function…
press *, 8, 0, d, 1, & E. [warble]
EGRESS Switch Type. Memory 81
(Factory Default: Normally Open EGRESS device)
Either a normally open or normally closed EGRESS switch
setting may be selected.
To set the EGRESS switch input to normally closed…
press *, 8, 1, d, 1, & E. [warble]
To set the EGRESS switch input to normally open…
press *, 8, 1, d, 0, & E. [warble]
ELC Relay Type. Memory 82.
(Factory Default: ELC is Normally Open)
The electronic latch control (ELC) relay can be set to
operate as either Normally Open (NO) for fail secure or
Normally Closed (NC) for fail safe.
To set the ELC relay type to normally closed…
press *, 8, 2, d, 1, & E. [warble]
To set the ELC relay type to normally open…
press *, 8, 2, d, 0, & E. [warble]

13
ELC Operating Time. Memory 83.
(Factory Default: ELC operate time of 10 seconds)
The electronic latch control (ELC) relay can be set to
operate for 1 second to 255 seconds in 1 second
increments.
To change the ELC operate time…
press *, 8, 3, d, “the time required in seconds”,
& E. [warble]
Door Input Enable. Memory 84.
(Factory Default: Input is disabled)
If the “Door Open Too Long” and “Door Forced Open”
functions are required then the input from the door switch
must be enabled. Note: enable only if your door has a reed
switch or the latch is monitored.
To enable the door input…
press *, 8, 4, d, 1, & E. [warble]
To disable the door input…
press *, 8, 4, d, 0, & E.[warble]
Door Open Too Long Timer. Memory 85.
(Factory Default: DOTL time of 60 seconds)
The time allowed for the door to be open before a DOTL
alarm is generated can be set from 1 to 9999 seconds. A
time of zero seconds will disable this function.
To change the DOTL time…
press *, 8, 5, d, “the time required in seconds”,
& E. [warble]
Note that time of 0 seconds will disable the DOTL function.
14
Door Forced Open Detection. Memory 86.
(Factory Default: Door Forced Detection is enabled)
Disabling the Door Forced Open function prevents the
DOTL output from activating (contacts closing) when the
door is opened without a valid code or EGRESS switch
having been used.
To disable Door Forced Open Detection…
press *, 8, 6, d, 0, & E. [warble]
To enable Door Forced Open Detection…
press *, 8, 6, d, 1, & E. [warble]
One Minute Lockout. Memory 87.
(Factory Default: 1 minute lockout is disabled)
Enabling the 1 minute lockout function means that the
system will not accept any codes for 1 minute after 5
successive invalid codes have been entered.
To enable the one minute lockout…
press *, 8, 7, d, 1, & E. [warble]
To disable the one minute lockout…
press *, 8, 7, d, 0, & E. [warble]
Use Two Codes. Memory 88.
(Factory Default: One User Code Only)
The use two codes memory is used to select the mode that
the PAC2 operates in. The value programmed into memory
88 selects either One User Code Only, Any Two User
Codes, Code 000 or 001 and any other user code or
Sequentially Numbered User Codes. For a description of
each of these operating modes refer to the Use Two Codes
section on page 6.
15
To select One User Code Only mode…
press *, 8, 8, d, 0, & E. [warble]
To select Any Two User Codes mode…
press *, 8, 8, d, 1, & E. [warble]
To select Code 000 or 001 and any other user code mode…
press *, 8, 8, d, 2, & E. [warble]
To select Sequentially Numbered User Codes mode…
press *, 8, 8, d, 3, & E. [warble]
IMPORTANT NOTE: When the PAC2 is set up to use any
of the two code combinations above (not One User Code
Only) the ELC relay will only operate in Timed Mode even if
the codes are programmed as Toggle codes.
Two Codes Timing. Memory 89.
(Factory Default: 60 seconds allowed between
entering two codes)
If the PAC2 is set up to operate in any of the two codes
modes above then the two codes must be entered within
the time specified in memory 88. This time may be set
between 1 and 255 seconds.
To set the time allowed between two codes…
press *, 8, 9, d, “the time allowed in seconds”, &
E. [warble]
16
The Management Code. Memory 9.
(Factory Default: No Management Code Programmed)
A management code will allow the programming of user
codes without having to press the program button on the
PAC2. This feature makes for greater convenience when
changing codes frequently or if the decoder is difficult to
reach. To add, change or delete the management code the
PAC2 must be put into program mode using the program
button.
The Management code can only be used to change user
codes. The management code cannot be used to set
programmable options or change the management code.
The system will only allow for one management code. If a
new management code is entered the old one will be
overwritten.
The Management code must be entered before each
programming operation to be perform. At the end of each
successful or unsuccessful programming attempt the PAC2
will automatically revert to the Operate mode.
To add or overwrite the management code…
press *, 9& E. [3 x 2 beeps]
press “the desired management code”, & E.
[warble]
To delete the management code…
press #, 9& E. [warble]
To enter the management mode…
press “the management code”, & E. [5 beeps]

17
User Codes. Memories 000 to 399.
(Factory Default: No User Codes Programmed)
User codes are the codes used to operate the ELC relay.
These codes can be programmed as either momentary
(timed) codes or toggle (bistable) codes.
When a momentary user code is used the ELC relay
operates (the door opens) for the time programmed in
memory 83, refer to page 13.
When a toggle code is used the ELC relay will operate and
remain operating (door remains open) until a toggle code is
again entered.
Remember that if the PAC2 is set up to operate using any
of the two code methods then all user codes become
momentary even if programmed as toggle.
Notes:
1/ User codes to be entered from a keypad can be 3 to 7
digits in length.
2/ User codes from other encoder devices can be from 3 to
9 digits in length.
3/ User codes can include but not start with the *or #
digits.
4/ User codes cannot be overwritten. They must first be
deleted and then reprogrammed.
5/ The same code cannot be programmed into more than
one memory location.
6/ User codes programmed into the lower numbered
memory locations will be found faster.
7/ Leading zeros (0) must be entered when opening a
memory location.
18
TO PROGRAM IN A NEW USER CODE
Programming of a user code is done in two steps, first the
memory location must be opened, then the user code must
be entered.
When opening a memory location the type of user code to
be entered for each door is also specified. This is one of
Momentary, Toggle or code disabled for each door.
Open a memory location…
press *, “the memory number”, “the door 1 code
type” , “the door 2 code type” & E.[3 x 2 beeps]
Where “the memory number” is a three digit location from
000 to 399 and “the door code type” is either 0for code
disabled for this door, 1for momentary or 2for toggle.
Next enter the user code…
press “the user code”, & E.[warble]
TO CHANGE THE CODE TYPE
To change an already programmed code to operate in a
different mode, i.e. code is programmed as Momentary for
door 1 and disabled for door 2, but you now require it to be
momentary for both doors, you simply reopen the memory
location with the new code type for each door.
This procedure is useful if you want to temporarily disable a
user code, simply set the new code type to 0(code
disabled) for each door. This saves having to delete the
code then reprogram it later.
Change the code type…
press *, “the memory number”, “the new door 1 code
type” , “the new door 2 code type” & E.[warble]
Notice how the keypad responds with a warble instead of
the 3 x 2 beeps when the code type is being changed.
19
TO DELETE A USER CODE
Delete a user code…
press #, “the memory number” & E.[warble]
Note that you do not enter the code types, nor do you need
to know the actual code when deleting a user code.
Examples:
In the following examples memory location 053 has been
used. All steps apply to any memory from 000 to 399.
To add a user code of 1234 as a momentary code for doors
1 & 2…
press *, 0, 5,3, 1, 1& E[3 x 2 beeps]
Door 2 Mode
Door 1 Mode
Memory No.
press 1, 2, 3, 4& E[warble]
User Code
To change the code (1234) stored in memory location 053
to a Toggle code for door 1 and Momentary for door 2…
press *, 0, 5, 3, 2, 1& E. [warble]
To disable the code (1234) stored in memory location 053
for door 1 and Momentary for door 2…
press *, 0, 5, 3, 0, 1& E. [warble]
To delete the code (1234) stored in memory location 053…
press #, 0, 5, 3& E. [warble]
REMEMBER when programming a new Management or User
code, the two steps must be done from devices on the same
DTA line. i.e. you cannot open a user location using a keypad
connected to DTA1 and then enter the new user code on a
keypad (or other Presco™ device) attached to DTA2.
}
}
20
Design Philosophy -Problems and Solutions.
1/ Most keypads contain the switching relay and control
wiring within the keypad housing. A skilled person could
easily bypass the keypad function simply by removing it
then manipulating the control wiring, a disastrous
situation. Presco™ is a 2 part system, so that the
decoder can do all the processing at a remote protected
environment. The code is transmitted between keypad
and decoder in “computer” language, therefore cutting or
shorting wires won’t compromise security.
2/ Other keypad installations can require 7 or more wires
thus increasing labour and cost. Presco™ uses only 3
wires to operate the door release, LED/buzzer feedback
of code entry, acknowledgment of correct code, state of
door strike, remote management code programming and
power. Up to 10 keypads can be connected to a decoder
by simple parallel wiring. No synchronising is required.
WARRANTY
The manufacturer will replace or repair this product if
proven to be faulty (excluding accidental or malicious
damage) under the 36 month warranty offered from the date
of purchase.
As NIDAC Security Pty. Ltd. or it’s agents do not perform
the final installation, inspection or training in the use of this
product, they cannot be held liable for injury, loss or
damage directly or consequentially arising from the use or
misuse of this product.
The software design of the NIDAC Presco™ is protected
internationally. Design improvement and specification
changes are subject to change without notice. All designs
are copyright protected.

21
SECURITY & PROTECTION
The following common sense hints will help to maximise the
security of your system.
•don’t use obvious codes such as 1234, or 888
•change codes on a regular basis
•ensure that knowledge of management and toggle codes
is appropriately restricted
The Presco™ system has a high immunity to all types of
static, EMF, and RF transmissions including those of police
and CB radio systems. Reverse polarity and over voltage
protection from lightning strike up to 10kV is provided.
OTHER MODELS AND ACCESSORIES
PRE Presco™ keypad encoder for Presco™ decoder.
PSE Presco™ Stainless Steel vandal and weather
resistant keypad encoder for Presco™ decoder.
PIM Presco™ Interface Module for Dallas iButton™,
Clock & Data (Magnetic Card) or Wiegand readers.
PAC1 Single Door Access Controller.
PRX Presco™ proximity card reader for PAC1, PAC2 or
Wiegand input controller.
CT1 User configurable general purpose timer module.
22
PROGRAMMING SUMMARY
Note: The dshown in the programming sequences must be
replaced by a 1for door 1 or 2for door 2.
Enable/Disable Automatic Relock. (default = enabled)
*, 8, 0, d, x, E. x = 0for disabled, x = 1for enabled.
Select EGRESS switch type. (default = N.O.)
*, 8, 1, d, x, E. x = 0for N.O., x = 1for N.C.
Select ELC relay type. (default = N.O.)
*, 8, 2, d, x, E. x = 0for N.O. (fail secure), x = 1for
N.C. (fail safe).
Set ELC operating time. (default = 10 seconds)
*, 8, 3, d, xxx, E. xxx = 1 to 255 (seconds).
Enable/Disable DOOR input. (default = disabled)
*, 8, 4, d, x, E. x = 0for disabled, x = 1for enabled.
Set DOTL timer. (default = 60 seconds)
*, 8, 5, d, xxxx, E. xxxx = 0 to 9999 (seconds).
Enable/Disable Door Forced detection. (default = enabled)
*, 8, 6, d, x, E. x = 0for disabled, x = 1for enabled.
Enable/Disable 1 minute lockout. (default = disabled)
*, 8, 7, d, x, E. x = 0for disabled, x = 1for enabled.
Select Use Two Codes mode. (default = One User Code)
*, 8, 8, d, x, E. x = 0for One User Code Only, x = 1
for Any Two User Codes, x = 2for Code 000 or 001 and
any other code, x = 3for Sequentially Numbered User
Codes.
Set Two Codes timing. (default = 60 seconds)
*, 8, 9, d, xxx, E. xxx = 1 to 255 (seconds).
23
Program or change the Management Code.
*, 9, E“code”, E.
New Management Code
Delete the Management Code.
#, 9, E.
Program a User Code.
*, nnn, m1, m2, E“code”, E.
New User Code
Door 2 Mode
0= Disabled
1= Momentary
2= Toggle
Door 1 Mode
0= Disabled
1= Momentary
2= Toggle
Memory No. 000 to 399
Change an existing User Code’s operating mode.
*, nnn, m1, m2, E.
Door 2 Mode
0= Disabled
1= Momentary
2= Toggle
Door 1 Mode
0= Disabled
1= Momentary
2= Toggle
Memory No. 000 to 399
Delete a User Code.
#, nnn, E.
Memory No. 000 to 399
Exit Program Mode.
#, 9, 9, E.
Revision 3.0
100%
Designed and Manufactured by:
NIDAC SECURITY PTY. LTD.
2 CROMWELL STREET
BURWOOD, VICTORIA Tel: (03) 9808 6244
AUSTRALIA 3125 Fax:(03) 9808 9335
This manual suits for next models
1
Table of contents
Other Nidac IP Access Controllers manuals

