Bayco Products, Inc. • 640 South Sanden Blvd. • Wylie, TX 75098 • 1-800-233-2155 • 1-469-326-9400 • www.nightstick.com
INS-T460XL-K01-21
CR123 (illustration 2-B). Les terminaux positifs de chaque batterie doivent être orientés
dans la direction de la èche sur le porte-batterie CR123, puis insérés dans la lampe
torche de façon à ce que les terminaux + soient orientés dans la direction de la tête
lumineuse (illustration 3-A).
3. Installez le pressostat à distance (RPS) (illustration 3-B) et xez-le en position.
4. Testez le fonctionnement du pressostat à distance (illustration 3-C) et de le commutateur
de côté (illustration 3-D). Voir la section intitulée Fonctionnement pour savoir comment
fonctionnent les commutateurs.
5. Décidez où vous souhaitez placer le support rail. Il est important que le support ne
touche pas le pressostat déporté, sinon le changement des piles vous obligera à retirer
la lumière.
6. Une fois que vous avez choisi l’emplacement du support de rail, rdesserrez les vis à
l’aide de la clé Allen fournie et faites glisser le support sur la lumière (Figure 4). Serrez
légèrement les vis.
7. Testez l’ajustement du support rail sur le rail Picatinny ou Weaver militaire de l’arme à
feu longue. En même temps, choisissez où vous allez placer le pressostat à distance
(illustration 6). REMARQUE : Le pressostat à distance peut être placé sur toute surface
propre, sèche et plate sur l’arme à feu longue. L’emplacement indiqué sur l’illustration 6
n’est qu’une possibilité. L’emplacement choisi sur votre propre arme à feu dépendra de
la conguration de votre arme et de vos préférences.
8. Terminez de serrer les vis de montage, en alternant entre chacune une petite quantité à
la fois jusqu’à ce que l’écart soit égal des deux côtés (Figure 4).
9. Une fois que vous avez choisi où placer le support rail et le pressostat à distance,
nettoyez l’emplacement sur votre arme où vous comptez placer le pressostat à distance
ainsi que la surface interne du pressostat à distance à l’aide du tampon d’alcool fourni.
10. Décollez une des deux bandes Velcro adhésives autocollantes de son verso en papier
et appuyez fermement pour la xer à l’arrière du pressostat à distance (illustration 5).
11. Ensuite, xez le support rail, avec la torche en place, sur le rail Picatinny ou Weaver
militaires de votre arme à feu et serrez la vis à oreilles.
12. Décollez la deuxième bande Velcro adhésive autocollante de son verso en papier et
appuyez fermement pour la xer sur l’emplacement nettoyé sur votre arme à feu longue
(illustration 6).
REMARQUE : L’adhésif autocollant collera de façon semi-permanente après environ 24
heures, aussi veuillez ne pas déplacer ou enlever les bandes adhésives autocollantes une
fois qu’elles sont en place. D’autre part, veuillez ne pas séparer les deux sections Velcro
après cette période.
FONCTIONNEMENT
La lampe torche tactique Nightstick pour arme à feu longue est maintenant montée et
est prête à être utilisée.
Le pressostat à distance compris permet d’éteindre et allumer la lampe torche
momentanément. Utiliser ce pressostat donne à l’utilisateur un contrôle immédiat sur la
lumière, qu’elle soit éteinte ou allumée.
Le commutateur de côté permet d’éteindre et allumer la lampe torche momentanément
en appuyant légèrement sur le bouton, ou de laisser la lampe torche allumée en appuyant
sur le bouton jusqu’à ce que vous entendiez un déclic.
Si le support a été positionné correctement (voir étape 5 ci-dessus), il est possible de
changer les batteries sans avoir à retirer la lampe torche du support rail et, selon le lieu où
se trouve l’équipement, il peut être possible de changer les batteries sans enlever le support
de votre arme.
Pour changer les batteries, commencez par séparer les deux faces de la bande Velcro
de façon à ce qu’une face adhère à votre arme à feu et que l’autre adhère au dos du
pressostat à distance. Puis, dévissez le pressostat à distance, retirez le porte-batterie
CR123 et remplacez les batteries (voir étape 2 ci-dessus).
GARANTIE
GARANTIE À VIE LIMITÉE
Bayco Products, Inc. garantit que ce produit est exempt de défauts de matériaux et de
fabrication à l’acheteur original durant toute sa vie. La garantie à vie limitée inclut les DEL,
les boîtiers et les lentilles. Les batteries rechargeables, les chargeurs, les interrupteurs, les
électroniques et les accessoires compris sont garantis pour une période de deux ans avec
une preuve d’achat. L’usure normal et les défaillances qui sont causés par des accidents,
une mauvaise utilisation, un abus, une installation défectueuse et un système d’éclairage
endommagé sont exclus.
Ce produit sera réparé ou remplacé si nous déterminons qu’il est défectueux. Ceci est
la seule garantie explicite ou implicite, y compris toute garantie de qualité marchande ou
d’adéquation à un usage particulier.
Pour une copie détaillée de la garantie, vous rendre sur le site www.baycoproducts.com/
bayco-product-support/warranties. Gardez ce reçu comme preuve d’achat.
Manual de Instrucción
TAC-460XL-K01
ADVERTENCIAS
yNO PARA USO EN LUGARES PELIGROSOS. No utilice este producto en ambientes
explosivos, cerca de líquidos inamables, o donde se requiere la iluminación a prueba de
explosión o de seguridad intrínseca.
yNO utilice este producto en las proximidades de vehículos o equipos cuando hay un
riesgo de que líquidos inamables entren en contacto con la linterna.
yLa luz puede calentarse mientras que está encendida. Para evitar daños, NO cubra ni
la coloque al lado de cualquier material potencialmente inamable mientras esté en uso.
yMantener fuera del alcance de los niños.
INSTRUCCIONES DE ENSAMBLAJE
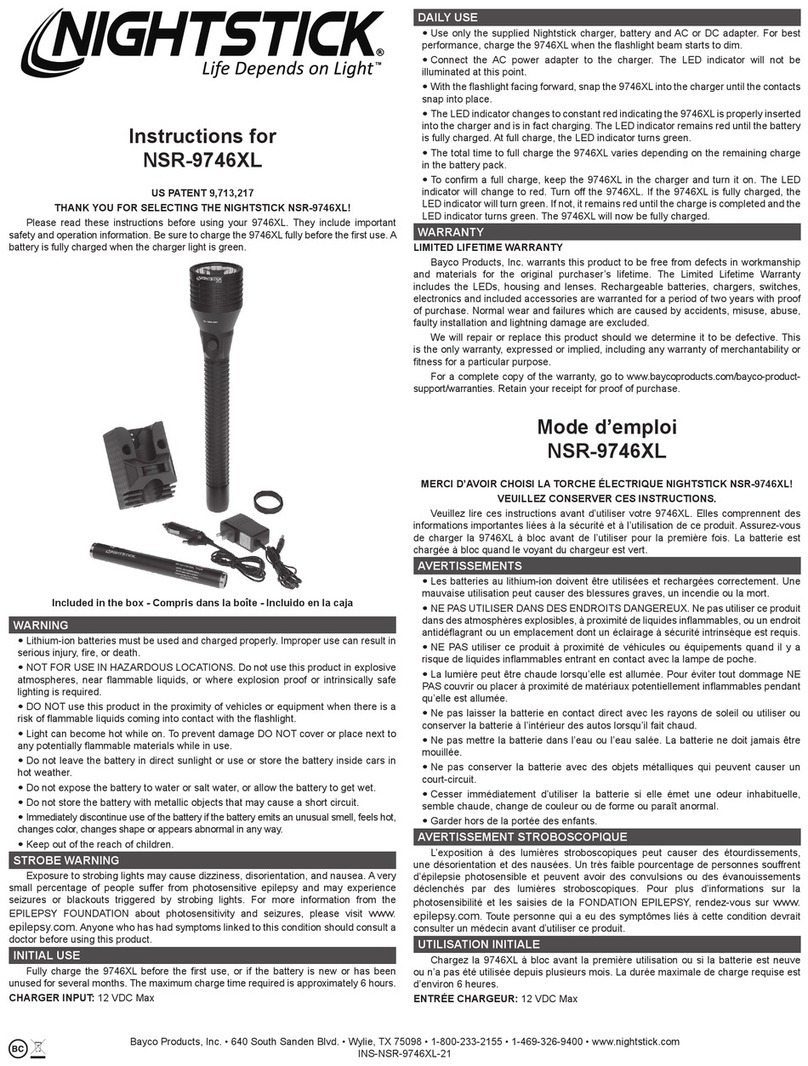
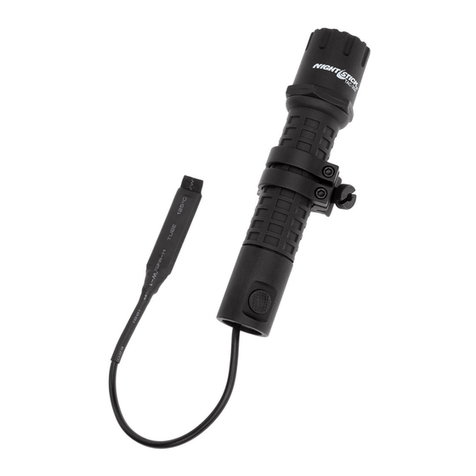
La linterna táctica TAC-460XL viene con el interruptor del casquillo de la tapa posterior
que ya está jado. Como tal, la luz se puede utilizar al sacarla de su caja como una linterna
táctica convencional una vez que se hayan instalado las baterías incluidas CR123 y CR123.
Esta luz se puede convertir de nuevo a esta conguración en cualquier momento.
1. Retire el interruptor de la tapa posterior (Figura 1-A) y el soporte de la batería CR123
(Figura 1-B). NOTA: Mantenga el interruptor del casquillo de la tapa posterior para su uso
futuro si esta luz alguna vez se convierte de nuevo a una linterna táctica convencional.
2. Instale las dos baterías incluidas (Figura 2-A) CR123 en el soporte de la batería CR123
(Figura 2-B). Los terminales positivos en cada batería deben estar orientados en la
dirección de la echa en el soporte de la batería CR123 y luego se insertan en la linterna
con el extremo terminal + apuntando en la dirección del bisel de la linterna (Figura 3-A).
3. Instale el Interruptor de Presión Remoto (Figura 3-B) y apriételo en su lugar.
4. Pruebe el funcionamiento del Interruptor de Presión Remoto (Figura 3-C) y el botón
lateral (Figura 3-D). Consulte la siguiente sección “Functionamiento” para ver cómo
funcionan los interruptores.
5. Determine la ubicación del soporte del riel en el cuerpo de la luz. Mantenga el soporte
alejado de la tapa del interruptor, de lo contrario, cambiar las baterías requerirá quitar la luz.
6. Una vez que se ha determinado la ubicación adecuada del rail mount a lo largo de la
manija de la luz, aoje los tornillos con la llave Allen suministrada y deslice el soporte en
el mango de la luz (Figura 4). Apriete parcialmente los tornillos.
7. Compruebe el ajuste del rail mount en la Picatinny o Weaver del carril de arma larga.
Al mismo tiempo, determine la ubicación deseada del Interruptor de Presión Remoto
(Figura 6). NOTA: El interruptor de Presión Remoto puede estar unido a cualquier
supercie limpia, plana y seca en el arma larga. La ubicación indicada en la gura 6
es sólo una posibilidad. La ubicación real de su arma larga será determinada por la
conguración de su arma y por sus preferencias.
8. Termine de apretar los tornillos de montaje, alternando entre cada uno una pequeña
cantidad a la vez hasta que el espacio sea igual en ambos lados (Figura 4).
9. Una vez que se ha determinado la ubicación Rail Mount y el Interruptor de Presión
Remoto, limpie el lugar de su arma en la que se encuentra el Interruptor de Presión
Remoto, así como la supercie interior del Interruptor de Presión Remoto utilizando el
hisopo de alcohol suministrado.
10. Despegue una de las partes de tras del papel adhesivo de velcro (Figura 8-A) y
presiónelo en su lugar en la parte posterior del Interruptor de Presión Remoto (Figura 5).
11. Fije el rail mount con la luz instalada en la Picatinny o el carril de la armadura de su arma
y apriete el tornillo de mariposa.
12. Despegue el papel adhesivo de velcro y presiónelo en su lugar en el área previamente
limpia de su arma larga (Figura 6).
NOTA: El Adhesivo Sensible a Presión hará un enlace semi-permanente después de
aproximadamente 24 horas, así que por favor no mueva ni quite las tiras adhesivas una
vez que han sido colocadas. Además, no trate de separar las dos secciones de velcro hasta
después de ese momento.
FUNCIONAMIENTO
El Kit Nightstick táctico de la Pistola Táctica Larga está completamente instalado y listo
para su uso.
El interruptor de Presión Remoto proporciona operación momentánea de encendido
/ apagado de sólo la luz. El uso de este interruptor, le da el control total e inmediato al
operador de cuando la luz está encendida, y cuando está apagada.
El interruptor lateral ofrece operación momentánea de encendido / apagado presionando
ligeramente el botón, o presionando constantemente hasta que el botón haga clic.
Si el mount se ha colocado correctamente (ver paso 5), el cambio de las baterías
pueden llevarse a cabo sin la eliminación de la luz del bloqueo de mount, y en función de
la ubicación de instalación, puede que sea posible cambiar las baterías sin necesidad de
retirar la montaje de su arma.
Para cambiar las baterías, primero separe las dos mitades de la tira de velcro entre sí de
modo que una mitad se mantiene adherida a su arma y el resto unido a la parte trasera del
Interruptor de Presión Remoto. Ahora desenrosque el Interruptor de Presión Remoto, quite
el soporte de la batería CR123 y vuelva a colocar las pilas (vea el paso 2).
GARANTÍA
GARANTIA LIMITADA DE POR VIDA
Bayco Products, Inc. garantiza que este producto está libre de defectos de mano de obra
y materiales durante la vida del comprador original. La garantía de por vida limitada incluye
los LED, la carcasa y los lentes. Las pilas recargables, los cargadores, los interruptores, la
electrónica y los accesorios incluidos están garantizados por un período de dos años con un
comprobante de compra. Se excluyen el desgaste y los fallos normales, que son causados
por accidentes, mal uso, abuso, instalación defectuosa y daños por rayos.
Repararemos o reemplazaremos este producto si lo determinamos como defectuoso.
Esta es la única garantía, expresa o implícita, incluyendo cualquier garantía de
comerciabilidad o idoneidad para un propósito particular.
Para obtener una copia completa de la garantía, visite www.baycoproducts.com/bayco-
product-support/warranties. Conserve su recibo para comprobar la compra.


