manuals.online logo
Brands
  1. Home
  2. •
  3. Brands
  4. •
  5. Night Stick
  6. •
  7. Flashlight
  8. •
  9. Night Stick TAC-300B-K01 User manual

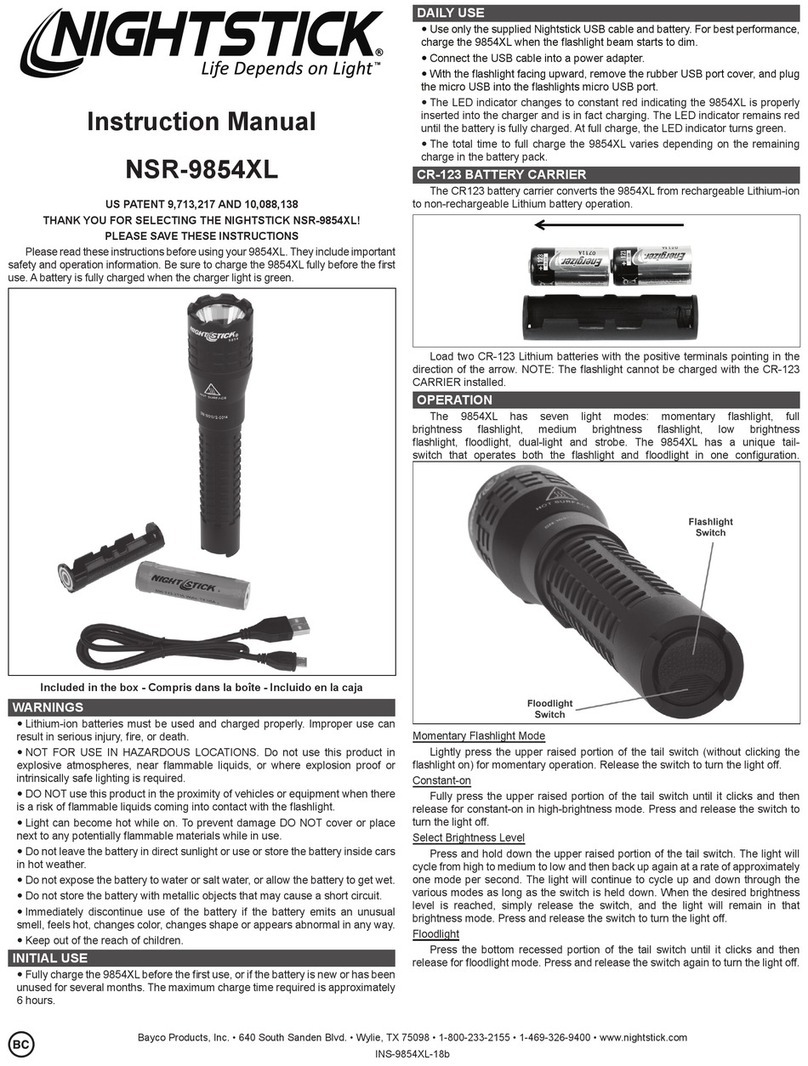
Night Stick TAC-300B-K01 User manual

Bayco Products, Inc. • 640 South Sanden Blvd. • Wylie, TX 75098 • 1-800-233-2155 • 1-469-326-9400 • www.nightstick.com
INS-T300B-K01-21
Instruction Manual
TAC-300B-K01
WARNINGS
•NOT FOR USE ABOVE HAZARDOUS LOCATIONS
•DO NOT use in explosive atmospheres, near ammable liquids, or where explosion
prooflampsarerequired.
•DONOTuseintheproximityofvehiclesorequipmentwhenthereisariskofammable
liquidscomingintocontactwiththeashlight.
•DONOTexposethebatteriestowaterorsaltwater,orallowthebatteriestogetwet.
•DONOTstorethebatterieswithmetallicobjectsthatmaycauseashortcircuit.
•Immediately discontinue use of the batteries if they emit an unusual smell, feel hot,
changecolor,changeshapeorappearabnormalinanyway.
•Keep out of the reach of children.
ASSEMBLY INSTRUCTIONS
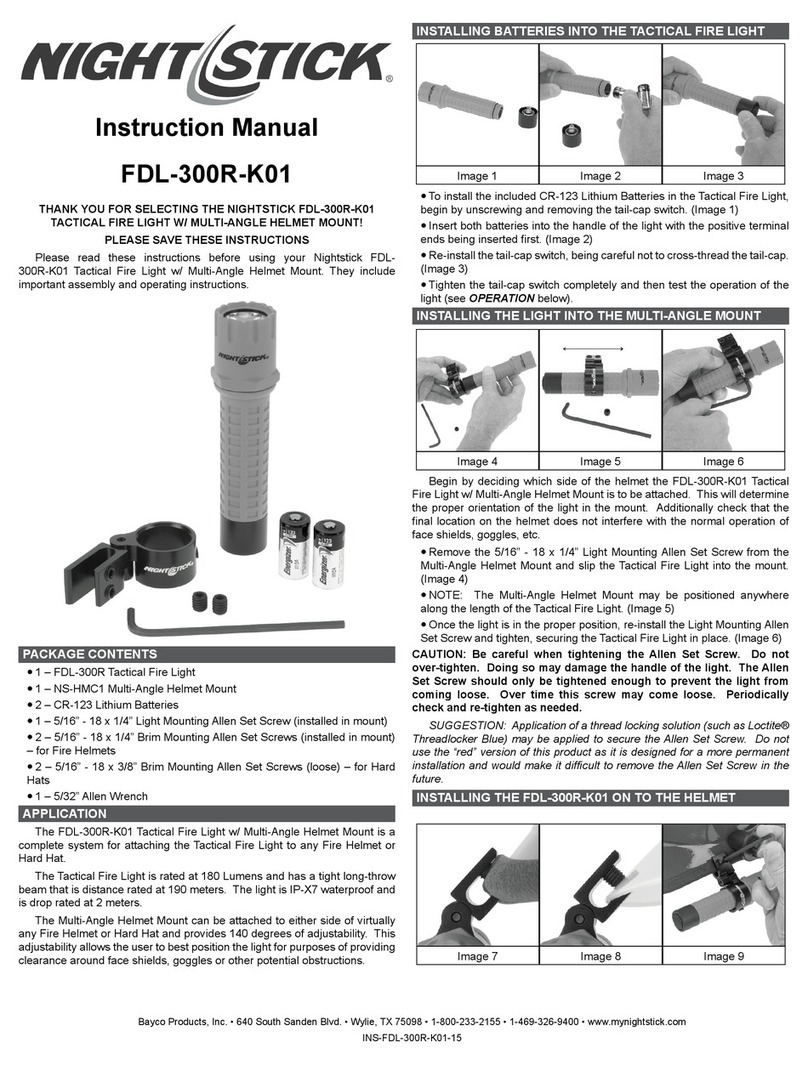
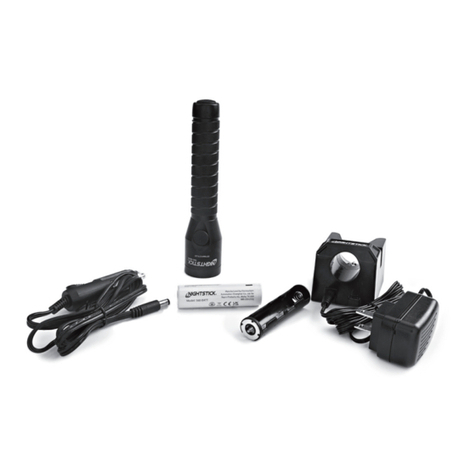
The TAC-300B includes the pocket clip and the tail cap switch already attached. The
lightcanbeusedimmediatelyasaconventionaltacticalashlightoncethebatteriesare
installed.Thislightmaybeconvertedbacktothiscongurationatanytime.
1. Removethepocketclip(Figure1-B)byunscrewingandremovingthelightbezel(Figure1-A).
2. Reinstallthelightbezel(Figure1-A).
3. Remove the tail cap switch (Figure 1-C). NOTE: Keep the tail cap switch and pocket clip
forfutureuseforthelightistobeconvertedbacktoaconventionaltacticalashlight.
4. InstallthetwoincludedCR123 batteries (Figure2-A).The positiveterminalson each
batteryshouldbeorientedinthedirectionoftheLightBezel.
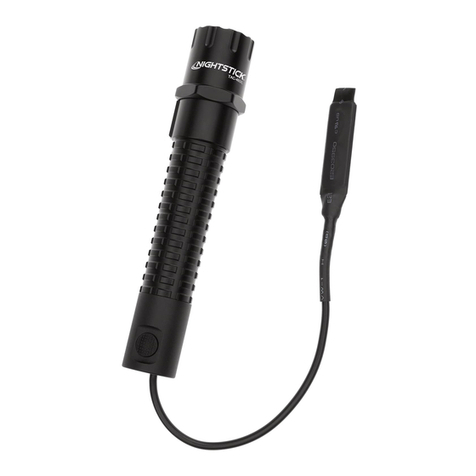
5. Install the Remote Pressure Switch (Figure 2-B) and tighten into place.
6. Test the operation of the Remote Pressure Switch and the side switch. See section titled
Operation for how the switches work.
7. Determinelocationoftherailmountonthebodyofthelight.Keepthemountclearofthe
switchcap,otherwisechangingthebatterieswillrequireremovingthemount.
8. Once the location of the mount has been determined, loosen the screws using the
supplied Allen wrench and slide the mount onto the handle of the light (Figure 3).
Partially tighten the screws.
9. TesttthemountontothePicatinnyorWeaverrail ofthelonggun.Determinethe
desiredlocationoftheRPS(Figure5)onthelonggun.Itcanbeattachedtoanyclean,
dry,atsurface.Figure5isoneexample;choosethebestlocationforyourweapon’s
congurationandpersonalpreferences.
10.Finishtighteningthemountscrews,alternatingbetweeneachasmallamountatatime
untilthegapisequalonbothsides(Figure3).
11. OncethelocationofthemountandtheRPShavebeendetermined,thoroughlyclean
thelocationontheweaponwheretheRPSwillbelocatedaswellastheinsidesurface
oftheRPSusingthesuppliedalcoholswab.
12.PeeloffthepaperbackingononesideoftheVelcro®adhesive strip and press it into
placeonthebacksideoftheRPS(Figure4).
13.Attachthelightwithmountontotherailoftheweaponandtightenthethumbscrew.
14.PeeloffthepaperbackingontheothersideoftheVelcro®adhesive strip and press it
onto onto the clean area of the long gun. (Figure 5).
NOTE:Donotmoveorremovetheadhesivestripsoncetheyhavebeenplaced.The
Velcro® adhesiverequiresabout24hourstomakeasemi-permanentbond.Donotattempt
to separate the two Velcro®sections until it is set.
OPERATION
The Nightstick Tactical Long Gun Kit is now fully installed and ready for use.
•The Remote Pressure Switch provides momentary On/Off operation of the light only.
Using this switch gives the operator instant control when the light is on and off.
•ThesideswitchprovidesmomentaryOn/Offoperationbypressingslightlyonthebutton,
orconstant-onbypressinguntilthebuttonclicks.
•If the mount is positioned correctly (see Step 7 above), changing the batteries may be
accomplished without removing the light from the mount. Depending on the installation location,
itmaybepossibletochangethebatterieswithoutremovingthemountfromtheweapon.
•Tochangethebatteries,rstseparatethetwohalvesoftheVelcro®strip from each other
sothatonehalfstaysadheredtoyourweaponandtheotherremainsattachedtotheback
side of the Remote Pressure Switch. Next, unscrew the Remote Pressure Switch and
replacethebatteries(seeStep4above).
WARRANTY
LIMITED LIFETIME WARRANTY
BaycoProducts,Inc.warrantsthisproducttobefreefromdefectsinworkmanshipand
materialsfortheoriginalpurchaser’s lifetime.TheLimitedLifetimeWarrantyincludesthe
LEDs, housing and lenses. Rechargeable batteries, chargers, switches, electronics and
included accessories are warranted for a period of two years with proof of purchase. Normal
wear and failures which are caused by accidents, misuse, abuse, faulty installation and
lightning damage are excluded.
Wewillrepairorreplacethisproductshouldwedetermineittobedefective.Thisisthe
onlywarranty,expressedorimplied,includinganywarrantyofmerchantabilityortnessfor
a particular purpose.
For a complete copy of the warranty, go to www.baycoproducts.com/bayco-product-
support/warranties. Retain your receipt for proof of purchase.
Mode d’emploi
TAC-300B-K01
AVERTISSEMENTS
•NEPASUTILISERAU-DESSUSD’ENDROITSDANGEREUX.
•NE PAS utiliser ce produit dans une atmosphère explosive, à proximité de liquides
inammables,oudansdesendroitsexigeantunéclairageantidéagrant.
•NEPASutiliserceproduitàproximitédevéhiculesoud’équipementquanddesliquides
inammablespourraiententrerencontactaveclalampetorche.
•NEPASexposerlesbatteriesàl’eauouàl’eausalée,etnepaslaisserlesbatteries
se mouiller.
•NEPASrangerlesbatteriesàproximitéd’objetsmétalliquesquipourraientcauserun
court-circuit.
•Arrêtezimmédiatementd’utiliserlesbatteriessiellesémettentuneodeurinhabituelle,
sontbrûlantesautoucher,changentdeforme,ouencasdetouteautreanomalie.
•Ne pas laisser pas à la portée des enfants
INSTRUCTIONS DE MONTAGE
La lampe torche tactique TAC-300B est fournie avec l’agrafe pour poche et le
capuchonarrièredéjàenplace.Latorchepeutdoncêtreutiliséedèsquevouslasortez
desonemballage entantquelampetorchetactiqueconventionnelleune foisqueles
batteries CR-123 incluses sont en place. La conguration de cette torche peut être
changée à tout moment.
1. Enlevez l’agrafe de poche (illustration 1-B) en dévissant et retirant la tête lumineuse
(illustration 1-A).
2. Unefoisl’agrafedepocheretirée,réinstallezlatêtelumineuse(illustration1-A).
Figure 5Figure 4
Figure 3
Bayco Products, Inc. • 640 South Sanden Blvd. • Wylie, TX 75098 • 1-800-233-2155 • 1-469-326-9400 • www.nightstick.com
INS-T300B-K01-21
3. Puis, retirez le commutateur du capuchon arrière (illustration 1-C). REMARQUE :
Conservez le commutateur du capuchon arrière et l’agrafe de poche pour utilisation
ultérieure au cas où vous voudriez réutiliser cette torche en tant que lampe torche
tactiqueconventionnelle.
4. Puis, installez les deux batteries CR-123 comprises (illustration 2-A). Les terminaux
positifsdechaquebatteriesdoiventêtreorientésdansladirectiondelatêtelumineuse.
5. Installezlepressostatàdistance(illustration2-B)etxez-leenposition.
6. Puis,testezlefonctionnementdupressostatàdistanceetdelecommutateurdecôté.Voir
la section intitulée Fonctionnement pour savoir comment fonctionnent les commutateurs.
7. Décidezoùvoussouhaitezplacerlesupportrail.Ilestimportantquelesupportnetouche
paslepressostatdéporté,sinonlechangementdespilesvousobligeraàretirerlalumière.
8. Unefois quevousavez choisi l’emplacementdusupport de rail,rdesserrezles vis à
l’aidedelacléAllenfournieetfaitesglisserlesupportsurlalumière(Figure3).Serrez
légèrement les vis.
9. Testezl’ajustementdusupportrailsurlerailPicatinnyouWeavermilitairedel’armeà
feulongue.Enmêmetemps,choisissezoùvousallezplacerlepressostatàdistance
(illustration5).REMARQUE:Lepressostatàdistancepeutêtreplacésurtoutesurface
propre,sècheetplatesurl’armeàfeulongue.L’emplacementindiquésurl’illustration
5n’estqu’unepossibilité.L’emplacementchoisisurvotreproprearmeàfeudépendrade
lacongurationdevotrearmeetdevospréférences.
10.Terminezdeserrerlesvisdemontage,enalternantentrechacuneunepetitequantitéà
lafoisjusqu’àcequel’écartsoitégaldesdeuxcôtés(Figure3).
11. Une fois que vous avez choisi où placer le support rail et le pressostat à distance,
nettoyezl’emplacementsurvotrearmeoùvouscomptezplacerlepressostatàdistance
ainsiquelasurfaceinternedupressostatàdistanceàl’aidedutampond’alcoolfourni.
12.DécollezunedesdeuxbandesVelcroadhésivesautocollantesdesonversoenpapier
etappuyezfermementpourlaxeràl’arrièredupressostatàdistance(illustration4).
13.Ensuite,xezle supportrail, aveclatorche enplace,sur lerailPicatinny ouWeaver
militairesdevotrearmeàfeuetserrezlavisàoreilles.
14. Décollez la deuxième bande Velcro adhésive autocollante de son verso en papier et
appuyezfermementpourla xer sur l’emplacement nettoyé sur votrearmeàfeulongue
(illustration 5).
REMARQUE:L’adhésifautocollantcolleradefaçonsemi-permanenteaprèsenviron24
heures,aussiveuilleznepasdéplacerouenleverlesbandesadhésivesautocollantesune
foisqu’ellessont enplace.D’autrepart,veuillez nepasséparerlesdeuxsectionsVelcro
après cette période.
FONCTIONNEMENT
LalampetorchetactiqueNightstickpourarmeàfeulongueestmaintenantmontéeet
est prête à être utilisé.
•Le pressostat à distance compris permet d’éteindre et allumer la lampe torche
momentanément.Utilisercepressostatdonneàl’utilisateuruncontrôleimmédiatsurla
lumière,qu’ellesoitéteinteouallumée.
•Lecommutateurdecôtépermetd’éteindreetallumerlalampetorchemomentanément
enappuyantlégèrementsurlebouton,oudelaisserlalampetorchealluméeenappuyant
surleboutonjusqu’àcequevousentendiezundéclic.
•Silesupportaétépositionnécorrectement(voirétape7ci-dessus),ilestpossiblede
changerlesbatteriessansavoiràretirerlalampetorchedusupportet,selonlelieuoùse
trouvel’équipement,ilpeutêtrepossibledechangerlesbatteriessansenleverlesupport
de votre arme.
•Pourchangerlesbatteries,commencezparséparerlesdeuxfacesdelabandeVelcro
defaçonàcequ’une face adhère à votre arme à feu et que l’autre adhère au dos du
pressostatàdistance.Puis,dévissezlepressostatàdistanceetremplacezlesbatteries
(voir étape 4 ci-dessus).
GARANTIE
GARANTIE À VIE LIMITÉE
BaycoProducts,Inc.garantitqueceproduitestexemptdedéfautsdematériauxetde
fabricationàl’acheteuroriginalduranttoutesavie.LagarantieàvielimitéeinclutlesDEL,
lesboîtiersetleslentilles.Lesbatteriesrechargeables,leschargeurs,lesinterrupteurs,les
électroniquesetlesaccessoirescomprissontgarantispourunepériodededeuxansavec
unepreuved’achat.L’usurenormaletlesdéfaillancesquisontcauséspardesaccidents,
unemauvaiseutilisation,unabus,une installationdéfectueuseet unsystèmed’éclairage
endommagé sont exclus.
Ceproduitseraréparéouremplacésinousdéterminonsqu’ilestdéfectueux.Ceciest
laseule garantieexpliciteou implicite,y compristoutegarantie dequalitémarchande ou
d’adéquationàunusageparticulier.
Pourunecopiedétailléedelagarantie,vousrendresurlesitewww.baycoproducts.com/
bayco-product-support/warranties.Gardezcereçucommepreuved’achat.
Manual de Instrucción
TAC-300B-K01
ADVERTENCIAS
•NO PARA USO SOBRE ZONAS PELIGROSAS
•NOutilizarenatmosferasexplosivas,cercadelíquidosinamablesodondeserequieran
lámparasapruebadeexplosión.
•NOutilizarenlaproximidaddevehículosoequipocuandohayriesgodequelíquidos
inamableshagancontactoconlalinterna.
•NOexpongalasbateríasalaguanialaguasalada,nipermitaquelasbateríassemojen.
•NOguardelasbateríasconobjetosdemetalquepudierancausaruncortocircuito.
•Descontinúeinmediatamenteelusodelasbateríassiestasemitenunolorinusual,sesienten
calientes,cambiandecolor,cambiandeformaoparecenanormaldecualquiermanera.
•Mantenerfueradelalcancedelosniños.
INSTRUCCIONES DE ENSAMBLAJE
La linterna táctica TAC-300B viene con el clip de bolsillo y el interruptor de tapa
posterioryaconectado.Comotal,laluzsepuedeutilizarenseguidadehabersidosacada
desuembalajecomounalinternatácticaconvencionalunavezquesehayaninstaladolas
bateríasincluidasCR-123.Estaluz sepuede convertirdenuevoaestaconguraciónen
cualquiermomento.
1. Retireelclipdebolsillo(Figura1-B)aojandoyquitandoelbiseldelaluz(Figura1-A).
2. Unavezqueelclipdebolsillosehaeliminado,reinstaleelbiseldelaluz(Figura1-A).
3. Acontinuación,retireelinterruptordelatapaposterior(Figura1-C).NOTA:Mantengael
interruptordelatapaposterioryelclipdebolsilloparausofuturosiestaluzalgunavez
se convierte de nuevo a una linterna táctica convencional.
4. Acontinuación,instalelasdosbateríasincluidasCR-123(Figura2-A).Losterminales
positivosencadabateríadebenestarorientadosenladireccióndelbiseldelaluz.
5. InstaleelInterruptorRemotodePresión(Figura2-B)yapriételoensulugar.
6. Seguidamente pruebe el funcionamiento del Interruptor Remoto de Presión y el
Interruptor Lateral. Consulte la siguiente sección “Functionamiento” para ver cómo
funcionan los interruptores.
7. Determine la ubicación del soporte del riel en el cuerpo de la luz. Mantenga el soporte
alejadodelatapadelinterruptor,delocontrario,cambiarlasbateríasrequeriráquitarlaluz.
8. Unavezquesehadeterminadolaubicaciónadecuadadelrailmountalolargodela
manijadelaluz,aojelostornillosconlallaveAllensuministradaydesliceelsoporteen
elmangodelaluz(Figura3).Aprieteparcialmentelostornillos.
9. CompruebeelajustedelrailmountenlaPicatinnyoWeaverdelcarrildearmalarga.
Almismotiempo, determine laubicacióndeseadadel Interruptor de PresiónRemoto
(Figura 5). NOTA: El interruptor de Presión Remoto puede estar unido a cualquier
supercielimpia, planayseca en elarma larga. Laubicaciónindicada enlagura 5
es sólo una posibilidad. La ubicación real de su arma larga será determinada por la
conguracióndesuarmayporsuspreferencias.
10.Terminedeapretarlostornillos de montaje, alternando entre cada uno una pequeña
cantidadalavezhastaqueelespacioseaigualenamboslados(Figura3).
11. Una vez que se ha determinado la ubicación Rail Mount y el Interruptor de Presión
Remoto,limpieel lugar de suarmaenla que se encuentra elInterruptorde Presión
Remoto,asícomolasupercieinteriordelInterruptordePresiónRemotoutilizandoel
hisopo de alcohol suministrado.
12.Despegueunadelaspartesdetrasdelpapeladhesivodevelcroypresióneloensu
lugarenlaparteposteriordelInterruptordePresiónRemoto(Figura4).
13.FijeelrailmountconlaluzinstaladaenlaPicatinnyoelcarrildelaarmaduradesuarma
y apriete el tornillo de mariposa.
14.Despegueelpapeladhesivodevelcroypresióneloensulugareneláreapreviamente
limpia de su arma larga (Figura 5).
NOTA: El papel autoadhesivo de presión determinará y pondrá un enlace
semipermanentedespués deaproximadamente24horas,así queporfavornomueva ni
quitelastirasdepapelautoadhesivasdepresiónunavezquehansidocolocadas.Además,
no trate de separar las dos secciones de Velcro hasta después de ese momento.
FUNCIONAMIENTO
The Nightstick Tactical Long Gun Light Kit ya está totalmente instalado y listo para el uso.
•El Interruptor Remoto de Presión proporciona operación momentánea de encendido
yapagadodelaluz.Elusodeesteinterruptor,ledaaloperadoruncontrolinstantáneo
sobrecuandolaluzestáencendidaycuandoestáapagada.
•El Interruptor Lateral ofrece operación de encendido y apagado momentáneo
presionandoligeramenteelbotón,oconstantesipresionahastaqueelbotónhagaclic.
•Si la montura del soporte se ha colocado correctamente (ver el paso 7 anterior), el
cambiodelasbateríaspuedellevarseacabosinlaeliminacióndelaluzdelamontura
delsoporte,ydependiendodellugardesuinstalación,puedequeseaposiblecambiarlas
bateríassinnecesidadderetirarlamonturadesuarma.
•Paracambiarlasbaterías, primero separe las dos mitades de la tiradeVelcro entre
sídemodoqueunamitadsemantieneadheridaasuarmaylaotrasemantieneunida
a la parte trasera del Interruptor Remoto de Presión. Seguidamente desenrosque el
InterruptorRemotodePresiónycambielasbaterías(veaelpaso4).
GARANTÍA
GARANTIA LIMITADA DE POR VIDA
BaycoProducts,Inc.garantizaqueesteproductoestálibrededefectosdemanodeobra
ymaterialesdurantelavidadelcompradororiginal.Lagarantíadeporvidalimitadaincluye
losLED,lacarcasayloslentes.Laspilasrecargables,loscargadores,losinterruptores,la
electrónicaylosaccesoriosincluidosestángarantizadosporunperíododedosañosconun
comprobantedecompra.Seexcluyeneldesgasteylosfallosnormales,quesoncausados
poraccidentes,maluso,abuso,instalacióndefectuosaydañosporrayos.
Repararemosoreemplazaremos esteproductosilodeterminamos comodefectuoso.
Esta es la única garantía, expresa o implícita, incluyendo cualquier garantía de
comerciabilidadoidoneidadparaunpropósitoparticular.
Paraobtenerunacopiacompletadelagarantía,visitewww.baycoproducts.com/bayco-
product-support/warranties.Conservesureciboparacomprobarlacompra.
Other Night Stick Flashlight manuals

Night Stick NSP-4650B User manual

Night Stick

Night Stick NSP-4650B User manual

Night Stick NSR-9744XL User manual

Night Stick

Night Stick NSR-9744XL User manual

Night Stick NSR-9614B User manual

Night Stick

Night Stick NSR-9614B User manual

Night Stick NSP-4616B User manual

Night Stick

Night Stick NSP-4616B User manual

Night Stick 2168 User manual

Night Stick

Night Stick 2168 User manual

Night Stick DUAL-LIGHT NSR-9844XL User manual

Night Stick

Night Stick DUAL-LIGHT NSR-9844XL User manual

Night Stick NSR-9944XL User manual

Night Stick

Night Stick NSR-9944XL User manual

Night Stick XPP-5422B User manual

Night Stick

Night Stick XPP-5422B User manual

Night Stick FORTEM NSK-XPP-5466R User manual

Night Stick

Night Stick FORTEM NSK-XPP-5466R User manual

Night Stick TAC-540XL User manual

Night Stick

Night Stick TAC-540XL User manual

Night Stick XPP-5412G User manual

Night Stick

Night Stick XPP-5412G User manual

Night Stick XPP-5420G User manual

Night Stick

Night Stick XPP-5420G User manual

Night Stick NSR-9844XL User manual

Night Stick

Night Stick NSR-9844XL User manual

Night Stick TAC-500 User manual

Night Stick

Night Stick TAC-500 User manual

Night Stick XPP-5418GX User manual

Night Stick

Night Stick XPP-5418GX User manual

Night Stick XPR-5584 User manual

Night Stick

Night Stick XPR-5584 User manual

Night Stick NSR-9924XL User manual

Night Stick

Night Stick NSR-9924XL User manual

Night Stick NSP-9842XL User manual

Night Stick

Night Stick NSP-9842XL User manual

Night Stick TAC-400 User manual

Night Stick

Night Stick TAC-400 User manual

Night Stick TAC-540XL User manual

Night Stick

Night Stick TAC-540XL User manual

Night Stick NSR-2070 User manual

Night Stick

Night Stick NSR-2070 User manual

Night Stick NSR-9850 User manual

Night Stick

Night Stick NSR-9850 User manual

Night Stick TAC-550 User manual

Night Stick

Night Stick TAC-550 User manual

Night Stick NSR-9940XL User manual

Night Stick

Night Stick NSR-9940XL User manual

Popular Flashlight manuals by other brands

StreamLight strion operating instructions

StreamLight

StreamLight strion operating instructions

Black & Decker BRIGHT BAR WLB36B instruction manual

Black & Decker

Black & Decker BRIGHT BAR WLB36B instruction manual

Surefire STILETTO PRO instructions

Surefire

Surefire STILETTO PRO instructions

steamlight LiteBox operating instructions

steamlight

steamlight LiteBox operating instructions

HQ TORCH-L-CAMP03 manual

HQ

HQ TORCH-L-CAMP03 manual

Uwatec Nova 850R user guide

Uwatec

Uwatec Nova 850R user guide

Larson Electronics ATX-20-SA user manual

Larson Electronics

Larson Electronics ATX-20-SA user manual

Light-For-Me TEC user manual

Light-For-Me

Light-For-Me TEC user manual

Makita DML186 instruction manual

Makita

Makita DML186 instruction manual

NightSearcher NSEXPLORER800 user manual

NightSearcher

NightSearcher NSEXPLORER800 user manual

Makita ML100W instruction manual

Makita

Makita ML100W instruction manual

Reference TX40 Operation manual

Reference

Reference TX40 Operation manual

Coleman EXPONENT user manual

Coleman

Coleman EXPONENT user manual

Sealey LED3601 Series instructions

Sealey

Sealey LED3601 Series instructions

Strauss LED torch FL4 Instructions and information

Strauss

Strauss LED torch FL4 Instructions and information

Thermal Dynamics 1Torch SL60 Hand Torch Installation and operation instructions

Thermal Dynamics

Thermal Dynamics 1Torch SL60 Hand Torch Installation and operation instructions

Master Appliance GT-70 instructions

Master Appliance

Master Appliance GT-70 instructions

Xtralite NiteSafe Slim Sensor XL20701 instruction manual

Xtralite

Xtralite NiteSafe Slim Sensor XL20701 instruction manual

manuals.online logo
manuals.online logoBrands
  • About & Mission
  • Contact us
  • Privacy Policy
  • Terms and Conditions

Copyright 2025 Manuals.Online. All Rights Reserved.