manuals.online logo
Brands
  1. Home
  2. •
  3. Brands
  4. •
  5. Nikon
  6. •
  7. Digital Camera
  8. •
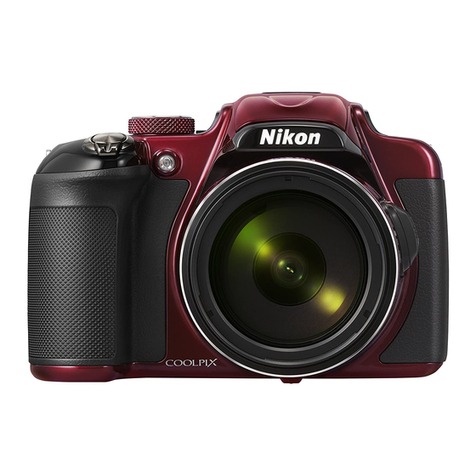
  9. Nikon COOLPIX 995 Reference guide

Nikon COOLPIX 995 Reference guide

Quick Ceph®Systems
Doc ID# 1028Nikon_995_help - Revision 3-26-02
Nikon Coolpix 995 Help
http://www quickceph com/docs/1028Nikon_995_help pdf Page 1
The camera settings shown below offer a starting point for taking pictures with the Nikon Coolpix 995 digital camera
We encourage you to familiarize yourself with the settings and usage of this camera
Nikon also includes a help manual on the “Reference Manuals CD-ROM”, packaged with each camera
Turn the camera on by set-
ting it to the setting
located on top of the camera,
as shown to the right.
FINE mode with Anytime
Flash enabled.
Adjust image quality:
Click on the button on
the back of the camera until
the FINE option is displayed.
A
Recommended Settings for Extraoral Photographs
A
e suggest using either a wall mounted lightbox with a built-in slave flash or a bare slave flash
to eliminate shadows on the facial photos. If you are using a bare slave flash, we have found that
it works best when placed precisely behind the patient’s head, facing toward a white background.
You may need to adjust the brightness on the background lighting that you use in order to generate
accurate soft tissue hues. Overhead fluorescent lighting may also affect the color of the images.
You can replace the fluorescent bulbs with halogen lighting to produce better color images.
Professional photographers spend time setting up their studios for just the right picture. e also
have to invest time in setting up our offices for the right lighting for digital images.
FINE
Yo r Control Panel
sho ld look like this.
Adjust flash settings:
Make sure to open the flash. Then, click on the
flash button on the back of the camera until
the flash displays only the symbol. This enables
the Anytime Flash mode.
General settings:
To take intraoral images, the camera must be switched to the Macro Close-up
mode. To activate this mode, press the button until the icon appears in
the Control Panel and the LCD monitor. The Anytime lash mode should be
turned on as well.
23
2
1
4
Tips for Taking Extraoral Images
hen you are taking the lateral head image, make sure the patient’s head is level, with no tilting or
canting. e suggest that you place a mirror in front of the patient with a vertical line and have them
align themselves to it. This will make it easier to align the photos to the x-ray tracings. You should
capture the photo with the camera lens aligned with the patient’s Frankfurt Horizontal plane to
ensure the most accuracy.
For intraoral photographs, we recommend switching to the Manual mode on the camera. This allows you to take higher
quality pictures than in the auto mode, and allows for greater control over the exposure and depth of field of the images. The
manual settings only need to be set once, as the camera “memorizes” these settings.
To access the manual set-
tings, turn the camera on by
setting it to the setting
located on top of the camera.
M
1
Adjusting ISO film speed:
The ISO settings define how quickly the camera
takes the picture. A higher ISO number means the
camera will take the picture quickly, so there’s less
chance of blurry pictures. This is especially useful
for intraoral pictures.
To set the ISO settings, hold down the flash button
on the back of the camera and rotate the “Command
Dial” located at the top of the camera as shown:
The letters ISO should appear in the Control Panel.
You should stop rotating the dial when ISO 400
appears.
3Adjusting Aperture Priority:
For a better depth of field, you should adjust the Aperture settings. Setting the cam-
era on “Aperture Priority” allows you to adjust the camera so you can take pictures
where the foreground and the background are both sharp. This is crucial for intra-
oral photographs.
To enable “Aperture Priority”, hold down the “Mode” button and rotate the
“Command Dial” located on the top of the camera until the icon appears:
Next, rotate the “Command Dial” all the way to the right until the you reach an F-
Stop of about 9.0, which appears in the control panel screen at the top of the cam-
era. You will need to use the Zoom buttons to fine tune the value. The
macro icon will then appear yellow on the LCD monitor.
4
Recommended Settings for Intraoral Photographs
B
Page 2
Quick Ceph®Systems
Doc ID# 1028Nikon_995_help - Revision 3-26-02
Nikon Coolpix 995 Help
http://www quickceph com/docs/1028Nikon_995_help pdf
Please Note: We only recommend this camera We do not manufacture it If you have technical difficulties,
please contact Nikon Support at 1-800-645-6689
Adjusting the Metering:
Metering allows the camera to determine how much light is necessary for illuminating a certain pic-
ture. You should use Center-Weighted Metering for intraoral pictures, as it allows you to preserve
background detail while providing the right amount of light output for the teeth. To select this, click
on the Menu button on the back of the camera and use the Selector button to navigate to the Metering
option, as shown below. hen Center- eighted is highlighted, push on the right arrow of the
Selector button to select.
Adjust the Speedlight settings:
To eliminate overexposure for intraoral pictures, you can adjust the flash output of Nikon’s
Speedlight. To do this, click on the Menu button on the back of the camera. Then, click on the left
arrow of the Selector Button. Scroll down to the “S” option and click to the right. The screen will
show “Setup 1” at the top. Scroll down past the last option on this page to get to “Speedlight Opt.”
Click to the right and select “Variable Power”.
e recommend using a setting of -0.7 for frontal and buccal intraorals. However, you may need to
adjust this value to fit the lighting in your office.
6
Selector Button
After all of the settings
have been selected, the
Control Panel at the top of
the camera should resem-
ble the image shown
below
Manual Mode with:
Macro setting
Anytime Flash
ISO 400 setting
Aperture Priority
Center Weighted Metering
Reduced Flash output
Tips for Taking Intraoral Images
e recommend taking the frontal and buccal intraoral pictures about 6 inches from the patient’s
mouth. This allows the flash to meter correctly without overexposing the picture. ith the camera’s
high resolution, you will not lose clarity when cropping the images. hen you are taking the frontal
and buccal intraoral pictures, make sure to take the picture at a 90º angle to the teeth. Also, try to align
the horizontal plane of the camera with the patient’s occlusal plane. This will save time, as you will
not have to rotate the image inside Quick Ceph later.
For the occlusal pictures, we recommend taking the images approximately 10 inches away from the
patient’s mouth. Due to the height of the flash, taking the image closer would result in the patient’s
lips obscuring the flash. Also, pictures taken too closely may not fit within the cropping windows.
Occlusal pictures tend to be dark compared to the frontal and buccal pictures. e rec-
ommend increasing the aperture of these pictures by one or two F-stops by rotating the
Command Dial slightly to the left. You can also set the camera to the A-mode and turn
on the Macro feature. For upper occlusal images taken with a mirror, we recommend
flipping the camera upside down to eliminate shadowing.
5
TIP
If the occlusal pic-
tures appear too
dark, you should set
the camera to the A-
mode and turn on
the Macro This
adds more light to
the occlusal pictures
Command Dial
Adj sting Images While in QCIPro and QC2000
C
Images taken while the camera is flipped upside down can be rotated easily in QC2000 and QCIPro.
For information on image editing, please see Chapter 2 in the Quick Ceph Manual (downloadable
from www.quickceph.com).
TIP
We recommend pur-
chasing an additional
Nikon EN-EL1
rechargeable Li-ion
battery The pro-
grammed settings
will be lost if the bat-
teries are taken out
of the camera for
more than 2 hours

Other manuals for COOLPIX 995

2

Other Nikon Digital Camera manuals

Nikon D5300 User manual

Nikon

Nikon D5300 User manual

Nikon EM User manual

Nikon

Nikon EM User manual

Nikon D90 - Digital Camera SLR User manual

Nikon

Nikon D90 - Digital Camera SLR User manual

Nikon CoolPix P6000 User manual

Nikon

Nikon CoolPix P6000 User manual

Nikon D50 User manual

Nikon

Nikon D50 User manual

Nikon D7100 User manual

Nikon

Nikon D7100 User manual

Nikon COOLPIX S4200 User manual

Nikon

Nikon COOLPIX S4200 User manual

Nikon COOLPIX 5700 User manual

Nikon

Nikon COOLPIX 5700 User manual

Nikon coolpix A300 User manual

Nikon

Nikon coolpix A300 User manual

Nikon D5100 User manual

Nikon

Nikon D5100 User manual

Nikon 1 J1 User manual

Nikon

Nikon 1 J1 User manual

Nikon COOLPIX L2 Guide User manual

Nikon

Nikon COOLPIX L2 Guide User manual

Nikon COOLPIX AW120 User manual

Nikon

Nikon COOLPIX AW120 User manual

Nikon N50 User manual

Nikon

Nikon N50 User manual

Nikon D60 User manual

Nikon

Nikon D60 User manual

Nikon CoolPix S3 User manual

Nikon

Nikon CoolPix S3 User manual

Nikon F 100 User manual

Nikon

Nikon F 100 User manual

Nikon COOLPIX S6500 User manual

Nikon

Nikon COOLPIX S6500 User manual

Nikon CoolPix P500 User manual

Nikon

Nikon CoolPix P500 User manual

Nikon COOLPIX P310 User manual

Nikon

Nikon COOLPIX P310 User manual

Nikon Z 7 User manual

Nikon

Nikon Z 7 User manual

Nikon COOLPIX P520 User manual

Nikon

Nikon COOLPIX P520 User manual

Nikon COOLPIX S5200 User manual

Nikon

Nikon COOLPIX S5200 User manual

Nikon COOLPIX P510 User manual

Nikon

Nikon COOLPIX P510 User manual

Popular Digital Camera manuals by other brands

Cobra Digital DCA1030 Specifications

Cobra Digital

Cobra Digital DCA1030 Specifications

Panasonic Lumix DMC-FX700 operating instructions

Panasonic

Panasonic Lumix DMC-FX700 operating instructions

Canon DIGITAL IXUS 430 Connection guide

Canon

Canon DIGITAL IXUS 430 Connection guide

Olympus Camedia C-450ZOOM Basic Manual

Olympus

Olympus Camedia C-450ZOOM Basic Manual

Sony Cyber-shot DSC-TX10 instruction manual

Sony

Sony Cyber-shot DSC-TX10 instruction manual

Mobius Nr32 808 instruction manual

Mobius

Mobius Nr32 808 instruction manual

Samsung p800 quick start guide

Samsung

Samsung p800 quick start guide

Samsung SL600 user manual

Samsung

Samsung SL600 user manual

Pentax Optio MX4 operating manual

Pentax

Pentax Optio MX4 operating manual

Panasonic AW-UE160WP operating instructions

Panasonic

Panasonic AW-UE160WP operating instructions

Lanoptik MC500W-G2 user manual

Lanoptik

Lanoptik MC500W-G2 user manual

Sony DSC-RX100M5 How to use

Sony

Sony DSC-RX100M5 How to use

Toshiba teli CSB1100F Operation manual

Toshiba teli

Toshiba teli CSB1100F Operation manual

Garmin BC 20 installation instructions

Garmin

Garmin BC 20 installation instructions

Photon Focus MV1-D1280-L01-3D05 Series user manual

Photon Focus

Photon Focus MV1-D1280-L01-3D05 Series user manual

Samsung NV20 - Digital Camera - Compact user manual

Samsung

Samsung NV20 - Digital Camera - Compact user manual

BenQ DC C640 user manual

BenQ

BenQ DC C640 user manual

Mini Gadgets BBSStaketimer user manual

Mini Gadgets

Mini Gadgets BBSStaketimer user manual

manuals.online logo
manuals.online logoBrands
  • About & Mission
  • Contact us
  • Privacy Policy
  • Terms and Conditions

Copyright 2025 Manuals.Online. All Rights Reserved.