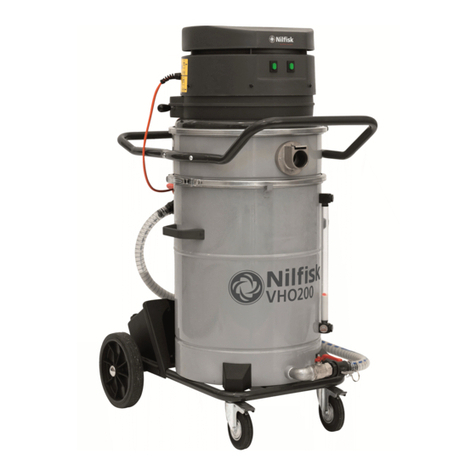
Nilfisk cfm VHO200 User manual

VHO200
C403 US-F-E
01/2014
INSTRUCTIONS MANUAL
MANUEL D’INSTRUCTIONS
MANUAL DE INSTRUCCIONES
US
F
E


VHO200
101/2014
US
Table of contents
Instructions for use.........................................................................................................2
Operator’s safety............................................................................................................................. 2
General information for using the vacuum cleaner.......................................................................... 2
Proper uses ..................................................................................................................................... 2
Improper Use................................................................................................................................... 2
In case of accident or breakdown.................................................................................................... 3
Vacuum cleaner description...........................................................................................4
Labels.............................................................................................................................................. 4
Vacuuming of liquids .................................................................................................................................. 4
Vacuuming of liquids and shavings ............................................................................................................ 4
Optional kits..................................................................................................................................... 4
Accessories ..................................................................................................................................... 4
Packing and unpacking ................................................................................................................... 4
Setting to work - connection to the power supply............................................................................ 5
Extensions....................................................................................................................................... 5
Vacuuming of liquids ....................................................................................................................... 6
Maintenance and repairs................................................................................................................. 6
Technical data ................................................................................................................................. 7
Dimensions...................................................................................................................................... 7
Controls, indicators and connections .............................................................................................. 8
Inspections prior to starting ............................................................................................................. 8
Starting ............................................................................................................................................ 8
Starting the vacuum cleaner ...................................................................................................................... 8
Stopping the vacuum cleaner..................................................................................................................... 8
Liquid vacuum stopping (g. 1) .................................................................................................................. 8
Emptying the containers.................................................................................................................. 8
Emptying the liquid container ..................................................................................................................... 8
Emptying the liquid container with the diverter valve ................................................................................. 8
Emptying the chip basket ........................................................................................................................... 9
Container Removal .................................................................................................................................... 9
At the end of a cleaning session ..................................................................................................... 9
Maintenance, cleaning and decontamination .................................................................................. 9
Cleaning the containers................................................................................................................. 10
Chip basket .............................................................................................................................................. 10
Liquid container........................................................................................................................................ 10
Cleaning or replacement of the safety lters................................................................................. 10
Using the chip basket lter (optional) ............................................................................................ 10
Tightness inspection...................................................................................................................... 10
Machine disposal............................................................................................................................11
Wiring diagrams .............................................................................................................................11
Wiring diagram list - g. 16....................................................................................................................... 11
Troubleshooting ............................................................................................................12

VHO200
01/2014 2
US
Instructions for use
Read the operating instructions and comply with the important safety recommendations identied by the word WARNING!
Operator’s safety
WARNING!
Before starting the vacuum cleaner, it is
absolutely essential to read these operating
instructions and to keep them ready at hand
for consultation.
The vacuum cleaner can only be used by people who
are familiar with the way it works and who have been
explicitly authorized and trained for the purpose.
Before using the device, the operators must be
informed, instructed and trained on how to work it and
for which substances its usage is permitted including
the safe method for removing and disposing of the
vacuumed material.
WARNING!
The use of the device by people (including children)
with limited physical and mental capacities or lacking
in experience and knowledge is strictly forbidden,
unless they are supervised by a person who is
experienced in the use and safe handling of the
machine.
Children must be supervised to make sure they will
not play with the machine.
General information for using the vacuum
cleaner
Use the vacuum cleaner in accordance with the laws in
force in the country where it is used. Besides the operating
instructions and the laws in force in the country where the
device is used, the technical regulations for ensuring safe
and correct operation must also be observed (Legislation
concerning environmental and labor safety, i.e. European
Union Directive 89/391/EC and successive Directives). Do
not perform any operation that could jeopardize the safety of
people, property and the environment. Comply with the safety
indications and prescriptions in this instruction manual.
Proper uses
This vacuum cleaner is suitable to work into workshops where
metallic shaving machining is done.
It sucks and separates machining shavings from liquids
(cutting uid, emulsions, coolants, etc.) collecting them
quickly.
Any other use is considered improper.
The vacuum cleaner has been designed to be used by one
operator at a time.
■Always leave enough room around the device to reach
the controls easily.
The device has been designed to be used by one operator
at a time. This vacuum cleaner consists of an automated
vacuum unit, with a lter upstream and a container for
collecting the vacuumed material.
Improper Use
WARNING!
The following use of the device is strictly forbidden:
■Outdoors in case of atmospheric precipitation.
■When not used on level horizontal surfaces.
■When the ltering unit is not installed.
■When the vacuum inlet and/or hose are turned to
face parts of the human body.
■Use without the guards, protective covers and
safety systems installed by the manufacturer.
■When the cooling vents are partially or totally
clogged.
■When the vacuum cleaner is covered with plastic or
fabric sheets.
■When the air outlet is partially or totally closed.
■When used in narrow areas where there is no fresh
air.
■Vacuuming the following materials:
1 Burning materials (embers, hot ashes, lit
cigarettes, etc.).
2 Open ames.
3 Combustible gas.
4 Flammable liquids, aggressive fuels (gasoline,
solvents, acids, alkaline solutions, etc.).
5 Explosive dust/substances and/or ones liable
to ignite in a spontaneous way (such as
magnesium or aluminum dusts, etc.).
Note: Fraudulent use is not permitted.

VHO200
301/2014
US
WARNING!
Turn off the vacuum cleaner, unplug it and ask for
asisstance from qualied personnel in the event of the
following:
■lter breakage;
■re outbreak;
■short-circuit;
■motor failure;
■electric shock
[ NOTE ]
Check the place of work and substances tolerated.
WARNING!
The vacuum cleaners must not be used or stored
outdoors in damp places.
WARNING!
If foam or liquid spills from the vacuum cleaner, switch
it off immediately and check for the cause.
In case of accident or breakdown
In case of accident or vacuum cleaner breakdown, disconnect
the equipment from the power supply.
In case the user comes into contact with the vacuumed
product, check the cautions shown on the safety data sheet of
the product, which must be made available from the employer.

VHO200
01/2014 4
US
Vacuum cleaner description
Labels
Figure 1
1 Identication plate:
Code of the model, technical specications, serial
number, CE marking, year of manufacture
2 Liquid container
3 Controls (switches)
4 Inlet
5 Vacuum/blower units
6 Liquid container clamp
7 Diverter valve control
8 Liquid level indicator tube
9 Liquid discharge valve
10 Safety lter
11 Float for stopping liquids
Vacuuming of liquids
The machine vacuums the liquids and deposits them into the
container (2).
Vacuuming of liquids and shavings
When the machine vacuums the material (shavings and
liquids) which was produced during the machining process,
the solid part is kept in the chip basket, whereas the liquid part
ows into the liquid container underneath (2).
Before turning on the vacuum cleaner, t the vacuum hose
into the inlet (4) and then t the required tool on to the other
end of the hose (refer to the manufacturer’s accessory catalog
or Service Center).
The oat (11) stops the vacuuming operation (the vacuuming
units remain activated) when the liquid container (2) is full; it
is then necessary to turn off the vacuum cleaner and to empty
the liquid container (2).
Optional kits
Various optional kits are available for converting the vacuum
cleaner:
■Liquid collection kit
For collecting uid only
■ Chip basket lter
It collects ner shavings in the chip basket.
On request, the vacuum cleaner can be supplied with optional
kits already installed. However, they can also be installed at a
later date.
Please contact the manufacturer’s sales network for further
details.
Instructions for installing the options are included in the
conversion kit.
WARNING!
Use only genuine options kits supplied and authorized
by the manufacturer.
Accessories
Various accessories are available; refer to the manufacturer’s
accessory catalog.
WARNING!
Use only genuine accessories supplied and authorized
by the manufacturer.
Packing and unpacking
Dispose of the packing materials in compliance with the laws
in force.
Figure 2
Model VHO200
A in. (mm) 27.5 (700)
B in. (mm) 47.2 (1200)
C in. (mm) 59 (1500)
Weight lbs (kg) 165.3 (75)

VHO200
501/2014
US
Setting to work - connection to the power
supply
WARNING!
■Make sure there is no evident sign of damage to
the vacuum cleaner before starting work.
■Before plugging the vacuum cleaner into the
electrical mains, make sure the voltage rating
indicated on the data plate corresponds to that of
the electrical mains.
■Plug the vacuum cleaner into a socket with a
correctly installed ground contact/connection.
Make sure that the vacuum cleaner is turned off.
■The plugs and connectors of the power supply
cords must be protected against splashes of water.
■Check that for proper connection to the electrical
mains.
■Use the vacuum cleaners only when the cord
that connects to the electricity mains is in good
condition (damaged cords could lead to electric
shock).
■Regularly check there are no signs of damage,
excessive wear, cracks or aging on the electric
cord.
WARNING!
When the device is operating, do not:
■Crush, pull, damage or tread on the cord that
connects to the electrical mains.
■Only disconnect the cord from the electrical mains
by removing the plug (do not pull the cord).
■Only replace the electric power cord with one of
the same type as the original: SJT the same rule
applies if an extension is used.
■The cord must be replaced by the manufacturer’s
Service Center staff or by equivalent qualied
personnel.
Extensions
If an extension is used, make sure it is t for the power input
and protection degree of the vacuum cleaner.
Minimum section of extension cord:
Maximum length = 20 m
Cord = 14/3 SJT or equivalent for 1-phase/120V
WARNING!
Sockets, plugs, connectors and installation of the
extension cordgrips must maintain the IP protection
degree of the vacuum cleaner, as indicated on the data
plate.
WARNING!
The vacuum cleaner’s power socket must be protected
by a differential circuit-breaker with surge current
limitation that shuts off the power supply when the
current discharged to the ground exceeds 30 mA for
30 msec. or an equivalent protection circuit.
WARNING!
Never spray water on the vacuum cleaner: this could
be dangerous for persons and could short circuit the
power supply.

VHO200
01/2014 6
US
Vacuuming of liquids
WARNING!
Comply with the safety regulations governing the
materials for which the vacuum cleaner is used.
WARNING!
■Before vacuuming, check that the oat is present.
■If foam forms, turn off the vacuum cleaner
immediately and empty the container.
■Warning: switch off the vacuum cleaner
immediately if foam or liquid leaks out.
■Warning: the dirty liquid collected by the vacuum
cleaner must be considered conductive.
WARNING!
Do not use the vacuum cleaner without the oat!
If it’s used without the oat, the vacuum cleaner may
be seriously damaged.
Maintenance and repairs
WARNING!
Disconnect the vacuum cleaner from its power
source before cleaning, servicing, replacing parts or
converting it to obtain another version/variant. The
plug must be removed from the socket.
■Carry out only the maintenance operations
described in this manual.
■Use only original spare parts.
■Do not modify the vacuum cleaner in any way.
Failure to comply with these instructions could
jeopardize your safety. Moreover, such action would
immediately void the EC declaration of conformity
issued with the device.
WARNING!
To carry out maintenance operations which are not
described in this manual contact the manufacturer’s
Service Center or our sales network.

VHO200
701/2014
US
Technical data
Parameter Units VHO200
Voltage/Frequency V/Hz 120/60
Power rating HP (kW) 2.14 (1.6)
Noise level (Lpf) (EN60335-2-69) dB(A) 70
Protection IP 44
Motor insulation class Class l
Container capacity with plate gal. (L) 19.8 (75)
Container capacity with basket gal. (L) 13.6 (51.5)
Basket capacity gal. (L) 5.8 (22)
Inlet (diameter) mm 50
Maximum air ow rate (without hose and reductions) CFM (L/min) 150 (4250)
Maximum air ow rate (with hose, length: 3m, diameter: 50mm) CFM (L/min) 114 (3230)
Max vacuum (controlled) in (mm) H2O 80.4 (2042)
Dimensions
Figure 3
Model VHO200
A in. (mm) 22.8 (580)
B in. (mm) 34.7 (880)
C in. (mm) 48.4 (1230)
Weight lbs (kg) 132 (60)
[ NOTE ]
■Storage conditions:
Temperature: +14°F ÷ +104°F (-10°C ÷ +40°C)
Humidity: ≤ 85%
■Operating conditions:
Maximum altitude: 2,624 ft. (800 m)
[Up to 6,561 ft. (2,000 m) with reduced performances]
Temperature: +14°F ÷ +104°F (-10°C ÷ +40°C)
Humidity: ≤ 85%

VHO200
01/2014 8
US
Controls, indicators and connections
Figure 4
1 ON/OFF switches of the vacuum units
2 Diverter valve control
Inspections prior to starting
Figure 5
1 Inlet
Prior to starting, check that:
■ All latches are tightly locked;
■ The vacuum hose and tools have been correctly tted
into the inlet (1);
■The chip basket is installed, if applicable.
■The liquid container is not full.
■ The oat inside the liquid container is present and
correctly installed.
■The diverter valve is turned to vacuuming position (B-
gure 7).
■The discharge valve (3 - gure 7) is closed.
Starting
Figure 6
1 Caster brakes
Lock the caster brakes (1) before starting the vacuum cleaner.
Starting the vacuum cleaner
■Push both switches (1 - gure 4) to start the vacuum
cleaner. The related warning lights turn on.
Stopping the vacuum cleaner
■Push the switches (1 - gure 4) once again to stop the
vacuum cleaner.
Liquid vacuum stopping (g. 1)
■ When the tank is full, the oat (11) stops the vacuuming
operation; the vacuum units (5) remain activated.
■Switch off the vacuum units by pushing the switches (3).
Emptying the containers
Figure 7
1 ON/OFF switches of the vacuum units
2 Diverter valve control
3 Liquid discharge valve
Emptying the liquid container
■Open the discharge valve (3) after putting a container in
the position to catch the liquid.
■After emptying it, close the discharge valve (3).
Emptying the liquid container with the diverter valve
■Open the discharge valve (3) after putting a container or
the drain hose (optional) in the position where the liquid
will be discharged.
Note: Drain the liquid left inside the suction hose by
gravity.
■Place the diverter valve (2), in the Aposition, in order to
invert the vacuum ow.
■Push both switches (1) to start draining, holding the drain
hose (4) rmly to prevent liquid splashes and leaks.
■At the end of the emptying operation push both switches
(1) to stop the vacuum units.
■To start the vacuum operation, close the discharge valve
(3), place the diverter valve (2) in the Bposition, then
push both switches (1).
WARNING!
Do not operate on the diverter valve “2” when the
vacuum units are activated.
If the ow is inverted when the vacuum units are
activated, the machine may be damaged.

VHO200
901/2014
US
Emptying the chip basket
Figure 8
1 Chip basket
2 Clamp
WARNING!
Before proceeding with these operations, turn off the
machine and remove the plug from the power socket.
Lift the container with a suitable lifting device.
■Open the container clamp (2) and lift the vacuum cleaner
motor head.
■Engage the motor head handle to the safety hook (3-
gure 9) by paying attention to the machine stability.
■Ensure that the motor head is fully lifted and locked into
its position with the stop hook (3 - gure 9).
■Remove the chip basket (1).
■Empty the container and clean it (see “Cleaning the
containers” paragraph).
■Place the chip basket back in position, making sure it is
correctly positioned.
Container Removal
Figure 9
■Open the container clamp(1) and lift the vacuum cleaner
motor head (2).
■Engage the motor head handle to the safety hook (3) by
paying attention to the machine stability.
■Ensure that the motor head is fully lifted and locked into
its position with the stop hook (3 - gure 9).
■ Remove the oat holding plate or, if equipped, the chip
basket.
■Remove the container using the handles (4).
■Reinstall the container properly by engaging the dowel
pins (5).
■Disengage the safety hook (4) to release and reposition
the motor head.
At the end of a cleaning session
■Turn off the vacuum cleaner and remove the plug from
the socket.
■Wind the electric connection cord.
■Empty the container as described in the “Emptying the
containers” paragraph.
■Clean the vacuum cleaner as described in the
“Maintenance, cleaning and decontamination” paragraph.
■Store the vacuum cleaner in a dry place, out of reach of
unauthorized people.
Maintenance, cleaning and
decontamination
WARNING!
The precautions described below must be taken
during all the maintenance operations, including
cleaning and replacing of the safety lters.
■To allow the user to carry out the maintenance
operations, the vacuum cleaner must be
disassembled, cleaned and overhauled as far as
is reasonably possible, without causing hazards
for the maintenance staff or other people. The
suitable precautions include decontamination
before disassembling the device, adequate
ltered ventilation of the exhaust air from the
room in which it is disassembled, cleaning of the
maintenance area and suitable personal protection.
Compartments that are not dust-tight must be opened
with suitable tools (screwdrivers, wrenches, etc.) and
thoroughly cleaned.
■Carry out a technical inspection at least once a
year, for example: check the lters to nd out
whether the air-tightness of the vacuum cleaner
has been impaired in any way and make sure that
the electric control panel operates correctly. This
inspection must be carried out by the manufacturer
or by a qualied technician.
WARNING!
Use only genuine spare parts supplied and authorized
by the manufacturer.

VHO200
01/2014 10
US
Cleaning the containers
WARNING!
Before proceeding with these operations, turn off the
vacuum cleaner and remove the plug from the power
socket.
Chip basket
■Clean the container after each emptying (see “Emptying
the chip basket” paragraph).
■ Check that the holes are free of dirt; clean them if
necessary.
Liquid container
Figure 10
1 Float support
2 Chip basket
3 Container clamp
4 Liquid discharge valve
■Empty the liquid container (see “Emptying the containers”
paragraph).
■Open the liquid container clamp (3).
■Lift the motor head.
■ Remove the oat and its support (1) or the chip basket
(2).
■Wash the container with water to remove deposits.
■Open the discharge valve (4) to empty the container.
■After emptying it, close the discharge valve (4).
■ Place the oat and its support or the chip basket (if
applicable) back into position.
Note: Check that the oat holder is properly aligned.
■Lock the motor head by using the liquid container clamp
(3).
WARNING!
Close the lever on the clamp with care to avoid
trapping your hands between the lever and the
band. Use gloves that provide ANSI/ISEA level “2”
protection.
Cleaning or replacement of the safety
lters
Figure 11
1 Filter
2 Filter box
■Lift the motor head.
■ Remove the lter box (2) by unscrewing the three knobs.
■ Remove the lter (1) and clean it with water or replace it
if necessary.
■ Reinstall the lter (1) making sure it is correctly
positioned.
■ Install the lter box and secure it by replacing the three
knobs.
■Lower the motor head and secure it to the container with
the clamp.
Using the chip basket lter (optional)
Figure 12
1 Chip basket lter
2 Basket kit
When vacuuming sludge (slush or other residual materials
which is not trapped by the basket kit), it is necessary to use
the chip basket lter.
Install the lter (1) inside the basket (2) by matching the
orientation shown.
[ NOTE ]
Periodically check the lter condition and, if necessary,
replace it.
Tightness inspection
Figure 13
1 Vacuum hose
2 Liquid level indicator tube
■Hoses check
Make sure that the suction connecting hose (1) and the
level hose (2) are in a good condition and correctly xed.
If the hose is damaged, broken or can not be properly
connected to the unions, it must be replaced.
Figure 14
1 Gasket
2 Liquid container
3 Motor head
■Motor head tightness check
Replace the seal (1) between the container (2) and the
motor head (3) if it is torn, cut, etc.

VHO200
11 01/2014
US
Machine disposal
Dispose of the device in compliance with the laws in force.
Proper disposal (electric and electronic waste).
(Applicable in the European Union and in countries
providing a separate collection system)
The above symbol (gure 15), which is present on the product
or in its documentation, indicates that the product cannot be
disposed of together with other domestic waste at the end of
its life cycle.
To prevent damage to the environment or health caused by
improper waste disposal, please separate this product from
other waste and recycle it responsibly in order to support the
sustainable reutilisation of material resources.
Domestic users should contact the retailer or the local ofce
providing information on separate collection and recycling of
this product.
Companies should contact the supplier and check the
purchase contract terms and conditions.
This product can not be disposed of together with other
commercial waste.
Wiring diagrams
Wiring diagram list - g. 16
Reference
number Part
1Armature
2Coil
3Terminal strip
4Condenser
5Bipolar switch
6Thermal protection
7Grounding cable
Internal wires 0.82 mm2
Cables 3 x 1.5 mm2

VHO200
01/2014 12
US
Troubleshooting
Problem Cause Remedy
The machine suddenly stops
vacuuming (the motors are running)
Activation of the level monitoring
system.
Emptying of the liquid container.
The vacuum cleaner suddenly stops. Intervention of thermal protection
devices.
Turn the switches to OFF, wait until the
motors cool down, then start it again.
The vacuum cleaner performance has
decreased.
Clogged vacuum hose. Check the vacuum hose and clean it.
Electrostatic current on the vacuum
cleaner.
Non existent or inefcient grounding. Check all grounding, particularly the union to
the inlet.
The vacuum cleaner is not efcient
after emptying the container.
The vacuum hose is not free from
debris.
Make sure that the oat does not close the
hose and/or the hose is not clogged.
No expulsion of liquids The exhaust valves do not open Check the proper position of the valve drives
Loss of liquid from the vacuum hose The bafe plate does not close Check the clapet operation

VHO200
101/2014
F
Table des matières
Mode d’emploi .................................................................................................................2
Sécurité de l’opérateur .................................................................................................................... 2
Informations générales sur l’utilisation de l’aspirateur..................................................................... 2
Utilisations prévues ......................................................................................................................... 2
Utilisations indues ........................................................................................................................... 2
En cas d’accident ou de panne ....................................................................................................... 3
Description de l’aspirateur .............................................................................................4
Plaques ........................................................................................................................................... 4
Aspiration de liquides ................................................................................................................................. 4
Aspiration de liquides et copeaux .............................................................................................................. 4
Options de transformation ............................................................................................................... 4
Accessoires ..................................................................................................................................... 4
Emballage et déballage................................................................................................................... 4
Mise en service - raccordement au réseau d’alimentation électrique ............................................. 5
Rallonges ........................................................................................................................................ 5
Aspiration de liquides ...................................................................................................................... 6
Entretien et réparation..................................................................................................................... 6
Données techniques........................................................................................................................ 7
Dimensions...................................................................................................................................... 7
Commandes, indicateurs et connexions ......................................................................................... 8
Contrôles avant la mise en marche................................................................................................. 8
Démarrage ...................................................................................................................................... 8
Démarrage de l’aspirateur.......................................................................................................................... 8
Arrêt de l’aspirateur.................................................................................................................................... 8
Arrêt de l’aspiration des liquides (g. 1)..................................................................................................... 8
Vidange des cuves .......................................................................................................................... 8
Vidange de la cuve de récupération liquides ............................................................................................. 8
Vidange de la cuve de récupération liquides avec la vanne déviatrice...................................................... 8
Vidange de la cuve à copeaux ................................................................................................................... 9
Dépose de la cuve ..................................................................................................................................... 9
En n de séance de nettoyage........................................................................................................ 9
Entretien, nettoyage et décontamination......................................................................................... 9
Nettoyage des cuves..................................................................................................................... 10
Cuve à copeaux ...................................................................................................................................... 10
Cuve de récupération liquides.................................................................................................................. 10
Nettoyage ou remplacement des ltres de sécurité ...................................................................... 10
Emploi du ltre de la cuve à copeaux (optionnel).......................................................................... 10
Contrôle des étanchéités............................................................................................................... 10
Mise au rebut..................................................................................................................................11
Schémas électriques ......................................................................................................................11
Légende schéma électrique - g. 16........................................................................................................ 11
Recherche des pannes .................................................................................................12

VHO200
01/2014 2
F
Mode d’emploi
Lire les instructions du mode d’emploi et respecter les avertissements importants pour la sécurité indiqués par la mention
ATTENTION !
Sécurité de l’opérateur
ATTENTION !
Avant de mettre l’aspirateur en service, lire
absolument les instructions d’utilisation et
les garder à portée de main pour pouvoir les
consulter en cas de besoin.
L’utilisation de l’aspirateur est réservée exclusivement
au personnel expérimenté, formé et expressément
chargé du fonctionnement.
Avant l’emploi, les opérateurs doivent être instruits et
formés à l’utilisation de l’appareil et des substances
pour lesquelles il est prévu, y compris la méthode sûre
d’évacuation et d’élimination des déchets aspirés.
ATTENTION !
L’emploi de l’appareil est formellement interdit aux
personnes (y compris des enfants) handicapées,
physiquement ou mentalement, ou manquant
d’expérience et de connaissances, si ce n’est sous la
surveillance constante d’une personne expérimentée
dans l’emploi et la manipulation sûrs de la machine.
Les enfants doivent être surveillés an qu’ils ne jouent
pas avec l’aspirateur.
Informations générales sur l’utilisation de
l’aspirateur
L’utilisation de l’aspirateur est soumise aux normes
internationales en vigueur. En plus des instructions du
mode d’emploi et des règlements en vigueur dans le Pays
où est utilisé l’appareil, pour la prévention des accidents
il est nécessaire d’observer les règles techniques pour un
travail sûr et correct (Législation relative à la sécurité sur le
lieu de travail, Directive de l’Union européenne n° 89 / 391
/ CE et suivantes). Éviter tout travail pouvant porter atteinte
à la sécurité des gens, des choses et de l’environnement.
Observer les informations et les prescriptions de sécurité
contenues dans ce mode d’emploi.
Utilisations prévues
Cet aspirateur est adapté à l’utilisation dans des ateliers où
l’on effectue des travaux de laminage.
Il aspire et sépare les copeaux des liquides (liquides de
coupe, émulsions, liquides de refroidissement, etc.) pour les
collecter rapidement.
Toute utilisation différente de celle autorisée est considérée
incorrecte.
L’aspirateur a été conçu pour être utilisé par un seul opérateur
par fois.
■Prévoir toujours un espace libre autour de l’appareil pour
permettre un accès aisé aux commandes.
L’appareil a été conçu pour être utilisé par un seul opérateur
par fois. Cet aspirateur est formé d’une unité d’aspiration
motorisée, précédée d’un ltre et munie d’une cuve pour la
collecte de la matière aspirée.
Utilisations indues
ATTENTION !
Sont formellement interdites :
■l’utilisation en plein air en cas de précipitations
atmosphériques.
■l’utilisation de l’aspirateur sur des surfaces non
planes et non horizontales.
■l’utilisation sans l’unité ltrante prévue par le
fabricant.
■l’utilisation avec l’embout et/ou le tuyau
d’aspiration tournés vers le corps humain.
■l’utilisation sans les abris, les protections et les
dispositifs de sécurité installés par le fabricant.
■l’utilisation de l’aspirateur en occluant
partiellement ou totalement les prises d’air de
refroidissement des composants à l’intérieur.
■l’utilisation de l’aspirateur couvert par des toiles en
plastique ou en tissu.
■l’utilisation avec la bouche d’échappement d’air
complètement ou partiellement fermée.
■l’utilisation dans des endroits exigus, qui ne
permettent pas l’échange d’air.
■Aspirer les matières suivantes :
1 Corps en ignition (braises, cendres chaudes,
cigarettes allumées, etc.).
2 Flammes libres.
3 Gaz combustibles.
4 Liquides inammables, combustibles agressifs
(essence, solvants, acides, solutions alcalines,
etc.).
5 Poussières / substances et / ou mélanges
explosifs et à allumage spontané (poussières
de magnésium ou d’aluminium, etc.).
Remarque : Toute forme d’utilisation frauduleuse est
interdite.

VHO200
301/2014
F
ATTENTION !
Arrêter l’aspirateur, le débrancher et demander
l’intervention de personnel spécialisé dans les cas
suivants :
■rupture du ltre ;
■incendie ;
■court-circuit ;
■panne du moteur ;
■choc électrique
[ REMARQUE ]
Vérier les substances éventuellement admises et la zone
de travail.
ATTENTION !
Les aspirateurs ne doivent pas être utilisés ou
emmagasinés en plein air ou en présence d’humidité.
ATTENTION !
En cas de fuite de mousse ou de liquide éteindre
immédiatement l’aspirateur et contrôler.
En cas d’accident ou de panne
En cas d’accident ou si l’on détecte une panne dans
l’aspirateur, débrancher l’appareil de l’alimentation électrique.
Si l’utilisateur entre en contact avec le produit aspiré, vérier
les avertissements indiqués dans la che des données de
sécurité du produit même, qui doit être mise à disposition par
l’employeur.

VHO200
01/2014 4
F
Description de l’aspirateur
Plaques
Figure 1
1 Plaque signalétique :
Code modèle, caractéristiques techniques, matricule,
marquage CE, année de fabrication
2 Cuve de récupération liquides
3 Commandes (interrupteurs)
4 Embout d’aspiration
5 Unités d’aspiration / de souferie
6 Collier cuve de récupération liquides
7 Commande de vanne déviatrice
8 Tuyau indicateur de niveau liquide
9 Vanne d’élimination de liquide
10 Filtre de sécurité
11 Flotteur pour arrêt de liquide
Aspiration de liquides
La machine aspire les liquides et les dépose à l’intérieur de la
cuve de récupération (2).
Aspiration de liquides et copeaux
Dans le cas de l’aspiration de matériel provenant de l’usinage
mécanique (copeaux et liquide), la partie solide est retenue
dans la cuve à copeaux, tandis que la partie liquide s’écoule
dans la cuve de récupération de liquide sous-jacente (2).
Avant de mettre l’aspirateur en marche, brancher le tuyau
d’aspiration dans l’embout correspondant (4) et monter
l’accessoire indiqué pour le travail à faire sur l’autre extrémité
du tuyau (consulter le catalogue des accessoires ou contacter
le service après-vente du fabricant).
Le otteur (11) arrête l’opération d’aspiration (les unités
d’aspiration restent activées) quand la cuve de récupération
liquides (2) est pleine ; il est donc nécessaire d’arrêter
l’aspirateur et de vider la cuve de récupération liquides (2).
Options de transformation
Différents types d’option de transformation de l’aspirateur sont
disponibles :
■Kit d’aspiration de liquides
Seulement pour la collecte des liquides
■Filtre cuve à copeaux
Il retient les copeaux ns à l’intérieur de la cuve à
copeaux.
Sur demande, l’aspirateur peut être muni de jeux en option
déjà installés. Toutefois, ils peuvent également être installés
ultérieurement.
Veuillez contacter le réseau commercial du fabricant pour de
plus amples informations.
Les instructions pour l’installation des parties en option sont
contenues dans le kit de transformation.
ATTENTION !
Utiliser uniquement des kits en option d’origine
fournis et agréés par le fabricant.
Accessoires
Plusieurs accessoires sont disponibles ; veuillez consulter le
catalogue des accessoires du fabricant.
ATTENTION !
Utiliser uniquement des accessoires d’origine fournis
et agréés par le fabricant.
Emballage et déballage
Éliminer les matériaux de l’emballage conformément à la
législation en vigueur.
Figure 2
Modèle VHO200
A pouces (mm) 27,5 (700)
B pouces (mm) 47,2 (1200)
C pouces (mm) 59 (1500)
Poids lbs (kg) 165,3 (75)

VHO200
501/2014
F
Mise en service - raccordement au réseau
d’alimentation électrique
ATTENTION !
■Avant la mise en service, s’assurer que l’aspirateur
n’a subi aucun dégât apparent.
■Avant de brancher l’aspirateur au réseau, s’assurer
que la tension indiquée sur la plaque corresponde
à celle du réseau.
■Brancher la che du câble de connexion
de l’aspirateur dans une prise avec contact
/ raccordement de mise à la terre installé
correctement. S’assurer que l’aspirateur soit éteint.
■Les ches et les connecteurs des câbles
d’alimentation doivent être protégés des
projections d’eau.
■Contrôler si le branchement au réseau électrique
est correct.
■N’utiliser que des aspirateurs dont le câble de
raccordement au réseau électrique est en bon
état (si les câbles sont endommagés, il y a risque
d’électrocution).
■Vérier régulièrement l’absence de dommages et
de signes d’usure, déchirures ou vieillissement du
câble de branchement au réseau.
ATTENTION !
Pendant le fonctionnement de l’appareil, éviter :
■Piétiner, écraser, tirer ou endommager le câble de
connexion au réseau électrique.
■Débrancher le câble simplement en retirant la che
(ne pas tirer le câble électrique).
■En cas de remplacement du câble d’alimentation
électrique, le remplacer par un câble d’origine du
même type : SJT, la même règle est valable si l’on
utilise une rallonge.
■Le câble d’alimentation doit être remplacé par le
Service Après-Vente du constructeur ou par du
personnel qualié équivalent.
Rallonges
Si l’on utilise une rallonge faire attention à la section qui doit
être adaptée à l’alimentation et au degré de protection de
l’aspirateur.
Section minimum du câble de la rallonge :
Longueur maximum = 20 m
Câble = 14/3 SJT ou équivalent pour monophasé / 120V
ATTENTION !
Les prises, les ches, les connecteurs et la pose des
câbles de la rallonge doivent être tels à maintenir
le degré de protection IP indiqué sur la plaque de
l’aspirateur.
ATTENTION !
La prise d’alimentation de l’aspirateur doit être
protégée par un disjoncteur différentiel à limitation
du courant de défaut, qui coupe l’alimentation quand
le courant dispersé vers la terre dépasse les 30 mA
pendant 30 msec., ou par un circuit de protection
équivalent.
ATTENTION !
Ne jamais éclabousser l’aspirateur d’eau : ceci est
dangereux pour les personnes et risque de créer un
court-circuit de l’alimentation.

VHO200
01/2014 6
F
Aspiration de liquides
ATTENTION !
Respecter les consignes de sécurité relatives aux
substances aspirées.
ATTENTION !
■Avant d’aspirer, vérier la présence du otteur.
■En cas de formation de mousse, arrêter
immédiatement le travail et vider la cuve.
■Attention : en cas de fuite de mousse ou de liquide,
éteindre immédiatement l’aspirateur.
■Attention : le liquide encrassé recueilli par
l’appareil pour l’aspiration d’eau doit être
considéré conducteur.
ATTENTION !
Ne pas utiliser l’aspirateur sans le otteur !
L’emploi sans otteur peut provoquer de graves
dégâts à l’aspirateur.
Entretien et réparation
ATTENTION !
Avant d’effectuer des travaux de nettoyage ou
d’entretien et pendant le remplacement des pièces
ou la reconversion de l’aspirateur à une autre version
/ variante, débrancher l’aspirateur de la source
d’alimentation. La che doit être enlevée de la prise.
■Se limiter aux travaux d’entretien décrits dans ce
manuel d’emploi.
■Utiliser seulement des pièces détachées d’origine.
■Ne pas apporter de modications à l’aspirateur.
Si ces indications ne sont pas respectées, votre
sécurité peut être compromise. En outre, la déclaration
CE de conformité émise avec l’appareil n’est plus
valable.
ATTENTION !
Pour les travaux d’entretien non décrits dans
ce manuel et pour les réparations s’adresser à
l’assistance technique du constructeur ou à notre
réseau de vente.
Other manuals for VHO200
1
Table of contents
Languages:
Other Nilfisk cfm Vacuum Cleaner manuals
