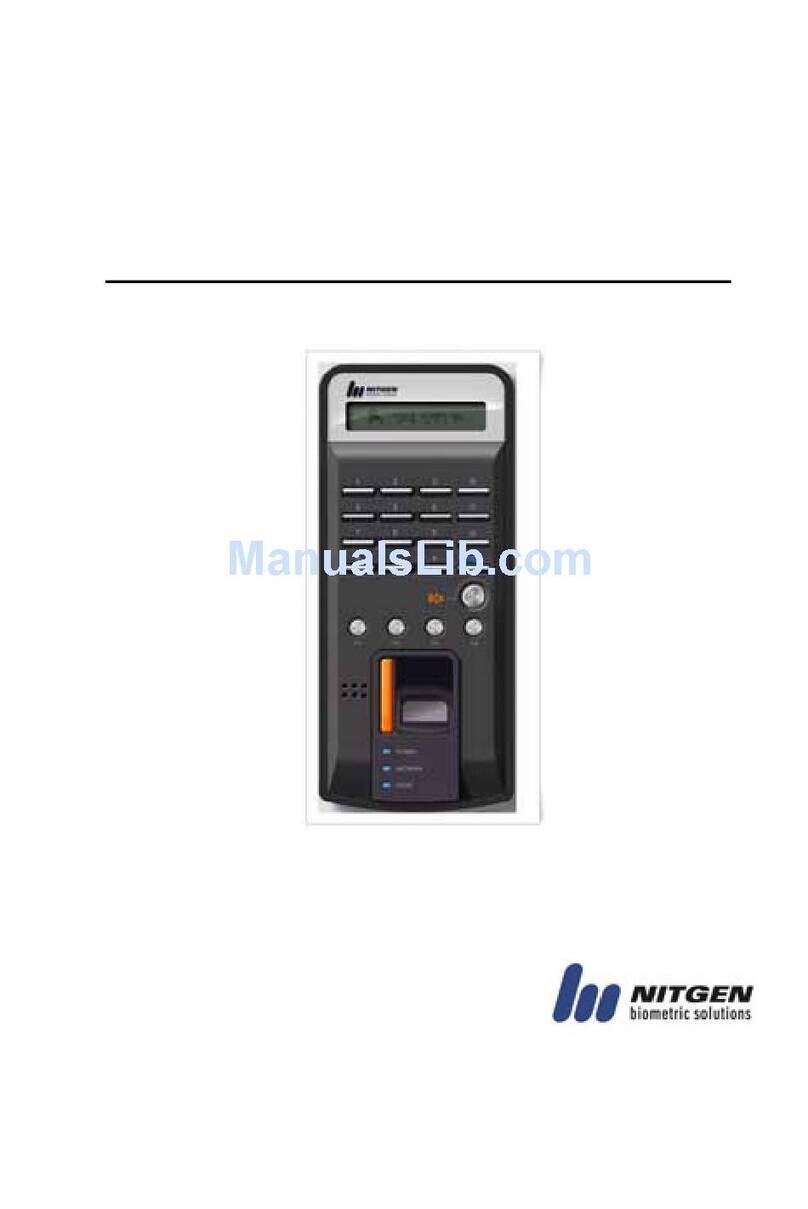
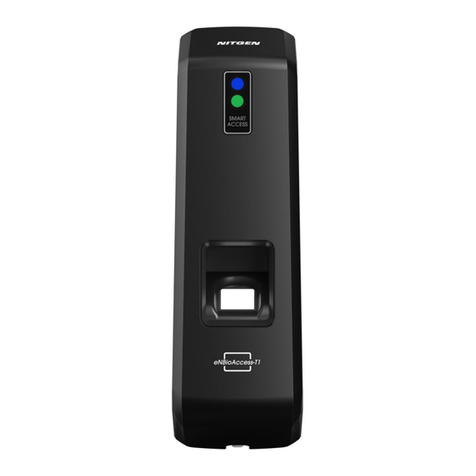
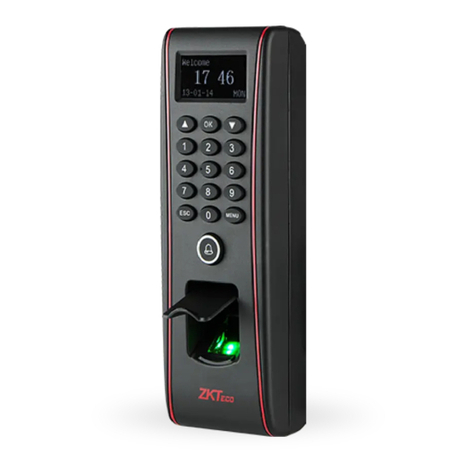
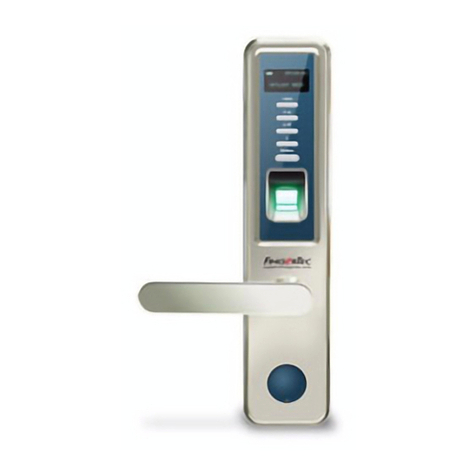
Nitgen eNBioAccess-T2 User manual

12F, Daemyung Valeon bldg., 127, Beobwon-ro,
Songpa-gu, Seoul, Korea (058 6)
Tel : 02-6488- 2 2 , Fax : 02-6488- 099,
E-Mail :cus[email protected] http://www.nitgen.com
eNBioAccess-T2 User Guide
Version eng-1.70
© Copyright 2013, NITGEN Co., Ltd.
A rights reserved. `
It is strict y prohibited to compi e, dup icate or pub ish part. Or who e of this manua prior written consent of NITGEN.
The specification of this product may be changed without prior notice to improve its functiona ity.
The ogo of NITGEN&COMPANY is a registered trademark of NITGEN Co., Ltd.
Other names or trademarks are registered trademarks of their respective owners.

eNBioAccess-T2 User Guide
2
12F, Daemyung Valeon bldg., 127, Beobwon-ro,
Songpa-gu, Seoul, Korea (058 6)
Tel : 02-6488- 2 2 , Fax : 02-6488- 099,
E-Mail :cus[email protected] http://www.nitgen.com
<Revison History >
Version Date Description Firmware Version
1.00 2016-07-15
Initia Re ease 1000-01
1.10
2016
-
08
-
17
M
odified
the description for icon information.
1000
-
0
2
1.20
2016
-
09
-
01
EMC Open
function
De etion
LOCK1/LOCK2 Resu t Output Menu De etion
1000
-
0
4
1.
30
2016
-
09
-
19
User
Logo Description Addition
Termina <-> LC015B Interface modification
Added the some description for User Input in
Backup Menu
1000
-
05
1.40
2016
-
09
-
29
Added the picture for
Backup Error
1000
-
06
1.50
2016
-
11
-
18
Modified
th
e range
for
D
oor open time
Modified the type of card modu e
(0=NONE,1=SC,2=EM,3=HID)
1000
-
14
1.60
2016
-
12
-
01
Modified the range for
open a arm
time
1000
-
16
1.70
2017
-
01
-
20
Fix similar fingerprint check part when registering
fingerprint (Check when there are 200 fingerprint
templates or less)
Added the description for authentication time in FP
Sensor menu.
1000
-
23

eNBioAccess-T2 User Guide
3
12F, Daemyung Valeon bldg., 127, Beobwon-ro,
Songpa-gu, Seoul, Korea (058 6)
Tel : 02-6488- 2 2 , Fax : 02-6488- 099,
E-Mail :cus[email protected] http://www.nitgen.com
<Glossary >
Administrator (Admin)
-The administrator can access the termina menu mode. He/she has the authority to
add/modify/de ete termina users and to change the operating environment by changing
settings.
-If there is no registered administrator in the termina , anybody can access to the termina
menu and change settings. It is recommended that more than one administrator
will be necessarily registered in the terminal.
-The administrator has the authority to change critica environmenta settings of the
fingerprint reader. So, specia attention is required to its registration and operation.
1:1 Authentication
-The user fingerprint is verified after entering User ID or Card.
-On y User ID or the user fingerprint registered to the card is compared. This is ca ed
One-to-One Authentication.
1: N Identification
-The user is searched on y by the fingerprint.
-The same fingerprint as the input fingerprint is identified among the registered
fingerprints without User ID or Card entered. This is ca ed One-to-N Identification.
Authentication Leve
-As a eve used for fingerprint authentication, it is disp ayed in Step 1 to 9.
Authentication cannot be a owed before the degree of match between two fingerprints
is higher than the set authorization eve .
-The higher authentication eve may ensure the higher security. But it requires the
re ative y high concordance rate. When authenticating User ID, it high ike y to deny
authentication.
-1:1 Leve : Authentication eve app ied when 1:1 authentication
-1: N Leve : Authentication eve app ied when 1: n authentication
Authentication Method
-It refers FP(Fingerprint)Authentication, RF(Card)Authentication and a various types of
authentication methods made by each of a combination.
LFD (Live Finger Detection): Fake fingerprint prevention function
- The LFD a ows on y actua fingerprints to be entered, except for any fake fingerprints
made of rubber, paper, fi m, and si icon and the ike.

eNBioAccess-T2 User Guide
4
12F, Daemyung Valeon bldg., 127, Beobwon-ro,
Songpa-gu, Seoul, Korea (058 6)
Tel : 02-6488- 2 2 , Fax : 02-6488- 099,
E-Mail :cus[email protected] http://www.nitgen.com
Table of Contents
1.
Before Getting Started ................................................................................. 6
1.1.
Safety Notes........................................................................................................6
1.2.
Product Details ...................................................................................................7
1.2.1.
FRONT ......................................................................................................7
1.2.2.
REAR.........................................................................................................8
1.2.3.
Input / Output .............................................................................................9
1.3.
Screen information during operation..............................................................12
1.3.1.
Initial Screen ............................................................................................ 12
1.3.2.
Icons ........................................................................................................12
1.3.3.
Function KEY...........................................................................................13
1.3.4.
Main Screen.............................................................................................13
1.4.
LED information during operation...................................................................15
1.5.
Voice information during operation.................................................................15
1.6.
Buzzer guide announced during operation .................................................... 15
1.7.
How to register and enter the correct fingerprint........................................... 16
2.
Product Descriptions ................................................................................. 17
2.1.
Product Features ..............................................................................................17
2.2.
Diagram ............................................................................................................. 18
2.2.1.
Single Type (Door Lock)...........................................................................18
2.2.2.
Single Type (Lock Controller) ...................................................................18
2.2.3.
Dummy Type (MCP040)........................................................................... 18
2.2.4.
Network Type (Door Lock)........................................................................ 19
2.2.5.
Network Type (Lock Controller)................................................................19
2.3.
Product Specification ....................................................................................... 20
3.
Environment Setting .................................................................................. 21
3.1.
Checkpoints before Environment Setting.......................................................21
3.1.1.
Menu........................................................................................................21
3.1.2.
Administration authentication ................................................................... 21
3.1.3.
How to access the menu without administrator authentication .................22
3.1.4.
Save Settings...........................................................................................22
3.1.5.
Default Setting .........................................................................................23
3.1.6.
Setting guide for Network Configuration................................................... 24
3.2.
How to register the terminal in Admin App ..................................................... 27
3.2.1.
Insta iAccess M P us................................................................................27
3.2.2.
Execute and Log in iAccess M P us ...........................................................27
3.2.3.
Access to Termina BLE REDAY .................................................................27
3.2.4.
Termina ogin Admin App.........................................................................28
3.2.5.
Administrator authentication of the termina ............................................28
3.2.6.
Termina registration.................................................................................28
3.3.
Access Device with Admin App .......................................................................29
3.4.
Access and Registration between ACM Pro and terminal ............................. 30
3.4.1.
Insta ACM Pro.........................................................................................30
3.4.2.
Execute ACM Pro ......................................................................................30
3.4.3.
Set in termina ..........................................................................................31
3.4.4.
LAN connection in termina .......................................................................31
3.4.5.
Register the termina in ACM Pro..............................................................32
3.5.
Menu Configuration.......................................................................................... 33
3.6.
USER .................................................................................................................39

eNBioAccess-T2 User Guide
5
12F, Daemyung Valeon bldg., 127, Beobwon-ro,
Songpa-gu, Seoul, Korea (058 6)
Tel : 02-6488- 2 2 , Fax : 02-6488- 099,
E-Mail :cus[email protected] http://www.nitgen.com
3.6.1.
Menu Configuration..................................................................................39
3.6.2.
ADD..........................................................................................................39
3.6.3.
AUTO ADD................................................................................................41
3.6.4.
MODIFY....................................................................................................42
3.6.5.
DELETE ....................................................................................................43
3.6.6.
DELETE ALL..............................................................................................43
3.7.
Network Menu ................................................................................................... 44
3.7.1.
Menu Configuration..................................................................................44
3.7.2.
AUTH Mode ..............................................................................................45
3.7.3.
Termina ID .............................................................................................. 45
3.7.4.
Termina ...................................................................................................46
3.7.5.
Server.......................................................................................................47
3.8.
Option Menu......................................................................................................48
3.8.1.
Menu configuration .................................................................................. 48
3.8.2.
ATTEND....................................................................................................48
3.8.3.
Screen ......................................................................................................50
3.8.4.
SAVE ........................................................................................................ 52
3.8.5.
TIMEOUT..................................................................................................53
3.8.6.
LOCKING ..................................................................................................54
3.9.
INT DEVICE .......................................................................................................56
3.9.1.
Menu Configuration..................................................................................56
3.9.2.
FP SENSOR............................................................................................... 56
3.9.3.
BEEP.........................................................................................................58
3.9.4.
VOICE ......................................................................................................58
3.9.5.
BLE...........................................................................................................58
3.9.6.
TAMPER....................................................................................................59
3.10.
EXT DEVICE ...................................................................................................... 60
3.10.1.
Menu Configuration..................................................................................60
3.10.2.
DOORLOCK............................................................................................... 60
3.10.3.
RS485.......................................................................................................63
3.10.4.
WIEGAND.................................................................................................64
3.11.
STATUS..............................................................................................................67
3.11.1.
Menu Configuration..................................................................................67
3.11.2.
DB INFO...................................................................................................67
3.11.3.
NETWORK ................................................................................................67
3.11.4.
OPTION....................................................................................................68
3.11.5.
INT DEVICE.............................................................................................. 68
3.11.6.
EXT DEVICE ............................................................................................. 68
3.11.7.
I/O PORT..................................................................................................68
3.11.8.
VERSION ..................................................................................................69
3.12.
RECOVERY .......................................................................................................70
3.12.1.
Menu Configuration..................................................................................70
3.12.2.
INITIALIZE ...............................................................................................70
3.12.3.
SELF TEST................................................................................................71
3.12.4.
BACKUP.................................................................................................... 75
3.12.5.
REBOOT ...................................................................................................77

eNBioAccess-T2 User Guide
6
12F, Daemyung Valeon bldg., 127, Beobwon-ro,
Songpa-gu, Seoul, Korea (058 6)
Tel : 02-6488- 2 2 , Fax : 02-6488- 099,
E-Mail :cus[email protected] http://www.nitgen.com
1. Before Getting Started
1.1. Safety Notes
Warning
Do not operate the termina
with wet hands, and pay
attention not to et any
iquid such as water enter
inside the termina .
- > Otherwise, ma function
or e ectric shock may be
caused.
Keep the termina away
from inf ammab es.
- > Otherwise, it may
cause a fire.
Do not disassemb e, repair
or remode the termina at
your disposa .
- > Otherwise, it may cause
ma function, e ectric shock,
or a fire.
Do not a ow chi dren to
touch the termina
care ess y.
- > Otherwise, it may
cause safety accidents of
chi dren or ma function.
- Non-comp iance of safety notes may cause death or serious injury for users.
Cautions
Do not insta the termina
in a p ace exposed to direct
sun ight.
→
Otherwise, it may cause
ma function, deformation
and disco oration.
Do not insta the termina
in humid or dusty p aces.
→
Otherwise, it may
cause ma function.
Do not c ean this termina
by sprink ing water, nor
wipe it with benzene,
thinner, and a coho .
→
Otherwise, it may cause
e ectric shock or a fire.
Keep the termina away
from magnets.
→
Otherwise, it may
cause fai ure and
ma function.
Keep the fingerprint input
section c ean.
→
Otherwise, the
fingerprint cannot be
recognized correct y.
Do not spray insecticides
or inf ammab es on the
termina .
→
Otherwise, it may
cause deformation and
disco oration.
Keep the termina away
from shock or sharp
objects.
→
Otherwise, it may
damage the termina and
resu t in ma function.
Do not insta the termina
in a p ace where there is
a severe change in
temperature.
→
Otherwise, it may
cause ma function.
- Non-comp iance of safety notes may cause persona injury or property damage for
users.
※
We are not responsib e for any accidents and damage that may arise from non-
comp iance of the information in this manua .

eNBioAccess-T2 User Guide
7
12F, Daemyung Valeon bldg., 127, Beobwon-ro,
Songpa-gu, Seoul, Korea (058 6)
Tel : 02-6488- 2 2 , Fax : 02-6488- 099,
E-Mail :cus[email protected] http://www.nitgen.com
1.2. Product Detai s
1.2.1. FRONT
Camera
LCD
Function KEY (F1~F4)
Speaker
Card Sensor (EM/SC/HID)
Fingerprint
Sensor
State LED
BLE embedded
USB assist device
(UDL10) connection

eNBioAccess-T2 User Guide
8
12F, Daemyung Valeon bldg., 127, Beobwon-ro,
Songpa-gu, Seoul, Korea (058 6)
Tel : 02-6488- 2 2 , Fax : 02-6488- 099,
E-Mail :cus[email protected] http://www.nitgen.com
1.2.2. REAR
Fixed bracket
Cab e harness

eNBioAccess-T2 User Guide
9
12F, Daemyung Valeon bldg., 127, Beobwon-ro,
Songpa-gu, Seoul, Korea (058 6)
Tel : 02-6488- 2 2 , Fax : 02-6488- 099,
E-Mail :cus[email protected] http://www.nitgen.com
1.2.3. Input / Output
1.2.3.1.
Cab e & Connector

eNBioAccess-T2 User Guide
10
12F, Daemyung Valeon bldg., 127, Beobwon-ro,
Songpa-gu, Seoul, Korea (058 6)
Tel : 02-6488- 2 2 , Fax : 02-6488- 099,
E-Mail :cus[email protected] http://www.nitgen.com
1.2.3.2.
Pin Detai s
Pin
number
Line co or Labe
(Line name)
Exp anation IN/OUT Note
1
ORANGE
EXT Inside open IN Connect to Exit button
2
YELLOW
DM0 DoorMonitor0 IN Sense door state(DM0)
3
GREEN
DM1 DoorMonitor1 IN Sense door state(DM1)
4
BLUE
DM2 DoorMonitor2 IN Sense door state(DM2)
5
BLACK
GND GND - Ground connection(for
door monitor)
6
RED
5V DC5V OUT DC 5V output
7
BLACK
PGND Power GND - Power supp y ground
connection
8
GREEN
R4A RS485A BI RS-485 interface
9
BLUE
R4B RS485B BI RS-485 interface
10
ORANGE
WO0 WIE_OUT0 OUT
Output WIGAND (WO0)
11
YELLOW
WO1 WIE_OUT1 OUT
Output WIGAND (WO1)
12
BROWN
WI0 WIE_IN0 IN
Input WIGAND (WI0)
13
PURPLE
WI1 WIE_IN1 IN
Input WIGAND (WI1)
14
BLACK
GND GND - Ground connection
(WIGAND signa )
15
RED
- N_TXN OUT LAN I/F (LAN cab e)
16
BLACK
- N_TXP OUT LAN I/F (LAN cab e)
17
GREEN
- N_RXN IN LAN I/F (LAN cab e)
18
WHITE
- N_RXP IN LAN I/F (LAN cab e)
19
RED
12V DC12V IN DC 12V power supp y
input
20
BLACK
GND Power GND - Power supp y ground
connection (Adapter)
21
RED
12V DC12V OUT DC 12V put out power
22
GRAY
L1C LOCK1_COM OUT Lock1 COM termina
23
BROWN
L1NC LOCK1_NC OUT Lock1 NC termina
24
WHITE
L1NO LOCK1_NO OUT Lock1 NO termina
25
PURPLE
L2 LOCK2 OUT Lock2 termina
26
BLACK
GND GND - Ground connection
(Lock connecter)
27
BLACK
PGND Power GND - Power supp y ground
connection (Lock
power)
28
BLACK
PGND Pane GND - Pane ground
connection (Earth)
1.2.3.3.
Termina <- > MCP040 wiring
Category T2 termina (Line name) MCP040
RS485A R4A (green) RDRA+
RS485B R4B (b ue) RDRA-
ground connection GND (b ack) G

eNBioAccess-T2 User Guide
11
12F, Daemyung Valeon bldg., 127, Beobwon-ro,
Songpa-gu, Seoul, Korea (058 6)
Tel : 02-6488- 2 2 , Fax : 02-6488- 099,
E-Mail :cus[email protected] http://www.nitgen.com
1.2.3.4.
T
ermina <- > LC015B wiring
Category T2 termina (Line name) LC015B
RS485A R4A (green) 485A
RS485B R4B (b ue) 485B
ground connection GND (b ack) GND
DOOR MONITOR IN1(If this pin is not used,
connect to GND Pin.)
INSIDE OPEN IN0
DC12V (LC015B separate power
supp y)
DC12V IN
ground connection (Power on y
for LC015B)
GND
But, door open time can be set with DIP SWITCH of LC015B (Maximum open time is 5 sec.)
1.2.3.5.
T
ermina <- > EM Type Door Lock wiring
Category T2 termina (Line name) EM Door Lock
Lock L1NC (Green) +
GND GND (B ack) -
Door Monitor DM0 (B ack) NC(Norma C ose)
1.2.3.6.
T
ermina <- > WIEGAND Device wiring
Category T2 termina (Line name) WIEGAND Device
WIEGAND INPUT0 WI0(
갈색
) Wiegand output0
WIEGAND INPUT1 WI1( 라) Wiegand output1
WIEGAND OUTPUT0 WO0(주황) Wiegand input0
WIEGAND OUTPUT1 WO1(노랑) Wiegand input1
GND GND (검정) GND

eNBioAccess-T2 User Guide
12
12F, Daemyung Valeon bldg., 127, Beobwon-ro,
Songpa-gu, Seoul, Korea (058 6)
Tel : 02-6488- 2 2 , Fax : 02-6488- 099,
E-Mail :cus[email protected] http://www.nitgen.com
1.3. Screen information during operation
1.3.1. Initia Screen
When powering on at first, the screen is disp ayed as fo ow.
1.3.2. Icons
Server connection
State
NONE
:
No use network
: LAN ine is disconnected.
: LAN ine is connected. (On y ink is connected.)
: Connected with server
Gate
State
: Gate is c osed.
: Gate is opened.
: Gate is opened forced y(unusua door open state)
: Gate communication prob em
Warning signa
State
NONE : Norma
: Termina Disassemb y State
Fire detection
State
NONE
:
Norma
: Sensed by fire detector(Va id on DM2 fire set)
BLE connection
State
NONE
:
Disconnected with Admin
App
: Connected with Admin App
MCP040 connection
State
NONE
:
MCP040 is not used.
(Norma state)
: MCP040 Mode and bad communication state.
: MCP040 Mode and norma communication state.
UDL connection
State
NONE
:
UDL
is not used
(Norma
state
)
.
: UDL is connected.
State icon
Operation Mode
TNA Mode
Date and Time

eNBioAccess-T2 User Guide
13
12F, Daemyung Valeon bldg., 127, Beobwon-ro,
Songpa-gu, Seoul, Korea (058 6)
Tel : 02-6488- 2 2 , Fax : 02-6488- 099,
E-Mail :cus[email protected] http://www.nitgen.com
1.3.3. Function KEY
Icon
Meaning
Function Key
Exp anation
UP F1 Move cursor up.
DOWN F3 Move cursor down.
LEFT
F2
Move cursor to eft
.
ESC
F2
ong
Move to upper menu
.
RIGHT
F4
Move cursor to right
.
ENTER
F4
ong or
F4 Move to submenu.
ENABLE
DISABLE F2 Category choice (ENABLE or DISABLE).
1.3.4. Main Screen
Operating in Exc usive mode
Initia Screen
Operating in Network mode
Initia Screen
Operating in Dummy mode
Initia Screen
Operating in ock mode
(Reject a users authentication)

eNBioAccess-T2 User Guide
14
12F, Daemyung Valeon bldg., 127, Beobwon-ro,
Songpa-gu, Seoul, Korea (058 6)
Tel : 02-6488- 2 2 , Fax : 02-6488- 099,
E-Mail :cus[email protected] http://www.nitgen.com
Menu of Initia Screen
Authentication succeess
Authentication fai ure
Waiting for Card Input
Waiting for Fingerprint Input
Waiting for Admin App registration

eNBioAccess-T2 User Guide
15
12F, Daemyung Valeon bldg., 127, Beobwon-ro,
Songpa-gu, Seoul, Korea (058 6)
Tel : 02-6488- 2 2 , Fax : 02-6488- 099,
E-Mail :cus[email protected] http://www.nitgen.com
1.4. LED information during operation
LED
Operating
state
Remark
RED
Norma
OFF
A arm
ON
or F ash
Authentication Fai ure
ON (
Maintain during authentication time
)
OFF
GREEN
Norma
OFF
Authentication Success
ON (
Maintain during auth
entication time
)
OFF
BLUE
Termina Norma
(a ive)
F ash at interva s of 5 seconds
Function Key
LED
Enter menu A ways ON
Touch in initia screen. ON(Maintain for 10 seconds) OFF
1.5. Voice information during operation
Category Voice information
Fingerprint Input P ease enter your fingerprint.
Authentication
success You are authorized.
Authentication
fai ure P ease try again.
1.6. Buzzer guide announced during operation
Buzzer Sound State Exp anation
Ppik
Key touch
Card tag
Fingerprint touch
-
Pressi
ng key or reading card
-When inputting fingerprint, input has
been comp eted and hands can take off.
Ppibik Fai ure
If authentication fai s or the user's input is
wrong
Ppiriririk Waiting for input
It shows the
state
for waiting user’s input
such as fingerprint or password.
Ppiririk Succeess
Authentication success or setting
comp etion

eNBioAccess-T2 User Guide
16
12F, Daemyung Valeon bldg., 127, Beobwon-ro,
Songpa-gu, Seoul, Korea (058 6)
Tel : 02-6488- 2 2 , Fax : 02-6488- 099,
E-Mail :cus[email protected] http://www.nitgen.com
1.7. How to register and enter the correct fingerprint
Correct fingerprint input method
Enter your fingerprint as if you take a thumbprint by using your forefinger if possib e.
The fingerprint cannot be correct y registered and entered on y by your fingertips.
The center of the fingerprint shou d be touched with the fingerprint input section.
Enter the fingerprint of your forefinger if possib e.
When using your forefinger, you can enter your fingerprint correct y and safe y.
Make sure that the fingerprint is unc ear or wounded.
Too dry, wet, b urry or wounded fingerprints are difficu t to recognize. In this case,
the fingerprint of another finger shou d be registered.
Precautions subject to your fingerprint state.
The avai abi ity of the fingerprint may vary subject to your fingerprint state.
This product consists of a fingerprint recognition system and cannot recognize
the damaged or unc ear fingerprints. The fingerprint shou d be registered using
the RF card.
If your hands are dry, you can blow your breath on the system to operate
it more smooth y.
For chi dren, too sma or unc ear fingerprints may be difficu t or impossib e to use.
They need to register a new fingerprint every six months.
For seniors, the fingerprint with too many ines may not be registered.
It is recommended that you wi register more than two fingerprints if possib e.
In order to increase the fingerprint authentication rate, it is recommended to use
six of the ten fingers as i ustrated be ow (both thumbs, forefingers, midd e
fingers).

eNBioAccess-T2 User Guide
17
12F, Daemyung Valeon bldg., 127, Beobwon-ro,
Songpa-gu, Seoul, Korea (058 6)
Tel : 02-6488- 2 2 , Fax : 02-6488- 099,
E-Mail :cus[email protected] http://www.nitgen.com
2. Product Descriptions
2.1. Product Features
BLE is equipped. Door Contro with smartphone is possib e at c ose range.
It is equipped with Co or Camera, and it saves the visitor’s video when authentication
succeeds or fai s.
Optiona , Avai ab e to use as RF(125kHz), Smart Card(13.56MHz), HID Reader
Easy to verify your ID via fingerprint
-The use of the fingerprint recognition techno ogy (Biometrics) can prevent
forgetting your password, osing your card or key, or avoid the risk of their theft.
The use of persona fingerprints enhances the security of authentication.
Access contro system using the oca area network (LAN)
-The fingerprint reader communicates with the authentication server using a TCP/IP
protoco . Therefore, this termina can be app ied to the existing LAN and has easy
expandabi ity. It ensures a fast speed by 10/100 Mbps Auto Detect and
faci itates management and monitoring via the network.
Provide various registration and authentication method
Fingerprint
Fingerprint registration
Fingerprint authentication
Card
Card
registration
Card authentication
Card
or Fingerprint
Card, Fingerprint
registratio
n
Card or Fingerprint authentication
Card
and Fingerprint
Card, Fingerprint
registration
Fingerprint authentication after Card authentication
Mobi e card
Mobi e Card
registration
(
registration
on y via server and admin
App)
Mobi e Card authentication

eNBioAccess-T2 User Guide
18
12F, Daemyung Valeon bldg., 127, Beobwon-ro,
Songpa-gu, Seoul, Korea (058 6)
Tel : 02-6488- 2 2 , Fax : 02-6488- 099,
E-Mail :cus[email protected] http://www.nitgen.com
2.2. Diagram
2.2.1. Sing e Type (Door Lock)
2.2.2. Sing e Type (Lock Contro er)
2.2.3. Dummy Type (MCP040)
Door Lock
Lock
contro
BLE 2.4G
Mobi e App
T2
C ose
Open
Lock Contro er
(LC010, LC015)
Mobi e App
RS485
BLE 2.4G
T2
C ose
Open
RS
485
MCP040
Ethernet
Server
T2
Lock/Open
Lock/Open
Lock/Open
RS485ID
#2
RS485ID
#1
RS485ID
#3

eNBioAccess-T2 User Guide
19
12F, Daemyung Valeon bldg., 127, Beobwon-ro,
Songpa-gu, Seoul, Korea (058 6)
Tel : 02-6488- 2 2 , Fax : 02-6488- 099,
E-Mail :cus[email protected] http://www.nitgen.com
2.2.4. Network Type (Door Lock)
2.2.5. Network Type (Lock Contro er)
Lock
Contro
BLE 2.4G
Mobi e App
C ose
Ethernet
Open
T2
Door Lock
Ethernet
Internet
Server
Internet
RS485
Lock Contro er
(LC010, LC015)
BLE 2.4G
Mobi e App
Ethernet
Ethernet
T2
C ose
Open
Server

eNBioAccess-T2 User Guide
20
12F, Daemyung Valeon bldg., 127, Beobwon-ro,
Songpa-gu, Seoul, Korea (058 6)
Tel : 02-6488- 2 2 , Fax : 02-6488- 099,
E-Mail :cus[email protected] http://www.nitgen.com
2.3. Product Specification
Category
Spec
CPU
32Bit RISC CPU(400MHz)
MEMORY
64M DDR RAM, 32M NOR,128M NAND
Camera
VGA, F2.8,
View ang e
61
degree
LCD
1.77’’ Co or LCD
Fingerprint Sensor
O
ptica
/ 500 DPI
Authentication Method
Fingerprint, RF Card, Mobi e Card
Authentication Speed
1:N < within1sec.
(based on
1,000 fingerprints)
Fingerprint capacity
20,000
Fingerprints
, 10,000
users
(
Two identica fingerprints
registration per user)
Note) Similar fingerprint inspection is possible when the number of
fingerprints is less than 200.
Log capacity
100,000
ogs
Communication interf
ace
TCP/IP, Wiegand In/Out (26/34bit),RS485
Lock
Deadbo t, EM Lock, Door Strike, Automatic Door
Temperature /
Humidity -20~60
℃
/ < RH 90%
Certification
KC, CE, FCC
Size
58mm(W) * 191mm(H) * 62mm(D)
Table of contents
Other Nitgen IP Access Controllers manuals
