NIXON THE DUAL TIDE User manual

(7B)
(7D)
IMPORTANTE
Por favor,referele al dorso de la caja del reloj
para verificar su nivel de estanqueidad, o en nuestro
sitio internet: www.nixonnow.com
WICHTIG
Bitte beachte das wasserfestigkeitsniveau, das auf der
ruecken deiner uhr steht, oder check unsere website:
www.nixonnow.com
IMPORTANT
Reportez-vous au dos du boîtier de la montre pour
vérifier son niveau d'étanchéité, ou sur notre site
internet: www.nixonnow.com
IMPORTANT
Please refer to the watch case back for your watch’s
water resistancy rating, or our website: www.
nixonnow.com
DETAILS IN TIMER TYPES:
Countdown Stop CD-STP (8E)
Countdown Countup CD-UP
Double Beep Toneat the last One Minute
Single Beep per second for last 5 seconds. When Timer
expires to zero, double beep for 20 seconds
Countdown Repeat CD-REP
Beeping patterns are the same as the other two timer
types except: If time is set to 20 seconds or less, only
one double beep will go off when time expires to zero.
Repetition of Countdown
is perpetual.
PRESS and HOLD MODE/SET Button to enter Time
Setting
SETTING SEQUENCE IS: Sec, Hour (4A),
Minute(4B), Year, Month, Date, 12/24H Format,
DST, Beach Zone(4C), Local Beach(4D).
PRESS QUICK TIDE Button to Advance
through the Setting Sequence.
PRESS START/STOPor WAVE/RESET to increase or
decrease current value.
PRESS MODE/SET again to Exit Setting.
There are 13 Beach Zones as well as a 14th
selection which is BasicTide.
This Tide Setting is there in case you can’t find a Pre-
Programmed location that works for you. Entering this
Zone will require you to SET the next High Tide Time
based on a Local Data reference such as a tide chart.
Setting your watch to BASIC TIDE will follow the tidal
computation of a 12 Hour 25 Minutes 14 Seconds
difference from High Tide to High Tide. Low Tides
are assumed to occur exactly in between
High Tide Times.
SETTING SEQUENCE IS: HOUR/MINUTE
4HOME TIME AND
HOME BEACH SETTING 5TIME 2 AND BEACH 2 22SETTING 6TIDE MODE CONTINUED
LOWER SECTION OF THE DISPLAY
The Numeric Tide Times for the first High and Low
Tides of the Day are displayed on the lower section of
the display for 3 seconds. This will alternate
PRESS START/STOPButton to Advance Tide
Display by 30 minutes (6D).
PRESS WAVE/RESET to Move Back Tide Display
by 30 minutes.
Youcan scroll forward for up to 2 days (48 hours) from
current time.
LOWER SECTION OF THE DISPLAY
The Numeric Tide Times for the first High and Low
Tides of the Day are displayed on the lower section of
the display for 3 seconds. This will alternate with the
Numeric Tide Times for the second High and Low Tides
of the day which are also displayed for 3 seconds (6E).
There is a Dot located next to each Tide Time. The dot
location is referring to AM and PM.(6F)
8
PRESS MODE/SET Button to advance to HEATTIMER
Mode (8A).
The word TIMER will be displayed on the
UPPER SECTION of the display.
PRESS WAVE/RESET Button to scrollthrough
preset Timers.
PRESS START/STOPButton to Start or Stop the
Timer.
PRESS and HOLD WAVE/RESET Button to reset
at Stop State.
PRESET TIMERS FOR: 7, 10, 15, 20,
30, 40 MINUTES AND 1HR
TO SET CUSTOM TIMER:
PRESS and HOLD MODE/SET Button to enter
Timer Setting (8B).
SETTING SEQUENCE IS: Sec (8C), Hour
(8D), Minute, Type.
PRESS QUICK TIDE Button to Advance through the
Setting Sequence.
PRESS START/STOPor WAVE/RESET Buttons
to increase or decrease current value.
The Upper Right corner of the display shows
which Timer is active. For example, if 07
is shown, the 7 Minute Timer is active. For
Custom Timers, CU is displayed.
8
HEAT TIMER HEAT TIMER CONTINUED
2QUICK TIDE MODE
21
7
456
8910
L
M
S/S
W/R
(5A)
(6A) (6B)
(6C) (6D)
(6E)
(7A)
(7C)
(7E) (8B)(8A)
MODES: PRESS MODE/SET Button to advance
through modes.
TIME
TIDE
FUTURE TIDE
TIMER
CHRONO AND WAVE COUNTER
ALARM
QUICK TIDE
Welcome to the wonderful world of Nixon Digital
Tide! The watch you are holding in your hand gives you
access to the Tidal Data for 200 Beaches. The beaches
are broken down into 13 different Zones that we have
hand picked for you across the Globe.
1MODES
NEVER PUSH A LIGHT
BUTTON OR SET THE WATCH
WHEN IT IS SUBMERGED.
OPERATIONS MANUAL
THE DUAL TIDE
www.nixonnow.com
HOLA.
Acabas de adquirir un reloj
NIXON. Bienvenido a NIXON, productos
customizados, calidad y durabilidad.
Estamos encant ado de que hayas escogido
uno de nuestros relojes. El hecho de que hayas
adquirido un NIXON significa que podras
saber la hora pero quizas no estes. familiarizado
con todas las funciones de nuestros relojes, si
es así lee estas instrucciones. O consigue a un
amigo para que se las lea por ti te pueda explicar
como va todo.
WELCOME.
You just bought a NIXON watch.
How about that. Welcome to the NIXON
side, a side that’s about custom-built
product, quality, and durability. We’re
stoked you selected one of our watches. The
fact that you bought a NIXON means you
can probably tell time, but you may not be
familiar with all the doo-dads and features
of our watches. So if you’re stuck, read
through these instructions. Or get your
friends to read them and then they can tell
you what’s up.
WILKOMMEN.
Sie haben sich soeben eine NIXON uhr
Gekauft. Herzlichen gluckwunsch und
willkomen auf der NIXON seite. Hier dreht
sich alles um massgeschneiderte produkte,
qualitat und haltbarkeit. Wir freuen uns, dass
sie eine unserer uhren ausgewahlt haben. Die
tatsache, dass sie eine NIXON gekauft haben.
Bedeutet, dass sie vermutlich jetzt jemandem
die aktuelle uhrzeit sagen koennen. Aber
wahrscheinlich sind sie nocht nicht mit
all den features und funktionen unserer
uhren vertraut. Falls sie also mal nicht mehr
weiterkommen, lesen sie sich einfach diese
anleitung durch. Oder ihre freunde sollen
sie lesen. Dann konnen die ihnen sagen wie’s
funktionert.
BIENVENUE.
Vous venez d´acheter une montre NIXON!
Alors quoi?! Bienvenue chez NIXON, oU vous
ne trouverez que des montres de longue durÈe
et de qualitÈ, faites sur mesure. Nous sommes
trËs heureux que vous ayez choisi une de nos
montres. Si vous avez une NIXON, cela veut
probablement dire que vous savez lire l’heure,
mais vous ne saurez peut-Être pas toutes
les petites astuces et caractÈristiques de nos
montres. Alors, si vous ne savez pas quoi faire,
jetez donc un coup D´œUil au mode d´emploi,
ou demandez un de vos copains de vous le lire
afin de vous mettre au jus.
Think of this mode as your Personal Vacation Planner!
Not only can you look out into the future until 2019*
to check the tide,you can also pick any beach that is in
your watch.
PRESS MODE/SET Button to advance to FUTURE
TIDE Mode.
The words TIDE FUTURE will be displayed on
the UPPER and LOWER SECTIONS of the
display (7A).
PRESS and HOLD MODE/SET Button to set the
Future Tide (7B).
SETTING SEQUENCE IS: Beach/Year/Month/Date
PRESS QUICK TIDE Button to Advance through the
Setting Sequence.
PRESS START/STOPor WAVE/RESET to increase (7C)
or decrease value (7D).
PRESS MODE/SET again to Exit Setting.
In FUTURE TIDE MODE you can only scroll by
Days to see Tide Events.
The 16 Hours of Tide Data relate to the current time in
your active Time Mode.
PRESS START/STOPButton to advance to the
following Day.
PRESS WAVE/RESET Button to move back to the
previous Day.
*until 2055 if you are using Basic Tide as your set Future
Tide Beach.
-/+
(2A) (2B)
(3A) (3B)
(4A) (4B)
(4C) (4D)
(7F)
*RINSE WATCH WITH SOAP AND WATER AFTER
EXPOSURE TOSALT WATER OR SAND.
Replace the battery at least every two years. Dead or low
batteries left in a watch may leak and destroy the movement
of your watch. If you have a water resistant watch, know that
the water resistancy is attained using rubber or plastic seals
which will deteriorate under normal conditions and reduce
the water resistancy of your watch. These seals should be
checked by an authorized jeweler at least every two years to
ensure the rated water resistancy.Do not expose your watch
to extreme temperatures (over 60ºC or 140ºF, under -10ºC or
14ºF). No hot tubs or saunas. Sorry,but do you really need to
know the time when you’re tubbing?
Avoid extreme shocks.
30 METER
50 METER
100-200
METER
CASE
RATING
RAIN,
SPLASHES,
ETC.
SHALLOW
SWIMMING,
SUBMERSION*
SURFING,
SNORKELING,
SPEAR FISHING*
A FEW OF OUR WATCHESARE GEARED
TOWARDS PURE STYLE AND ARE NOT
DESIGNED FOR SURF OR SWIM. THIS IS
INDICATEDBY THE “NO WATER”ICON.
WATER RESISTANCY RATINGS
AND WATCH CARE
7FUTURE TIDE
7FUTURE TIDE CONTINUED
8
7
*DIE UHR NACH KONTAKTMIT SALZWASSER
ODER SAND MIT WASSERUND SEIFE
ABWASCHEN.
Wechseldie Batterie alle zwei Jahr. Eine leere Batterie
kann das Uhrwerk beschaedigen oder zerstoeren. Wenn
Du eine wasserdichte Uhr hast, solltest du wissen, dass
Gummidichtingen Deine Uhr wasserdicht machen. Diese
Dichtungen koennen sproede werden und die wasserfestigkeit
deiner Uhr beeintraechtigen. Diese Dichtungen sollten alle
zwei Jahre von einem uhrmacher geprueft werden. Setzedeine
Uhr keinen extremen Temperaturen aus (ueber 60 °C, oder
unter –10° C). Keine Whirlpools oder Sauna, oder musst du
wirklich die Zeit wissen, wenn du badest? Vermeide extreme
Erschuetterungen.
30 METER
50 METER
100-200
METER
GEHAUSE
EINTEILUNGEN
REGEN,
SPRITZER,
ECT.
SCHWIMMEN,
EINTAUCHEN*
SURFEN,
SCHNORCHELN,
SPEERFISCHEN*
EIN PAARUNSERER MODELLE SIND UM
DES REINEN STYLES WILLEN DESIGNT UND
NICHT ZUM SURFEN, SCHWIMMEN ODER
WHIRLPOOLEN. DIESES ZEICHEN WEISST
DARAUF HIN. IST IST AUF DER INFO KARTE
ODER IM KATALOG ZU FINDEN.
WASSERFESTIGKEITSNIVEAU UND
PFLEGEHINWEISE
DRUECKE den MODE/SET Knopf um zur Chronograph
& Wellenzaehl Funktion zugelangen. Die Woerter
CHRO und WAVE werdenim unteren und oberen
Bereich des Displays angezeigt (9A).
DRUECKE den START/STOPKnopf um den
Chronographen
zu starten bzw zu stoppen (9B)
DRUECKE und HALTEden WAVE/RESET Knopf im
Stopstatus um auf Null zu stellen Wellen-Zaehler Um
die Uhr als einen Wellen-Zaehler zu nutzen (9C)
DRUECKE den WAVE/RESET Knopf waehrendder
Chronograph laeuft. Der Zeitabschnitt
zwischen dem DRUECKEN von STARTund WAVE wird
fuer 5 Sekunden im Display angezeigt (9D).
Wenn die naechste Welle kommt,
DRUECKE den WAVE/RESET Knopf erneut um eine
weitere Welle zu zaehlen.
Die Zahl 2 wird neben dem Wort WAVEerscheinen und
der Zeitraum seit dem letzten Druecken des WAVE/
RESET Knopfes wird fuer 5 Sekunden angezeigt.
Die maximale Wellenanzahl fuer die Uhr ist 99. Das
waere ein unglaublicher Surf.
DRUEKE den QUICK TIDE Knopf jederzeit
in irgendeiner anderen Einstellung, um zur
Gezeitenfunktion
umzuschalten (2A).
DRUECKE den QUICK TIDE Knopf nochmals um
zurueck zur zuletzt benutzten Funktion zu gelangen
(2B).
DRUECKE und HALTE MODE/SET Knopf, um die
Zeiteinstellung vorzunehmen
EINSTELLUNGSREIHENFOLGE: Sek, Stunde(4A),
Minute (4B), Jahr,Monat, Datum, 12/24H, For mat,
Winterzeit, Strand-Zone(4C), Hausstrand (4D).
DRUECKE den QUICK TIDE Knopf, um durch die
Einstellungsreihenfolge fortzuschreiten.
DRUECKE START/STOP oder WAVE/RESET, UM DEN
GEGENWAERTIGEN WERT ZU VERAENDERN
DRUECKE MODE/SET erneut, um die Einstellung
zu verlassen.
Es gibt 13 Strand-Zonen sowie eine 14. Auswahl
welche die Basis-Gezeit ist. Diese Gezeitenfunktion ist
fuer den Fall das keiner der vorprogrammierten Orte
fuer dich in Frage kommt.Um diese Zone einzustellen
ist es erforderlich das naechste Hochwasser anhand
von oertlichen Datenbanken wie Gezeitenkalender
zu kennen.
Die BASIC TIDE Einstellung basiert auf einem 12 Std.
25 Min. und 14 Sec. Wechselrhytmus. Ebbe ist genau
zwischen zwei Fluten programmiert.
EINSTELLUNGSSEQUENCE IST: STUNDEN/MINUTEN
4HEIMAT ZEIT UND HAUSSTRAND
EINSTELLUNG 5ZEIT 2 UND STRAND 2
EINSTELLUNG 6GEZEITEN MODUS
7
HALTEden START/STOP Knopf gedrueckt, um zu
Zeit 2 zu gelangen. Das T2 Zeichen erscheint im
Display (5A).
WENN ZEIT 2 AKTIVIERT IST,WIRD DIE ZEIT WIE
OBEN BESCHRIEBEN EINGESTELLT.
OBERE DISPLAY ANSICHT
Die vertikale Linie zeigt den aktuellen Gezeitenstand
an.
DRUECKE START/STOPum in 30 min. Einheiten
vorzuschreiten (6B).
DRUECKE WAVE/RESET um in 30 min. Einheiten
zurueck zu gehen (6C).
UNTERE DISPLAY ANSICHT
Die jeweils erste Flut und Ebbe eines jeden Tageswird
fuer 3 Sec (6E). im Display zu sehen sein. Danach wird
jeweils die zweite Flut und Ebbe des jeweiligen Tages
zu sehen sein.
Durch einen Punkt neben jeder Gezeitenanzeige wird
AM und PM angezeigt (6F).
zu gelangen.
Wie im normalen Gezeiten Modus werden die Zeiten
von Ebbe und Flut unten im Display angezeigt. Wenn
Du FUTURE TIDE verlaesst, springt die Uhr zurueck zu
deinem vorher eingestellten Strand 1. oder 2.
Wenn du wieder zur FUTURE TIDE gehst, so wird erst
wieder dein local eingestellter Strand zur aktuellen
Uhrzeit angezeigt (7E).
Wenn du den Quick Tide Knopf im Future Tide Modus
drueckst, um aktuelle Tideinfos zu erhalten, dann den
Quick Tide Knopf wieder drueckst, um zurueck zu
gelangen, werden die Gezeiteninformationen deines
letzten Strandes, den du in FUTUR TIDE eingestellt
hast, genomme (7F).
WELT ZEIT MODUS 8
Timer aktive ist. Fuer persoehnliche Einstellungen wird
CU angezeigt.
Timer Typen:
Runterzaehlen der Zeit: CD-STP (8E)
Raufzaehlen der Zeit: CD-UP
Doppelter Beep Tonbei der letzten Minute
Einzelner Beep Tonfuer die letzten 5 Sec.
Bei Zeitablauf ertoent fuer 20 sec. ein Doppel Beep
TonWiederhohlen
des Countdown: CD-REP
Die Singnaltoene sind die Selben, ausser:
Bei der 20 sec. Countdowneinstellung ertoent nur ein
doppelter beep Ton,wenn die Zeit abgelaufen ist. Die
Wiederhohlung des Countdowns ist unbegrenzt.
9
HEAT STOPUHR CHRONOGRAPH &
WELLENZAEHLER 10 WECKZEIT
2DIREKTZUGANG GEZEITEN
FUNKTION
EINSTELLUNGEN / BETRIEBSART:Druecke den
MODE/SET Knopf um durch die Funktionen zu
schalten.
ZEIT
GEZEITEN
ZUKUENFTIGE GEZEITEN
ZEITNEHMER (TIMER)
CHRONOGRAPH (STOPUHR) UND WELLENZAEHLER
WECKZEIT
DIREKTZUGANG GEZEITEN
Willkomen in der wundervollen Welt von “Nixon
Digital Tide”! Die Uhr,die Du in Deinen Haenden
haeltst, verschafft Dir Zugang zu Gezeiten Daten
von 200 Straenden. Die Straende sind in 13
unterschiedliche Zonen eingeteilt die wir ganz
speziell fuer Dich ueber den ganzen Planeten verteilt
ausgesucht haben.
1LEGENDE
DRÜNCKE NIEMALS DEN
LICHTKNOPF ODER STELLE
DIE UHRZEIT EIN, WENN DIE
UHR IM WASSER IST.
DRUECKE den MODE/SET Knopf, um in den HEAT
TIMER Modus zu kommen. Das Wort
TIMER erscheint OBEN im Display (8A).
MIT dem WAVE/RESET Knopf kannst du die
vorprogrammierten Zeiten auswaehlen.
MIT START/STOP startest oder stoppst du den
Timer
MIT dem WAVE/RESET Knopf resetest du die
gestoppte Zeit.
VORPROGRAMIERTE ZEITEN SIND: 7, 10, 15, 20, 30,
40 MINUTEN UND 1 STD.
PERSOENLICHE ZEITEINSTELLUNG:
HALTE DEN MODE/SET Knopf gedrueckt (8B).
DIE EINSTELLUNGSSEQUENZIST:
Sec (8C), Stunden (8D), Minuten, Typ.
MIT DEM QUICK TIDE Knopf springst du zu
den Einstellungen.
MIT DEM START/STOP oder dem WAVE/ RESET
Knopf erhoehst oder verringerst du deine
Einstellung.
Ober rechts im Display wird angezeigt welcher Timer
aktive ist. Z.B. zeigt dir 07 an, dass der 7 Minuten
Diese Funktion kann dein Urlaubsplaner sein!
Nicht nur das du alle Gezeitenstaende bis ins Jahr 2019
ablesen kannst, sondern du kannst das auch mit jedem
Strand machen der in deiner Uhr ist.
DRUECKE MODE/SET,um in den FUTURE TIDE Modus
zu gelangen.
Angezeigt wird dies durch das Wort FUTURE TIDE (7A).
HALTEMODE/SET Knopf gedrueckt, um die FUTURE
TIDE einzustellen (7B).
EINSTELLUNG IST WIE FOLGT: Strand/Jahr/
Monat/Datum
DRUECKE den QUIK TIDE Knopf um durch die
Einstellungssequence zu gelangen.
DRUECKE START/STOP(7C) FUER + UND
WAVE/RESET (7D) FUER -.
DRUECKE MODE/SET wieder,um die Einstellung
zu speichern.
Im FUTURE TIDE MODUS koennen die Gezeiten nur
tageweise angezeigt werden. Die 16 Stunden der
Gezeiten beziehen sich auf die aktuell eingestellte Zeit
im Time Modus.
DRUECKE START/STOPum zum naechsten Tag
zu gelangen.
DRUECKE WAVE/RESET um zum vorherigen Tag
7WELT ZEIT MODUS
8HEAT STOPUHR
PRESS and HOLD START/STOPButton to change to
Time 2 Display.
T2 Icon will be on (5A).
WHEN TIME 2 IS ACTIVE, SET TIME AS NOTED TO THE
LEFT IN HOME TIME and HOME BEACH SETTING (5A)
10 ALARM
PRESS WAVE/RESET Button to move back to the
previous Day (7E).
Just like in Tide mode, the Numeric Tide Times for the
Day will be displayed and will alternate on the LOWER
SECTION of the display.
Exiting FUTURE TIDE Mode will cause the watch
to revert the Beach Data back to the Local Beach
active in TimeMode (either Time 1 or Time 2 Beach).
Therefore accessing FUTURE TIDE again will show the
Local Beach in the Current Time. However,if you only
press the Quick Tide Button in Future Tide Mode to
check your current Tide information, then the Tide
information will be retained from the last Beach and
Date set in FUTURE TIDE (7F).
9CHRONO & WAVE COUNT
PRESS MODE/SET Button to advance to Chrono
& Wave Count Mode
The words CHRO and WAVEwill be displayed
on the Upper and Lower sections of the
display (9A).
PRESS START/STOPButton to Start or Stop the
Chrono (9B).
PRESS MODE/SET Button to advance to Alarm Mode
(10A)
PRESS WAVE/RESET Button to change the Alarm Type
(10B) Alarm Types are: Daily/Weekly/Yearly
PRESS START/STOPto turn Alar m On or Off
PRESS and HOLD MODE/SET to enter Alarm Setting
SETTING SEQUENCES:
DAILY Hour/Minute/Time Zone (10C)
WEEKLY Hour/Minute/Dayof the Week /Time Zone (10D)
YEARLY Hour/Minute/Month/Date/Time Zone
PRESS QUICK TIDE Button to Advance through the
Setting Sequence.
PRESS START/STOPor WAVE/RESET Buttons to
increase or decrease current value.
GOT IT? GOOD!
Now Get out in the water and Surf !!!
PRESS QUICK TIDE Button at any time from any
other Mode to toggle to TIDE Mode (2A).
PRESS QUICK TIDE Button again to go back to the
last Mode you were in (2B).
PRESS LIGHT Button to active the Light (3A).
PRESS WAVE/RESET to turn Hourly Chime On or
Off (3B).
PRESS and HOLD WAVE/RESET Button to turn
Keytone ON or OFF DUALTIME and DUAL TIDE
PRESS START/STOPButton to show TIME 2 and
BEACH 2.
PRESS and HOLD START/STOPButton TO change to
TIME 2 and BEACH 2.
That’s right, you can set a differentBeach that
corresponds to Time 2!
3TIME MODE
PRESS the MODE/SET Button to advance to TIDE
Mode. Theword TIDE will be displayed on the
UPPER SECTION of the display (6A).
The Beach Defaults to the Current Beach you have set
in TIME Mode.This Beach Name is displayed on the
LOWER SECTION of the display.If Time 1 is active,
the beach set for Tide 1 will be displayed. If Time 2 is
active, the beach set for Tide 2 will be displayed.
UPPER SECTION OF THE DISPLAY
The Solid Vertical Line Represents the CurrentTime.
PRESS START/STOPButton to Advance Tide Display
by 30 minutes (6B).
PRESS WAVE/RESET to Move Back Tide Display
by 30 minutes (6C). Youcan scroll forward for
up to 2 days (48 hours) from current time.
6TIDE MODE
9CHRONO & WAVE COUNT
CONTINUED
PRESS and HOLD WAVE/RESET Button to Reset
when in the Stop State (9C) Wave Counter
While CHRONO is Running
PRESS WAVE/RESET Button to use the watch as a
wave or set counter.The time from when
you pressed STARTuntil you pressed WAVE
will be displayed for 5 Seconds.
When the next wave comes,
PRESS WAVE/RESET Button again to count another
wave (9D). The number 2 will appear next
to word WAVEand the time from when you
last pressed the WAVE/RESETButton will
be displayed for 5 Seconds. The Maximum
number of waves is 99 for the watch. That
would be a RAD session.
3ZEIT FUNKTION
DRUECKE den LIGHT Knopf, um das Licht zu aktivieren
(3A).
DRUECKE WAVE/RESET, um das Stunden-Tonsignalein
oder auszuschalten (3B)
DRUECKE und HALTEden WAVE/RESET Knopf, um die
Tastentoeneaus oder einzuschalten.
ZWEITZEIT und ZWEIT GEZEIT
DRUECKE den START/STOPKnopf um ZEIT 2 und
STRAND 2 ANZUZEIGEN
DRUECKE und HALTEden START/STOP Knopf um
zwischen ZEIT 2 und STRAND 2 ZU WECHSELNJa es
stimmt, Du kannst einen anderen Strand einstellen der
sich nach der Zeit 2 richtet.
6GEZEITEN MODUS EINSTELLUNG
DRUECKE den MODE/SET Knopf, um in den TIDE
Modus zu gelangen.TIDE wird oben im
Display zu lesen sein (6A).
Der Gezeitenunterschied zum aktuell eingestellten
Strand muss im ZEIT Modus eingestellt werden.
Dieser Strand wird unten im Display zu sehen sein.
Wenn Zeit 1 eingestellt ist, sind die Gezeiten fuer
Strand 1 abzulesen.
Wenn Zeit 2 eingestellt ist, sind die Gezeiten fuer
Strand 2 abzulesen.
DRUECKE den MODE/SET Knopf um zur Weckzeit-
Funktion zu gelangen (10A).
DRUECKE den WAVE/RESET Knopf um denWeckzeit-
Typ zu wechseln (10B)
Weckzeit-Typensind: Taeglich /
Woechentlich / Jaehrlich
DRUECKE START/STOPum die Weckzeit ein- und
auszuschalten
DRUECKE und HALTEMODE/SET zum Eingeben der
Weckzeit-Einstellung
EINSTELLUNGSSEQUENZ:
Taeglich-Stunde/Minute/Zeitzone (10C)
Woechentlich -Stunde/Minute/Wochentag/Zeitzone
(10D)
Jaehrlich -Stunde/Minute/Monat/Datum/Zeitzone
DRUECKE den QUICK TIDE Knopf um durch die
Einstellungsreihenfolge fortzuschreiten
DRUECKE die START/STOPoder WAVE/RESET
Knoepfe um den gegenwaertigen Wert zu verstellen.
ALLES KLAR? SEHR GUT!
DANN GEHTS JETZT AUF WASSER !!!
36
(8C) (8D)
(8E)
(9A) (9B)
9(9C)
(9D)
(10B)(10A)
(10C) (10D)
LIGHT
MODE/
SET
START/STOP/
[+]
QUICK
TIDE
WAVE/
RESET/
[-]
(6F)
AM PM
WELCOME.
www.nixonnow.com
DRY
NO
DRY
NO
DRY
NO
aumentar o disminuir los valores visualizadas
La Cuenta Atras activa se visualiza en la parte superior de
la pantalla, a la derecha. Por ejemplo, si 07 se visualiza, la
cuenta atras de 7 minutos esta activada. Para las cuentas
personalizadas, CU se visualiza a la derecha. Detalles sobre
los tipos de Cuenta Atras
Paro de la Cuenta Atras CD-STP (8E).
Cuenta Atras Activa CP-UP
2 senales sonoros « Beep » para senalar el ultimo minuto
1 senal sonoro “Beep” cada Segundo para los 5 ultimos
segundos Cuando la cuenta atras llegue a 0, se oye un
doble senal sonoro durante 20 segundos.
Repeticion de la cuenta atras CD-REP
Los senales sonoros estan los mismos cuando la cuenta
atras se repite, excepto en los casos siguientes : Si el tiempo
programado esta igual o inferior a 20 segundos, solo se oye
un doble senal sonoro cuando la cuenta atras llegue a 0. La
repeticion de la Cuenta Atras esta perpetua
MANTENER PRESIONADO EL BOTON MODE/SET
durante unos segundos para ir al Reglaje de la Hora.
EL ORDEN DEL REGLAJE ESTA:Seg, Hora (4A), Minuto
(4B), Ano, Mes, Fecha, formato 12o24H, DST(Hora de
VeranoInvier no), Zona de la Playa (4C),Playa Local (4D).
PULSAR el boton QUICK TIDE para ir de una secuencia
de Reglaje a una otra
PULSAR START/STOPo WAVE/RESET para aumentar
o disminuir los valores visualizadas
PULSAR de nuevo el boton MODE/SET para salir
de los Reglajes.
El reloj tiene 13 Zonas de Playa, y tambien una
decimocuarta seleccion que corresponde a un programa
basico de Mareas. Este ajuste esta en caso de que no puede
encontrar un lugar pre-programado que le conviene. Para
que este programa funcione, tiene que PROGRAMAR la
hora de la proxima marea alta, que se encontra en cualquier
Calendario de las Mareas Local.
Si ajusta su reloj en el programa MAREAS BASICAS, el
programa va a seguir el funcionamiento clasico de las
mareas,con unos 12 horas 25 minutos 14 segundos de
diferencia entre 2 mareas altas. Las mareasbajas estan
exactamente entre dos mareas altas. El orden de reglaje
esta: HORA/MINUTO
4REGLAJE DE LA HORA
LOCAL Y LA PLAYA LOCAL 5AJUSTE DE LA
HORA 2 Y LA PLAYA2 6MODO MAREAS
8
PULSAR el BOTON MODE/SET para ir al modo
HEATTIMER (8A)
La palabra TIMER se visualizara en la parte
superior de su pantalla.
PULSAR el boton WAVE/RESET para hacer
desfilar en la pantalla las Cuentas Atras
programadas.
PULSAR el boton Start/Stop para activar/
desactivar la cuenta atras.
MANTENER PRESIONADO el boton WAVE/RESET
durante unos segundos para resetear la
Cuenta Atras cuando esta parada.
Los tiempos siguientes estan rogramados:7,10,15,20,30,40
minutos y 1 hora Para programar una Cuenta Atras
personalizada
MANTENER PRESIONADO el boton MODE/SET
durante unos segundos para ajustar la
cuenta atras(8B).
EL ORDEN DEL REGLAJE ESTA:Segundos (8C), Hora (8D),
Minuto, Tipo.
PULSAR el boton QUICK TIDE para ir en las
diferentes secuencias
PULSAR los botones START/STOP o WAVE/RESET para
8
CUENTA ATRAS EN
MANGA TIMER MODE
CUENTA ATRAS EN
MANGA TIMER MODE
2CONSULTA RAPIDA
DE LAS MAREAS
MODOS: PULSAR EL BOTON MODO/AJUSTARpara ir
en los diferentes modos
HORA
MAREAS
MAREAS FUTURAS
CUENTAATRAS
CRONO Y CONTADORDE OLAS
ALARMA
CONSULTA RAPIDA DE LAS MAREAS
Bienvenido en le mundo magnifico de los relojes de
Mareas Digitales Nixon. El reloj que tiene ahora en
manos da los horarios de Mareas para 200 playas. Las
playas se reparten en 13 zonas diferentes que hemos
seleccionado para ustedes a traves del mundo.
1MODES
NUNCA EMPUJE UN BOTÓN
LIGERO O FIJE EL RELOJ
CUANDO SE SUMERGE
Se puede ver este modo como su proprio agenda de
vacaciones ! No solo se puede consultar los horarios
de mareas hasta 2019, pero se puede consultarlos para
cualquier playa programada en su reloj.
PULSAR el boton MODE/SET para ir a la funcion
FUTURE TIDE (7A).
Las palabras TIDE FUTURE se visualizaran en las partes
inferiores y superiores de su pantalla.
PULSAR el boton MODE/SET durante unos segundos
para ajustar las mareas futuras (7B)
EL ORDEN DE REGLAJE ESTA:Playa/Ano/Mes/Fecha
PULSAR el boton QUICK TIDE para ir en las diferentes
secuencias de reglaje
PULSAR START/STOPo WAVE/RESET para aumentar
(7C) odisminuir (7D) los valores
VOLVERA PULSAR MODE/RESET para salir del reglaje
*RINSE WATCH WITH SOAP AND WATER AFTER
EXPOSURE TOSALT WATER OR SAND.
Replace the battery at least every two years. Dead or low
batteries left in a watch may leak and destroy the movement
of your watch. If you have a water resistant watch, know that
the water resistancy is attained using rubber or plastic seals
which will deteriorate under normal conditions and reduce
the water resistancy of your watch. These seals should be
checked by an authorized jeweler at least every two years to
ensure the rated water resistancy.Do not expose your watch
to extreme temperatures (over 60ºC or 140ºF, under -10ºC or
14ºF). No hot tubs or saunas. Sorry,but do you really need to
know the time when you’re tubbing?
Avoid extreme shocks.
30 METER
50 METER
100-200
METER
CASE
RATING
RAIN,
SPLASHES,
ETC.
SHALLOW
SWIMMING,
SUBMERSION*
SURFING,
SNORKELING,
SPEAR FISHING*
A FEW OF OUR WATCHESARE GEARED
TOWARDS PURE STYLE AND ARE NOT
DESIGNED FOR SURF OR SWIM. THIS IS
INDICATEDBY THE “NO WATER”ICON.
WATER RESISTANCY RATINGS
AND WATCH CARE
7MAREA FUTURA
7MAREA FUTURA
MANTENER PRESIONADO el boton
START/STOP durante unos segundos para ir a la
visualizacion de la Hora 2 (5A).
Cuando la hora 2 esta activada, ajusta la hora como
explicado mas arriba en el « Reglaje de la Hora y Playa
a casa »
10 ALARMA
EN MODO FUTURE TIDE solo se puede ver los horarios
de mareas por dia. Las 16 horas programadas para los
movimientos de mareas dependen del reglaje de su
hora corriente
PULSAR el boton START/STOP para ir al dia siguiente
PULSAR el boton WAVE/RESET para volver al dia
anterior (7E).
Como en el modo MAREAS, las cifras de las
mareas altas y mareas bajas del dia se visualizan
alternativamente en la parte inferior de su pantalla.
Hasta el ano 2055 si utiliza la marea basica como marea
futura Cuando se sale del modo FUTURE TIDE el reloj
vuelve automaticamente en la playa local programada
en modo hora (tanto en hora 1 como en hora 2).
Es decir que si vuelve al modo FUTURE TIDE, tendra
su playa local, a la hora corriente. Sin embargo, si
solo PULSE el boton QUICK TIDE en modo FUTURE
TIDE para ver las informaciones de la marea actual,
y despues vuelve a pulsar el boton Quick Tide para
volver al modo FUTURE TIDE, la informacion de marea
que tendra sera la ultima playa y fecha programada en
FUTURE TIDE (7F).
9CRONOMETRO Y
CONTADOR DE OLAS
PULSAR el boton MODE/SET para ir al modo CHRONO
Y VWAVE COUNT (9A).
Las palabras CHRO y WAVE se visualizaran en la parte
superior y inferior de la pantalla.
PULSAR el boton START/STOPpara activar o
PULSAR el boton QUICK TIDE (consulta rapida
de las mareas) en cualquier momento,
desde cualquier modo, para ir al modo TIDE
(2A).
VOLVER A PULSAR el boton QUICK TIDE para
volver al modo anterior (2B).
PULSAR el boton LIGHT para activar la Luz (3A)
PULSAR el boton WAVE/RESET para activar/
desactivar el senal horario sonoro (3B).
MANTENER PRESIONADO el boton WAVE/RESET
para activar/desactivar la sonoridad de
las teclas
DUAL TIME and DUAL TIDE DOBLE HUSO HORARIO y
DOBLE PROGRAMA DE MAREAS
PULSAR EL BOTON START/STOP para visualizar
la HORA n’2 y la PLAYA n’2
MANTENER PRESIONADO el boton START/STOP
durante unos segundos para visulalizar
la HORA n’2 y la PLAYA n’2.
Eso es, se puede programar una playa diferente, que
corresponde a la HORA n’2
3MODO HORA
PULSAR el boton MODE/SET para ir al modo
TIDE (mareas) La palabraTIDE(mareas)
se visualizara en la parte superior de
la pantalla La Playa de referencia esta la
que fue programada en el modo HORA (6A).
El nombre de esta Playa se visualiza en la PARTE
INFERIOR de la pantalla Si la hora 1 esta activada, la
playa programada en Marea 1 se visualiza Si la hora 2
esta activada, la playa
6MODO MAREAS
9CRONOMETRO Y
CONTADOR DE OLAS
desactivar el Crono (9B)
MANTENER PRESIONADO el boton WAVE/RESET
durante unos segundos para reinicializar el
cronografo cuando esta parado
Contador de holas Cuando el cronoesta
activado (9C)
PULSAR el boton WAVE/RESET para utilizar su reloj
como Contador de ola o como Cuenta Atras de Serie.
El tiempo pasado entre el momento en el que pulse el
boton STARTy el momento en el que pulse el boton
WAVE se visualiza durante 5 segundos. Cuando la ola
siguiente llegue,
PULSAR de nuevo el boton WAVE/RESET para
contar una otra ola (9D).
La cifra 2 se visualizara al lado de la palabra WAVE el
tiempo pasado desde su ultima presion en el boton
WAVE/RESET se visualizara durante 5 segundos.
Se puede contar un maximo de 99
olas – lo que seria una serie increible !
programada en Marea 2 se visualiza.
PARTE SUPERIOR DE LA PANTALLA
La Linea Continua Vertical representala Hora Corriente
PULSAR el boton START/STOP para adelantar la
Marea por segmento de 30 minutos (6B).
PULSAR el boton OLA/INICIALIZAR para volver a la
visualizacion de la Mareas con 30 minutos
menos (6C).
Desde l ahora corriente/actual, puede adelantar hasta
48 horas el calendario de las Mareas.
PARTE INFERIOR DE LA PANTALLA
Los datos en cifras de las primeras mareas altas y
mareas bajas del dia se visualizan en la parte inferior de
su pantalla durante 2 segundos.Estos datos alternan
con las segundas mareas altas y mareas bajas del dia
(6E). Hay un punto al lado de cada hora de Marea.
Este punto indicale si se trata de la manana o de la
tarde (6F).
PULSAR el boton MODE/SET para ir al modo Alarma
(10A)
PULSAR el boton WAVE/RESET para cambiar el tipo
de Alarma
Las diferentes alarmas son: diaria/semanal/anual (10B)
PULSAR START/STOP para activar/desactivar la
Alarma
PULSAR MODE/SET durante unos segundos para
memorizar el tipo de alarma
SETTING SEQUENCES: El orden de reglaje esta:
Alarma Diaria - Hora/Minuto/Huso Horario(10C)
Alarma semanal - Hora/Minuto/Dia de la
semana/Huso Horario Yearly- Hour/Minute/ (10D)
Month/Date/Time Zone Alarma annual - Hora/Minuto/
Mes/Fecha/Huso Horario
PULSAR el boton QUICK TIDE para ir en las diferentes
secuencias de ajuste.
PULSAR START/STOP o WAVE/RESET para aumentar o
disminuir los valores visualizadas.
Vale? Bien! Ahora puede ir a surfear

AM PM
*RINCEZ LA MONTRE À L'EAU ET AU SAVON
APRÈS TOUTEEXPOSITION À L'EAU SALÉE OU
AU SABLE.
Changez la pile au moins tous les deux ans. Une pile faible
ou morte, laissée dans une montre, peut fuir et endommager
le mouvement. Si vous avez une montre étanche, sachez que
l'étanchéité est obtenue par l'utilisation de joints en plastique
ou en caoutchouc qui se détérioreront dans des conditions
normales et réduiront le niveau d'étanchéité de votre montre.
Ces joints doivent être vérifiés par un horloger qualifié au
moins tous les deux ans pour maintenir le niveau d'étanchéité.
N'exposez pas votre montre à des températures extrêmes
(supérieures à 60°C ou 140°F, inférieures à –10°C ou –14°F).
Pas de bain trop chaud ni de sauna. Pardon,mais avez-vous
vraiment besoin d'avoir l'heure quand vous prenez un bain ?
Evitez les chocs extrêmes.
30 MÈTRES
50 MÈTRES
100-200
MÈTRES
NIVEAU
D'ÉTANCHÉITÉ
PLUIE,
ÉCLABOUSSURES,
ETC.
NATATION ET
IMMERSION
EN EAU PEU
PROFONDE*
SURF,PLONGÉE,
PÊCHE SOUS-
MARINE*
CERTAINESDE NOS MONTRES SONT DÉDIÉES
AU STYLE PUR ET NE SONT PASCONÇUES
POUR LE SURF OU LA NATATION. CECI EST
INDIQUÉ PARL'ICÔNE "PAS D'EAU".
NIVEAUX D'ÉTANCHÉITÉ ET CONSEILS
D'ENTRETIEN
WARRANTY INFO
Nixon offers a limited warranty on defects in materials and
workmanship. when purchased from an authorized Nixondealer
and with proof of purchase (receipt).This means that if the materials
in your watch aren’t right or if the watch isn’tput together correctly,
we’ll repairor replace it, at our option. But, this doesn’t mean you
can abuse your watch and expect us to fix it for free. Wedon’tcover
normal wear and tear or batteries, crystal, watch case, strap, bracelet,
loss or theft. Youwill void your warranty if you open your caseback,
push the buttons underwater, or forget to screw downor push in the
crown and expose your watch to moisture. Forinformation regarding
the length of your warranty,please visit www.nixonnow.comand
select your country’ssite.
Problems? If you’re in North America, please call us at
1 760 944 0900 during normal business hours, PacificTime, and we
can work it out. If you’re somewhere else in the world, please contact
the store at which you bought your Nixon and they will point youin
the right direction.
NO IMPLIED WARRANTIES,INCLUDING THE
WARRANTIESOF MERCHANTABILITY AND FITNESS,
SHALL APPLYTO THIS PRODUCT FOR ANY PERIOD
BEYONDTHE TWO (2)YEAR TERM OFTHIS WRITTEN
WARRANTY.NIXON IS NOT LIABLE, UNDER ANY
CIRCUMSTANCES,FOR ANY INCIDENTAL DAMAGES
SUSTAINEDIN CONNECTION WITH THIS PRODUCT.ANY
RECOVERYMAY NOT BE GREATERTHAN THE PURCHASE
PRICE PAID FORTHIS PRODUCT.
Some countries and states, however,do not allow the exclusion
or limitation on how long an implied warranty lasts or allow the
exclusion or limitation of incidental or consequential damages, so the
above limitations and exclusions may not apply to you.This warranty
gives you specific legal rights, and you may also have other rights
which may vary from country to country and state to state.
INFORMACIÓN DE GARANTÍA
Nixon ofrece una garantía limitada para defectos de material
y manufactura, cuando el reloj se ha adquirido a través de una
distribuidor autorizado Nixon y con una prueba de compra (recibo).
Esto significa que si el material de tu reloj no está en condiciones o
si el reloj no ha sido ensamblado correctamente, lo repararemos o
sustituiremos, según decidamos. Si embargo, esto no significa que
puedas maltratar tu reloj y esperar que nosotros lo reparemos gratis.
No están cubiertos el uso y desgaste normal o las pilas, la esfera, la
caja del reloj, la cincha, la correa, pérdida o robo.Tu garantía queda
anulada si abres la caja, si pulsas los botones bajo el agua, o si te
olvidas de enroscar o presionar y bloquear la corona , o si expones tu
reloj a la humedad. Para más información en relacióna la duración
de tu garantía, por favor visita www.nixonnow.com y elige la página
de tu país.
Un problema? Si está en America del Norte,puede contactarnos
al 1.760.944.0900 durante las horas de trabajo, hora del pacifico,
y podrémos ayudarle. Si se encuentra en cualquier otra parte del
mundo, contacte la tienda donde compró su Nixon y le dirán la
manera de actuar.
NINGUNA GARANTIA, INCLUIDO LAS GARANTIAS
COMERCIALES Y DE ADAPTACION,SE APLICARA A
ESTE PRODUCTODESPUES DEL PLAZO DE 2 AÑOS
A PARTIRDEL PRINCIPIO DE ESTA GARANTIA. EN
NINGUNO CASO NIXON ESTARESPONSABLE DE TODO
DAÑO ACCIDENTALSUFRIDO POR ESTE PRODUCTO.
NINGUNO REEMBOLSO EXCEDERA EL PRECIO DE
ORIGEN DEL PRODUCTO(AL QUE FUE COMPRADO).
Algunos paises o estados, sin embargo, no permiten la exclusión o la
limitación de la duración de la garantía o la exclusión o la limitación
de los daños accidentales o consecutivos, de tal modo que las
limitaciones y exclusiones más arriba no se aplican a usted.
GARANTIE INFO
Nixon gibt eine eingeschraenkte Garantie auf Material-oder
Produktionsfehler sofern von einem autorisierten Haendler
erworben und ein Kaufbeleg vorhanden ist. Das bedeutet wenn
das Material nicht in Ordnung ist oder die Einzelteile nicht richtig
Zusammengesetzt wurden, wird die Uhr entweder repariert oder
ausgetauscht. Bei unsachgemaesser Behandlung gibt es keinen
Garantieanspruch. Normale Abnutzung undVerschleiss von
Batterien, Glas, Gehaeuse und Band sowie derVerlust bzw. Diebstal
dergleichen, werden nicht unter Garantie genommen. Die Garantie
geht verloren wenn der Gehaeusedeckel geoeffnet wird, Knoepfe
unter Wasserbetaetigt werden, oder die Uhr mit offener, bzw.
nicht eingeschraubter Krone, Naesse ausgesetzt wird. BeiFraegen
bezueglich der Garantie und der Garantiedauer,besuchen Sie bitte
unsere Webpagewww.nixonnow.com,bitte das Land auswaehlen.
Probleme? WennEuropa wohnen, rufen sie uns bitte unter 0033
558435917 während der normalen Geschäftsstunden an und wir
finden eine Loesung. WennSie irgendwo sonst in der Welt sind,
treten Sie bitte mit dem Shop in Verbindung, an dem Sie Ihr Nixon
kauften haben.
KEINE IMPLIZIERTEN GARANTIEN, EINSCHLIESSLICH
DIE GARANTIEN DER MARKTGÄNGIGKEIT UND
DER EIGNUNG, TREFFEN AUFDIESES PRODUKT
WÄHRENDJEDER MÖGLICHEN PERIODE ÜBER (2) ZWEI
JAHRE DIESER SCHRIFTLICHEN GARANTIE HINAUS
ZU. NIXON IST NICHT,FUER BESCHAEDIGUNGEN
DIE IM ZUSAMMENHANG MIT DIESEM PRODUKT
UNTERSTÜTZT WERDEN, VERANTWORTLICH.EINE
REPARATURODER EIN ERSATZ IST IN DEN MEISTEN
FAELLEN GENAUSO TEUER WIE DER KAUFPREIS, DER
FÜR DIESES PRODUKT GEZAHLTWURDE.
Einige Länder und Staaten jedoch erlauben nicht den Ausschluß
oder die Beschränkung eine implizierte Garantie oder den Ausschluß
oder die Beschränkung der beiläufigen Folgeschadenn. In dem
Fall können die oben genannten Beschränkungen und Ausschlüsse
möglicherweise nicht auf Sie angewand werden. Diese Garantie gibt
Ihnen spezifische Rechte, jedoch können Sie andere Rechte haben,
die von Land zu Land und Staat zu Staat schwanken.
WARRANTY INFOINFORMATIONS SUR
LA GARANTIE
Nixon offre une garantie limitée aux défauts de matériaux et de
fabrication quand l’achat a été fait auprès d'un revendeur Nixon
agrée Nixon et avec preuved'achat (reçu). Cela signifie que si les
matériaux de votre montre sont défectueux ou si la montre n’est
pas montée correctement, nous la réparons ou la remplaçons, selon
le cas. Mais cela ne veut pas dire que vous pouvez abuser de votre
montre et vous attendre à ce que nous la réparions gratuitement.
Notre garantie ne couvre pas l'usureou la détérioration ou les
batteries, le verre, le boitier,le bracelet, la perte ou le vol. Votre
garantie sera annulée si vous ouvrez le dos de votre boitier de
montre, appuyez sur les boutons dans l’eau, ou révisez la couronne
ou de la repousser et exposez votre montre a l’humidité. Pour
information regardez la durée de votre garantie sur notresite
nixonnow.com en sélectionnant votre pays.
Un problème ? Sivous êtes en Amérique du Nord, vous pouvez nous
joindre au 1 760 944 0900 pendant les heures de bureau, heure du
Pacifique, et nous pourrons vous aider.Si vous êtes ailleurs dans le
monde, contactez le magasin où vous avez acheté votre Nixonet ils
vous indiqueront la marche à suivre.
AUCUNE GARANTIE, Y COMPRIS LES GARANTIES
MARCHANDES ET D'ADAPTATION, NE S'APPLIQUERA
A CE PRODUIT AUDEL A DU DELAI DE DEUX (2)
ANS A COMPTER DU DEBUT DE CETTE GARANTIE.
NIXON N'EST EN AUCUN CAS RESPONSABLE DETOUT
DOMMAGE ACCIDENTEL SUBI PARCE PRODUIT.
AUCUN REMBOURSEMENT NE SAURAIT EXCEDERLE
PRIX AUQUEL CE PRODUITA ETE ACHETE.
Certains pays ou états, cependant, ne permettent pas l'exclusion
ou la limitation de la durée de la garantie ou l'exclusion ou la
limitation des dommages accidentels ou consécutifs, de sorte que les
limitations et exclusions ci-dessus ne vous sont pas appliquées. Cette
garantie vous donne des droits spécifiques, et vous pouvez avoir
également d'autres droits en fonction des pays ou des états.
APPUYEZ sur le bouton MODE/SET pour accéder au
mode Chronomètre et compteur de vagues Les mots
CHRO et WAVE serontaffichés dans les parties
supérieures et inférieures du cadran (9A)
APPUYEZ sur le bouton START/STOPpour mettre
en marche ou arrêter le Chronomètre (9B)
APPUYEZ et maintenez appuyé le bouton WAVE/
RESET pour remettre à zéro le chronomètre lorsqu’il
est arrêté
Compteur de vagues Lorsque le chronomètre est en
marche,
APPUYEZ sur le bouton WAVE/RESET pour utiliser
votre montre comme compteur de vagues
ou compte à rebours de série.(9C)
Le temps écoulé entre le moment où vous appuyez sur
le bouton STARTet le moment où vous appuyez sur le
bouton WAVE apparaît pendant 5 secondes. Lorsque la
vague suivante arrive,
APPUYEZ sur le bouton WAVE/RESET à nouveau
pour compter une autre vague (9D).
Le chiffre 2 apparaîtra à côté du mot WAVEet le temps
écoulé depuis votre dernière pression sur le bouton
WAVE/RESET sera affichépendant 5 secondes.
Vous pouvez compter 99 vagues au maximum ce qui
serait une excellente session !
APPUYEZ sur le bouton QUICK TIDE (consultation
rapide de la marée) à n’importe quel moment même si
vous êtes dans un autre mode et vous basculerez
immédiatement en mode marée (TIDE) (2A)
APPUYEZ à nouveau sur le bouton QUICK TIDE pour
revenir au mode dans lequel vous étiez initialement
(2B).
APPUYEZ et maintenez appuyé le bouton MODE/
SET pour accéder au réglage de l’heure Les réglages
se font dans l’ordre suivant: Secondes, heures (4A),
minutes (4B), année, mois, date, 12 h ou 24 h, heure
d’été et heure d’hiver,zone de la plage (4C), plage
locale (4D)
APPUYEZ sur le bouton QUICK TIDE pour accéder aux
différents réglages
APPUYEZ sur le bouton START/STOPou WAVE/RESET
pour augmenter ou diminuer les valeurs
affichées
APPUYEZ à nouveau sur le bouton MODE/SET POUR
sortir des réglages
13 zones de plages sont enregistrées dans les
données de marées basiques et vous avez la
possibilité d’en enregistrer une 14 ème vous même.
Ce programme vous servira si vous ne parvenez pas à
trouver un réglage qui corresponde à votre situation
géographique. Pour enregistrer cette quatorzième
zone vous devez enregistrer l’heure de la prochaine
marée haute selon les renseignements locaux comme
référence de base pour la zone. Si vous réglez votre
montre en mode de marée basic, vous ajustez vos
marées sur le modèle 12 heures 24 minutes et 14
secondes entre une marée haute et la suivante.
4REGLAGE DE L’HEURE LOCALE ET
DE LA MAREE LOCALE 4REGLAGE DE L’HEURE LOCALE ET
DE LA MAREE LOCALE 6MODE MAREE
7
Le nom de cette plage apparaît en bas de votre cadran
Si vous êtes en heure 1, la plage enregistrée en marée
1 apparaît Si vous êtes en heure 2, la plage enregistrée
en marée 2 apparaît
PARTIE SUPERIEURE DU CADRAN
La ligne verticale continue représente l’heure courante
APPUYEZ sur le bouton START/STOPpour avancer la
marée par tranche de 30 minutes (6D).
APPUYEZ sur le bouton WAVE/RESET pour reculerla
marée de 30 minutes Vous avez 2 jours (48 heures) de
manoeuvre à partir de l’heure courante
PARTIE INFERIEURE DU CADRAN
Les informations numériques des premières marées
haute et basse du jour apparaissent dans la partie
inférieure de votre cadran pendant 3 secondes (6E).
Ces informations apparaissent en alternance avec les
secondes marées haute et basse du jour.Il y a un point
situé à côté de chaque heure de marée. Ce point vous
indique s’il s’agit du matin ou de l’après midi. marée
locale »(6F)
jour les horaires de marées.
Les 16 heures enregistrées pour les mouvements
de marées dépendent du réglage de votre heure
courante.
APPUYEZ sur le bouton START/STOPpour avancer
au jour suivant
APPUYEZ sur le bouton WAVE/RESET pour revenir
au jour précédent (7E)
Comme en mode marée, les chiffres des marées hautes
et basses du jour apparaissent en alternance dans la
partie inférieure de votre cadran
Jusqu’en 2055 si vous utilisez la marée basique comme
référence pour votre marée future
Lorsque vous sortez du mode FUTURE TIDE la
montre revient automatiquement sur la plage locale
enregistrée en mode heure (aussi bien en heure 1
qu’en heure 2) Donc si vous accédez à nouveau au
mode FUTURE TIDE vous verrez la plage locale à
l’heure courante
Cependant, si vous appuyez seulement sur le bouton
QUICK TIDE en mode FUTURE TIDE pour voir les
informations de marée courante, et que vous appuyez
ensuite à nouveau sur le bouton QUICK TIDE pour
retourner en mode FUTURE TIDE, l’information de
marée sera la dernière plage et date enregistrée en
mode FUTURE TIDE (7F).
MAREE FUTURE 8
apparaît à cet endroit
Détails sur les types de minuteurs :
Arrêt du minuteur CD-STP (8E)
Minuteur en marche CD-UP
2 bip sonores pour signaler la dernière minute
1 bip sonore à chaque seconde pour les 5 dernières
Lorsque le compte à rebours arrive à zéro, vous
entendez un double bip sonore pendant 20 secondes
Répétition du compte à rebours CD-REP
Les signaux sonores sont les mêmes lors de la
répétition du compte à rebours sauf dans les cas
suivants :
Si le temps programmé est égal ou inférieur à 20
secondes, vous entendrez un seul double beep lorsque
le compte à rebours arrivera à zéro
La répétition du compte à rebours est perpétuelle
9
MINUTEUR DE SERIE CHRONOMETRE ET COMPTEUR
DE VAGUES 10ALARME
2MODE DE VISUALISATION RAPIDE
DE LA MAREE
MODES : Appuyez sur le bouton MODE/SET pour
accéder aux différents modes
HEURE
MAREE
MAREE FUTURE
MINUTEUR
CHRONOMETRE ET COMPTEUR DE VAGUES
ALARME
CONSULTATIONRAPIDE DES MAREES
Bienvenue dans le monde merveilleux des montres
digitales de marées NIXON ! La montre que vous avez
en main vous permet de connaître les marées de 200
plages.
Les plages sont réparties en 13 zones différentes que
nous avons choisi pour vous à travers le Globe.
1MODES
NE JAMAIS POUSSER UN
BOUTON OU REGLER LA
MONTRE LORSQU'ELLE EST
IMMERGEE. JAMAIS.
APPUYEZ sur le bouton MODE/SET pour accéder au
mode minuteur de série Le mot TIMER apparaîtra dans
la partie haute de votre cadran (8A)
APPUYEZ sur le bouton WAVE/RESET pour faire
dérouler les minuteurs programmés
APPUYEZ sur START/STOPpour démarrer ou arrêter
le compte à rebours
APPUYEZ et maintenez appuyé le bouton WAVE /
RESET pour réinitialiser le compte à rebours lorsqu’il
est arrêté
Les temps suivants sont pré enregistrés: 7, 10, 15,
20,30 ,40 minutes et 1 heure
Pour programmer un compte à rebours personnalisé:
APPUYEZ et maintenez appuyé le bouton MODE/SET
(8B) pour régler le compte à rebours
Le réglage se fait comme suit : Secondes (8C),
heures (8D), minutes, type
APPUYEZ sur le bouton QUICK TIDE pour avancer à
travers les différentes séquences
APPUYEZ sur START/STOPou WAVE/RESET pour
augmenter ou diminuer les valeurs affichées Le
minuteur actif est affiché en haut à droite du cadran.
Par exemple, si 07 est affiché, le minuteur de 7 minutes
est en marche. Pour les temps personnalisés, CU
Pensez à ce mode comme à votre agenda de vacances
personnel !
Non seulement vous pouvez consulter les horaires de
marées jusqu’en 2019 mais ceci pour toutes les plages
enregistrées dans votre montre.
APPUYEZ sur le bouton MODE/SET pour accéder à la
fonction FUTURE TIDE
Les mots TIDE FUTURE vont apparaître dans les parties
inférieures et supérieures de votre cadran (7A).
APPUYEZ et maintenez appuyé le bouton MODE/
SET pour régler les marées futures
Le réglage se fait comme suit : Plage / Année / Mois
/ Date (7B)
APPUYEZ sur le bouton QUICK TIDE pour avancer
dans les différentes séquences de réglage.
APPUYEZ sur START/ STOP ou WAVE/RESET pour
augmenter (7C) ou diminuer (7D) les
valeurs affichées
APPUYEZ sur MODE/SET à nouveau pour sortir du
réglage
En mode FUTURE TIDE vous pouvez seulement voir par
7MAREE FUTURE
8MINUTEUR DE SERIE
1MODES
Les marées basses sont donc programmées pour être
exactement entre 2 marées hautes.
SETTING SEQUENCE IS: HOUR/MINUTE
Le réglage est le suivant : HEURE / MINUTE
3MODE HEURE
APPUYEZ sur le bouton LUMIERE (LIGHT) pour activer la
lumière du cadran(3A)
APPUYEZ sur le bouton WAVE/ RESET pour activer ou
désactiver le bip horaire (3B).
APPUYEZ et maintenez appuyé le bouton WAVE / RESET
pour activer ou désactiver la sonorité des
touches.
DOUBLE FUSEAU HORAIRE ET DOUBLE
ENREGISTREMENT DE MAREES
APPUYEZ sur le bouton START/STOPpour afficher
l’heure 2 et la plage 2
APPUYEZ et maintenez appuyé le bouton START/STOP
pour afficher l’heure 2 et la plage 2
Ainsi vous pouvez programmer une plage différente qui
correspond à l’heure 2 !
5RÉGLAGE DE L’HEURE 2 ET DE LA
PLAGE 2
APPUYEZ et maintenez appuyé le bouton START/
STOP pour afficher l’heure 2 (5A) L’icône T2 apparaîtra
sur le cadran
Lorsque vous êtes en heure 2, réglez l’heure et la
marée locale comme mentionné plus haut dans le
paragraphe « réglage de l’heure et de la marée locale »
6MODE MAREE
APPUYEZ sur le bouton MODE/SET pour accéder au
mode marée (TIDE) (6A)
Le mot TIDE (marée) apparaîtra en haut de votre
cadran. Par défaut, la plage locale que vous avez
enregistrée en mode heure apparaît
APPUYEZ sur le bouton MODE/SET pour accéder au
mode alarme (10A)
APPUYEZ sur le bouton WAVE/RESET pour changer
le type d’alarme(10B)
Les types d’alarme sont : journalière, hebdomadaire,
annuelle
APPUYEZ sur START/STOPpour activer ou
désactiver l’alarme
APPUYEZ et maintenez appuyé MODE/SET pour
enregistrer le type d’alarme
L’enregistrement se fait comme suit :
Alarme journalière – Heure/Minute/ Fuseau horaire
(10C)
Alarme hebdomadaire- Heure/ Minute/ Jour de la
semaine/Fuseau horaire (10D)
Alarme annuelle- Heure/ Minute /Mois / Date /Fuseau
horaire
APPUYEZ sur le bouton QUICK TIDE pour accéder
aux différentes séquences de réglage
APPUYEZ sur START/STOPou WAVE/RESET pour
augmenter ou diminuer les valeurs affichées
VOUS L’AVEZ? BIEN! Maintenant vous pouvez allez
surfer!!!
446
TIDE MODE
78
9FUTURE TIDE 10 HEAT TIMER
2QUICK TIDE MODE 7
8
3TIME MODE 5
(7B)
(7D)
IMPORTANTE
Por favor,referele al dorso de la caja del reloj
para verificar su nivel de estanqueidad, o en nuestro
sitio internet: www.nixonnow.com
WICHTIG
Bitte beachte das wasserfestigkeitsniveau, das auf der
ruecken deiner uhr steht, oder check unsere website:
www.nixonnow.com
IMPORTANT
Reportez-vous au dos du boîtier de la montre pour
vérifier son niveau d'étanchéité, ou sur notre site
internet: www.nixonnow.com
IMPORTANT
Please refer to the watch case back for your watch’s
water resistancy rating, or our website: www.
nixonnow.com
21
7
456
8910
L
M
S/S
W/R
(5A)
(6A) (6B)
(6C) (6D)
(6E)
(7A)
(7C)
(7E) (8B)(8A)
-/+
(2A) (2B)
(3A) (3B)
(4A) (4B)
(4C) (4D)
(7F)
8
7
36
(8C) (8D)
(8E)
(9A) (9B)
9(9C)
(9D)
(10B)(10A)
(10C) (10D)
LIGHT
MODE/
SET
START/STOP/
[+]
QUICK
TIDE
WAVE/
RESET/
[-]
(6F)
DRY
NO
DRY
NO
Other manuals for THE DUAL TIDE
4
Other NIXON Watch manuals

NIXON
NIXON THE SMALL FULL NELSON User manual
NIXON
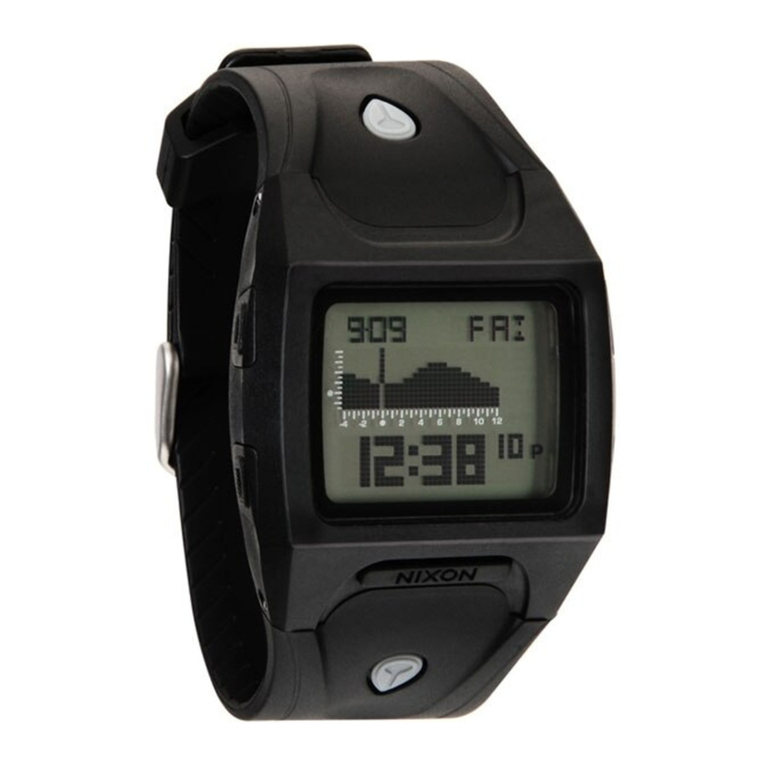
NIXON THE DUAL TIDE User manual

NIXON
NIXON THE DUO User manual
NIXON
NIXON Outsider User manual
NIXON
NIXON DICTATOR User manual
NIXON
NIXON THE BASE User manual
NIXON
NIXON Automatic II User manual

NIXON
NIXON THE RIPLEY User manual
NIXON
NIXON the PLAYER XL User manual
NIXON
NIXON THE DORK TOO User manual
NIXON
NIXON DICTATOR User manual

NIXON
NIXON THE ULTRATIDE User manual
NIXON
NIXON UNIT DIVE User manual
NIXON
NIXON Comp User manual
NIXON
NIXON THE STEELCAT User manual
NIXON
NIXON THE DUAL TIDE User manual

NIXON
NIXON THE METRO User manual

NIXON
NIXON THE SIREN User manual

NIXON
NIXON THE SIREN User manual
NIXON
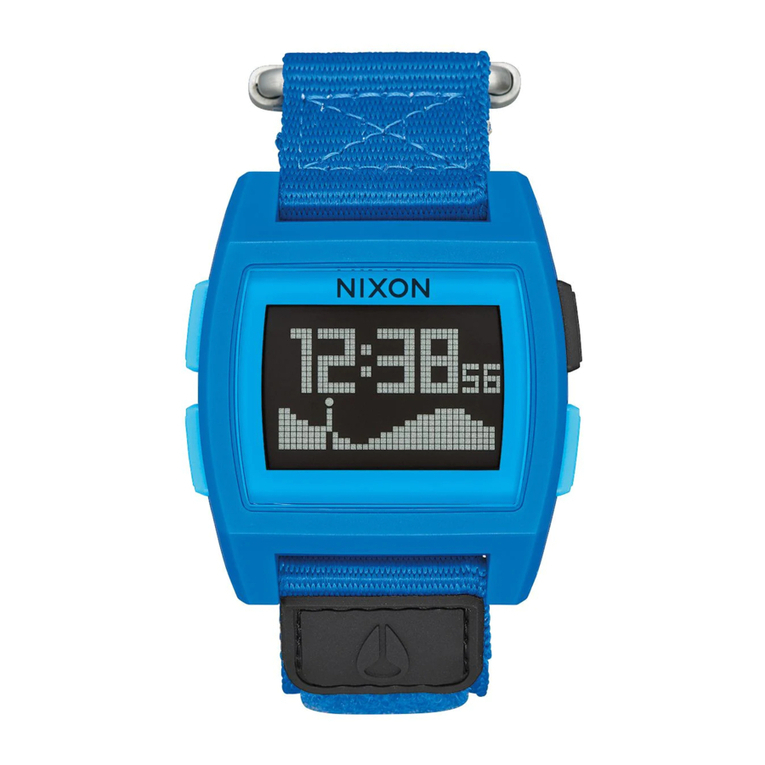
NIXON THE DUAL TIDE User manual
