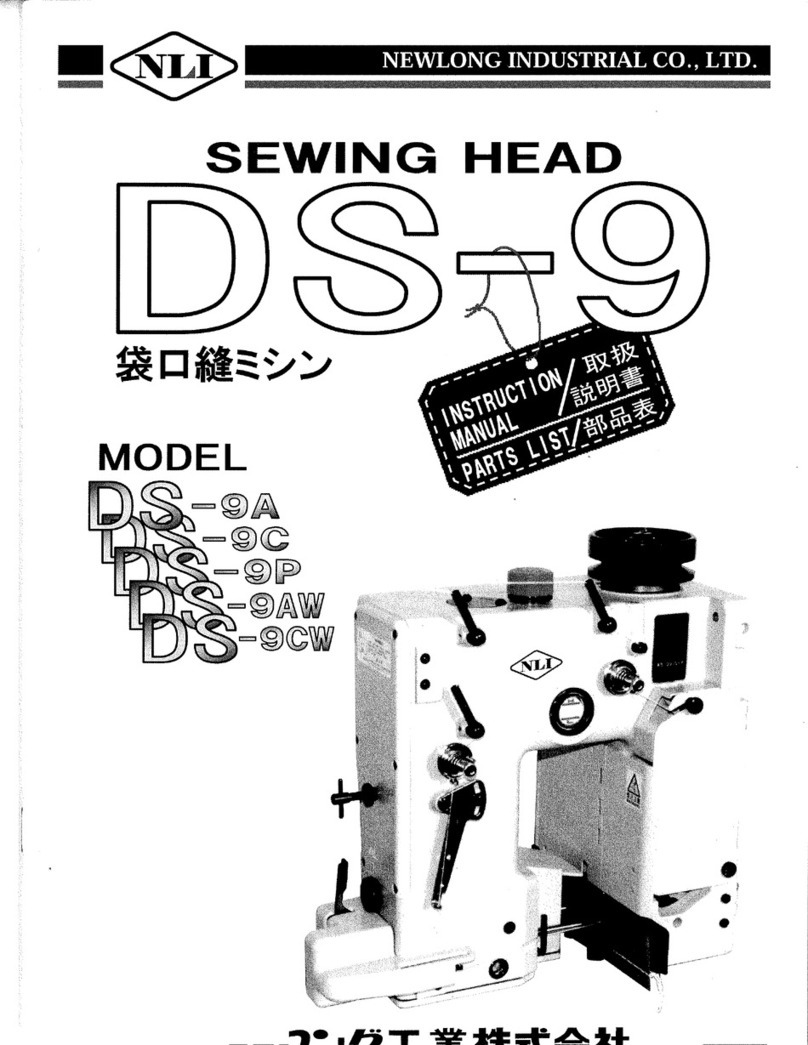
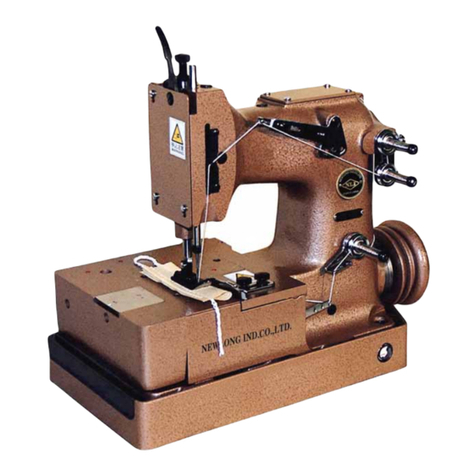
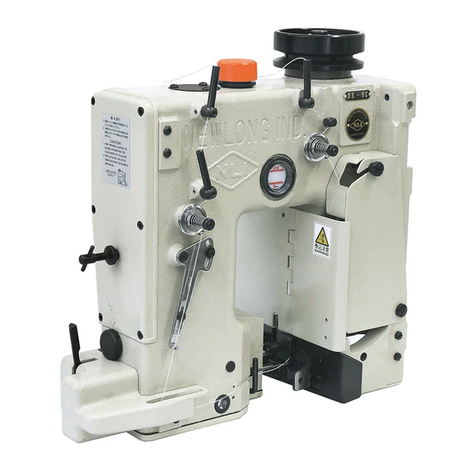
NLI HR-2A User manual

NLIF-017
NEWLONG INDUSTRIAL CO., LTD. NLIF-008
NEWLONG INDUSTRIAL CO., LTD.
縁カガリ縫製袋用ミシン

安全について
ニューロング工業(株)HR−2A型製袋用ミシンをお
買い上げいただき有り難うございます。
○この取扱説明書は HR-2A型製袋用ミシンの取扱い方法と使
用上の注意事項が記載されています。ご使用まえにこの取
扱説明書をかならずお読みください。内容を十分理解して正
しくご使用ください。
○この取扱説明書はミシンのそばに、いつでもご利用いただけ
るよう、保管してください。
HR-2A 型製袋用ミシンを貸し出し、または譲渡の場合はこの
取扱説明書を機械に添付してください。
○この取扱説明書を紛失された場合は、ニューロング工業(株)
全国営業所・連絡所にご注文ください。
○この取扱説明書は機能向上または安全のため、予告なし
に変更することがあります。
●ミシンに袋を挿入する時は注意しないと針や押エ金に指が
巻き込まれるおそれがあります。
●ミシンには巻込注意マークを貼っています。
指がミシンに直接さわらないように注意してください。
●針棒と上糸天秤は高速で動いています。
ミシンには挟込注意マークを貼っています。
ミシンが動いているときは針棒と上糸天秤に指や体を近づ
けないでください。
挟込注意
WARNING
捲込注意
●Theinstructionmanualandpartslistissubjecttochangewithoutpriornotice.
●この取扱説明書/パーツリストは、機能向上のため予告なしに変更することがあります。
ForOperatorSafety
ThankyouforpurchasingtheNLIModelHR-2A
BagSewingMachineHead.
○Thismanualcontainstheinstructionsandprecautionsfor
usingtheModelHR-2ABagSewingMachineHead.Be
suretoreadandunderstandthismanualbeforeuseand
usethemachinecorrectly.
○Keep this manual near the sewing machine for easy
reference.Besuretoattachthismanualtothemachine
when lending or transferring it to another person or
company.
○PleaseorderthismanualfromthenearestNLIofficeifit
islost.
○The contents of this manual are subject to change
withoutpriornoticeforimprovementandsafetypurpose.
●Becareful,whenyouinsertabagtobeclosedinto
thesewingmachine,oryourfingersmaybecaught
inthemachinebetweenthepresserfootandfeed
dog.
●A “Hazardous”markisattachedtothe machine.
Wh
ib h h
hi
●A Needle Bar and Needle Thread Take-UP are
movingathighspeed.A“Hazardous”mark
is attached to the machine. When the
machineisoperation,keepfingersandyourself
away from the Needle Bar and Needle Thread
Take-Up.
巻込危険
挟込注意
HazardofBeingCaughtintheMachine
HazardofBeingCaughtintheMachine
WARNING

WARNING
PERSONALINJURYMAY
RESULTIFTHEFOLLOWING
SAFETYPRECAUTIONSARE
NOTOBSERVED.
1.
BESURETHEAREASURROUNDINGMACHINE
ISFREEOFALLHAZARDSSUCHASFIRE,
WATER,OIL,RUBBISHORANYTHINGTHAT
CANCAUSEINJURY.
2.
DONOTOPERATEMACHINEINANEXPLOSIVE
AREAORUNDERWETCONDITIONS.
THEMACHINEISNOTANEXPLOSION-PROOF
TYPENORWATER-PROOFTYPE.
3.
DONOTOPERATEMACHINEBEFOREREADING
INSTRUCTIONMANUAL.
4.
DONOTOPERATEMACHINEONVOLTAGES
OTHERTHANSPECIFIEDFORTHEMACHINE.
5.
BESUREMACHINEISCONNECTEDTO
BUILDINGELECTRICALSAFETYGROUND
(EARTH).
6.
BESUREPOWER(ANDAIRSUPPLY)IS
OFFBEFORE PERFORMINGMACHINE
MAINTENANCE,PARTS REPLACEMENT,
ADJUSTMENTSORCLEANING.
7.
DONOTOPERATEMACHINEWITHGUARDS
ANDCOVERSREMOVED.
8.
DONOTTOUCHKNIFE,NEEDLE,PULLEY,
BELTANDMOVINGPARTSWHENMACHINEIS
INOPERATION.
9.
BESUREMACHINEISPLACEDONASMOOTH
(LEVEL)SURFACEWHENPERFORMING
MAINTENANCE,PARTSREPLACEMENT,
ADJUSTMENTS,CLEANINGORSTORAGE.
10.
BESURETHEMATERIALTOBESEWNOR
CLOSEDCOMPLIESWITHTHEMACHINE
SPECIFICATIONS.
11
DONOTUSESPAREPARTSOTHERTHAN
“NLI”GENUINEPARTS.
.
警 告
下記の安全項目を順守しなかった
場合には事故の原因となりますので
注意してください。
1. 機械の周辺に事故を起こす原因となる火気、
水、油、可燃物などがないか確かめてください。
2. 爆発の危険のある環境・水滴が直接機械にかかる
環境では使用しないでください。
この機械は、防爆型・防滴型ではありません。
3. 取扱説明書を必ず読んでから機械を運転してくだ
さい。
さ
4. 機械の指定電圧以外では運転しないでください。
5. アース線が接続されていることを確認してくださ
い。
6. 機械の整備・部品交換・調整、または掃除の
前に必ず電源(およびエアー源)を切って
ください。
7. 蓋やカバーが外れた状態では機械を運転し
ないでください。
8. 機械の運転中はカッター、針、プーリー、
ベルトその他動いている箇所には手を触れ
ないでください。
9. 機械の整備・部品交換・調整・掃除や保管の
時には平らな場所に置いてください。
10. 縫おうとする素材が機械の仕様に合っているか
確かめてください。
11 “ニューロング工業㈱”純正部品以外は使用しない
でください。
.
i

IdentifyingandOrderingParts
Where the construction permits, each part is
stamped with its part number. On all orders,
pleaseincludepartnumber,partnameandmodel
nameofmachine.
SafetyRules
Topreventpersonalinjury:
● Allpowersourcestothemachinemustbeturned
offbeforethreading,oiling,adjustingorreplacing
parts.
●All cover and guards must be in position before
operatingmachine.
●Donottamperwithsafetycover,guards,etc.,
whilemachineisinoperation.
CautionsWhenUsingtheMachine
SafetyPrecautions
1) Alwaysturnpoweroffbeforethreading,oiling,and
adjustingthemachineorreplacingparts.
2)Wearsafetyglasses.
3)Make sure, before starting the machine, that all
coversandshieldsareinplaceandclosed.
4)Donottouchonthemachinewhenitisrun.
5)Turnpoweroffandmakesurethecutterdoesnot
operate before you put your fingers under the
cutterbladesandtheneedlestoadjust.
6)Donottouchonthemachinewhenitisrun.
Maintenance
●Pleasekeepinmindtohandlethemachinecarefully
andtomaintainthemachineingoodcondition.
●Threadfuzzordustmustbecleanedwithairor
brushonthroatplate,inthegrooveoffeeddogor
aroundlooperaftertheday'swork.
●Wipetheareaeasytorustwithoilcloth.
●Check the machine for loose screws and tighten
them,ifany,onceamonth.
●Goodmaintenancewill prolongthemachinelife.
サービスに関するお問い合せ
部品交換とご注文上の注意
●ニューロング工業(株)全国営業所・連絡所には HR-2A
型の純正部品を常備しております。
●ご注文の際は、パーツリストのパーツ番号と名称でご指
示ください。
●使用上ご不明な点および使用中の故障や不審な点、
そ
の他整備などで解りにくい場合は、お買い上げいただ
き
ましたニューロング工業(株)全国営業所・連絡所にご
連
絡ください。
尚その際、機種名、機械番号、ミシン頭部名、ミシン番
号
をご指示くださいますようお願いいたします。
使用上の注意
安全について
1) 袋詰まり・糸切れのときの糸通し、糸の交換、給油、調整、部品
交換、保守点検作業の前に必ず電源を切ってください。
2) 調整作業のときは安全メガネの使用をおすすめします。
3) 全ての蓋・カバーは必ず運転前に締めてください。
4) カバーなどが閉まっていることを確認してから運転してくださ
い。
5) 針の下に手を入れるときは、必ず電源を切ってください。
修理調整のときは、必ず電源を切りミシンが動かないことを確
認
してから作業を行ってください。
6) ミシンの運転中には、ミシンに触れないでください。
整備
●ミシン頭部は精密な小さな部品から出来上がってい
ま
す。注意深く取扱うとともに常に整備に心掛けてくださ
い。
●一日の作業が終了しましたら、針板の上、送リ金の溝の
中、ルーパーのまわりに集まったほこり等はきれいに取り
除いてください。
●その他錆易い箇所は油布等で拭いてください。
●月に一度はネジのゆるみがないか点検してください。
●手入れの良し悪しは機械の寿命に影響しますのでご
注
意ください。
ii

CONTENTS/目次
1.Specifications/仕様2
2.Threading/糸通し図2
3.Lubrication(Fig.1) 給油(Fig.1)3
4.Adjustment/調整3
4-1NeedleSetting (針の交換)3
4-2AdjustingofLooper (ルーパーの調整)4
a)ThedistancebetweentheNeedleandLooper(針とルーパーの距離)4
b)TheclearancebetweentheNeedleandLooper(針とルーパーの間隔)4
4-3Adjusting Spreader (スプレッダーの調整)5
a)ThedistancebetweentheNeedleandSpreader (針とスプレッダーの距離)5
b)TheclearancebetweentheNeedleandSpreader (針とスプレッダーの間隔)5
4-4AdjustingThreadRetainer (糸捌キの調整)6
4-5AdjustingFeedDog (送り金の調整)6
a)HeightAdjustment(上下の調整)6
b)AdjustmentinCrosswiseDirection (左右の調整)6
4-6AdjustingStitchSpacing (縫目巾の変更)6
4-7AdjustingNeedleGuard (針ガードの調整)7
4-8PresserFoot (押エ金の調整)8
a)HeightAdjustment(上下の調整)8
b)AdjustmentinCrosswiseDirection(左右の調整)8
4-9ThreadTension(糸調子関係)8
a)(糸調子)8
b)(上糸調節)8
5.TroubleShooting/ミシンのトラブルの原因と対処(9,10)
PartsList/部品表12〜
NumericalIndexofParts/パーツ索引24,25
ListofScrew,Nut&Washer/ネジ、ナット、ワッシャー一覧図26
1
11

2
1.Specifications/仕様
2.Threading/糸通し
Seamspecificationandstitchtype
StitchRange
StandardSettingofRange
WidthofSeam
WidthofSeamspecialorder
Maximumthicknessofmaterial
Feed
NeedleTypeandsize
Thread(Cottonorjute)
Workingspeed
Maximumspeed
Motorspeed
Motorpulleydiameter
V-belttypeandsize
縫い形式
縫い目幅
標準縫い目幅
カガリ幅
カガリ幅特注
最大縫い厚
送り方式
針
綿糸、麻糸
作業回転数
最高回転数
モーター回転数
モータープーリー
Vベルト
502-SSa-1
6.5mm-15mm
10mm
15mm
10mm
16mm
PlainFeed普通送り
UO×1970 400
CottonorJute 綿糸,麻糸
1850rpm
2000rpm
2800(50Hz)/3400rpm(60Hz)
φ105mm(50Hz)φ90mm(60Hz)
M41(50Hz)M40(60Hz)
DESCRIPTION
OneNeedle,TwoThread,OveredingBagSewingMachine
APPLICATION
Foroverseamingoflightweighttoheavyweight
juteorPE/PPwovenclothbags.
説明
1本針、2本糸 袋縁カガリ縫いミシン
適用
コンテナバッグ、麻袋等の薄物から厚物まで
の織物の縁カガリ縫い用

3
3.Lubrication/給油
Lubricationisperformedeverydaytoensurealong
servinglifeofthemachine.Eachoilingpartismarked
witharedcap.
Beforestartingoperation,pleasemakesurethatanoilcup
issufficientlyfilledwithoil,andpleasesupplementoili
f
itfoundnotenough.
PLEASEOBSERVETHEOILINGWITHOUTFAIL,
ASANUNSUFFICIENTOILINGCOULDHAVETHE
MACHINEBURNTORCAUSEOTHERTROUBLE.
Forlubrication,werecommendWHITESPINDLE#60
orequivalent.(Viscosity:8-12cStat40℃)
Asanexample,SHELLTELLUSOILC10.
4.Adjustment/調 整
4-1NeedleSetting.
Beforeadjustingthemachine,insertanewneedleintothe
needlebarasdeepasitwillgo.Thelonggrooveofthe
needleshouldfacetheoperator.Tightentheneedleba
r
nut(HA56)firmly.
Note Improperneedlesettingacrookedneedle,and
wornoutneedlepoint and hole arepossible
causesofthreadbreakingandskipping.
HR−2A型製袋用ミシンを初めて運転をするとき、また相当
期間使用していないミシンを運転するときは、必ず手差し
で、各部に充分注油してから運転してください。
(例) シェルテラスオイル C10
運転開始の前にちょうつがい式の正面カバー(81201A)
を開き、正面と上側のカバー(80887A,80688)を取りはず
して、給油箇所に注油してください。
a)主軸の全てのエキセンカム関係
b)針棒
c)オイルカップ
d)ベースカバーの給油穴部
e)ボトルオイラー
○ミシンを手で廻して滑らかに回転することを確認したあ
と、ミシンを10分間ていど低速で廻して、油を充分に
オ
イルフェルトにしみわたらせます。その後再び各部に注
油してから運転を始めてください。
○毎日の運転前に必ず赤マークのついた穴から、注油し
てください。ボトルオイラーの油の量を確認してください。
少なければ、補給してから運転をしてください。
○給油が不充分の状態では、ミシンは焼き付けを起こし、
障の原因になります。必ず、使用前に注油をしてくださ
HR−2A型ミシンは弊社で適正な調整をして出荷していま
すが、部品交換などで調整が必要になりましたら、次の調整
方法を参照にして調整してください。
4-1 針の交換
針の取付
針を取付けるときは重要なことが二つあります。
a) 針のえぐりを(針穴近くの凹んでいる部分を)袋の進行
方向に向けて取付けてください。
b) 針棒に針を差し込むとき、針がつかえるまで一杯に差し込
んでください。そのあと針棒ナット(HA56)をしっかり締め
付けてください。
注) 針の向きを間違えると、ルーパーが針にあたり、糸切
れになります。針が曲がり、また針に傷ができると糸
れ、目飛びが起こります。新しい針と交換してくださ

4-2 ルーパーの調整
ルーパーの調整をする前に、押エ金、針板・送り金・針ガード
を取りはずしてください。
ルーバーの調整が容易になります。
a) 針とルーパーの距離<Fig.1>
ルーパー(81208)を、ルーパー台(81213)に取り付
けます。
針がもっとも下がったとき、ルーパーの先端と針の中心
までの距離は6mmです。<Fig.1>距離の調整は次の
通りです。
○ルーパー台とボールジョイント(15442K)を止めている
ナット(9937)を緩めてください。
ルーパー台とボールジョイントを S の方へ動かすと、ルー
は針に近づきます(Sʼ)。 L の方へ動かすとルーパー
は針から遠ざかります(Lʼ)。
距離の調整が終わったらナットを緩めてください。
注)距離が6mm以下では2度掛け、6mm以上では目飛び
の原因になります。
b) 針とルーバーの間隔
ルーバーが右に進み, ルーバーの先端が針の後ろを
通
過するとき,ルーバーの先端と針のえぐり部との間隔
は
0.1mmです。ルーバー台を調整してください。
○ルーバー台のネジ(98)を緩め、軸方向に動かして
調
節してください。
注) 針とルーバーの間隔がなく、針にルーパーがあたっ
て
いると、針に傷がつき、糸切れの原因になります。また
,
離れすぎると目飛びの原田になります。
4-2 AdjustingofLooper
Forconvenientaccess,removethepresserfoot,throa
plateandfeeddog.
a)Thedistancebetweentheneedlecenterandthelooper
Insertalooper(81208)intothelooperrocker(81213).
Turnthepulleyclockwise,andcheckthedistance
betweentheneedlecenterandthelooperpointinthe
lowestpositionoftheneedlebarjustbeforemoving
upwards.Thedistanceshouldbe6mmasshownin
(Figure1)
Ifitislargerorsmallerthan6mm,carryoutnecessary
adjustmentsafterlooseningthenut(9937)whichholds
thelooperrocker(81213)andtheballjoint(15442K)
inposition,untiltherequireddistanceisobtained.
○Settingthelooperrockerand the balljointinthe
directionsS willcausethelooperget nearertothe
needle(Sʼ),whilesettingtheminthedirectionLwill
maketheloopergoawayfromtheneedle(Lʼ).Never
failtotightenthenut(9937)aftertheadjustment.
(Note)
Ifthedistance betweentheneedlecenterandthe
looperpointisshorterthan6mm,"doublestitching”
willbecausedwhilethethreadmay skipifitis larger.
b)Theclearancebetweentheneedleandlooper
Turnthepulleyclockwise,andadjustthelooperrocker
sothattheclearancebetweentheJooperpoint and
theneedleis0.1mmwhentheloopermovesto
therightandpassesbehindtheneedle.
○Forthisadjustment,thelooperrockercanbemovedin
theaxialdirectionwhenthesetscrew(98) ofthe
looperrockerisloosened.
(Note)
Ifthereisnoclearancebetweentheneedleand
t
he
looper,withtheneedlecontactingthelooper,the
formerwillbecaused.Threadmay skip if
t
he
clearanceistoolarge.
4
Fig1 Fig2

4-3 Ad
j
ustingSpreader
a)ThedistancebetweenNeedleandSpreader
Turn the pulley clockwise, and check the distance
betweentheneedlecenterandtheconcavepartofthe
spreader(81207)atthetimewhenthespreaderisat
thefarthestintheleft.Thedistancemustbe6.5mm
asshown in (Figure2).Ifthedistanceislargeror
smallerthan6.5mm,carryoutnecessaryadjustments
asfollows:loosenthesetscrew (22517)ofthespreader
lever(81238),andturntheleverdown(directionS')
tomovethespreadertotheright(directionS),
orturnitup(directionL)tomovethespreaderto
theleft(directionL').Neverfailtotightenthesetscre
w
(22517)aftertheadjustment.
b)TheclearancebetweenNeedleandSpreader
Turnthepulleyclockwisefurther, and youwill see
theloopermovestotherightwhilethespreadergoes
to the left. In thiscase, notethat thespreader
pointpassestheconcavepartofthelooper(on thefar
side),as shownin(Figure3).Checktheclearance
betweentheconcavepartofthelooperand
thespreaderpoint.Theclearanceshouldbe
0to0.1mm.
○Iftheclearancedoesnotfallwithinthespecifiedrange,
loosenthesetscrew(318)ofthespreaderbearing
(81255),asshownin (Figure4),andmoveupthe
spreaderbearing(inthedirectionS)tomakethe
clearancesmallerormoveitdown(inthedirection
L)tomaketheclearancelarger.
Firmlytightenthesetscrewofthespreaderbearing
aftertheadjustment.
○Confirmthattheclearancebetweentheneedleandthe
spreaderis0to0.5mmatthetimewhentheneedle is
cominginbetweenthespreaderandtheloop
guide(81210),whileturningthepulleyclockwise.
c)Thecenterdistanceoftheballjoint
Thecenterdistanceofthebal1jointconnectingthe
spreaderlever(81238)andthespreader rocker
(81213AW)isfixedat105mm.Keepthisdimension,
otherwisetimingofthelooperandthespreader willget
outoforder.
SettingheightofNeedleBar
Adjusttheheightofthenedlebar(80617)sothatthe
upperpartoftheneedleholecoincideswiththeloope
r
hole,asshownin(Figure5),whentheloopergoestothe
rightandthelooperholealignswithneedlecenter.
Forthisadjustment,loosenthesetscrew(BP108)ofthe
needlebarvertically.
Aftertheadjustment,alwaystightenthesetscrew.
4-3 スプレッダーの調整
a) 針とスプレッダ―の距離<Fig.2>
プーリーを廻して、スプレッダー(81207)がもっとも左に
きたとき、針芯とスプレッダーのえぐり部の距離は
6.5mmです。距離の調整は次の通りです。
○スプレッダーレバー(81238)を止めているネジ(22517)
を緩めて、かるく仮締めしてください。 スプレッダーレバー
を倒す方向(S)に動かすと、スプレッダーは右方向(Sʻ)
に動きます。起こす方向(L)に動かすとスプレッダーは
左方向(Lʻ) に動きます。 調整が終わったらスプレッダー
レバーのネジ(22517)をしっかりと締めてください。
b) 針とスプレッダーの間隔 <Fig.3>
プーリーを廻して、ルーバーが右に動き、スプレッダーが
左に動いて、ルーバーの向こう側を通るとき、ルーバー
の向こう側のえぐり部とスプレッダーとの間隔は0〜0.1m
m
です。
間隔の調整は次の通りです。 <Fig.4>
○スプレッダー軸受(81255)のネジ(318)を緩めて調節
してください。
スプレッダー軸受を上方向(S)動かすと、間隔はせ
まくなり、下方向(L)に動かすと間隔は広くなります。
調整が終わったら軸受けのネジ(318)をしっかりと
締
めてください。
○手でプーリーを右に(時計方向に)廻して、スプレッダー
とループガイド(81210)の間に針が入るとき、針とスプ
レッダーの間隔は0〜0.5mmです。 確認してください。
c) ボールジョイントの距離
スプレッダーレバー(81238)とスプレッダー台
(81213AW)をむすぶボールジョイントとの距離は105mm
です。 この寸法は変えないでください。 この寸法が変わ
ると、ルーバーとスプレッダーのタイミングが狂います。
針の高さ<Fig.5>
ルーバーが右方向に進み、ルーバーの穴が針芯上にき
た
とき、針穴の上部とルーバー穴が一致するように調整し
て
ください。
○調整は針棒抱キ(80659)のネジ(BPI08)を緩めて、
針棒を上下に動かします。 調整が終わったらネジをしっかり
と締めてください。
5
Fig3
Fig5
Fig4

4-4 AdjustingThreadRetainer
Thethreadretainer(81211)hastocatchthelowerthread
beforethelooper(81208)enterstheneedlethreadloop.It
istobeadjustedsothattheclearancebetweenthethread
retainerandthelooperis0.5to1mmwhentheretainer
beginsitsupwardmovementandthelooperisatits
farthestrightposition.Forthisadjustment,loosentheset
screw(90)ofthe retainerandmovetheretaineras
necessary(Figure4refers).Loosenthesetscrew(98)of
thespreaderrocker(81213AW)andturnthespreader
rockershaft(81251A)asnecessary,sothattheclearance
betweenthepointoftheretainerandthethroatplate
(81224IW)is1mmatthetimewhentheretainerisfacing
upwardstoitsfullextent.
4-5 AdjustingFeedDog
Theheightofthefeeddogiscorrectwhen,atitshighest
pointoftravel,therearmostteethprojectabovethethroat
plateby1mmasshownin(Figure6).Thiscanbe
accomplishedbyremovingthefeeddog(764061),then
adjustingthescrew (97X) ofthe feedbar(80234B)to
obtaintherequiredheight.Fastenthefeeddogsetscrew
(93)afterensuringthatthefeeddogiscontactingthe
screw(97X).Toadjustthefeeddogwithinthethroatplate
(81224IW),ensuringuniformclearancebetweentherows
ofteethandthethroatplategrooves,loosenthesetscrew
(89)ofthefeedrocker(80233),andadjustthefeedrocker
asnecessary.
4-6 AdjustingStitchLength
Thestitchlengthadjustableintherangeof6.5to15mm.
Yourmachineissetatthestandardstitchlengthof10mm
inour plant before shipment.Toadjust,loosenthenut
(HA18)ofthefeedregulatingstud(80696)which
connectsthefeedrocker(80233)andthefeedrod(80651)
andmovethefeedregulatingstudvertically,asshownin
(Figure7).Bringingdownthefeedmakesthestitchlonger
andmovingitup shorter. Aftertheadjustment,never
forgettotightenthenut.
(Note)
Anychange inthestitchlengthwillnecessitatea
correspondingchangeinthesettingoftheneedle
guard(80225)
4-4 糸捌キの調整<Fig.4>
糸捌キ(81211)は,ルーバー(81208)が上糸のループに
はいる前の、下糸を押える働きをします。
○糸捌キが上向きに動く直前で、ルーバーがもっとも右
側
になるとき,ルーパーと糸捌キの間隔は0.5〜1mmです。
○調整は糸捌キのネジ(90)を緩めて、糸捌キ(81211)
を動かします。糸捌キがもっとも上向きになったとき、糸
捌キの先端と針板(812241W)の間隔が1mmになる
ように調整します。
○スプレッダー台(81213AW)のネジ(98)を緩めて,ス
プレッダー揺動軸(81251A)を動かして調整してくだ
さい。
4-5 送り金の調整
a) 上下の調整<Fig.6>
送り土台(80234B)に送り金(764061)を取り付けま
す。プーリーを手で廻して、送り金(764061)をもっとも
高い位置にします。止メネジ(93)をはずして、送り金
の上部が、針板から1mm出るように送り金の高さを調
節します。送り土台のネジ(97X)を、送り金の下から
支えるように調節し、止メネジ(93)で送り金を固定
し
ます。
b) 左右の調整<Fig.6>
送り元土台のネジ(89)を緩め、送り元土台(80233)
を左右に動かします。
針板(81244IW)のみぞの中で、送り金がみぞの側面
に触らないように、また送り金の位置が左右均等になる
ように調整してください。
調整のあとネジ(89)を仮締めして、送リロッド(80651)
の動きに支障がないか確認してから、ネジ(89)をしっ
かりと締めてください。
4-6 縫い目巾の調整<Fig.7>
HR-2A型製袋用ミシンは縫い目巾10mmに調整して、出
荷しています。
縫い目巾は6.5〜15mmまで調整可能です。
縫い目巾を変更するときは,次の順序で調整してください。
1) プーリーを手で廻して、送り金をもっとも前進した位置
に
します。
2) 送り元土台(80233)と送リロッド(80651)をつないで
いる、送り調節軸(80696)のナット(HA18A)を緩め
て、かるく仮締めしてください。
3) 送り調節軸を、送り元土台の、扇状の長い溝にそって
上下に動かして調整します。下げると縫い目巾はあらく
なります。上げると縫い目巾はこまかくなります。
○ナット(HA18A)を仮締めしてテスト縫いをしてください。
テスト袋の縫い目を見て、(希望の縫い目巾になってい
るかどうか)確認してください。確認が出来ましたらナット
(HA18A)をしっかり締付けてください。
○縫い目巾が決まったら、針ガード(80225)を送り土台
に取り付けてください。
注) 縫い目巾を変更するときは、必ず針ガード(80225)の
調整をしてください。
6
Fig6

4-7 針ガードの調整〈Fig.8,9〉
針ガードは(81225と80225の)2種類です。縫い目巾を変
更したときは、必ず針ガード(80225)を調整し直してくださ
い。針ガードの調整をしないと、針折れ・目飛びの原因にな
ります。
a) 針ガード(81225)は、針板(81244IW)の下側にネジ
(90)で取り付けています。
針と針ガードの間隔は、もっとも近づいたとき 1 mm です。
〈Fig.8〉
○ネジ(90)を緩めて針ガードをうごかし調整してください。
調整が終わったら、ネジ(98)をしっかりと締付けてくだ
さい。
b) 針ガード(80225)は、送り土台(80234B)のみぞの中
に、ネジ(93A)で取り付けています。
○針が上昇していくとき、針の動きに合わせて、針ガードが
かるく接触するように調整します。送り土台の取り付け
みぞにそって、針ガードの位置を動かし、調整してくださ
い。 そのあとネジ(93A)をしっかりと締めてください。
〈Fig.9〉
○プーリーを逆に(反時計方向に)廻して、針の先端が
針ガ一ドに乗り上げる音がするときは、針ガードが針
を
押しています。調整し直してください。
4
-7 AdjustingNeedleGuard
M
ounttheneedleguard(81225)inthegrooveonthe
t
hroatplate(81244IW),asshownin(Figure8),andadjust
i
tspositionsothattheclearancebetweentheneedleand
t
heguardis1mm.Holdtheguardinpositionbymeansof
th
escrew
(90)
.
M
ountanotherneedleguard(80225)onthefeedbar
(
80234B),asshownin(Figure9),andadjustitspositionin
t
hegrooveofthefeedbar,sothatitwilljustcontactthe
n
eedleastheneedlegoesup.Holdtheguardinposition
s
ecurelybytighteningthescrew(93A).Toconfirm the
p
ropera
dj
ustment,turnt
h
epu
ll
eycounterc
l
oc
k
w
i
se to
c
heckiftheneedleclicksontheguard.Ifitdoes,the
g
uardispushingtheneedleandreadjustmentisnecessary.
(
Note
)
R
eadjustmentoftheneedleguard(80225)is
n
ecessarywhenthestitchlengthischanged.
7
Fig7
Fig8
Fig9

4-8 MountingPresserBar andAdjustingPressure
ofPresserFoot
Thepresserbarsmustmovefreely.
a)Removethefacecover(80887A)anddetermine the
positionofthesetcollar(482C),asfollows:
1.
Adjustandsetthepresserbarholder(80632) so that
theclearancebetweenthepresserlifterlever (80648)
andthepresserlifterpin(22870)is1mm,asshownin
(Figure10).
2.Maketheclearancebetweenthepresserbarholder and
thesetcollar“A”1.5mm.
3.
Maketheclearancebetweenthesetcollars “A” and
“B”7mm.
4.Placethesetcollar“C”inthemiddleofthepresserbar
holder
.
5.
Theremustbeasufficientclearancebetweenthepresser
foot(inthehighestposition)andtheneedlebar nut(in
thelowestposition).Asufficientclearanceis also
re
q
uiredbetweenthes
p
readerintheu
p
wardmovement
andthepresserfootfingerintheliftedposition.
○Adjustthesetcollar“D” sothatthespreader inits
upwardmovementwillnothitthepresserfootfingerat
thetimewhenthepresserfootisliftedbythe lifter
lever(80648).
b)
Nowthatthepositionofthesetcollars“A”to“
D” has
beendetermined,andtheyareproperlyset, adjust
thespringpressureproperlybymeansofthepresser
footplate springadjustingscrew (64Y)locatedon the
topcover(80688).Turnthespringadjustingscre
w
clockwisetoincreasethepressureonthepresser
footorturncounterclockwisetodecrease.Threadis
brokenifthepresserfootgivesextrapressure.
Chainingofstitchisnotformedifthepressingpressure
fallsexcessivelylow.
○Aftertheadjustment, firmlylocktheadjusting screw
usingthelocknut(35733B),topreventitsloosening.
4-9 ThreadTension
Thetensionbalancesofneedlethreadandlooper
threaddecidethestitchingappearance.Thethread
tensionmustbesoadjustedthatasturdyappearance
isformedalloverthestitchline.
a)ThreadTension
Needlethreadformsastitchingline.Thethreadtension
ofneedlethreadmustbesoadjustedthatastraightline
Isformedontheundersideofabag.
Looperthreadsewsastitchinglineontothesurface.
Thethreadtensionoflooperthreadmustbesoadjusted
thatstitchingissteadyandfirm.
b)AdjustingRollingNeedleThreadGuideAssembly
Adjusttherollingneedlethreadguideassembly(80665D)
sothattheneedlethreadisraisedby2to3mm,(as
shown
inFigure11),whentheneedlereachesthelowerlimit.
8
4-8 押エ金の調整〈Fig.10〉
押エ棒(80660,80661)が滑らかに上下することを確認
し
て、押エ金を取り付けます。
a) 高さ調整
上面カバー(80887A)をはずして、カラー(482C)の
位置を調整します。
1. 押エ揚ゲレバー(80648)の先端と押エ揚ゲピン
(22870)の間隔が1 mmになるよう、押エ棒抱キ(80632)
のネジ(95)を緩めて調整します。
2. 押エ棒抱キとカラーAの間隔を1.5mmに、カラーのネジ
(98)を緩め、調整してください。
3. カラーAとカラーBの間隔を7mmに調整してください。
4. カラーCは、押エ棒ブッシュ上(80262)の下面と、押エ
棒抱キ(80632)の上面との、中間の位置になるように
調整してください。
5. 押エ金をもっとも高い位置に上げて、針棒ナットをもっと
も下げたとき、この間には十分な間隔が必要です。また、
スプレッダーが上昇し、押エ金爪が上に持ち上げら
れ
たときにも、この間には十分な間隔が必要です。また、
スプレッダーが上昇し、押エ金爪が上に持ち上げら
れ
たときにも、この間には十分な間隔が必要です。
○押エ揚ゲレバーで押エ金を上げたとき、上昇中のスプ
レッダーが、押エ金爪に当たらないようにカラーDの位
置
を調整してください。
b) 押エ圧の調整〈Fig.10〉
袋が一定に送り出されるように押エ金の押エ圧を調
整
します。カラーA〜Dの位置がきまったら、上蓋(80688)
にある押エ板バネ調節ネジ(64Y)のナットを緩めて、
スプリングの圧力で押エ圧を調整してください。右に
廻
すと押エ圧が強くなり、左に廻すと弱くなります。押エ
圧
が強すぎると糸切れの原因になります。また弱すぎると
空縫いが出なくなります。
○調整が終わったらナット(35733B)で、ネジ(64Y)が
緩まないようにしっかりと固定してください。
4-9 糸調子関係
糸調子、上糸調節はきれいな縫い目をつくる重要な部品
です。糸締まり、縫い目を見て調整してください。
a) 糸調子
上糸の糸調子は、袋の裏側の表面にきれいな縫い目が出
来るように調整します。下糸の糸調子はしっかりした縫い目
をつくるように調整します。
b) 上糸調節〈Fig.11〉
プーリーを廻して、針がもっとも下の位置のとき、上糸が 2〜3mm
上の位置になるように、上糸調節(80665D)を動かして調
整
してください。
Fig11Fig10

5.TROUBLESHOOTING
TroubleCauseCure
Needlethreadbreaks 1.Damagedlooper Replacelooper.
2.Needlethreadtootight Reducetension.
3.Wornoutfeeddogcausingfine Relacefeeddog.
stitches
4.Threadtwistingorentangling Securecorrectthreading.
betweenthreadstandandneedle
5.Improperneedlesetting; Setneedleproperly;
Bentordamagedneedle Replaceneedle.
6.Needlethreadtooloose Increasetension.
Looperthreadbreaks 1.Looperthreadtootightortoo Adjusttension.
loose
2.Damagedlooper Replacelooper.
3.Threadtwistingorentangling Checkforcorrectthreading.
betweenthreadstandand
looper
Nochainingonworkedges 1.Incorrectthreading Threadmachinecorrectly.
2.Looperthreadtootight Reducetension.
3.Impropertimingofneedleand Adjusttimingofneedleand
looper looper.
4.Presserfootscrewloosened Tightenthescrew.
Threadskips 1.Needlesettingnotcorrect; Setneedlecorrectly.
Bentordamagedneedle
2.Needlethreadregulatorsettoo Replaceneedle.
low.Raiseregulator.
3.Needlethreadstickingon Uselubricantonthread.
needleduetoheat
4.Needlebarsettoohigh Lowerneedlebar.
5.Needlethreadpinchedby Lowerneedleguardslightly.
needleguard,collapsingloop
6.Looperthreadtooloose, not Increaselooperthreadtension.
makingagoodtriangle
Needleorlooperbreaks 1.Impropertimingofneedleand Adjusttimingofneedleand
looper looper.
2.Bentneedle Replaceneedle.
Nonuniformstitchlength; 1.Weakpressureofpresserfoot Increasepressure.
seamnotstraight 2.Bentneedle Replaceneedle.
3.Wornoutfeeddog Replacefeeddog.
Whentroubleoccurswhileoperatingthemachine,refertothefollowingtableforselectingsuitablemeasures:
9

5.ミシンのトラブルの原因と対処
トラブル内容原因対処
上糸が切れる1.ルーバーに傷がある。ルーパーを交換す。
2.上糸調子のテンションが強すぎる。テンションを弱くする。
3.送リ金が摩滅して縫目がこまかくなる。送リ金を交換する。
4.糸立から針までの間で糸がもつれたり、糸がもつれたり、からまないよう糸通しに
からまったりする。注意する。
5.針が正常に取り付けられていない。針の取付け方が正常か確認する。
曲がったり損傷している。新しい針に交換する。
6.上糸調子のテンションが極端に弱テンションを強くする。
すぎる。
下糸が切れる1.下糸のテンションが強すぎたり、極端糸調子のテンションを調整する。
にゆる過ぎる。
2.ルーバーに傷がある。ルーパーを交換する。
3.糸立からルーバーまでの間で糸が糸がもつれたり、からまないよう糸通しに
もつれたりする。注意する。
空縫が出ない1.糸の通し方がまちがつている。正しく糸を通す。
2.下糸調子のテンションが強すぎる。下糸調子のテンションを弱くする。
3.針とルーバーのタイミングが合ってい針とルーバーのタイミングを調整する。
ない。
4.押エ金の止メネジがゆるんでいる。押エ金止メネジを締める。
目飛び1.針が正常に取付けられていない。針の取付け方が正常か確認する。
針が曲がったり損傷している。新しい針に交換する。
2.上糸調節が低くセットしすぎている。上糸調節を上げる。
3.熱のため糸が針にくっつく。糸に油を使用する。
4.針棒が高くセットされている。針樺を下げる。
5.上糸が針ガイドで押えつけられて針ガイドを下げる。
ループがうまくできていない
6.下糸がゆるすぎてよい三角形をつくらな
い。(かえり目飛び)下糸のテンションを強くする。
針が折れる 1.針とルーパーのタイミングが悪い。針とルーパーのタイミングを調整する。
ルーバーが折れる2.針が曲がっている。針を交換する。
縫目巾が不揃い 1.押エ金圧が弱い。押エ金圧を強くする。
縫目が曲っている 2.針がまがっている。針を交換する。
3.送リ金が摩滅している。送リ金を交換する。
ミシンを縫っていてトラブルが発生しましたら、次の表を参考にして対処してください。
10

11
ORDERINGPARTS
1. Descriptionofeachpartanditsstampnumberisdescribedinthispartslist.Screwsandnutsforpartsar
e
shownadjacenttotherelevantparts.Whenorderingparts,describeclearlystampnumberwithitsnameofpart.
2. ThepartswhichhavenoRef.Numbercannotbedeliveredindependently;alwaysoderitasanassembly.
3. Asetofassembledpartsisrepresentedbythestampnumberofitsmainparts.
4. Thelastfigureonthepartsstampnumberadvancesoneachimprovementoftheparts.
5. PartsNo.describedin[ ]ofRemarksmeansoldpartsNo.
* Thepartslistissubjecttochangewithoutpriornotice.
ご注文上の注意事項
1. ご注文の際は、部品番号、部品名称、個数を明記ください。
2. 但し(図番Ref.No.)の記入がない部品は、単体販売できませんので、それに該当する完備部品(組部品))をご注文
ください。
3. 組部品はその中の主バーツの刻印番号で表示してあります。
4. 刻印番号は、その部品が改良される都度に、最後の数字が1番ずつ繰り上がり、新しい刻印番号にかわりますのでご
了承ください。
5. 摘要欄中の[]内は旧バーツ番号です。
* 本部品表は改良のため予告なく変更することがあります。
CONTENTS目次
01. BUSHING, OILER AND COVER PARTS 12
ブッシュ、オイラー、カバー関係
02. MISCELLANEOUS THREAD GUIDE AND THREAD TENSION PARTS14
糸調子、糸ガイド関係
03. NEEDLE LEVER, PULLEY AND CRANK SHAFT PARTS 16
クランクシャフト、針棒関係
04. PRESSER FOOT LIFTER AND PRESSER FOOT PARTS 18
押エ場ゲ、押エ金関係
05. LOOPER DRIVE PARTS 20
ルーパー関係
06, FEED LIFT AND FEED DRIVING PARTS 22
送り関係
NUMERICAL INDEX OF PARTS 24、25
パーツ索引
SCREW, NUT & WASHER 26
ネジ、ナット、ワッシャー

01 BUSHING,OILERANDCOVERPARTS
ブッシュ、オイラー、カバー関係
12

13
図番
Ref.No.部品番号
PartNo.部品名称
Description個数
Qʼty摘要
Remarks
1 76-81201 ClothPlateAssʼy ベースカバー組 1 (2-6)
2 80437A Axle ベースカバービン 1
3 89 Screwfor80437A ネジ 2
4 81239 Guide ロックピン 1
5 80438 Spring スプリング 1
6 80440 Screw ツマミ 1
7 22574 Screwfor76-81201 ネジ 3
8 81203WW EdgeGuide 定規 1
9 22514 Screwfor81203WW ネジ 2
10 81290 ClothPlate,OilReservoirAssʼy 油槽組 1 (11,12)
11 765021 ClothPlate,OilReservoir 油槽 1
12 666-79 SightFeedOiler ボトルオイラー 2
13 22562 Screwfor765021ネジ 2
14 80291 OilTubeClamp パイプ押エ 1
15 22513 Screwfor80291 ネジ 1
16 80293A OilDistributingMember オイラー受ケ 1
17 95 Screwfor80293A ネジ 1
18 96A Screwfor80293A ネジ 1
19 80688 TopCover 上蓋 1
20 80246 BushingforNeedleLeverShaft 針棒レバー軸ブッシュ 2
21 89 Screwfor80246 ネジ 2
22 80644 PlugScrew プラグ 2
23 88 Screw ネジ 2
24 80689A OilCup(φ3/16) オイルカップ 3
25 80673C GuardforNeedleBar 針棒ガード 1
26 80273 BushingforNeedleBar,upper 針棒ブッシュ上 1
27 80262 BushingforPresserBar,upper 押エ棒ブッシュ上 2
28 80273A BushingforNeedleBar,lower 針棒ブッシュ下 1
29 80262A BushingforPresserBar,lower 押エ棒ブッシュ下 2
30 80887A FaceCover 上面板 1
31 376 Screwfor80887A ネジ 2
32 80690A OilCup オイルカップ 2
33 22539F PlugScrew プラグ 1
34 81284A ShieldforLooperDrive 下糸カバー 1
35 94 Screwfor81284A ネジ 2
36 80694 BushingforMainShaft 主軸ブッシュ 2
37 22539 PlugScrew プラグ 1
38 81240A BushingforTransverseShaft ルーバー揺動軸ブッシュ 2
39 80292 BushingforFeedRockerShaft 送り元土台ブッシュ 2
40 81261 BushingforConeShaft ルーパー揺動軸ブッシュ 1
41 81255 LooperShaftBearing スプレッダー軸受 1
42 41046G BallValveOiler ボールカップ 2
43 81257 Washer ワッシャー 2
44 318 Screwfor81255 ネジ 2
45 80280A BasePlate ミシンベース 1
46 21681B “T”bolt Tボルト 2
47 81203B FabricEdgeGuide 定規 (1)
48 376A Screw ネジ (2)
49 81203 EdgeGuide 定規 (1)
50 81203C Tougue 定規爪 (1)
51 HS24C Screwfor81203C ネジ (1)
01 BUSHING,OILERANDCOVERPARTS
ブッシュ、オイラー、カバー関係

02 MISCELLANEOUSTHREADGUIDE AND THREAD TENSI0NPARTS
糸調子、糸ガイド関係
14
図番
Ref.No.部品番号
PartNo.部品名称
Description個数
Qʼty摘要
Remarks
1 81256A ThreadSleeveAssʼy 糸ガイド組 3 (2-4)
2 AS137 Support 糸ガイド支エ 4
3 81256 ThreadSleeve 糸ガイド 3
4 28C Screwfor81256 ネジ 4
5 AS137A ThreadEyeletwithSupportAssʼy 糸ガイド組 1 (2,4,6)
6 HA103B ThreadEyelet 糸ガイド 1

図番
Ref.No.部品番号
PartNo.部品名称
Description個数
Qʼty摘要
Remarks
7 22560B Screwfor81256A,AS137A ネジ 3
8 108 TensionRegulatingNut 糸調子ナット 2
9 107 TensionSpringFerrule 糸調子スプリング受ケ 2
10 795321 TensionSpring 糸調子スプリング 1
11 HA1349 TensionSleeve スプリング受ケ 2
12 80676A TensionDisc 糸調子皿 4
13 HA1348 TensionPostFerrule 糸調子スリーブ 2
14 HS106 TensionPost 糸調子芯棒 2
15 80667 TensionDiscStopPin 糸調子皿止メ 2
16 G111 ThreadGuide 糸ガイド 1
17 95 ScrewforG111,80665D,81256A ネジ 3
18 80665D RollingThreadGuideAssʼy 上糸調節組 1 (19,24-26)
19 HS53B RollingThreadGuide 糸ガイドローラー 1 (20-23)
20 22560 Screw ネジ 1
21 HA1286B Spring スプリング 1
22 12964C SpringBall ボール 1
23 81086G RollingThreadGuideAxle 上糸調節ローラー軸 1
24 80668 ThreadGuideRoller 上糸天秤ローラー 1
25 80665 ThreadRollerSupport 上糸調節 1
26 88 ScrewforHS53B ネジ 1
27 29774D NeedleBarConnectionAssʼy 針棒ダキ組 1 (28-40)
28 80659 NeedleBarConnection 針棒ダキ 1
29 BP108 Screwfor80659 ネジ 2
30 91 Screw ネジ 1
31 80655 ThreadGuidePin 糸ガイド 1
32 22743 Screwfor80655 ネジ 1
33 HS52B RollingThreadGuideAxleAssʼy 糸ガイドローラー組 1 (34-37)
34 22560 Screw ネジ 1
35 HA1286B Spring スプリング 1
36 12964C Ball ボール 1
37 81086C RollingThreadGuideAxle 上糸天秤ローラー軸 1
38 81039 GuideRoller 糸ガイドローラー 1
39 88 ScrewforHS52B ネジ 1
40 HS100D PinScrew 糸調子皿止メピン 1
41 80669 TensionPostFerrule 糸調子スリーブ 1
42 80676 TensionDisc 糸調子皿 2
43 HA58C ThreadTensionFerrule 糸調子スプリング受ケ 1
44 HA58F TensionSpring 糸調子スプリング 1
45 80046 TensionPost 糸調子芯棒 1
46 HA58D ThreadTensionFerrule 糸調子スプリング受ケ 1
47 21111 Collar 糸調子芯棒カラー 1
48 88 Screwfor21111 ネジ 1
49 81252 ThreadEyelet 下糸ガイド 1
50 88 Screwfor81252 ネジ 1
51 81250G LooperThreadTensionAssʼy 糸調子ブラケット組 1 (52-61)
52 81250E Bracket 下糸調子ブラケット 1
53 80669 TensionPostFerrule 糸調子スリーブ 1
54 81292 TensionPost 糸調子芯棒 1
55 80676A TensionDisc 糸調子皿 2
56 1349A-5 TensionSpring 糸調子スプリング 1
57107 TensionSpringFerrule 糸調子スプリング受け 1
58 108 TensionRegulatingNut 糸調子ナット 1
59 HS100D PinScrew 糸調子止メピン 2
60 81253 ThreadHookfor81250G 糸ガイド 1
61 28C Screwfor81253 ネジ 1
62 22517 Screwfor81250G ネジ 1
63 110-4 TensionSpring 糸調子スプリング (1)
15
02 MISCELLANEOUSTHREADGUIDE AND THREAD TENSI0NPARTS
糸調子、糸ガイド関係

16
03 NEEDLELEVER,PULLEYANDCRANKSHAFTPARTS
クランクシャフト、針棒関係
Table of contents
Languages:
Other NLI Sewing Machine manuals
